A checklist that takes your new site from a fresh start to live, one step at a time.
A new site comes with a checklist that takes you from a fresh start to live. Each step says what it changes and opens the exact screen where you do it. Most steps tick themselves done when you save the right details. A few need more: a successful test, or choosing Looks good.Who can do this: Admins and Owners.
Before you start
Your site starts offline. A new site is in maintenance mode, so visitors see a “be right back” page. You and your team see the full site. A reminder bar at the bottom says: “Maintenance mode is on — visitors currently see the maintenance page. Turn it off in Site settings → Maintenance.” The last step puts your site live.
Have your details handy: your logo, a small square icon for browser tabs, your address, phone and email, and your legal business name.
Work at your own pace. Close the checklist whenever you like. It remembers what’s done, and it stays in your menu for as long as your site exists.
Open the checklist
In the toolbar, choose your picture and name, then Set up your site.
Or open the command palette (⌘K, or Ctrl+K on Windows) and choose Set up your site.
Or press T, then Shift+S.
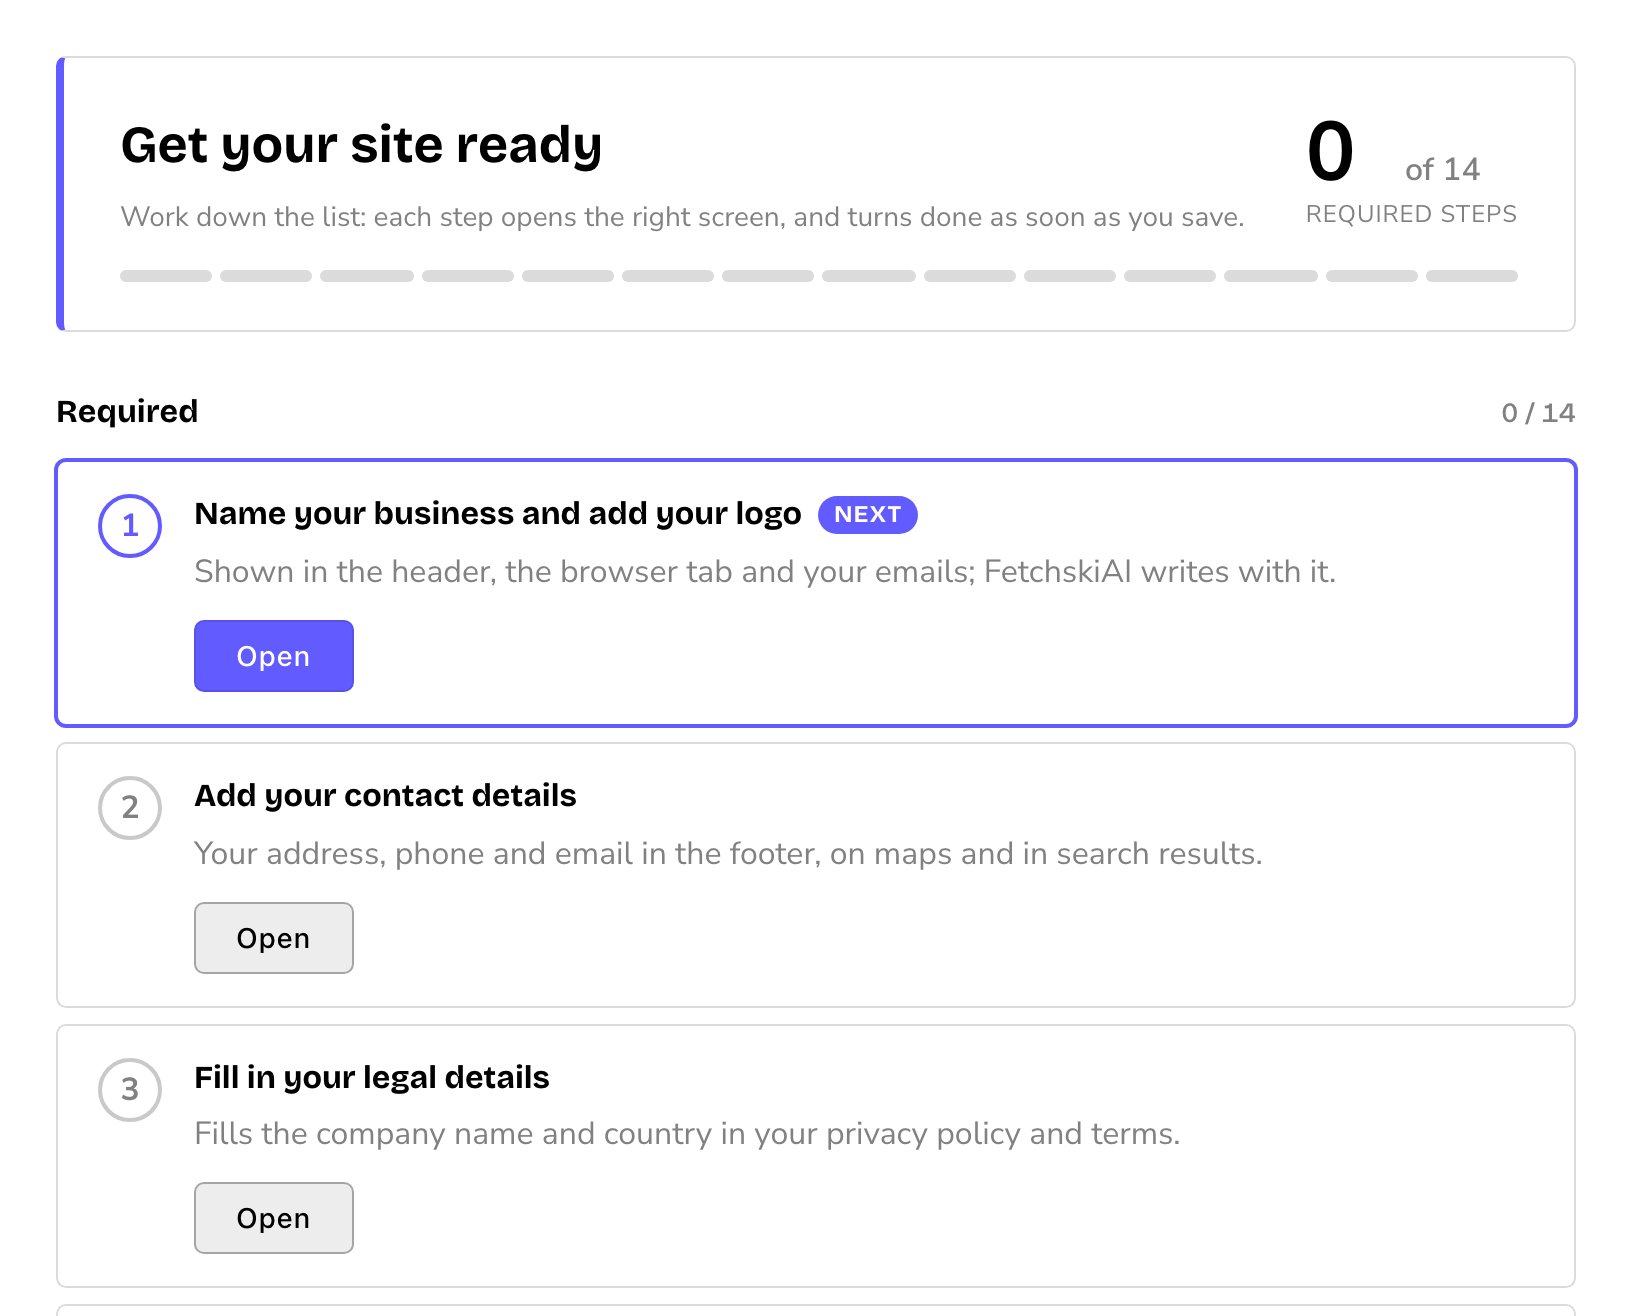
The Set up your site window opens. At the top, Get your site ready counts the required steps you’ve finished. Below it, the steps are in two lists: Required and Optional. The first required step that isn’t done yet is marked Next.
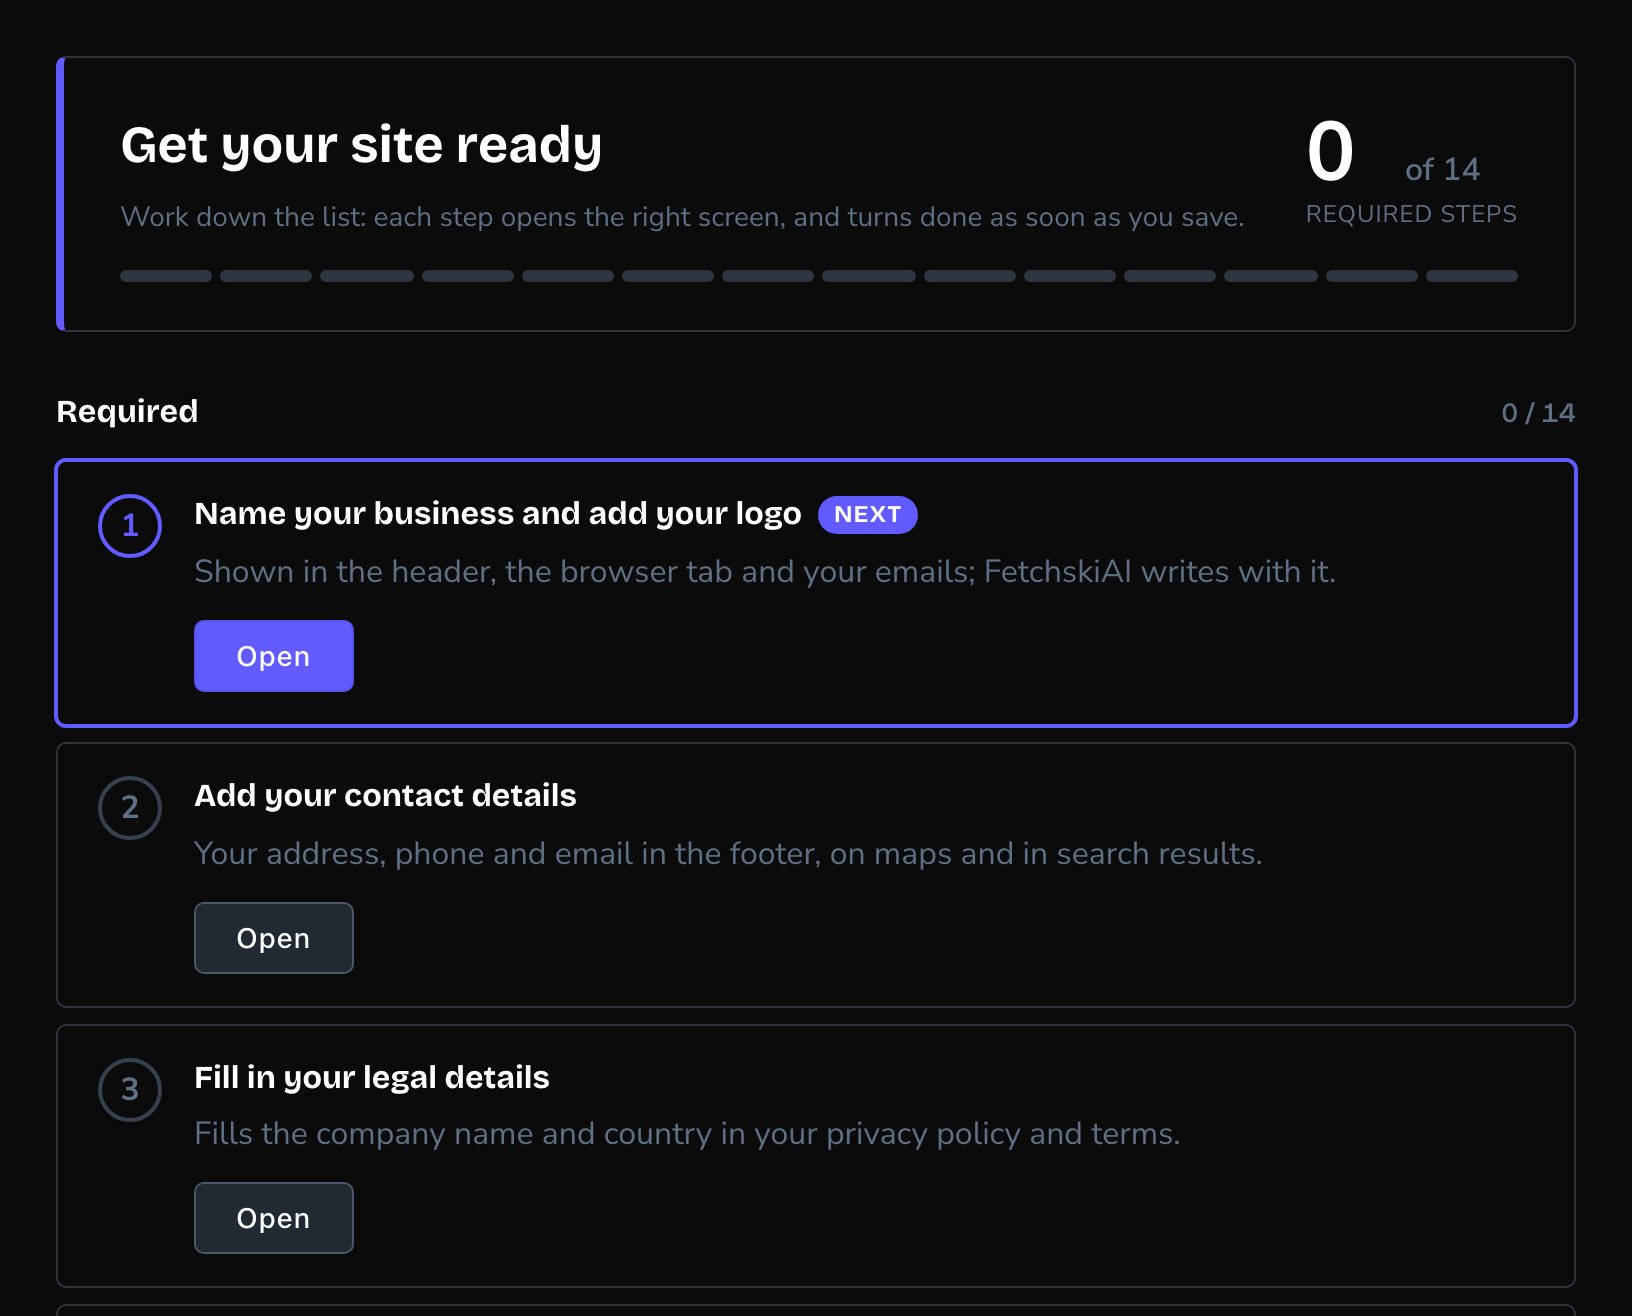
The checklist on a new site. Next marks where to start.
Work through the steps
1
Choose Open on a step
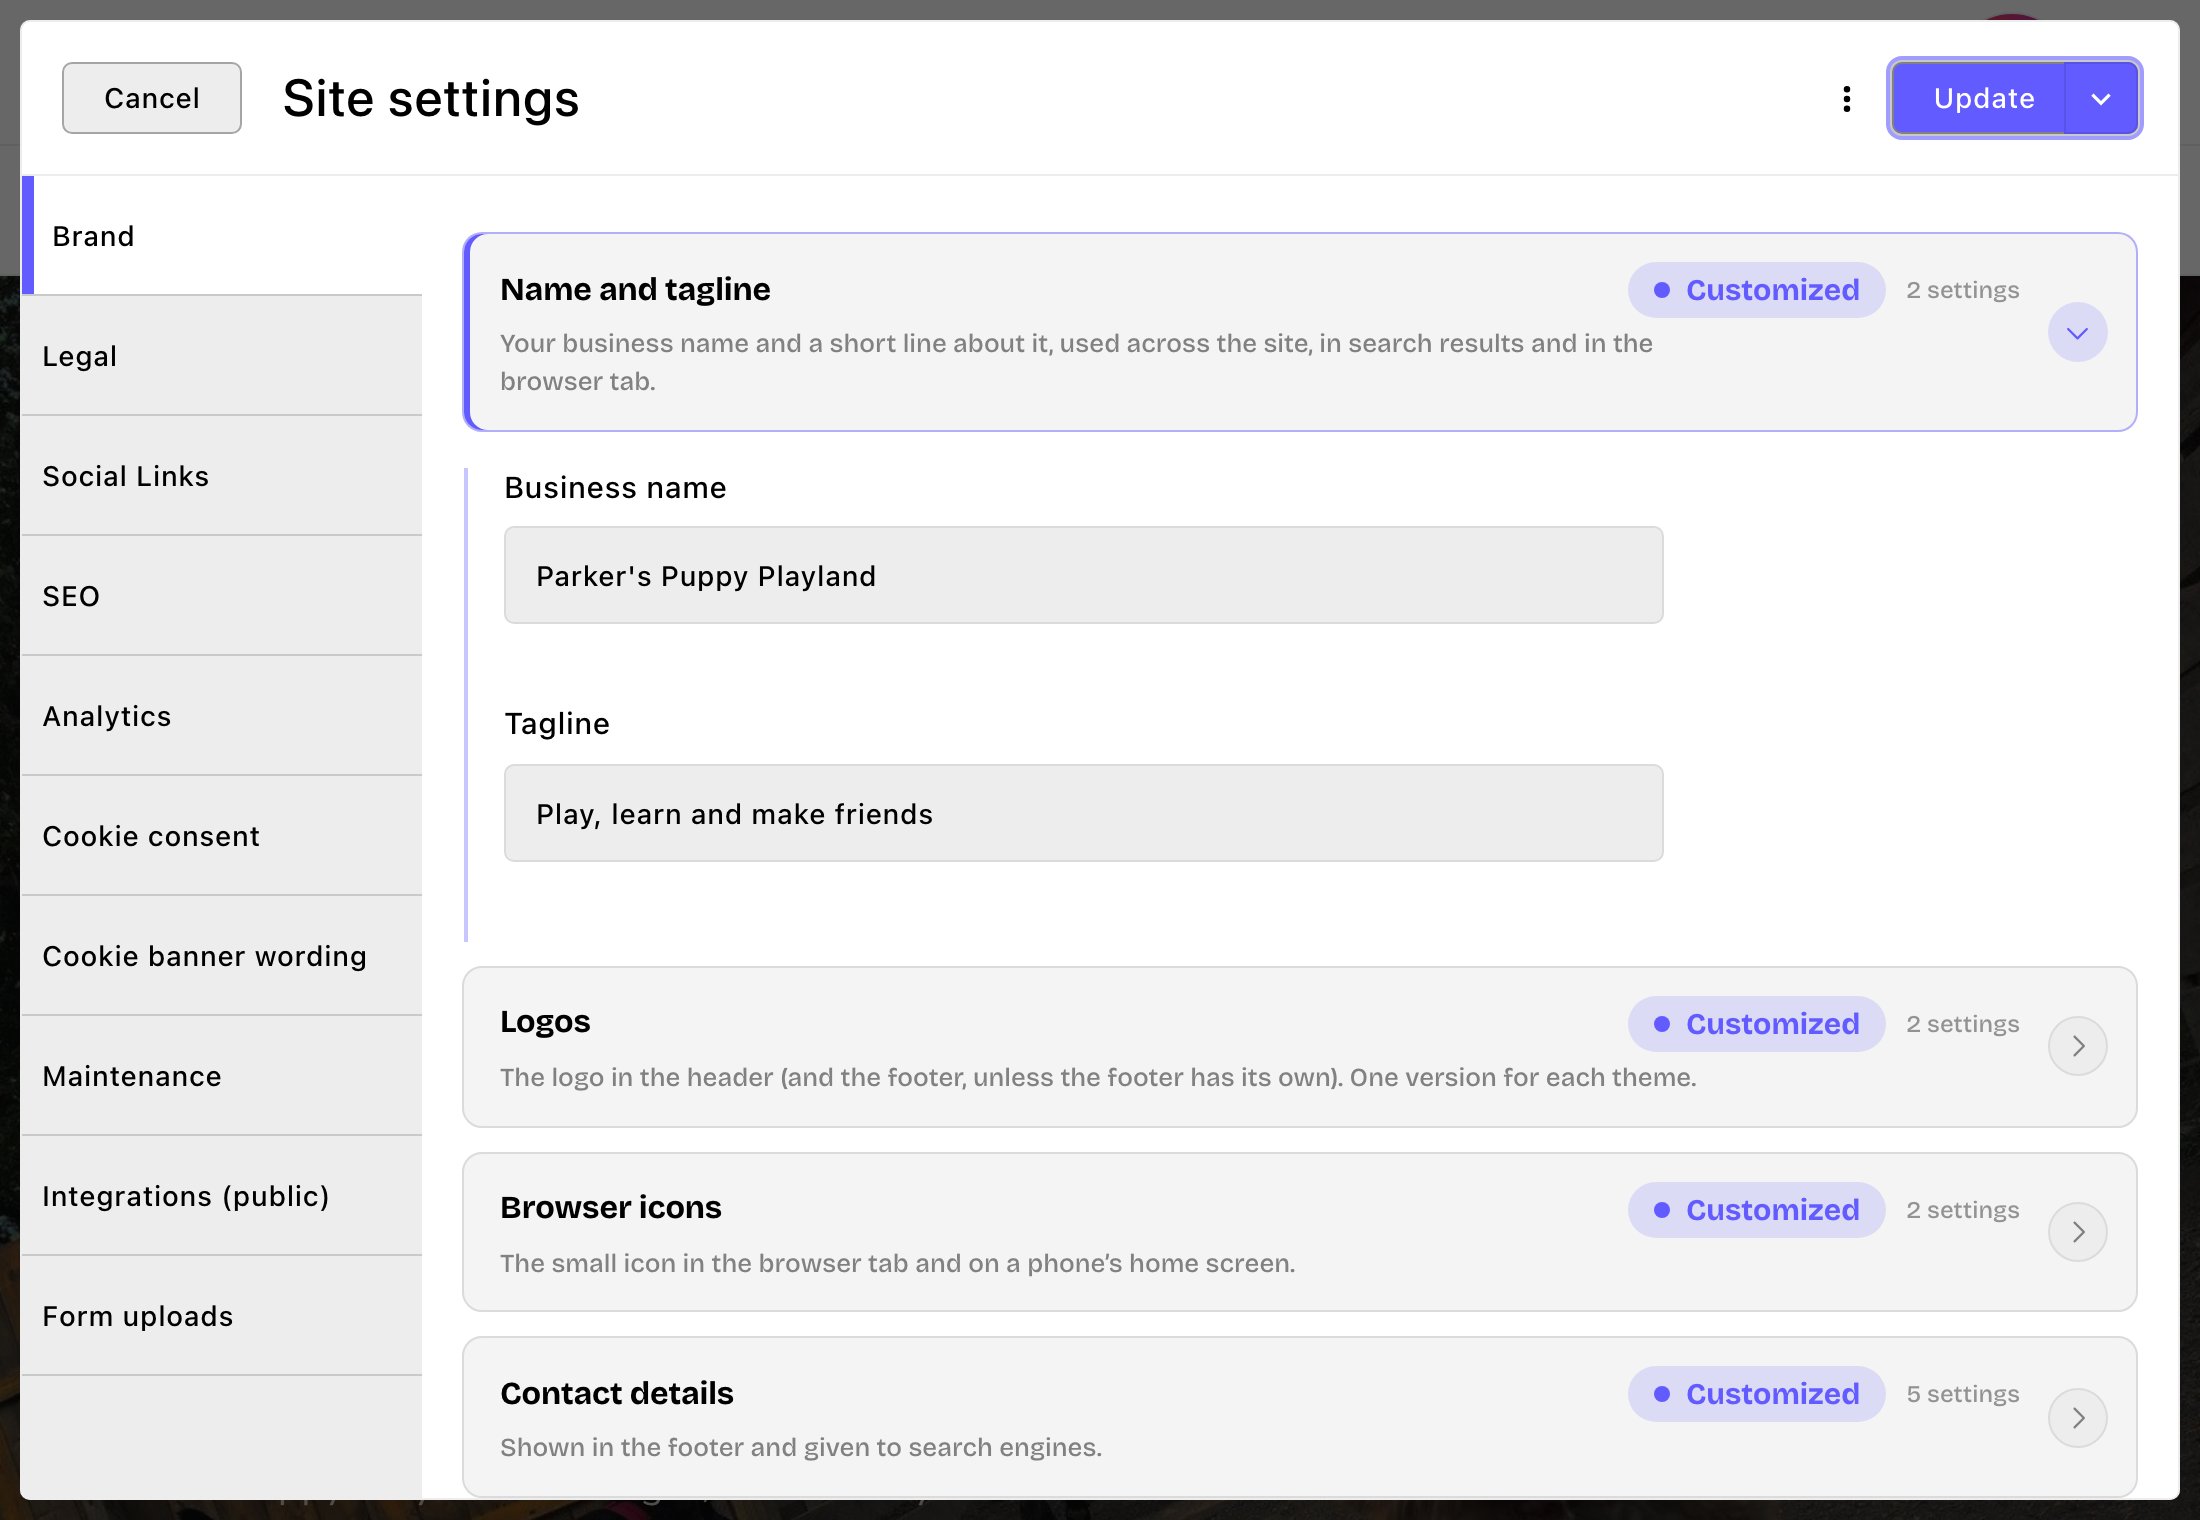
The right screen opens on top of the checklist, on the right tab. Often the right group of settings is already open too.
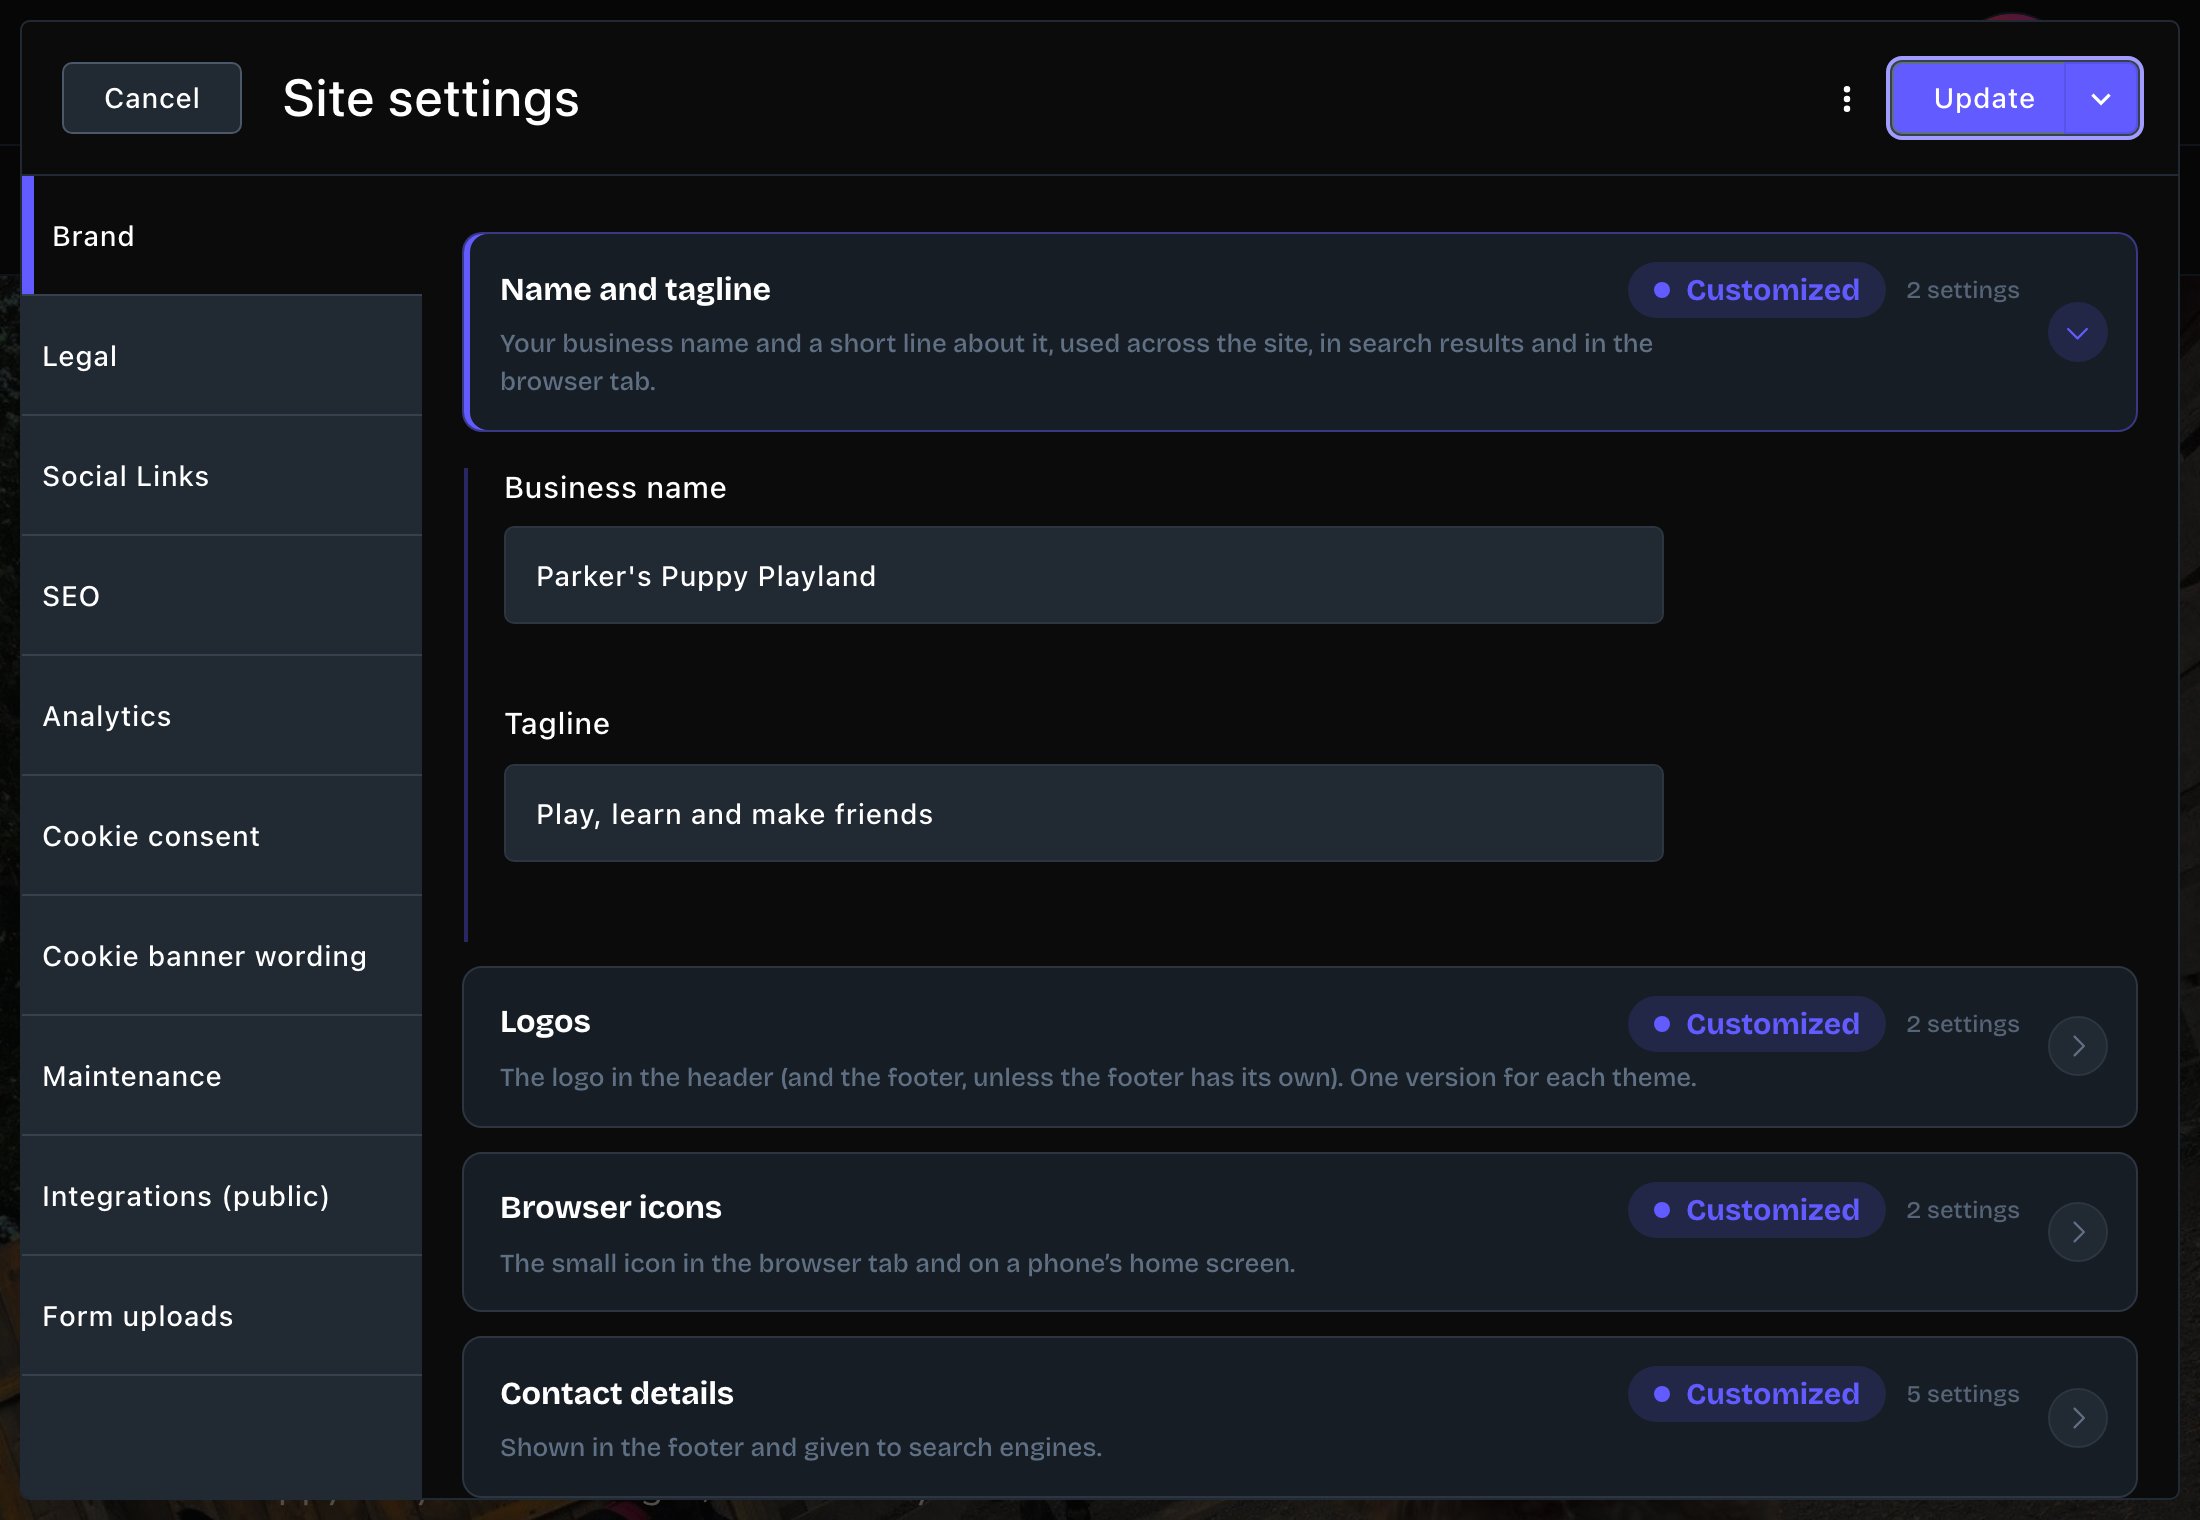
Open takes you straight to the right settings.
2
Make your changes and save
In Site settings or Site design, choose Update. In Connections, choose Save. Then close the screen. You’re back on the checklist, and the step shows a check mark if it’s done.
3
Tick the steps that are already fine
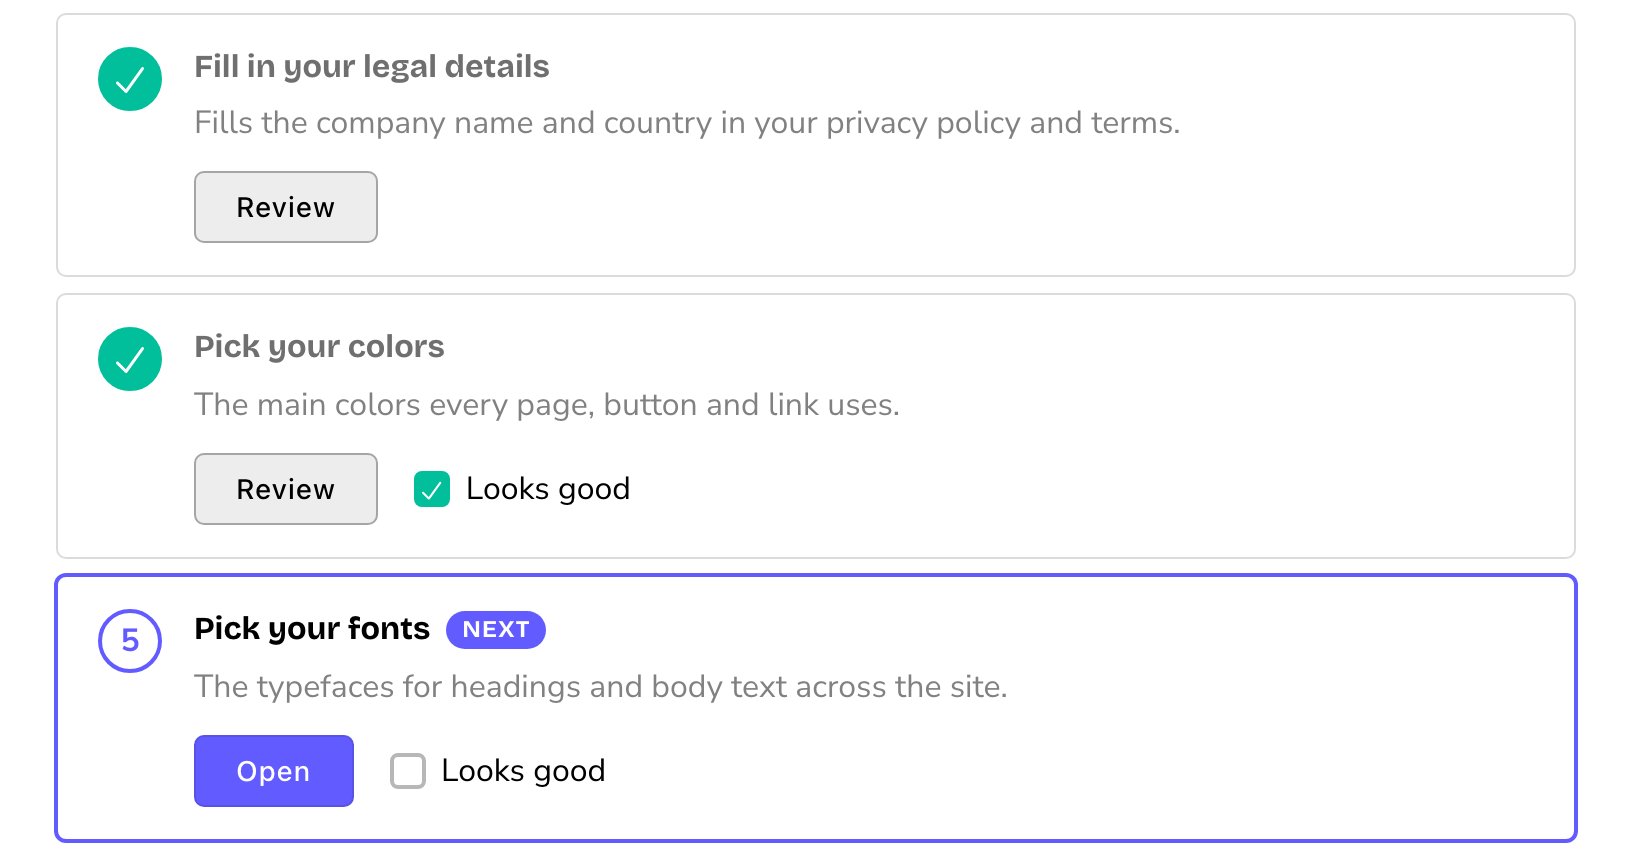
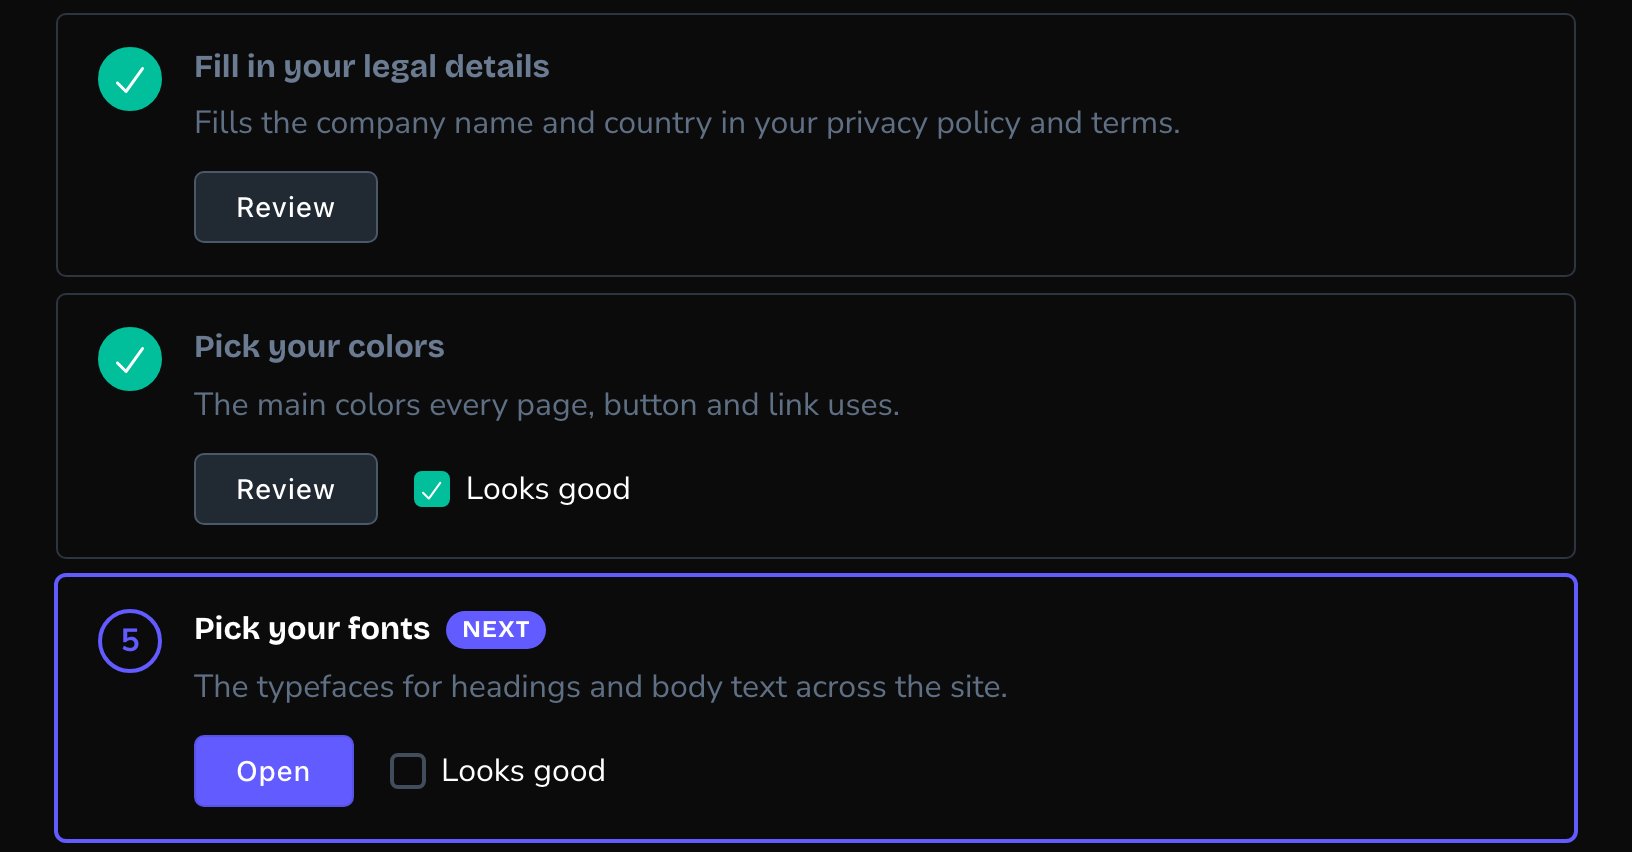
Some steps come with sensible starting settings, such as your colors and fonts. If you’re happy with them as they are, choose Looks good on that step. Anyone who opens the checklist sees the tick.
Looks good marks a step done when its starting settings suit you.
4
Keep going until Get your site ready is full
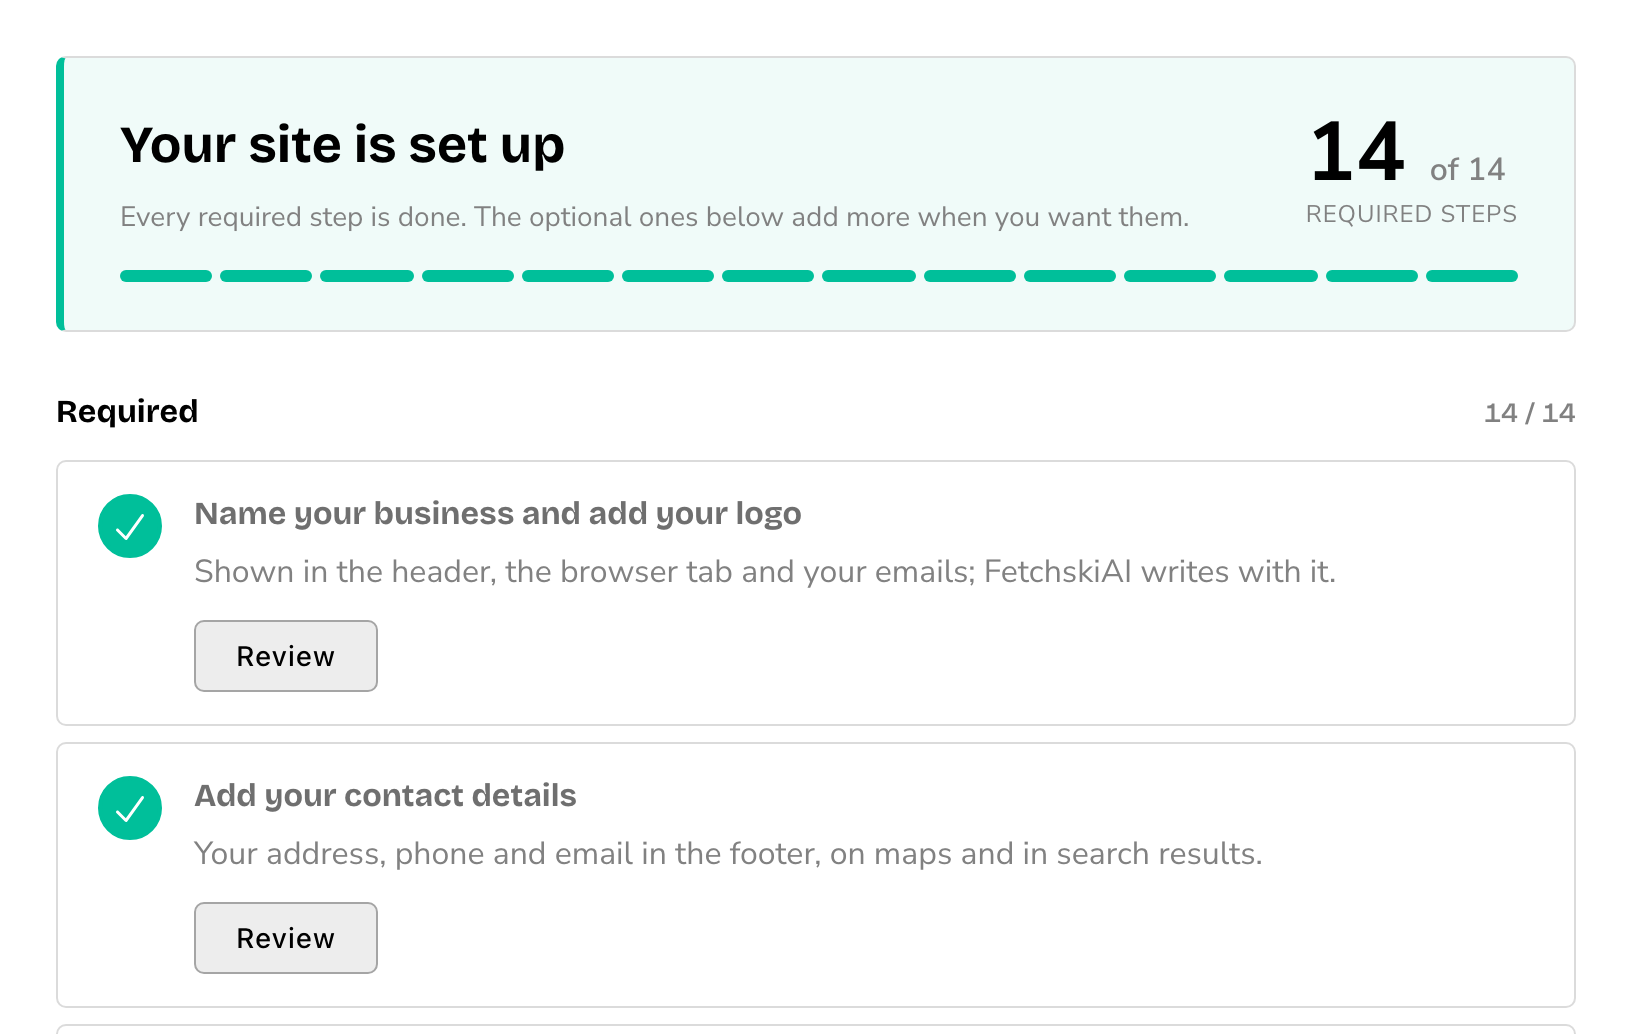
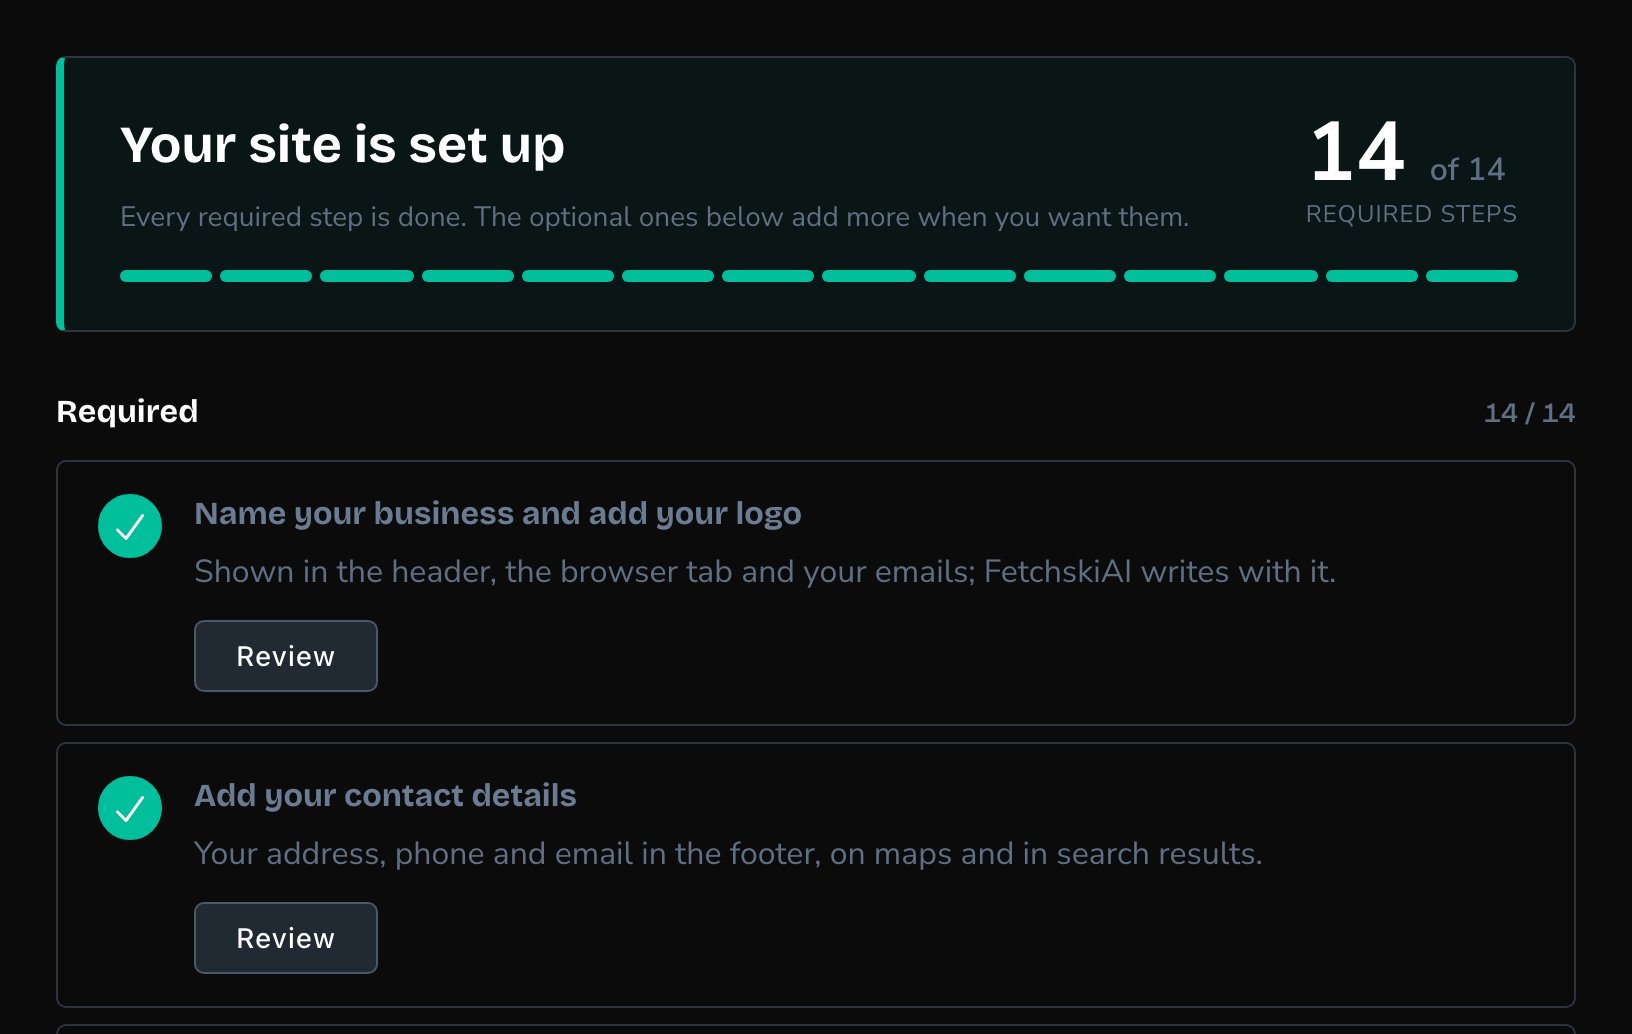
When every required step is done, the heading changes to Your site is set up.
A step that’s done shows Review instead of Open, so you can go back and change it later.
The required steps
Step
What it changes
Where it opens
Done when
Name your business and add your logo
Your name in the header, the browser tab and your emails
Site settings → Brand
You’ve replaced the starting business name, and added a logo and a browser icon
Add your contact details
Your address, phone and email in the footer, on maps and in search results
Site settings → Brand
You’ve replaced the starting placeholder in at least one of phone, email or address. Before you go live, check all three are yours
Fill in your legal details
Your company name and country in your privacy policy and terms
Site settings → Legal
You’ve added your legal business name and country
Pick your colors
The main colors of every page, button and link
Site design → Colors · Brand
You’ve changed them, or chosen Looks good
Pick your fonts
The typefaces for headings and body text
Site design → Typography
You’ve changed them, or chosen Looks good
Set up your header menu
The links at the top of every page
Site design → Header: Navigation
You’ve changed it, or chosen Looks good
Set up your footer
The link groups at the bottom of every page
Site design → Footer: Links
You’ve changed it, or chosen Looks good
Connect email
Form notifications and every other email from your site
Connections → Email
The card says it’s connected, and a test email has gone through
Turn on spam protection
A quiet check of every form submission for bots. See Spam protection
Connections → Spam protection
The card says it’s on
Build your contact form
A form that emails you, or sends to another app, when someone fills it in
Forms
A form that does one of those is published
Write your pages
Your home page and the rest of your site
Pages
You’ve edited your home page and published it
Set your sharing image and home page description
What search results and shared links show
The image: Site settings → SEO → Sharing → Default social share image (the picture for your whole site; each page can also have its own). The description: open your home page, then More Options (⋯) → Edit → SEO → SEO description, and choose Update
You’ve set a sharing image and a home page description
Review cookie consent
The banner that asks visitors which cookies they allow. The starting settings are safe: read the banner’s wording, check the cookie list, then choose Looks good. See Cookie consent
Site settings → Cookie consent (plus a Cookies list button)
You’ve chosen Looks good
Go live
Turns off maintenance mode, so visitors see your site
Site settings → Maintenance
Maintenance mode is off
The optional steps
These add more when you want them. They don’t count toward Get your site ready.
Step
What it adds
Where it opens
Add your social links
Icons linking to your social profiles in the footer
Site settings → Social Links
Connect Google, reviews and photos
Your Google listing, reviews, maps, Instagram feed and photo storage
Sends visitors and search engines from your old addresses to your new pages
Redirects (or choose Looks good if you don’t need any)
Add analytics
Visitor counts, without cookies
Site settings → Analytics
Add tracking and chat scripts
A chat window, a visitor tracker or an ad tracker from another service. The service gives you a short piece of code, and you paste it in. See Embed scripts
Embed Scripts
Track conversions for your ads
Tells your ad platforms when a visitor books, buys or gets in touch
Visitor data → Conversions (plus a Conversions button)
Send events to other systems
Tells another app the moment something happens, such as a contact form arriving, so it can act on it. See Send events with a webhook
Webhook Destinations
Turn on FetchskiAI
Writing help and the FetchskiAI Agent
FetchskiAI settings (plus an Agent Setup button)
What happens next
When you finish Go live, maintenance mode is off and visitors see your site. The reminder bar disappears.The checklist stays in your menu. Come back any time to add the optional steps or review a step.
Every required step is done. Your site is set up.
Troubleshooting
I saved, but the step isn't done
Each step checks for something specific. Compare what you saved with the Done when column above. For example, Name your business and add your logo needs your business name, a logo and a browser icon, all three.
Connect email went back to not done
The email step stays done only while your email settings match the last test that worked. If you change any of your email connection’s settings, such as the sender address, send a test email again. Choose Send test email on the Email card in Connections. See Email notifications.
I published my home page, but Write your pages isn't done
Your home page was first published by itself when your site was created, and that doesn’t count. Make a real change to your home page, then publish it again. A publish in the first few minutes after your site was created may not count either: wait a few minutes and publish again.
There's no Looks good on a step
Looks good appears only on steps whose starting settings are already a fine answer. Other steps need you to add something of your own, such as your business name, so they tick themselves done when you save it.
How do I add people?
You can’t invite people from the checklist. Fetchski gives each person access to your site: ask Fetchski Support to add them. Once they’ve signed in, give them a role in People & Roles. See People & Roles.
Couldn’t load your setup checklist
The checklist couldn’t reach your site. Choose Try again. If it keeps happening, reload the page, then contact Fetchski Support.
Related
Site settings
your business details, SEO and cookie consent.
Site design
colors, fonts, header and footer.
Connections
email, spam protection, Google and more.
Maintenance mode
what visitors see before you go live.
⌘I
{"docsConfig":{"theme":"almond","$schema":"https://mintlify.com/docs.json","name":"Fetchski Attract Docs","colors":{"primary":"#16a34a","light":"#22c55e","dark":"#15803d"},"logo":{"light":"https://mintcdn.com/fetchski-attract-api/mn9qfQRsqaASh7UE/logo/light.svg?fit=max\u0026auto=format\u0026n=mn9qfQRsqaASh7UE\u0026q=85\u0026s=66db13e248b70a44a5ff5f6990d4cb63","dark":"https://mintcdn.com/fetchski-attract-api/mn9qfQRsqaASh7UE/logo/dark.svg?fit=max\u0026auto=format\u0026n=mn9qfQRsqaASh7UE\u0026q=85\u0026s=86904ba8d47714303521b2dcd5aa2a50","href":"/"},"favicon":"https://mintcdn.com/fetchski-attract-api/mn9qfQRsqaASh7UE/favicon.svg?fit=max\u0026auto=format\u0026n=mn9qfQRsqaASh7UE\u0026q=85\u0026s=fd4f2c0615961c9e01c9762b98c8999f","api":{"playground":{"display":"interactive"},"examples":{"defaults":"required","languages":["bash","typescript","php"]}},"appearance":{"default":"dark"},"background":{"color":{"light":"#ffffff","dark":"#0b0e13"}},"search":{"prompt":"Search the docs…"},"seo":{"metatags":{"robots":"noindex, nofollow"}},"fonts":{"family":"Inter"},"icons":{"library":"fontawesome"},"styling":{"codeblocks":"dark","latex":true},"contextual":{"options":["copy","view"],"display":"header"},"navigation":{"pages":[]}},"deployment":{"deploymentMetadataValue":{"subdomain":"fetchski-attract-api","hasAudioNarration":false,"actualSubdomain":"fetchski-attract-api","customDomains":["docs.fetchski-attract.com"],"gitSource":{"type":"github","owner":"fetchski","repo":"fetchski_cms_astro_monorepo","deployBranch":"main","contentDirectory":"docs/attract","isPrivate":true,"mountPath":"","label":"","_id":"6adb9c232f0947a18a27541d"},"entitlements":{},"buildId":"6af6df04bd8b0362cdec74ff","clientVersion":"0.0.4131","searchFilterCounts":[{"language":"default","tag":"Media","count":953},{"language":"default","tag":"Content","count":863},{"language":"default","tag":"Publishing","count":720},{"language":"default","tag":"API reference","count":484},{"language":"default","tag":"Laravel","count":472},{"language":"default","tag":"TypeScript","count":470},{"language":"default","tag":"AdonisJS","count":469},{"language":"default","tag":"Batch jobs","count":364},{"language":"default","tag":"Pages \u0026 Site","count":224},{"language":"default","tag":"Forms","count":168}]},"assistantConfig":{"enableAskAiButton":false,"enableStarterQuestions":false,"enableContextualStarterQuestions":false,"enableAskAiSearchBar":true},"basePath":"","hasChatPermissions":false,"hasWebMcpPermissions":false,"toggles":[{"name":"kill-isr","enabled":true,"variant":{"name":"disabled","enabled":false,"feature_enabled":true},"impressionData":false},{"name":"custom-rbac-roles","enabled":true,"variant":{"name":"disabled","enabled":false,"feature_enabled":true},"impressionData":false},{"name":"agent-mintlify-slack","enabled":true,"variant":{"name":"disabled","enabled":false,"feature_enabled":true},"impressionData":false},{"name":"agent-integrations-settings","enabled":true,"variant":{"name":"disabled","enabled":false,"feature_enabled":true},"impressionData":false},{"name":"rbac-expansion","enabled":true,"variant":{"name":"disabled","enabled":false,"feature_enabled":true},"impressionData":false},{"name":"automations-pr-grouping","enabled":true,"variant":{"name":"disabled","enabled":false,"feature_enabled":true},"impressionData":false},{"name":"custom-prefix","enabled":true,"variant":{"name":"disabled","enabled":false,"feature_enabled":true},"impressionData":false},{"name":"analytics-v7","enabled":true,"variant":{"name":"disabled","enabled":false,"feature_enabled":true},"impressionData":false},{"name":"user-flows-analytics","enabled":true,"variant":{"name":"disabled","enabled":false,"feature_enabled":true},"impressionData":false},{"name":"no-publish-flow","enabled":true,"variant":{"name":"disabled","enabled":false,"feature_enabled":true},"impressionData":false},{"name":"workos-onboarding","enabled":true,"variant":{"name":"disabled","enabled":false,"feature_enabled":true},"impressionData":false},{"name":"snapshot-serving-live","enabled":true,"variant":{"name":"disabled","enabled":false,"feature_enabled":true},"impressionData":false},{"name":"stripTemperatureMiddleware","enabled":true,"variant":{"name":"disabled","enabled":false,"feature_enabled":true},"impressionData":false},{"name":"support-platform-pylon-zendesk","enabled":true,"variant":{"name":"disabled","enabled":false,"feature_enabled":true},"impressionData":false},{"name":"snapshot-serving","enabled":true,"variant":{"name":"disabled","enabled":false,"feature_enabled":true},"impressionData":false},{"name":"instant-rollback","enabled":true,"variant":{"name":"disabled","enabled":false,"feature_enabled":true},"impressionData":false},{"name":"granular-notifications-server","enabled":true,"variant":{"name":"disabled","enabled":false,"feature_enabled":true},"impressionData":false},{"name":"granular-notifications","enabled":true,"variant":{"name":"disabled","enabled":false,"feature_enabled":true},"impressionData":false},{"name":"automations-fable","enabled":true,"variant":{"name":"disabled","enabled":false,"feature_enabled":true},"impressionData":false},{"name":"fixed-ai-action-pricing","enabled":true,"variant":{"name":"disabled","enabled":false,"feature_enabled":true},"impressionData":false},{"name":"automation-resolve-merge-conflict","enabled":true,"variant":{"name":"disabled","enabled":false,"feature_enabled":true},"impressionData":false},{"name":"scoped-publishing","enabled":true,"variant":{"name":"disabled","enabled":false,"feature_enabled":true},"impressionData":false},{"name":"mintql","enabled":true,"variant":{"name":"disabled","enabled":false,"feature_enabled":true},"impressionData":false},{"name":"page-level-analytics","enabled":true,"variant":{"name":"disabled","enabled":false,"feature_enabled":true},"impressionData":false},{"name":"editor-version-history-v2","enabled":true,"variant":{"name":"disabled","enabled":false,"feature_enabled":true},"impressionData":false},{"name":"billing-page-v2","enabled":true,"variant":{"name":"disabled","enabled":false,"feature_enabled":true},"impressionData":false},{"name":"full-page-search","enabled":true,"variant":{"name":"disabled","enabled":false,"feature_enabled":true},"impressionData":false},{"name":"workspace-projects","enabled":true,"variant":{"name":"disabled","enabled":false,"feature_enabled":true},"impressionData":false},{"name":"assistant-v5","enabled":true,"variant":{"name":"disabled","enabled":false,"feature_enabled":true},"impressionData":false},{"name":"fork-pr-previews","enabled":true,"variant":{"name":"disabled","enabled":false,"feature_enabled":true},"impressionData":false},{"name":"revalidation-jwt","enabled":true,"variant":{"name":"disabled","enabled":false,"feature_enabled":true},"impressionData":false},{"name":"workos-sso-scim","enabled":true,"variant":{"name":"disabled","enabled":false,"feature_enabled":true},"impressionData":false},{"name":"hobby-abuse-scan","enabled":true,"variant":{"name":"disabled","enabled":false,"feature_enabled":true},"impressionData":false},{"name":"dashboard-inbox","enabled":true,"variant":{"name":"disabled","enabled":false,"feature_enabled":true},"impressionData":false},{"name":"workos-signup","enabled":true,"variant":{"name":"disabled","enabled":false,"feature_enabled":true},"impressionData":false},{"name":"turbopuffer-dual-write","enabled":true,"variant":{"name":"disabled","enabled":false,"feature_enabled":true},"impressionData":false},{"name":"workos-enabled","enabled":true,"variant":{"name":"disabled","enabled":false,"feature_enabled":true},"impressionData":false},{"name":"approve-review-flow","enabled":true,"variant":{"name":"disabled","enabled":false,"feature_enabled":true},"impressionData":false},{"name":"editor-metadata","enabled":true,"variant":{"name":"disabled","enabled":false,"feature_enabled":true},"impressionData":false},{"name":"sso-setup-deadline-banner","enabled":true,"variant":{"name":"disabled","enabled":false,"feature_enabled":true},"impressionData":false},{"name":"turbopuffer-serve","enabled":true,"variant":{"name":"disabled","enabled":false,"feature_enabled":true},"impressionData":false},{"name":"live-agents","enabled":true,"variant":{"name":"disabled","enabled":false,"feature_enabled":true},"impressionData":false},{"name":"llms-txt-v2","enabled":true,"variant":{"name":"disabled","enabled":false,"feature_enabled":true},"impressionData":false}],"googleFontsInlined":false},"customCss":[{"filePath":"style.css","content":"@media (min-width: 1280px){:root{--content-width: 52rem}}@media (min-width: 1600px){:root{--content-width: 60rem}}@media (min-width: 1920px){:root{--content-width: 68rem}}@media (min-width: 1024px) and (max-width: 1919px){#content-container{padding-left:2rem;padding-right:2rem}div:has(>#content-area){padding-left:0}#table-of-contents{width:14rem}}html[data-page-mode=\"wide\"] #content-area{max-width:84rem}@media (min-width: 1024px){#navbar .nav-tabs{position:fixed;left:15rem;top:0;height:6rem}}@media (min-width: 1024px) and (max-width: 1599px){#navbar .nav-tabs{gap:0}#navbar .nav-tabs .nav-tabs-item{gap:0.375rem;font-size:0.9375rem;padding-inline:0.5rem}#navbar .nav-tabs .nav-tabs-item svg,#navbar .nav-tabs .nav-tabs-item img{width:1.0625rem;height:1.0625rem}}@media (min-width: 1024px) and (max-width: 1199px){#navbar .nav-tabs .nav-tabs-item svg,#navbar .nav-tabs .nav-tabs-item img{display:none}}@media (min-width: 1024px) and (max-width: 1319px){div:has(>#search-bar-entry){width:3rem!important}#search-bar-entry{justify-content:center;padding:0!important}#search-bar-entry>div>:not(svg),#search-bar-entry>:not(div){display:none}}.mdx-content{font-size:1.0625rem;line-height:1.8}@media (min-width: 1024px){.mdx-content{font-size:1.25rem;line-height:1.85}#page-title{font-size:2.875rem;line-height:1.15}#page-title+*,#header .prose{font-size:1.375rem}#sidebar-content a{font-size:1.125rem}.toc-item{font-size:1rem}}.mdx-content>[data-as=\"p\"],.mdx-content>p{margin-top:0;margin-bottom:1.75rem}.mdx-content>h2{margin-top:3.5rem;margin-bottom:1.25rem;padding-top:2rem;border-top:1px solid rgb(0 0 0 / 0.08);font-size:1.875rem;letter-spacing:-0.01em}.dark .mdx-content>h2{border-top-color:rgb(255 255 255 / 0.08)}.mdx-content>h2:first-child{margin-top:0;padding-top:0;border-top:0}.mdx-content>h3{margin-top:2.75rem;margin-bottom:1.125rem;font-size:1.4375rem}.mdx-content>h4{margin-top:2rem;margin-bottom:0.75rem}.mdx-content li{margin-top:0.625rem;margin-bottom:0.625rem}.mdx-content>ul,.mdx-content>ol{margin-bottom:1.75rem}.mdx-content :not(pre)>code{font-size:0.875em;padding:0.125rem 0.375rem;overflow-wrap:anywhere}.mdx-content table{font-size:1.0625rem;line-height:1.7}.mdx-content th,.mdx-content td{padding:0.875rem 1.5rem 0.875rem 0!important;vertical-align:top}.mdx-content th{padding-top:0.25rem!important}.mdx-content th:last-child,.mdx-content td:last-child{padding-right:0!important}.mdx-content td>code:only-child{white-space:nowrap}pre{max-height:36rem;overflow:auto}.mdx-content pre code{font-size:0.9375rem;line-height:1.75}.mdx-content>.code-block,.mdx-content>.code-group{margin-top:1.5rem;margin-bottom:2rem}.mdx-content .columns{column-gap:1.25rem;row-gap:0.5rem;margin-top:1.75rem;margin-bottom:2.25rem}.mdx-content .card{border-radius:1rem}.mdx-content .card [data-component-part=\"card-content-container\"]{padding:1.5rem 1.75rem}.mdx-content [data-component-part=\"card-title\"]{font-size:1.25rem}.mdx-content [data-component-part=\"card-content\"]{font-size:1.0625rem;line-height:1.7}.mdx-content .callout{margin-top:2rem;margin-bottom:2.25rem;padding:1.25rem 1.75rem;font-size:1.125rem;line-height:1.75}.mdx-content .steps{margin-top:1.75rem;margin-bottom:2.25rem}.mdx-content .step{padding-bottom:0.75rem}.mdx-content .accordion-group,.mdx-content>.accordion{margin-top:1.75rem;margin-bottom:2.25rem}.mdx-content .tabs{margin-top:1.75rem;margin-bottom:2.25rem}.mdx-content .tabs [role=\"tabpanel\"]{padding-top:0.375rem;padding-right:0.375rem;padding-bottom:0.375rem}.mdx-content [data-component-name=\"mermaid-container\"]{--im-node-fill: #ecfdf3;--im-node-stroke: #16a34a;--im-node-text: #0b3a1f;--im-cluster-fill: rgb(22 163 74 / 0.04);--im-cluster-stroke: rgb(22 163 74 / 0.35);--im-edge: #64748b;--im-label-bg: #ffffff;margin-top:1.75rem;margin-bottom:2.25rem;padding:2rem 1.5rem;border:1px solid rgb(0 0 0 / 0.08);border-radius:1rem;background:rgb(0 0 0 / 0.015)}.dark .mdx-content [data-component-name=\"mermaid-container\"]{--im-node-fill: #0b2e1a;--im-node-stroke: #22c55e;--im-node-text: #e7fbef;--im-cluster-fill: rgb(34 197 94 / 0.05);--im-cluster-stroke: rgb(34 197 94 / 0.35);--im-edge: #94a3b8;--im-label-bg: #0f1214;border-color:rgb(255 255 255 / 0.08);background:rgb(255 255 255 / 0.02)}.mdx-content [data-component-name=\"mermaid-container\"] svg[id^=\"mermaid\"]{display:block;margin-left:auto;margin-right:auto}.mdx-content [data-component-name=\"mermaid-container\"] .node rect,.mdx-content [data-component-name=\"mermaid-container\"] .node polygon,.mdx-content [data-component-name=\"mermaid-container\"] .node circle,.mdx-content [data-component-name=\"mermaid-container\"] .node path{fill:var(--im-node-fill)!important;stroke:var(--im-node-stroke)!important;stroke-width:1.5px!important}.mdx-content [data-component-name=\"mermaid-container\"] .node rect{rx:8px;ry:8px}.mdx-content [data-component-name=\"mermaid-container\"] .nodeLabel,.mdx-content [data-component-name=\"mermaid-container\"] .node .label{color:var(--im-node-text)!important;fill:var(--im-node-text)!important}.mdx-content [data-component-name=\"mermaid-container\"] .cluster rect{fill:var(--im-cluster-fill)!important;stroke:var(--im-cluster-stroke)!important;stroke-dasharray:6 4;rx:12px;ry:12px}.mdx-content [data-component-name=\"mermaid-container\"] .cluster-label .nodeLabel,.mdx-content [data-component-name=\"mermaid-container\"] .cluster .nodeLabel{color:var(--im-node-stroke)!important}.mdx-content [data-component-name=\"mermaid-container\"] .flowchart-link,.mdx-content [data-component-name=\"mermaid-container\"] .edgePath path{stroke:var(--im-edge)!important;stroke-width:1.5px!important}.mdx-content [data-component-name=\"mermaid-container\"] marker path,.mdx-content [data-component-name=\"mermaid-container\"] .arrowheadPath{fill:var(--im-edge)!important;stroke:var(--im-edge)!important}.mdx-content [data-component-name=\"mermaid-container\"] .edgeLabel,.mdx-content [data-component-name=\"mermaid-container\"] .edgeLabel p,.mdx-content [data-component-name=\"mermaid-container\"] .labelBkg{background-color:var(--im-label-bg)!important;color:var(--im-edge)!important}.mdx-content [data-component-name=\"mermaid-container\"] rect.actor{fill:var(--im-node-fill)!important;stroke:var(--im-node-stroke)!important;stroke-width:1.5px!important;rx:8px;ry:8px}.mdx-content [data-component-name=\"mermaid-container\"] text.actor>tspan,.mdx-content [data-component-name=\"mermaid-container\"] text.actor{fill:var(--im-node-text)!important}.mdx-content [data-component-name=\"mermaid-container\"] .actor-line{stroke:var(--im-cluster-stroke)!important}.mdx-content [data-component-name=\"mermaid-container\"] .messageLine0,.mdx-content [data-component-name=\"mermaid-container\"] .messageLine1{stroke:var(--im-edge)!important;stroke-width:1.5px!important}.mdx-content [data-component-name=\"mermaid-container\"] #arrowhead path,.mdx-content [data-component-name=\"mermaid-container\"] #crosshead path{fill:var(--im-edge)!important;stroke:var(--im-edge)!important}.mdx-content [data-component-name=\"mermaid-container\"] .note{fill:var(--im-cluster-fill)!important;stroke:var(--im-cluster-stroke)!important}.mdx-content .field .prose-sm{font-size:1.0625rem;line-height:1.8}@media (min-width: 1024px){.mdx-content .field .prose-sm{font-size:1.125rem}}.mdx-content .field{padding-top:1.25rem;padding-bottom:1.25rem}:root{--fa-accent: 22 163 74;--fa-ink: 15 23 42;--fa-button: 21 128 61;--fa-button-hover: 22 101 52;--fa-on-button: 255 255 255}.dark{--fa-accent: 34 197 94;--fa-ink: 255 255 255;--fa-button: 34 197 94;--fa-button-hover: 74 222 128;--fa-on-button: 5 46 22}.mdx-content .card{transition:border-color 150ms ease,\n background-color 150ms ease}.mdx-content a.card:hover,.mdx-content .card:has(a:hover){border-color:rgb(var(--fa-accent) / 0.45);background-color:rgb(var(--fa-accent) / 0.06)}.mdx-content .card [data-component-part=\"card-icon\"]{display:flex;width:1.75rem;height:1.75rem;margin-bottom:1rem}.mdx-content .card [data-component-part=\"card-icon\"] svg{width:1.75rem;height:1.75rem;mask-size:contain;background-color:rgb(var(--fa-accent))!important}.mdx-content .card [data-component-part=\"card-content-container\"].flex [data-component-part=\"card-icon\"]{margin-bottom:0}html[data-page-mode=\"wide\"] #header{display:none}.fa-hero{position:relative;isolation:isolate;display:grid;grid-template-columns:minmax(0, 1fr);gap:3rem;align-items:center;overflow:hidden;margin:-1.5rem 0 3.5rem;padding:3.5rem 3rem;border:1px solid rgb(var(--fa-accent) / 0.2);border-radius:1.5rem;background-color:rgb(var(--fa-accent) / 0.025);background-image:radial-gradient(\n 55% 75% at 82% 50%,\n rgb(var(--fa-accent) / 0.16),\n transparent 70%\n )}.fa-hero::before{content:'';position:absolute;inset:0;z-index:-1;background-image:linear-gradient(rgb(var(--fa-accent) / 0.1) 1px, transparent 1px),\n linear-gradient(90deg, rgb(var(--fa-accent) / 0.1) 1px, transparent 1px);background-size:2rem 2rem;background-position:-1px -1px;mask-image:radial-gradient(80% 90% at 85% 40%, #000 20%, transparent 75%);pointer-events:none}.fa-hero::after{content:'';position:absolute;top:0;right:10%;left:10%;height:1px;background:linear-gradient(\n 90deg,\n transparent,\n rgb(var(--fa-accent) / 0.8),\n transparent\n );pointer-events:none}@media (min-width: 1536px){.fa-hero{grid-template-columns:minmax(0, 0.85fr) minmax(0, 1.15fr);padding:4rem 3.5rem}}.fa-hero-code>.code-group,.fa-hero-code>.code-block{margin:0;border-color:rgb(var(--fa-accent) / 0.25);box-shadow:0 1px 0 rgb(255 255 255 / 0.04) inset,\n 0 30px 60px -24px rgb(0 0 0 / 0.55),\n 0 0 0 6px rgb(var(--fa-accent) / 0.06)}.mdx-content .fa-hero-code pre code{font-size:0.8125rem}.mdx-content .fa-hero .fa-hero-mark{margin:0 0 1.75rem}.mdx-content .fa-hero .fa-hero-mark img{display:block;width:auto;height:4rem;margin:0;border-radius:0}.mdx-content .fa-hero .fa-hero-mark .fa-hero-mark-dark,.dark .mdx-content .fa-hero .fa-hero-mark .fa-hero-mark-light{display:none}.dark .mdx-content .fa-hero .fa-hero-mark .fa-hero-mark-dark{display:block}.fa-hero h1{max-width:40rem;margin:0;font-size:3.25rem;font-weight:700;line-height:1.06;letter-spacing:-0.035em;text-wrap:balance}.fa-hero h1 .fa-hero-accent{color:rgb(var(--fa-accent))}.mdx-content .fa-hero-lede{max-width:34rem;margin:1.5rem 0 2.25rem;font-size:1.1875rem;line-height:1.7;opacity:0.78;text-wrap:pretty}.fa-hero-actions{display:flex;flex-wrap:wrap;gap:0.75rem}.mdx-content .fa-hero-facts{display:flex;flex-wrap:wrap;gap:0.5rem 1.5rem;margin-top:2rem;font-size:0.9375rem;opacity:0.8}.mdx-content .fa-hero-facts>span{display:inline-flex;align-items:center;gap:0.5rem}.mdx-content .fa-hero-facts>span::before{content:'';flex:none;width:1rem;height:1rem;background:rgb(var(--fa-accent));mask:url(\"data:image/svg+xml,%3Csvg xmlns='http://www.w3.org/2000/svg' viewBox='0 0 16 16'%3E%3Cpath d='M3.5 8.5l3 3 6-7' fill='none' stroke='%23000' stroke-width='2' stroke-linecap='round' stroke-linejoin='round'/%3E%3C/svg%3E\")\n center / contain no-repeat}.fa-button{display:inline-flex;align-items:center;gap:0.5rem;height:2.75rem;padding:0 1.125rem;border:1px solid transparent;border-radius:0.625rem;font-size:0.9375rem;font-weight:600;letter-spacing:-0.005em;text-decoration:none!important;transition:background-color 150ms ease,\n border-color 150ms ease,\n box-shadow 150ms ease,\n transform 150ms ease}.fa-button-primary{border-color:rgb(var(--fa-button) / 1);background:rgb(var(--fa-button));box-shadow:inset 0 1px 0 rgb(255 255 255 / 0.25),\n 0 8px 20px -10px rgb(var(--fa-button) / 0.9);color:rgb(var(--fa-on-button))!important}.fa-button-primary::after{content:'';width:1rem;height:1rem;background:currentcolor;mask:url(\"data:image/svg+xml,%3Csvg xmlns='http://www.w3.org/2000/svg' viewBox='0 0 16 16'%3E%3Cpath d='M3 8h9.5M8.5 4l4 4-4 4' fill='none' stroke='%23000' stroke-width='1.75' stroke-linecap='round' stroke-linejoin='round'/%3E%3C/svg%3E\")\n center / contain no-repeat;transition:transform 150ms ease}.fa-button-primary:hover{background:rgb(var(--fa-button-hover));box-shadow:inset 0 1px 0 rgb(255 255 255 / 0.25),\n 0 10px 24px -10px rgb(var(--fa-button) / 1)}.fa-button-primary:hover::after{transform:translateX(2px)}.fa-button-secondary{border-color:rgb(var(--fa-ink) / 0.16);background:rgb(var(--fa-ink) / 0.03);color:inherit!important}.fa-button-secondary:hover{border-color:rgb(var(--fa-accent) / 0.55);background:rgb(var(--fa-accent) / 0.08)}.fa-button:active{transform:translateY(1px)}.fa-button:focus-visible{outline:2px solid rgb(var(--fa-accent));outline-offset:3px}@media (prefers-reduced-motion: reduce){.fa-button,.fa-button-primary::after{transition:none}.fa-button:active,.fa-button-primary:hover::after{transform:none}}@media (max-width: 767px){.fa-hero{padding:2.5rem 1.5rem}.fa-hero h1{font-size:2.25rem}}#sidebar-content a,#sidebar-content li>button{gap:0.875rem;padding-top:0.625rem;padding-right:0.5rem;padding-bottom:0.625rem;font-size:1.125rem;line-height:1.45}#sidebar-content li+li{margin-top:0.25rem}#sidebar-content li>button>div:nth-child(2){min-width:0}#sidebar-content li>button>div:last-child{width:1.25rem;margin-left:auto;justify-content:center}#sidebar-content li>ul{margin:0.25rem 0 0.25rem 1.25rem;padding-left:0.375rem;border-left:1px solid rgb(0 0 0 / 0.1)}.dark #sidebar-content li>ul{border-left-color:rgb(255 255 255 / 0.1)}#sidebar-content li>ul>li>:is(a,button){padding-left:0.75rem!important;font-size:1.0625rem}#sidebar-content .sidebar-group-header{margin-bottom:0.625rem;font-size:0.875rem;font-weight:700;letter-spacing:0.08em;text-transform:uppercase;color:color-mix(in srgb, rgb(var(--fa-accent)) 72%, black)}.dark #sidebar-content .sidebar-group-header{color:rgb(var(--fa-accent))}#sidebar-content div:has(>.sidebar-group-header)+div:has(>.sidebar-group-header){margin-top:2.25rem}#sidebar-content a svg,#sidebar-content a img,#sidebar-content li>button>div:first-child svg,#sidebar-content li>button>div:first-child img{width:1.375rem;height:1.375rem}#sidebar-content .sidebar-group-header svg{width:1rem;height:1rem}.nav-tabs-item{gap:0.625rem;font-size:1.0625rem}.nav-tabs-item svg,.nav-tabs-item img{width:1.3125rem;height:1.3125rem}.nav-tabs-item[href^=\"/typescript\"] svg{background-color:#d4b106}.dark .nav-tabs-item[href^=\"/typescript\"] svg{background-color:#f7df1e}.nav-tabs-item[href^=\"/laravel\"] svg{background-color:#ff2d20}.nav-tabs-item[href^=\"/adonisjs\"] svg{background-color:#5a45ff}.dark .nav-tabs-item[href^=\"/adonisjs\"] svg{background-color:#8b7dff}li[data-group-tag]>button svg[style*=\"/brands/js.svg\"]{background-color:#d4b106}.dark li[data-group-tag]>button svg[style*=\"/brands/js.svg\"]{background-color:#f7df1e}li[data-group-tag]>button svg[style*=\"/brands/laravel.svg\"]{background-color:#ff2d20}#sidebar-content img[src$=\"/n8n.png\"]{transform:scale(1.35)}@media (min-width: 1024px){:root{--mintlify-slot-header-height: 6rem;--sidebar-width: 26rem}#navbar{height:6rem}#sidebar-content{top:6rem}#navbar div:has(img.nav-logo){height:100%}img.nav-logo{height:3.5rem;margin-left:0.5rem}div:has(>#search-bar-entry){position:fixed;top:1.5rem;right:7rem;z-index:40;width:clamp(11rem, calc(100vw - var(--sidebar-width) - 45rem), 24rem)}#search-bar-entry{height:3rem;padding-left:1.125rem;border-radius:0.875rem;font-size:1.0625rem}#search-bar-entry svg{width:1.125rem;height:1.125rem}}[data-switch=\"pill\"]{width:auto!important;height:auto!important;padding:0.3125rem;gap:0.25rem}.switch-option{width:2.125rem!important;height:2.125rem!important}.switch-option svg{width:1.125rem;height:1.125rem}.mdx-content .accordion-group{display:grid;gap:0.75rem;overflow:visible;border:0;border-color:transparent;border-radius:0;background:none}.mdx-content details.accordion{margin:0 0 0.75rem;border-color:transparent;border-radius:1rem!important;outline:1px solid rgb(var(--fa-ink) / 0.1);outline-offset:-1px;overflow:hidden;transition:outline-color 150ms ease,\n box-shadow 150ms ease}.mdx-content .accordion-group>details.accordion{margin:0}.mdx-content details.accordion:hover{outline-color:rgb(var(--fa-accent) / 0.35)}.mdx-content details.accordion[open]{outline-color:rgb(var(--fa-accent) / 0.45);box-shadow:inset 3px 0 0 rgb(var(--fa-accent))}.mdx-content [data-component-part=\"accordion-button\"]{gap:1rem;padding:1rem 1.25rem 1rem 1.5rem;border-radius:0!important;transition:background-color 150ms ease}.mdx-content [data-component-part=\"accordion-button\"]:hover{background:rgb(var(--fa-accent) / 0.05)}.mdx-content [data-component-part=\"accordion-button\"]:focus-visible{outline:2px solid rgb(var(--fa-accent));outline-offset:-2px}.mdx-content [data-component-part=\"accordion-caret-right\"]{order:3;width:2rem;height:2rem;border-radius:999px;background:rgb(var(--fa-ink) / 0.06);transition:background-color 150ms ease}.mdx-content [data-component-part=\"accordion-caret-right\"] svg{width:0.875rem;height:0.875rem}.mdx-content details.accordion[open] [data-component-part=\"accordion-caret-right\"]{background:rgb(var(--fa-accent) / 0.15)}.mdx-content details.accordion[open] [data-component-part=\"accordion-caret-right\"] svg{color:rgb(var(--fa-accent))}.mdx-content [data-component-part=\"accordion-icon\"]{display:inline-flex;align-items:center;justify-content:center;width:1.25rem;height:1.25rem}.mdx-content [data-component-part=\"accordion-icon\"] svg{width:1.25rem;height:1.25rem;background-color:rgb(var(--fa-accent))!important}.mdx-content [data-component-part=\"accordion-title\"]{font-size:1.1875rem}.mdx-content [data-component-part=\"accordion-content\"]{max-width:none;padding:1.5rem 2rem 1.75rem 1.5rem;border-top:1px solid rgb(var(--fa-ink) / 0.08);font-size:1.125rem;line-height:1.95}@media (min-width: 768px){.mdx-content details.accordion:has(>summary [data-component-part=\"accordion-icon\"])>[data-component-part=\"accordion-content\"]{padding-left:3.75rem}}.mdx-content [data-component-part=\"accordion-content\"]>[data-as=\"p\"],.mdx-content [data-component-part=\"accordion-content\"]>p{display:block;max-width:46rem;margin:0 0 1.25rem}.mdx-content [data-component-part=\"accordion-content\"]>:last-child{margin-bottom:0}@media (prefers-reduced-motion: reduce){.mdx-content details.accordion,.mdx-content [data-component-part=\"accordion-button\"],.mdx-content [data-component-part=\"accordion-caret-right\"]{transition:none}}[data-badge=\"true\"]{--fa-badge: 100 116 139;padding:0.125rem 0.5rem;border-radius:0.5rem;background:rgb(var(--fa-badge) / 0.14)!important;box-shadow:inset 0 0 0 1px rgb(var(--fa-badge) / 0.32);color:rgb(var(--fa-badge))!important;font-variant-numeric:tabular-nums}[data-badge=\"true\"][data-color=\"red\"]{--fa-badge: 239 68 68}[data-badge=\"true\"][data-color=\"orange\"]{--fa-badge: 245 130 32}[data-badge=\"true\"][data-color=\"yellow\"]{--fa-badge: 214 160 20}[data-badge=\"true\"][data-color=\"green\"]{--fa-badge: 22 163 74}[data-badge=\"true\"][data-color=\"blue\"]{--fa-badge: 17 145 240}.dark [data-badge=\"true\"][data-color=\"red\"]{--fa-badge: 248 113 113}.dark [data-badge=\"true\"][data-color=\"orange\"]{--fa-badge: 251 158 75}.dark [data-badge=\"true\"][data-color=\"yellow\"]{--fa-badge: 250 204 21}.dark [data-badge=\"true\"][data-color=\"green\"]{--fa-badge: 74 222 128}.dark [data-badge=\"true\"][data-color=\"blue\"]{--fa-badge: 62 165 245}.dark [data-badge=\"true\"][data-color=\"gray\"]{--fa-badge: 161 161 170}.mdx-content td [data-badge=\"true\"]+[data-badge=\"true\"]{margin-left:0.375rem}.mdx-content :is([data-as=\"p\"],p,li,td,blockquote),#header .prose,#page-title+*{color:rgb(38 43 52)}.dark .mdx-content :is([data-as=\"p\"],p,li,td,blockquote),.dark #header .prose,.dark #page-title+*{color:rgb(222 226 232)}.mdx-content :is(th,strong){font-weight:600}#sidebar-content a,#sidebar-content li>button{color:rgb(70 76 88)}.dark #sidebar-content a,.dark #sidebar-content li>button{color:rgb(196 201 210)}.toc-item a{color:inherit}.mdx-content [data-component-part=\"callout-content\"]{font-size:1.125rem;line-height:1.75}.mdx-content [data-component-part=\"callout-icon\"]{width:1.25rem;margin-top:0.25rem}.mdx-content [data-component-part=\"step-title\"]{font-size:1.25rem}.mdx-content [data-component-part=\"step-content\"],.mdx-content [data-component-part=\"tab-content\"]{font-size:1.125rem;line-height:1.85}.mdx-content [data-component-part=\"step-number\"]{margin-left:calc(0.5px - 1.125rem)}.mdx-content [data-component-part=\"step-indicator\"]{width:2.25rem;height:2.25rem;background-color:transparent;color:rgb(var(--fa-accent));font-size:1.25rem;font-weight:600}.mdx-content [data-component-part=\"step-indicator\"] svg{width:1.5rem;height:1.5rem;background-color:rgb(var(--fa-accent))!important}.mdx-content [data-component-part=\"tab-button\"]{font-size:1rem}.mdx-content [data-component-part=\"code-block-header\"],.mdx-content [data-component-part=\"code-block-header-filename\"]{font-size:0.875rem}.mdx-content [data-component-part=\"code-group-tab-bar\"]{font-size:0.9375rem}.mdx-content [data-component-part=\"field-name\"]{font-size:1.0625rem}.mdx-content [data-component-part=\"field-meta\"],.mdx-content [data-component-part=\"field-info-pill\"],.mdx-content [data-component-part=\"field-required-pill\"]{font-size:0.875rem}.mdx-content [data-component-part=\"expandable-button\"]{font-size:1rem}[data-component-part=\"pagination-title\"]{font-size:1.125rem}[data-component-part=\"pagination-label\"]{font-size:0.9375rem}.mdx-content>.multi-view-item{max-width:none;font-size:inherit;line-height:inherit}.multi-view-item>[data-as=\"p\"],.multi-view-item>p{margin-top:0;margin-bottom:1.75rem}.multi-view-item>h2{margin-top:3.5rem;margin-bottom:1.25rem;padding-top:2rem;border-top:1px solid rgb(0 0 0 / 0.08);font-size:1.875rem;letter-spacing:-0.01em}.dark .multi-view-item>h2{border-top-color:rgb(255 255 255 / 0.08)}.multi-view-item>h2:first-child{margin-top:0;padding-top:0;border-top:0}.multi-view-item>h3{margin-top:2.75rem;margin-bottom:1.125rem;font-size:1.4375rem}.multi-view-item>ul,.multi-view-item>ol{margin-bottom:1.75rem}.multi-view-item>.code-block,.multi-view-item>.code-group{margin-top:1.5rem;margin-bottom:2rem}#content-container .prose.prose-sm{font-size:1.0625rem;line-height:1.8}#sidebar-content .method-nav-pill{width:2.75rem}#sidebar-content .method-nav-pill>*{padding:0.125rem 0.375rem;font-size:0.6875rem;line-height:1.25rem}#fa-reader-values{margin-top:1.75rem;padding:1.5rem;border:1px solid rgb(var(--fa-ink) / 0.14);border-radius:1rem;background:transparent;font-size:1.0625rem;line-height:1.6;transition:border-color 150ms ease;container:fa-reader / inline-size}#fa-reader-values:hover,#fa-reader-values:focus-within{border-color:rgb(var(--fa-accent) / 0.45)}#fa-reader-values .fa-reader-line{display:grid;grid-template-columns:auto 1fr;align-items:center;gap:1rem 1.25rem}#fa-reader-values .fa-reader-toggle{grid-column:1 / -1;justify-self:start}@container fa-reader (min-width: 30rem){#fa-reader-values .fa-reader-line{grid-template-columns:auto 1fr auto}#fa-reader-values .fa-reader-line .fa-reader-toggle{grid-column:auto}}#fa-reader-values .fa-reader-icon{width:4rem;height:4rem;background:url('/logo/attract-glyph-color-a-green-on-light-scalable.svg') center / contain\n no-repeat}.dark #fa-reader-values .fa-reader-icon{background-image:url('/logo/attract-glyph-color-a-green-on-dark-scalable.svg')}#fa-reader-values .fa-reader-copy{min-width:0}#fa-reader-values .fa-reader-copy p{margin:0}#fa-reader-values .fa-reader-title{font-size:1.125rem;font-weight:600;color:rgb(var(--fa-ink))}#fa-reader-values .fa-reader-values{display:grid;grid-template-columns:auto 1fr;align-items:center;gap:0.625rem 0.875rem;margin:0.75rem 0 0}#fa-reader-values .fa-reader-values>div{display:contents}#fa-reader-values .fa-reader-values dt{font-weight:500;color:rgb(var(--fa-ink))}#fa-reader-values .fa-reader-values dd{justify-self:start;min-width:0;margin:0}#fa-reader-values code{display:inline-block;padding:0.375rem 0.875rem;border:1px solid rgb(var(--fa-accent) / 0.4);border-radius:0.5rem;background:rgb(var(--fa-ink) / 0.03);color:rgb(var(--fa-ink));font-size:0.95em;font-weight:700;line-height:1.4;overflow-wrap:anywhere}#fa-reader-values button{padding:0.625rem 1.25rem;border:1px solid rgb(var(--fa-ink) / 0.16);border-radius:0.625rem;background:rgb(var(--fa-ink) / 0.03);color:rgb(var(--fa-ink));font-weight:600;white-space:nowrap;cursor:pointer;transition:background-color 150ms ease,\n border-color 150ms ease}#fa-reader-values button:hover{border-color:rgb(var(--fa-accent) / 0.55);background:rgb(var(--fa-accent) / 0.08)}#fa-reader-values button:focus-visible,#fa-reader-values input:focus-visible{outline:2px solid rgb(var(--fa-accent));outline-offset:2px}#fa-reader-values .fa-reader-form{display:grid;grid-template-columns:1fr;gap:1.75rem 1.5rem;margin-top:1.5rem;padding:1.5rem 0.25rem 0.25rem;border-top:1px solid rgb(var(--fa-ink) / 0.1)}@media (min-width: 768px){#fa-reader-values .fa-reader-form{grid-template-columns:1fr 1fr}}#fa-reader-values .fa-reader-form[hidden]{display:none}#fa-reader-values label{display:grid;gap:0.625rem;align-content:start}#fa-reader-values label>span{font-weight:600;color:rgb(var(--fa-ink))}#fa-reader-values label em{font-style:normal;font-weight:400}#fa-reader-values input{width:100%;padding:0.75rem 1rem;border:1px solid rgb(128 128 128 / 0.4);border-radius:0.5rem;background:rgb(128 128 128 / 0.08);color:rgb(var(--fa-ink));font:inherit}#fa-reader-values small{display:block;margin-top:0.5rem;font-size:0.9375rem;line-height:1.6;color:rgb(var(--fa-ink))}#fa-reader-values .fa-reader-error{grid-column:1 / -1;margin:0;color:#dc2626}.dark #fa-reader-values .fa-reader-error{color:#f87171}#fa-reader-values .fa-reader-error:empty{display:none}#fa-reader-values .fa-reader-actions{display:flex;flex-wrap:wrap;grid-column:1 / -1;align-items:center;gap:1rem;padding-top:0.25rem}.mdx-content .n8n-canvas{--n8n-dot: rgb(0 0 0 / 0.12);--n8n-node-bg: #ffffff;--n8n-node-border: rgb(0 0 0 / 0.18);--n8n-line: #94a3b8;margin:1.75rem 0 2.25rem;padding:2rem 0.75rem 1.5rem;overflow-x:auto;border:1px solid rgb(0 0 0 / 0.08);border-radius:1rem;background-color:rgb(0 0 0 / 0.015);background-image:radial-gradient(var(--n8n-dot) 1px, transparent 1px);background-size:18px 18px}.dark .mdx-content .n8n-canvas{--n8n-dot: rgb(255 255 255 / 0.1);--n8n-node-bg: #1b1f24;--n8n-node-border: rgb(255 255 255 / 0.22);--n8n-line: #64748b;border-color:rgb(255 255 255 / 0.08);background-color:rgb(255 255 255 / 0.02)}.mdx-content .n8n-canvas-row{display:flex;align-items:flex-start;justify-content:center;min-width:max-content;margin:0 auto}.mdx-content .n8n-node{display:flex;flex-direction:column;align-items:center;width:7.25rem;text-align:center}.mdx-content .n8n-node-box{display:flex;align-items:center;justify-content:center;width:4.5rem;height:4.5rem;border:2px solid var(--n8n-node-border);border-radius:0.75rem;background:var(--n8n-node-bg);box-shadow:0 1px 3px rgb(0 0 0 / 0.08)}.mdx-content .n8n-node-trigger .n8n-node-box{border-radius:2.25rem 0.75rem 0.75rem 2.25rem}.mdx-content .n8n-node-accent .n8n-node-box{border-color:rgb(var(--fa-accent));box-shadow:0 0 0 4px rgb(var(--fa-accent) / 0.15)}.mdx-content .n8n-node-title{margin-top:0.6rem;font-size:0.95rem;font-weight:600;line-height:1.3}.mdx-content .n8n-node-note{margin-top:0.2rem;font-size:0.8rem;line-height:1.35;opacity:0.7}.mdx-content .n8n-node-box svg{width:1.9rem!important;height:1.9rem!important}.mdx-content .n8n-link{display:flex;flex-direction:column;align-items:center;width:4rem;margin:0 -1.125rem;padding-top:1.1rem}.mdx-content .n8n-link-items{height:1.1rem;font-size:0.75rem;font-weight:600;line-height:1.1rem;white-space:nowrap;color:rgb(var(--fa-accent))}.mdx-content .n8n-link-line{position:relative;width:100%;height:2px;margin-top:0.4rem;background:var(--n8n-line)}.mdx-content .n8n-link-line::after{position:absolute;top:-4px;right:-1px;border-top:5px solid transparent;border-bottom:5px solid transparent;border-left:7px solid var(--n8n-line);content:''}.mdx-content .n8n-canvas figcaption{margin-top:1.25rem;font-size:0.85rem;text-align:center;opacity:0.7}.mdx-content .n8n-signed{margin:1.5rem 0 2rem;padding:1.5rem 1.25rem 1.25rem;overflow-x:auto;border:1px solid rgb(0 0 0 / 0.08);border-radius:1rem}.dark .mdx-content .n8n-signed{border-color:rgb(255 255 255 / 0.08)}.mdx-content .n8n-signed-row{display:flex;flex-wrap:wrap;align-items:flex-start;justify-content:center;row-gap:1rem}.mdx-content .n8n-signed-part{display:flex;flex-direction:column;align-items:center;gap:0.5rem}.mdx-content .n8n-signed-value,.mdx-content .n8n-signed-dot{padding:0.35rem 0.55rem;border-radius:0.4rem;font-size:0.95rem;white-space:nowrap}.mdx-content .n8n-signed-dot{padding:0.35rem 0.15rem;background:none;font-weight:700}.mdx-content .n8n-signed-value{min-width:2.5rem;text-align:center;background:rgb(var(--n8n-part) / 0.14);box-shadow:inset 0 0 0 1px rgb(var(--n8n-part) / 0.45)}.mdx-content .n8n-signed-label{font-size:0.75rem;font-weight:600;letter-spacing:0.04em;text-transform:uppercase;color:rgb(var(--n8n-part))}.mdx-content .n8n-signed-0{--n8n-part: 37 99 235}.mdx-content .n8n-signed-1{--n8n-part: 22 163 74}.mdx-content .n8n-signed-2{--n8n-part: 217 119 6}.mdx-content .n8n-signed-3{--n8n-part: 219 39 119}.mdx-content .n8n-coming-soon-logos{display:flex;align-items:center;gap:1rem;margin-bottom:1.25rem}.mdx-content .n8n-coming-soon-logos img{width:auto;height:3.5rem;margin:0}.mdx-content .n8n-coming-soon-logos img[class^=\"n8n-mark-\"]{height:4.5rem;margin:-0.5rem}.mdx-content .n8n-coming-soon-logos .n8n-mark-dark,.dark .mdx-content .n8n-coming-soon-logos .n8n-mark-light{display:none}.dark .mdx-content .n8n-coming-soon-logos .n8n-mark-dark{display:block}.mdx-content .n8n-coming-soon-logos span{font-size:1.75rem;font-weight:600;opacity:0.6}.mdx-content .n8n-coming-soon-title{margin:0 0 0.35rem;font-size:1.25rem;font-weight:600;color:rgb(var(--fa-ink))}.mdx-content .n8n-coming-soon-title+*{margin-top:0}"}],"page":{"pagePath":"guides/get-started/set-up-your-site","slug":"/guides/get-started/set-up-your-site","pageMetadata":{"title":"Set up your site","sidebarTitle":"Set up your site","description":"A checklist that takes your new site from a fresh start to live, one step at a time.","icon":"list-check","href":"/guides/get-started/set-up-your-site"},"description":{"compiledSource":"\"use strict\";\nconst {jsx: _jsx} = arguments[0];\nconst {useMDXComponents: _provideComponents} = arguments[0];\nfunction _createMdxContent(props) {\n const _components = {\n p: \"p\",\n ..._provideComponents(),\n ...props.components\n };\n return _jsx(_components.p, {\n children: \"A checklist that takes your new site from a fresh start to live, one step at a time.\"\n });\n}\nfunction MDXContent(props = {}) {\n const {wrapper: MDXLayout} = {\n ..._provideComponents(),\n ...props.components\n };\n return MDXLayout ? _jsx(MDXLayout, {\n ...props,\n children: _jsx(_createMdxContent, {\n ...props\n })\n }) : _createMdxContent(props);\n}\nreturn {\n default: MDXContent\n};\n","frontmatter":{},"scope":{}},"pageType":"default","mdx":{"mdxSource":{"compiledSource":"\"use strict\";const{Fragment:_Fragment,jsx:_jsx,jsxs:_jsxs}=arguments[0];const{useMDXComponents:_provideComponents}=arguments[0];function _createMdxContent(props){const _components={a:`a`,li:`li`,p:`p`,strong:`strong`,tbody:`tbody`,td:`td`,th:`th`,thead:`thead`,tr:`tr`,ul:`ul`,..._provideComponents(),...props.components},{Accordion,AccordionGroup,Card,Columns,Frame,Heading,Icon,OptimizedImage,Step,Steps,Table}=_components;if(!Accordion)_missingMdxReference(`Accordion`,true);if(!AccordionGroup)_missingMdxReference(`AccordionGroup`,true);if(!Card)_missingMdxReference(`Card`,true);if(!Columns)_missingMdxReference(`Columns`,true);if(!Frame)_missingMdxReference(`Frame`,true);if(!Heading)_missingMdxReference(`Heading`,true);if(!Icon)_missingMdxReference(`Icon`,true);if(!OptimizedImage)_missingMdxReference(`OptimizedImage`,true);if(!Step)_missingMdxReference(`Step`,true);if(!Steps)_missingMdxReference(`Steps`,true);if(!Table)_missingMdxReference(`Table`,true);return _jsxs(_Fragment,{children:[_jsxs(_components.p,{children:[`A new site comes with a checklist that takes you from a fresh start to live. Each step says what it changes and opens the exact screen where you do it. Most steps tick themselves done when you save the right details. A few need more: a successful test, or choosing `,_jsx(_components.strong,{children:`Looks good`}),`.`]}),`\n`,_jsxs(_components.p,{children:[_jsx(Icon,{icon:`user-shield`}),` `,_jsx(_components.strong,{children:`Who can do this:`}),` Admins and Owners.`]}),`\n`,_jsx(Heading,{level:`2`,id:`before-you-start`,children:`Before you start`}),`\n`,_jsxs(_components.ul,{children:[`\n`,_jsxs(_components.li,{children:[_jsx(_components.strong,{children:`Your site starts offline.`}),` A new site is in maintenance mode, so visitors see a “be right back” page. You and your team see the full site. A reminder bar at the bottom says: “Maintenance mode is on — visitors currently see the maintenance page. Turn it off in Site settings → Maintenance.” The last step puts your site live.`]}),`\n`,_jsxs(_components.li,{children:[_jsx(_components.strong,{children:`Have your details handy:`}),` your logo, a small square icon for browser tabs, your address, phone and email, and your legal business name.`]}),`\n`,_jsxs(_components.li,{children:[_jsx(_components.strong,{children:`Work at your own pace.`}),` Close the checklist whenever you like. It remembers what’s done, and it stays in your menu for as long as your site exists.`]}),`\n`]}),`\n`,_jsx(Heading,{level:`2`,id:`open-the-checklist`,children:`Open the checklist`}),`\n`,_jsxs(_components.ul,{children:[`\n`,_jsxs(_components.li,{children:[`In the toolbar, choose your picture and name, then `,_jsx(_components.strong,{children:`Set up your site`}),`.`]}),`\n`,_jsxs(_components.li,{children:[`Or open the command palette (⌘K, or Ctrl+K on Windows) and choose `,_jsx(_components.strong,{children:`Set up your site`}),`.`]}),`\n`,_jsx(_components.li,{children:`Or press T, then Shift+S.`}),`\n`]}),`\n`,_jsxs(_components.p,{children:[`The `,_jsx(_components.strong,{children:`Set up your site`}),` window opens. At the top, `,_jsx(_components.strong,{children:`Get your site ready`}),` counts the required steps you’ve finished. Below it, the steps are in two lists: `,_jsx(_components.strong,{children:`Required`}),` and `,_jsx(_components.strong,{children:`Optional`}),`. The first required step that isn’t done yet is marked `,_jsx(_components.strong,{children:`Next`}),`.`]}),`\n`,_jsxs(Frame,{caption:`The checklist on a new site. Next marks where to start.`,children:[_jsx(OptimizedImage,{className:`mint-block dark:mint-hidden`,src:`https://mintcdn.com/fetchski-attract-api/0g3iIRMTmzCPGaat/images/cms/guides/get-started/set-up-your-site/guides-get-started-setup-checklist-light.png?fit=max\u0026auto=format\u0026n=0g3iIRMTmzCPGaat\u0026q=85\u0026s=9756f0165f297f126b077fc651eb4201`,alt:`The Set up your site window on a fresh site: Get your site ready with \"0 of 14 required steps\" and its progress bar, then the Required list with step 1.`,\"data-og-width\":`1632`,width:`1632`,\"data-og-height\":`1316`,height:`1316`,\"data-path\":`images/cms/guides/get-started/set-up-your-site/guides-get-started-setup-checklist-light.png`,\"data-optimize\":`true`,\"data-opv\":`3`,srcset:`https://mintcdn.com/fetchski-attract-api/0g3iIRMTmzCPGaat/images/cms/guides/get-started/set-up-your-site/guides-get-started-setup-checklist-light.png?w=280\u0026fit=max\u0026auto=format\u0026n=0g3iIRMTmzCPGaat\u0026q=85\u0026s=2139c81510448db7a62dc38a50165f15 280w, https://mintcdn.com/fetchski-attract-api/0g3iIRMTmzCPGaat/images/cms/guides/get-started/set-up-your-site/guides-get-started-setup-checklist-light.png?w=560\u0026fit=max\u0026auto=format\u0026n=0g3iIRMTmzCPGaat\u0026q=85\u0026s=82f6247a744ab80750bccd4d49cc12da 560w, https://mintcdn.com/fetchski-attract-api/0g3iIRMTmzCPGaat/images/cms/guides/get-started/set-up-your-site/guides-get-started-setup-checklist-light.png?w=840\u0026fit=max\u0026auto=format\u0026n=0g3iIRMTmzCPGaat\u0026q=85\u0026s=39d812141db02db48fe7cd440292ee70 840w, https://mintcdn.com/fetchski-attract-api/0g3iIRMTmzCPGaat/images/cms/guides/get-started/set-up-your-site/guides-get-started-setup-checklist-light.png?w=1100\u0026fit=max\u0026auto=format\u0026n=0g3iIRMTmzCPGaat\u0026q=85\u0026s=d069984682830be02c5d1210fff726ff 1100w, https://mintcdn.com/fetchski-attract-api/0g3iIRMTmzCPGaat/images/cms/guides/get-started/set-up-your-site/guides-get-started-setup-checklist-light.png?w=1650\u0026fit=max\u0026auto=format\u0026n=0g3iIRMTmzCPGaat\u0026q=85\u0026s=b8c543c9831079c59c08590b27fc7bb8 1650w, https://mintcdn.com/fetchski-attract-api/0g3iIRMTmzCPGaat/images/cms/guides/get-started/set-up-your-site/guides-get-started-setup-checklist-light.png?w=2500\u0026fit=max\u0026auto=format\u0026n=0g3iIRMTmzCPGaat\u0026q=85\u0026s=f3915cdf2d38452d2b3da7057c05a105 2500w`}),_jsx(OptimizedImage,{className:`mint-hidden dark:mint-block`,src:`https://mintcdn.com/fetchski-attract-api/0g3iIRMTmzCPGaat/images/cms/guides/get-started/set-up-your-site/guides-get-started-setup-checklist-dark.png?fit=max\u0026auto=format\u0026n=0g3iIRMTmzCPGaat\u0026q=85\u0026s=ea54493df121aeec52d94f07d9869b06`,alt:`The Set up your site window on a fresh site: Get your site ready with \"0 of 14 required steps\" and its progress bar, then the Required list with step 1.`,\"data-og-width\":`1632`,width:`1632`,\"data-og-height\":`1316`,height:`1316`,\"data-path\":`images/cms/guides/get-started/set-up-your-site/guides-get-started-setup-checklist-dark.png`,\"data-optimize\":`true`,\"data-opv\":`3`,srcset:`https://mintcdn.com/fetchski-attract-api/0g3iIRMTmzCPGaat/images/cms/guides/get-started/set-up-your-site/guides-get-started-setup-checklist-dark.png?w=280\u0026fit=max\u0026auto=format\u0026n=0g3iIRMTmzCPGaat\u0026q=85\u0026s=6229e351ffc9eba181f7c11fca2cd0af 280w, https://mintcdn.com/fetchski-attract-api/0g3iIRMTmzCPGaat/images/cms/guides/get-started/set-up-your-site/guides-get-started-setup-checklist-dark.png?w=560\u0026fit=max\u0026auto=format\u0026n=0g3iIRMTmzCPGaat\u0026q=85\u0026s=97a67d8f9d69540b506b6a81c13e81c0 560w, https://mintcdn.com/fetchski-attract-api/0g3iIRMTmzCPGaat/images/cms/guides/get-started/set-up-your-site/guides-get-started-setup-checklist-dark.png?w=840\u0026fit=max\u0026auto=format\u0026n=0g3iIRMTmzCPGaat\u0026q=85\u0026s=535df434c09d8619974574f959e9d082 840w, https://mintcdn.com/fetchski-attract-api/0g3iIRMTmzCPGaat/images/cms/guides/get-started/set-up-your-site/guides-get-started-setup-checklist-dark.png?w=1100\u0026fit=max\u0026auto=format\u0026n=0g3iIRMTmzCPGaat\u0026q=85\u0026s=92ce7cfd390351aaea432ce38b55f200 1100w, https://mintcdn.com/fetchski-attract-api/0g3iIRMTmzCPGaat/images/cms/guides/get-started/set-up-your-site/guides-get-started-setup-checklist-dark.png?w=1650\u0026fit=max\u0026auto=format\u0026n=0g3iIRMTmzCPGaat\u0026q=85\u0026s=3218d7483bf8d6b4aed2aabbe574b179 1650w, https://mintcdn.com/fetchski-attract-api/0g3iIRMTmzCPGaat/images/cms/guides/get-started/set-up-your-site/guides-get-started-setup-checklist-dark.png?w=2500\u0026fit=max\u0026auto=format\u0026n=0g3iIRMTmzCPGaat\u0026q=85\u0026s=826d4bd7f56572233eee1739aa61f460 2500w`})]}),`\n`,_jsx(Heading,{level:`2`,id:`work-through-the-steps`,children:`Work through the steps`}),`\n`,_jsxs(Steps,{children:[_jsxs(Step,{title:`Choose Open on a step`,children:[_jsx(_components.p,{children:`The right screen opens on top of the checklist, on the right tab. Often the right group of settings is already open too.`}),_jsxs(Frame,{caption:`Open takes you straight to the right settings.`,children:[_jsx(OptimizedImage,{className:`mint-block dark:mint-hidden`,src:`https://mintcdn.com/fetchski-attract-api/VHp0B0s1nBbMi7JQ/images/cms/guides/get-started/set-up-your-site/guides-get-started-setup-step-open-light.png?fit=max\u0026auto=format\u0026n=VHp0B0s1nBbMi7JQ\u0026q=85\u0026s=73977ec3a6827653b65f0be7a8817e9f`,alt:`Site settings opened from step 1, on the Brand tab with the Name and tagline group open and scrolled into view, the checklist dimmed behind it.`,\"data-og-width\":`2200`,width:`2200`,\"data-og-height\":`1520`,height:`1520`,\"data-path\":`images/cms/guides/get-started/set-up-your-site/guides-get-started-setup-step-open-light.png`,\"data-optimize\":`true`,\"data-opv\":`3`,srcset:`https://mintcdn.com/fetchski-attract-api/VHp0B0s1nBbMi7JQ/images/cms/guides/get-started/set-up-your-site/guides-get-started-setup-step-open-light.png?w=280\u0026fit=max\u0026auto=format\u0026n=VHp0B0s1nBbMi7JQ\u0026q=85\u0026s=1563a679f357c2f457bb73300564c7c0 280w, https://mintcdn.com/fetchski-attract-api/VHp0B0s1nBbMi7JQ/images/cms/guides/get-started/set-up-your-site/guides-get-started-setup-step-open-light.png?w=560\u0026fit=max\u0026auto=format\u0026n=VHp0B0s1nBbMi7JQ\u0026q=85\u0026s=d30541a2a18d8ce314877f73a444f35d 560w, https://mintcdn.com/fetchski-attract-api/VHp0B0s1nBbMi7JQ/images/cms/guides/get-started/set-up-your-site/guides-get-started-setup-step-open-light.png?w=840\u0026fit=max\u0026auto=format\u0026n=VHp0B0s1nBbMi7JQ\u0026q=85\u0026s=0888052da0c6e81cd4b8ce4f15ec5889 840w, https://mintcdn.com/fetchski-attract-api/VHp0B0s1nBbMi7JQ/images/cms/guides/get-started/set-up-your-site/guides-get-started-setup-step-open-light.png?w=1100\u0026fit=max\u0026auto=format\u0026n=VHp0B0s1nBbMi7JQ\u0026q=85\u0026s=71b4419fac4abdc812179a3c5a4d9f44 1100w, https://mintcdn.com/fetchski-attract-api/VHp0B0s1nBbMi7JQ/images/cms/guides/get-started/set-up-your-site/guides-get-started-setup-step-open-light.png?w=1650\u0026fit=max\u0026auto=format\u0026n=VHp0B0s1nBbMi7JQ\u0026q=85\u0026s=32c835aae469db5313130edf2871aca5 1650w, https://mintcdn.com/fetchski-attract-api/VHp0B0s1nBbMi7JQ/images/cms/guides/get-started/set-up-your-site/guides-get-started-setup-step-open-light.png?w=2500\u0026fit=max\u0026auto=format\u0026n=VHp0B0s1nBbMi7JQ\u0026q=85\u0026s=9a90a7af052b98c765af6b50879c33d7 2500w`}),_jsx(OptimizedImage,{className:`mint-hidden dark:mint-block`,src:`https://mintcdn.com/fetchski-attract-api/VHp0B0s1nBbMi7JQ/images/cms/guides/get-started/set-up-your-site/guides-get-started-setup-step-open-dark.png?fit=max\u0026auto=format\u0026n=VHp0B0s1nBbMi7JQ\u0026q=85\u0026s=9eca92a13ac516f937d1c39b02df4208`,alt:`Site settings opened from step 1, on the Brand tab with the Name and tagline group open and scrolled into view, the checklist dimmed behind it.`,\"data-og-width\":`2200`,width:`2200`,\"data-og-height\":`1520`,height:`1520`,\"data-path\":`images/cms/guides/get-started/set-up-your-site/guides-get-started-setup-step-open-dark.png`,\"data-optimize\":`true`,\"data-opv\":`3`,srcset:`https://mintcdn.com/fetchski-attract-api/VHp0B0s1nBbMi7JQ/images/cms/guides/get-started/set-up-your-site/guides-get-started-setup-step-open-dark.png?w=280\u0026fit=max\u0026auto=format\u0026n=VHp0B0s1nBbMi7JQ\u0026q=85\u0026s=042fee516a30bbad82e0e0fb092ebf88 280w, https://mintcdn.com/fetchski-attract-api/VHp0B0s1nBbMi7JQ/images/cms/guides/get-started/set-up-your-site/guides-get-started-setup-step-open-dark.png?w=560\u0026fit=max\u0026auto=format\u0026n=VHp0B0s1nBbMi7JQ\u0026q=85\u0026s=97bf368426741a003d2296e413dd526c 560w, https://mintcdn.com/fetchski-attract-api/VHp0B0s1nBbMi7JQ/images/cms/guides/get-started/set-up-your-site/guides-get-started-setup-step-open-dark.png?w=840\u0026fit=max\u0026auto=format\u0026n=VHp0B0s1nBbMi7JQ\u0026q=85\u0026s=141f85b22f2ab2248e7c93b47906eb16 840w, https://mintcdn.com/fetchski-attract-api/VHp0B0s1nBbMi7JQ/images/cms/guides/get-started/set-up-your-site/guides-get-started-setup-step-open-dark.png?w=1100\u0026fit=max\u0026auto=format\u0026n=VHp0B0s1nBbMi7JQ\u0026q=85\u0026s=8efb170c4841df1b1dec7b1a1ea64ae7 1100w, https://mintcdn.com/fetchski-attract-api/VHp0B0s1nBbMi7JQ/images/cms/guides/get-started/set-up-your-site/guides-get-started-setup-step-open-dark.png?w=1650\u0026fit=max\u0026auto=format\u0026n=VHp0B0s1nBbMi7JQ\u0026q=85\u0026s=4c0e5614dce566a990e391950771faea 1650w, https://mintcdn.com/fetchski-attract-api/VHp0B0s1nBbMi7JQ/images/cms/guides/get-started/set-up-your-site/guides-get-started-setup-step-open-dark.png?w=2500\u0026fit=max\u0026auto=format\u0026n=VHp0B0s1nBbMi7JQ\u0026q=85\u0026s=e887e347cb772db4ae84777197e2412a 2500w`})]})]}),_jsx(Step,{title:`Make your changes and save`,children:_jsxs(_components.p,{children:[`In `,_jsx(_components.strong,{children:`Site settings`}),` or `,_jsx(_components.strong,{children:`Site design`}),`, choose `,_jsx(_components.strong,{children:`Update`}),`. In `,_jsx(_components.strong,{children:`Connections`}),`, choose `,_jsx(_components.strong,{children:`Save`}),`. Then close the screen. You’re back on the checklist, and the step shows a check mark if it’s done.`]})}),_jsxs(Step,{title:`Tick the steps that are already fine`,children:[_jsxs(_components.p,{children:[`Some steps come with sensible starting settings, such as your colors and fonts. If you’re happy with them as they are, choose `,_jsx(_components.strong,{children:`Looks good`}),` on that step. Anyone who opens the checklist sees the tick.`]}),_jsxs(Frame,{caption:`Looks good marks a step done when its starting settings suit you.`,children:[_jsx(OptimizedImage,{className:`mint-block dark:mint-hidden`,src:`https://mintcdn.com/fetchski-attract-api/0g3iIRMTmzCPGaat/images/cms/guides/get-started/set-up-your-site/guides-get-started-setup-looks-good-light.png?fit=max\u0026auto=format\u0026n=0g3iIRMTmzCPGaat\u0026q=85\u0026s=fe6ace32f8cde7a4a857248454105b28`,alt:`Step 4, Pick your colors, with its Open button and the Looks good box ticked; steps 1 to 3 above it show check marks.`,\"data-og-width\":`1632`,width:`1632`,\"data-og-height\":`852`,height:`852`,\"data-path\":`images/cms/guides/get-started/set-up-your-site/guides-get-started-setup-looks-good-light.png`,\"data-optimize\":`true`,\"data-opv\":`3`,srcset:`https://mintcdn.com/fetchski-attract-api/0g3iIRMTmzCPGaat/images/cms/guides/get-started/set-up-your-site/guides-get-started-setup-looks-good-light.png?w=280\u0026fit=max\u0026auto=format\u0026n=0g3iIRMTmzCPGaat\u0026q=85\u0026s=8553b0416e25003148a4fa2f44187a46 280w, https://mintcdn.com/fetchski-attract-api/0g3iIRMTmzCPGaat/images/cms/guides/get-started/set-up-your-site/guides-get-started-setup-looks-good-light.png?w=560\u0026fit=max\u0026auto=format\u0026n=0g3iIRMTmzCPGaat\u0026q=85\u0026s=7fdbbfa9b3fcace6ae8ffdb8717a3b02 560w, https://mintcdn.com/fetchski-attract-api/0g3iIRMTmzCPGaat/images/cms/guides/get-started/set-up-your-site/guides-get-started-setup-looks-good-light.png?w=840\u0026fit=max\u0026auto=format\u0026n=0g3iIRMTmzCPGaat\u0026q=85\u0026s=91d6972ac4f406c3e809ff3c6808fa90 840w, https://mintcdn.com/fetchski-attract-api/0g3iIRMTmzCPGaat/images/cms/guides/get-started/set-up-your-site/guides-get-started-setup-looks-good-light.png?w=1100\u0026fit=max\u0026auto=format\u0026n=0g3iIRMTmzCPGaat\u0026q=85\u0026s=88e0573d89b5796a8c43077ab48ba409 1100w, https://mintcdn.com/fetchski-attract-api/0g3iIRMTmzCPGaat/images/cms/guides/get-started/set-up-your-site/guides-get-started-setup-looks-good-light.png?w=1650\u0026fit=max\u0026auto=format\u0026n=0g3iIRMTmzCPGaat\u0026q=85\u0026s=d0ba97140fbe90b89e8e939b21d000fe 1650w, https://mintcdn.com/fetchski-attract-api/0g3iIRMTmzCPGaat/images/cms/guides/get-started/set-up-your-site/guides-get-started-setup-looks-good-light.png?w=2500\u0026fit=max\u0026auto=format\u0026n=0g3iIRMTmzCPGaat\u0026q=85\u0026s=b05b260ee81440e41bffd97c64768579 2500w`}),_jsx(OptimizedImage,{className:`mint-hidden dark:mint-block`,src:`https://mintcdn.com/fetchski-attract-api/0g3iIRMTmzCPGaat/images/cms/guides/get-started/set-up-your-site/guides-get-started-setup-looks-good-dark.png?fit=max\u0026auto=format\u0026n=0g3iIRMTmzCPGaat\u0026q=85\u0026s=2a78febb04726a0e08fccfe39a15166d`,alt:`Step 4, Pick your colors, with its Open button and the Looks good box ticked; steps 1 to 3 above it show check marks.`,\"data-og-width\":`1632`,width:`1632`,\"data-og-height\":`852`,height:`852`,\"data-path\":`images/cms/guides/get-started/set-up-your-site/guides-get-started-setup-looks-good-dark.png`,\"data-optimize\":`true`,\"data-opv\":`3`,srcset:`https://mintcdn.com/fetchski-attract-api/0g3iIRMTmzCPGaat/images/cms/guides/get-started/set-up-your-site/guides-get-started-setup-looks-good-dark.png?w=280\u0026fit=max\u0026auto=format\u0026n=0g3iIRMTmzCPGaat\u0026q=85\u0026s=939e0c43c52a43b9394589901f38c299 280w, https://mintcdn.com/fetchski-attract-api/0g3iIRMTmzCPGaat/images/cms/guides/get-started/set-up-your-site/guides-get-started-setup-looks-good-dark.png?w=560\u0026fit=max\u0026auto=format\u0026n=0g3iIRMTmzCPGaat\u0026q=85\u0026s=43e0a19c1bf6085c2a24e83ada95dcf1 560w, https://mintcdn.com/fetchski-attract-api/0g3iIRMTmzCPGaat/images/cms/guides/get-started/set-up-your-site/guides-get-started-setup-looks-good-dark.png?w=840\u0026fit=max\u0026auto=format\u0026n=0g3iIRMTmzCPGaat\u0026q=85\u0026s=6bb6a02b95e8765e9197785051919abf 840w, https://mintcdn.com/fetchski-attract-api/0g3iIRMTmzCPGaat/images/cms/guides/get-started/set-up-your-site/guides-get-started-setup-looks-good-dark.png?w=1100\u0026fit=max\u0026auto=format\u0026n=0g3iIRMTmzCPGaat\u0026q=85\u0026s=7f94b205c3f1cbbf60e9af10fa686e61 1100w, https://mintcdn.com/fetchski-attract-api/0g3iIRMTmzCPGaat/images/cms/guides/get-started/set-up-your-site/guides-get-started-setup-looks-good-dark.png?w=1650\u0026fit=max\u0026auto=format\u0026n=0g3iIRMTmzCPGaat\u0026q=85\u0026s=500f01c83dfe3b44c700820f5102081d 1650w, https://mintcdn.com/fetchski-attract-api/0g3iIRMTmzCPGaat/images/cms/guides/get-started/set-up-your-site/guides-get-started-setup-looks-good-dark.png?w=2500\u0026fit=max\u0026auto=format\u0026n=0g3iIRMTmzCPGaat\u0026q=85\u0026s=407890befd7a409595d183c90f775f03 2500w`})]})]}),_jsx(Step,{title:`Keep going until Get your site ready is full`,children:_jsxs(_components.p,{children:[`When every required step is done, the heading changes to `,_jsx(_components.strong,{children:`Your site is set up`}),`.`]})})]}),`\n`,_jsxs(_components.p,{children:[`A step that’s done shows `,_jsx(_components.strong,{children:`Review`}),` instead of `,_jsx(_components.strong,{children:`Open`}),`, so you can go back and change it later.`]}),`\n`,_jsx(Heading,{level:`2`,id:`the-required-steps`,children:`The required steps`}),`\n`,_jsxs(Table,{children:[_jsx(_components.thead,{children:_jsxs(_components.tr,{children:[_jsx(_components.th,{children:`Step`}),_jsx(_components.th,{children:`What it changes`}),_jsx(_components.th,{children:`Where it opens`}),_jsx(_components.th,{children:`Done when`})]})}),_jsxs(_components.tbody,{children:[_jsxs(_components.tr,{children:[_jsx(_components.td,{children:_jsx(_components.strong,{children:`Name your business and add your logo`})}),_jsx(_components.td,{children:`Your name in the header, the browser tab and your emails`}),_jsxs(_components.td,{children:[_jsx(_components.strong,{children:`Site settings`}),` → `,_jsx(_components.strong,{children:`Brand`})]}),_jsx(_components.td,{children:`You’ve replaced the starting business name, and added a logo and a browser icon`})]}),_jsxs(_components.tr,{children:[_jsx(_components.td,{children:_jsx(_components.strong,{children:`Add your contact details`})}),_jsx(_components.td,{children:`Your address, phone and email in the footer, on maps and in search results`}),_jsxs(_components.td,{children:[_jsx(_components.strong,{children:`Site settings`}),` → `,_jsx(_components.strong,{children:`Brand`})]}),_jsx(_components.td,{children:`You’ve replaced the starting placeholder in at least one of phone, email or address. Before you go live, check all three are yours`})]}),_jsxs(_components.tr,{children:[_jsx(_components.td,{children:_jsx(_components.strong,{children:`Fill in your legal details`})}),_jsx(_components.td,{children:`Your company name and country in your privacy policy and terms`}),_jsxs(_components.td,{children:[_jsx(_components.strong,{children:`Site settings`}),` → `,_jsx(_components.strong,{children:`Legal`})]}),_jsx(_components.td,{children:`You’ve added your legal business name and country`})]}),_jsxs(_components.tr,{children:[_jsx(_components.td,{children:_jsx(_components.strong,{children:`Pick your colors`})}),_jsx(_components.td,{children:`The main colors of every page, button and link`}),_jsxs(_components.td,{children:[_jsx(_components.strong,{children:`Site design`}),` → `,_jsx(_components.strong,{children:`Colors · Brand`})]}),_jsxs(_components.td,{children:[`You’ve changed them, or chosen `,_jsx(_components.strong,{children:`Looks good`})]})]}),_jsxs(_components.tr,{children:[_jsx(_components.td,{children:_jsx(_components.strong,{children:`Pick your fonts`})}),_jsx(_components.td,{children:`The typefaces for headings and body text`}),_jsxs(_components.td,{children:[_jsx(_components.strong,{children:`Site design`}),` → `,_jsx(_components.strong,{children:`Typography`})]}),_jsxs(_components.td,{children:[`You’ve changed them, or chosen `,_jsx(_components.strong,{children:`Looks good`})]})]}),_jsxs(_components.tr,{children:[_jsx(_components.td,{children:_jsx(_components.strong,{children:`Set up your header menu`})}),_jsx(_components.td,{children:`The links at the top of every page`}),_jsxs(_components.td,{children:[_jsx(_components.strong,{children:`Site design`}),` → `,_jsx(_components.strong,{children:`Header: Navigation`})]}),_jsxs(_components.td,{children:[`You’ve changed it, or chosen `,_jsx(_components.strong,{children:`Looks good`})]})]}),_jsxs(_components.tr,{children:[_jsx(_components.td,{children:_jsx(_components.strong,{children:`Set up your footer`})}),_jsx(_components.td,{children:`The link groups at the bottom of every page`}),_jsxs(_components.td,{children:[_jsx(_components.strong,{children:`Site design`}),` → `,_jsx(_components.strong,{children:`Footer: Links`})]}),_jsxs(_components.td,{children:[`You’ve changed it, or chosen `,_jsx(_components.strong,{children:`Looks good`})]})]}),_jsxs(_components.tr,{children:[_jsx(_components.td,{children:_jsx(_components.strong,{children:`Connect email`})}),_jsx(_components.td,{children:`Form notifications and every other email from your site`}),_jsxs(_components.td,{children:[_jsx(_components.strong,{children:`Connections`}),` → `,_jsx(_components.strong,{children:`Email`})]}),_jsx(_components.td,{children:`The card says it’s connected, and a test email has gone through`})]}),_jsxs(_components.tr,{children:[_jsx(_components.td,{children:_jsx(_components.strong,{children:`Turn on spam protection`})}),_jsxs(_components.td,{children:[`A quiet check of every form submission for bots. See `,_jsx(_components.a,{href:`/guides/forms/spam-protection`,children:`Spam protection`})]}),_jsxs(_components.td,{children:[_jsx(_components.strong,{children:`Connections`}),` → `,_jsx(_components.strong,{children:`Spam protection`})]}),_jsx(_components.td,{children:`The card says it’s on`})]}),_jsxs(_components.tr,{children:[_jsx(_components.td,{children:_jsx(_components.strong,{children:`Build your contact form`})}),_jsx(_components.td,{children:`A form that emails you, or sends to another app, when someone fills it in`}),_jsx(_components.td,{children:_jsx(_components.strong,{children:`Forms`})}),_jsx(_components.td,{children:`A form that does one of those is published`})]}),_jsxs(_components.tr,{children:[_jsx(_components.td,{children:_jsx(_components.strong,{children:`Write your pages`})}),_jsx(_components.td,{children:`Your home page and the rest of your site`}),_jsx(_components.td,{children:_jsx(_components.strong,{children:`Pages`})}),_jsx(_components.td,{children:`You’ve edited your home page and published it`})]}),_jsxs(_components.tr,{children:[_jsx(_components.td,{children:_jsx(_components.strong,{children:`Set your sharing image and home page description`})}),_jsx(_components.td,{children:`What search results and shared links show`}),_jsxs(_components.td,{children:[`The image: `,_jsx(_components.strong,{children:`Site settings`}),` → `,_jsx(_components.strong,{children:`SEO`}),` → `,_jsx(_components.strong,{children:`Sharing`}),` → `,_jsx(_components.strong,{children:`Default social share image`}),` (the picture for your whole site; each page can also have its own). The description: open your home page, then `,_jsx(_components.strong,{children:`More Options`}),` (⋯) → `,_jsx(_components.strong,{children:`Edit`}),` → `,_jsx(_components.strong,{children:`SEO`}),` → `,_jsx(_components.strong,{children:`SEO description`}),`, and choose `,_jsx(_components.strong,{children:`Update`})]}),_jsx(_components.td,{children:`You’ve set a sharing image and a home page description`})]}),_jsxs(_components.tr,{children:[_jsx(_components.td,{children:_jsx(_components.strong,{children:`Review cookie consent`})}),_jsxs(_components.td,{children:[`The banner that asks visitors which cookies they allow. The starting settings are safe: read the banner’s wording, check the cookie list, then choose `,_jsx(_components.strong,{children:`Looks good`}),`. See `,_jsx(_components.a,{href:`/guides/site-settings/cookie-consent`,children:`Cookie consent`})]}),_jsxs(_components.td,{children:[_jsx(_components.strong,{children:`Site settings`}),` → `,_jsx(_components.strong,{children:`Cookie consent`}),` (plus a `,_jsx(_components.strong,{children:`Cookies list`}),` button)`]}),_jsxs(_components.td,{children:[`You’ve chosen `,_jsx(_components.strong,{children:`Looks good`})]})]}),_jsxs(_components.tr,{children:[_jsx(_components.td,{children:_jsx(_components.strong,{children:`Go live`})}),_jsx(_components.td,{children:`Turns off maintenance mode, so visitors see your site`}),_jsxs(_components.td,{children:[_jsx(_components.strong,{children:`Site settings`}),` → `,_jsx(_components.strong,{children:`Maintenance`})]}),_jsxs(_components.td,{children:[_jsx(_components.strong,{children:`Maintenance mode`}),` is off`]})]})]})]}),`\n`,_jsx(Heading,{level:`2`,id:`the-optional-steps`,children:`The optional steps`}),`\n`,_jsxs(_components.p,{children:[`These add more when you want them. They don’t count toward `,_jsx(_components.strong,{children:`Get your site ready`}),`.`]}),`\n`,_jsxs(Table,{children:[_jsx(_components.thead,{children:_jsxs(_components.tr,{children:[_jsx(_components.th,{children:`Step`}),_jsx(_components.th,{children:`What it adds`}),_jsx(_components.th,{children:`Where it opens`})]})}),_jsxs(_components.tbody,{children:[_jsxs(_components.tr,{children:[_jsx(_components.td,{children:_jsx(_components.strong,{children:`Add your social links`})}),_jsx(_components.td,{children:`Icons linking to your social profiles in the footer`}),_jsxs(_components.td,{children:[_jsx(_components.strong,{children:`Site settings`}),` → `,_jsx(_components.strong,{children:`Social Links`})]})]}),_jsxs(_components.tr,{children:[_jsx(_components.td,{children:_jsx(_components.strong,{children:`Connect Google, reviews and photos`})}),_jsx(_components.td,{children:`Your Google listing, reviews, maps, Instagram feed and photo storage`}),_jsxs(_components.td,{children:[_jsx(_components.strong,{children:`Connections`}),`, each on its own card: `,_jsx(_components.a,{href:`/guides/connections/google-business-profile`,children:`Google Business Profile`}),`, `,_jsx(_components.a,{href:`/guides/connections/google-reviews`,children:`Google Reviews`}),`, `,_jsx(_components.a,{href:`/guides/connections/google-maps`,children:`Google Maps`}),`, `,_jsx(_components.a,{href:`/guides/connections/instagram`,children:`Instagram`}),` and `,_jsx(_components.a,{href:`/guides/connections/photo-storage`,children:`Photo storage`}),`. The step opens `,_jsx(_components.strong,{children:`Google Business Profile`})]})]}),_jsxs(_components.tr,{children:[_jsx(_components.td,{children:_jsx(_components.strong,{children:`Add redirects from your old site`})}),_jsx(_components.td,{children:`Sends visitors and search engines from your old addresses to your new pages`}),_jsxs(_components.td,{children:[_jsx(_components.strong,{children:`Redirects`}),` (or choose `,_jsx(_components.strong,{children:`Looks good`}),` if you don’t need any)`]})]}),_jsxs(_components.tr,{children:[_jsx(_components.td,{children:_jsx(_components.strong,{children:`Add analytics`})}),_jsx(_components.td,{children:`Visitor counts, without cookies`}),_jsxs(_components.td,{children:[_jsx(_components.strong,{children:`Site settings`}),` → `,_jsx(_components.strong,{children:`Analytics`})]})]}),_jsxs(_components.tr,{children:[_jsx(_components.td,{children:_jsx(_components.strong,{children:`Add tracking and chat scripts`})}),_jsxs(_components.td,{children:[`A chat window, a visitor tracker or an ad tracker from another service. The service gives you a short piece of code, and you paste it in. See `,_jsx(_components.a,{href:`/guides/connections/embed-scripts`,children:`Embed scripts`})]}),_jsx(_components.td,{children:_jsx(_components.strong,{children:`Embed Scripts`})})]}),_jsxs(_components.tr,{children:[_jsx(_components.td,{children:_jsx(_components.strong,{children:`Track conversions for your ads`})}),_jsx(_components.td,{children:`Tells your ad platforms when a visitor books, buys or gets in touch`}),_jsxs(_components.td,{children:[_jsx(_components.strong,{children:`Visitor data`}),` → `,_jsx(_components.strong,{children:`Conversions`}),` (plus a `,_jsx(_components.strong,{children:`Conversions`}),` button)`]})]}),_jsxs(_components.tr,{children:[_jsx(_components.td,{children:_jsx(_components.strong,{children:`Send events to other systems`})}),_jsxs(_components.td,{children:[`Tells another app the moment something happens, such as a contact form arriving, so it can act on it. See `,_jsx(_components.a,{href:`/guides/connections/api-keys-and-webhooks#send-events-with-a-webhook`,children:`Send events with a webhook`})]}),_jsx(_components.td,{children:_jsx(_components.strong,{children:`Webhook Destinations`})})]}),_jsxs(_components.tr,{children:[_jsx(_components.td,{children:_jsx(_components.strong,{children:`Turn on FetchskiAI`})}),_jsx(_components.td,{children:`Writing help and the FetchskiAI Agent`}),_jsxs(_components.td,{children:[_jsx(_components.strong,{children:`FetchskiAI settings`}),` (plus an `,_jsx(_components.strong,{children:`Agent Setup`}),` button)`]})]})]})]}),`\n`,_jsx(Heading,{level:`2`,id:`what-happens-next`,children:`What happens next`}),`\n`,_jsxs(_components.p,{children:[`When you finish `,_jsx(_components.strong,{children:`Go live`}),`, maintenance mode is off and visitors see your site. The reminder bar disappears.`]}),`\n`,_jsx(_components.p,{children:`The checklist stays in your menu. Come back any time to add the optional steps or review a step.`}),`\n`,_jsxs(Frame,{caption:`Every required step is done. Your site is set up.`,children:[_jsx(OptimizedImage,{className:`mint-block dark:mint-hidden`,src:`https://mintcdn.com/fetchski-attract-api/0g3iIRMTmzCPGaat/images/cms/guides/get-started/set-up-your-site/guides-get-started-setup-done-light.png?fit=max\u0026auto=format\u0026n=0g3iIRMTmzCPGaat\u0026q=85\u0026s=1917737596d79c1c30751936dd814214`,alt:`The Set up your site window with every required step done: the heading reads \"Your site is set up\", 14 of 14, the progress bar full.`,\"data-og-width\":`1632`,width:`1632`,\"data-og-height\":`1034`,height:`1034`,\"data-path\":`images/cms/guides/get-started/set-up-your-site/guides-get-started-setup-done-light.png`,\"data-optimize\":`true`,\"data-opv\":`3`,srcset:`https://mintcdn.com/fetchski-attract-api/0g3iIRMTmzCPGaat/images/cms/guides/get-started/set-up-your-site/guides-get-started-setup-done-light.png?w=280\u0026fit=max\u0026auto=format\u0026n=0g3iIRMTmzCPGaat\u0026q=85\u0026s=f01cfd023337dd923d6abc69ea096787 280w, https://mintcdn.com/fetchski-attract-api/0g3iIRMTmzCPGaat/images/cms/guides/get-started/set-up-your-site/guides-get-started-setup-done-light.png?w=560\u0026fit=max\u0026auto=format\u0026n=0g3iIRMTmzCPGaat\u0026q=85\u0026s=e8c782d051a1fc265127e0e7a5a2db6a 560w, https://mintcdn.com/fetchski-attract-api/0g3iIRMTmzCPGaat/images/cms/guides/get-started/set-up-your-site/guides-get-started-setup-done-light.png?w=840\u0026fit=max\u0026auto=format\u0026n=0g3iIRMTmzCPGaat\u0026q=85\u0026s=50092129c6352bd4e632da74e126232f 840w, https://mintcdn.com/fetchski-attract-api/0g3iIRMTmzCPGaat/images/cms/guides/get-started/set-up-your-site/guides-get-started-setup-done-light.png?w=1100\u0026fit=max\u0026auto=format\u0026n=0g3iIRMTmzCPGaat\u0026q=85\u0026s=02d1b1b5c69277ec124864bc3fba617b 1100w, https://mintcdn.com/fetchski-attract-api/0g3iIRMTmzCPGaat/images/cms/guides/get-started/set-up-your-site/guides-get-started-setup-done-light.png?w=1650\u0026fit=max\u0026auto=format\u0026n=0g3iIRMTmzCPGaat\u0026q=85\u0026s=935e2d4171829f123a685d3b8b6fe4cf 1650w, https://mintcdn.com/fetchski-attract-api/0g3iIRMTmzCPGaat/images/cms/guides/get-started/set-up-your-site/guides-get-started-setup-done-light.png?w=2500\u0026fit=max\u0026auto=format\u0026n=0g3iIRMTmzCPGaat\u0026q=85\u0026s=70cb2af76687ca75d0287f9829a557db 2500w`}),_jsx(OptimizedImage,{className:`mint-hidden dark:mint-block`,src:`https://mintcdn.com/fetchski-attract-api/0g3iIRMTmzCPGaat/images/cms/guides/get-started/set-up-your-site/guides-get-started-setup-done-dark.png?fit=max\u0026auto=format\u0026n=0g3iIRMTmzCPGaat\u0026q=85\u0026s=ba77c9568c07c8579cff5962f76b6bf2`,alt:`The Set up your site window with every required step done: the heading reads \"Your site is set up\", 14 of 14, the progress bar full.`,\"data-og-width\":`1632`,width:`1632`,\"data-og-height\":`1034`,height:`1034`,\"data-path\":`images/cms/guides/get-started/set-up-your-site/guides-get-started-setup-done-dark.png`,\"data-optimize\":`true`,\"data-opv\":`3`,srcset:`https://mintcdn.com/fetchski-attract-api/0g3iIRMTmzCPGaat/images/cms/guides/get-started/set-up-your-site/guides-get-started-setup-done-dark.png?w=280\u0026fit=max\u0026auto=format\u0026n=0g3iIRMTmzCPGaat\u0026q=85\u0026s=0c8fbf35dc935154af0ed7c05efb0fe0 280w, https://mintcdn.com/fetchski-attract-api/0g3iIRMTmzCPGaat/images/cms/guides/get-started/set-up-your-site/guides-get-started-setup-done-dark.png?w=560\u0026fit=max\u0026auto=format\u0026n=0g3iIRMTmzCPGaat\u0026q=85\u0026s=4fd7ad420cedf91ef343918e7bab3b22 560w, https://mintcdn.com/fetchski-attract-api/0g3iIRMTmzCPGaat/images/cms/guides/get-started/set-up-your-site/guides-get-started-setup-done-dark.png?w=840\u0026fit=max\u0026auto=format\u0026n=0g3iIRMTmzCPGaat\u0026q=85\u0026s=42a4fc5ffceb4372b3d586b9e02bd309 840w, https://mintcdn.com/fetchski-attract-api/0g3iIRMTmzCPGaat/images/cms/guides/get-started/set-up-your-site/guides-get-started-setup-done-dark.png?w=1100\u0026fit=max\u0026auto=format\u0026n=0g3iIRMTmzCPGaat\u0026q=85\u0026s=1d6ced65a6edbf7cfa04fea7751c99ee 1100w, https://mintcdn.com/fetchski-attract-api/0g3iIRMTmzCPGaat/images/cms/guides/get-started/set-up-your-site/guides-get-started-setup-done-dark.png?w=1650\u0026fit=max\u0026auto=format\u0026n=0g3iIRMTmzCPGaat\u0026q=85\u0026s=a1da288ab8aed9c73c4f4153a0a2e09a 1650w, https://mintcdn.com/fetchski-attract-api/0g3iIRMTmzCPGaat/images/cms/guides/get-started/set-up-your-site/guides-get-started-setup-done-dark.png?w=2500\u0026fit=max\u0026auto=format\u0026n=0g3iIRMTmzCPGaat\u0026q=85\u0026s=f572f19c9f96cba95240aa6086908439 2500w`})]}),`\n`,_jsx(Heading,{level:`2`,id:`troubleshooting`,children:`Troubleshooting`}),`\n`,_jsxs(AccordionGroup,{children:[_jsx(Accordion,{title:`I saved, but the step isn't done`,id:`i-saved-but-the-step-isnt-done`,children:_jsxs(_components.p,{children:[`Each step checks for something specific. Compare what you saved with the `,_jsx(_components.strong,{children:`Done when`}),` column above. For example, `,_jsx(_components.strong,{children:`Name your business and add your logo`}),` needs your business name, a logo and a browser icon, all three.`]})}),_jsx(Accordion,{title:`Connect email went back to not done`,id:`connect-email-went-back-to-not-done`,children:_jsxs(_components.p,{children:[`The email step stays done only while your email settings match the last test that worked. If you change any of your email connection’s settings, such as the sender address, send a test email again. Choose `,_jsx(_components.strong,{children:`Send test email`}),` on the `,_jsx(_components.strong,{children:`Email`}),` card in `,_jsx(_components.strong,{children:`Connections`}),`. See `,_jsx(_components.a,{href:`/guides/forms/email-notifications`,children:`Email notifications`}),`.`]})}),_jsx(Accordion,{title:`I published my home page, but Write your pages isn't done`,id:`i-published-my-home-page-but-write-your-pages-isnt-done`,children:_jsx(_components.p,{children:`Your home page was first published by itself when your site was created, and that doesn’t count. Make a real change to your home page, then publish it again. A publish in the first few minutes after your site was created may not count either: wait a few minutes and publish again.`})}),_jsx(Accordion,{title:`There's no Looks good on a step`,id:`theres-no-looks-good-on-a-step`,children:_jsxs(_components.p,{children:[_jsx(_components.strong,{children:`Looks good`}),` appears only on steps whose starting settings are already a fine answer. Other steps need you to add something of your own, such as your business name, so they tick themselves done when you save it.`]})}),_jsx(Accordion,{title:`How do I add people?`,id:`how-do-i-add-people`,children:_jsxs(_components.p,{children:[`You can’t invite people from the checklist. Fetchski gives each person access to your site: ask Fetchski Support to add them. Once they’ve signed in, give them a role in `,_jsx(_components.strong,{children:`People \u0026 Roles`}),`. See `,_jsx(_components.a,{href:`/guides/people/people-and-roles`,children:`People \u0026 Roles`}),`.`]})}),_jsx(Accordion,{title:`Couldn’t load your setup checklist`,id:`couldnt-load-your-setup-checklist`,children:_jsxs(_components.p,{children:[`The checklist couldn’t reach your site. Choose `,_jsx(_components.strong,{children:`Try again`}),`. If it keeps happening, reload the page, then contact Fetchski Support.`]})})]}),`\n`,_jsx(Heading,{level:`2`,id:`related`,children:`Related`}),`\n`,_jsxs(Columns,{cols:2,children:[_jsx(Card,{title:`Site settings`,icon:`gear`,href:`/guides/site-settings/index`,children:_jsx(_components.p,{children:`your business details, SEO and cookie consent.`})}),_jsx(Card,{title:`Site design`,icon:`palette`,href:`/guides/site-design/index`,children:_jsx(_components.p,{children:`colors, fonts, header and footer.`})}),_jsx(Card,{title:`Connections`,icon:`plug`,href:`/guides/connections/index`,children:_jsx(_components.p,{children:`email, spam protection, Google and more.`})}),_jsx(Card,{title:`Maintenance mode`,icon:`person-digging`,href:`/guides/site-settings/maintenance`,children:_jsx(_components.p,{children:`what visitors see before you go live.`})})]})]})}function MDXContent(props={}){const{wrapper:MDXLayout}={..._provideComponents(),...props.components};return MDXLayout?_jsx(MDXLayout,{...props,children:_jsx(_createMdxContent,{...props})}):_createMdxContent(props)}return{default:MDXContent};function _missingMdxReference(id,component){throw new Error(`Expected `+(component?`component`:`object`)+\" `\"+id+\"` to be defined: you likely forgot to import, pass, or provide it.\")}","frontmatter":{},"scope":{"codeStyling":"dark","config":{},"pageMetadata":{"title":"Set up your site","sidebarTitle":"Set up your site","description":"A checklist that takes your new site from a fresh start to live, one step at a time.","icon":"list-check","href":"/guides/get-started/set-up-your-site"}}},"mdxSourceWithNoJs":null},"mdxExtracts":{"tableOfContents":[{"title":"Before you start","slug":"before-you-start","depth":2,"children":[]},{"title":"Open the checklist","slug":"open-the-checklist","depth":2,"children":[]},{"title":"Work through the steps","slug":"work-through-the-steps","depth":2,"children":[]},{"title":"The required steps","slug":"the-required-steps","depth":2,"children":[]},{"title":"The optional steps","slug":"the-optional-steps","depth":2,"children":[]},{"title":"What happens next","slug":"what-happens-next","depth":2,"children":[]},{"title":"Troubleshooting","slug":"troubleshooting","depth":2,"children":[]},{"title":"Related","slug":"related","depth":2,"children":[]}],"codeExamples":{}},"jsLinks":["/_mintlify/custom/fetchski-attract-api/f59e82e583443cfa/reader-values.js"],"dynamicCss":".mint-block {\n display: block\n}\n.mint-hidden {\n display: none\n}\n.dark\\:mint-block:is(.dark *) {\n display: block\n}\n.dark\\:mint-hidden:is(.dark *) {\n display: none\n}","subdomain":"fetchski-attract-api","siteName":"Fetchski Attract Docs","title":"Set up your site - Fetchski Attract Docs","navMaps":{"firstHrefInVersion":{},"firstHrefInLanguage":{}},"lastModified":"2026-11-11T22:20:35.250Z","originalFileLocation":"guides/get-started/set-up-your-site.mdx"},"headHtml":"\u003cscript data-mint-head>(function(){var d=document.documentElement,p=null;if(!p){try{p=localStorage.getItem(\"isDarkMode\")}catch(e){}if(p==='true')p='dark';else if(p==='false')p='light';if(p!=='light'\u0026\u0026p!=='dark'\u0026\u0026p!=='system')p=\"dark\"}var r=p==='system'?(matchMedia(\"(prefers-color-scheme: dark)\").matches?'dark':'light'):p;d.classList.remove(r==='dark'?'light':'dark');d.classList.add(r);d.setAttribute(\"data-theme-preference\",p)})();\u003c/script>\u003cmeta data-mint-head name=\"description\" content=\"A checklist that takes your new site from a fresh start to live, one step at a time.\">\u003cmeta data-mint-head name=\"application-name\" content=\"Fetchski Attract Docs\">\u003cmeta data-mint-head name=\"generator\" content=\"Mintlify\">\u003cmeta data-mint-head name=\"robots\" content=\"noindex, nofollow\">\u003clink data-mint-head rel=\"icon\" type=\"image/png\" sizes=\"192x192\" href=\"/mintlify-assets/_mintlify/favicons/fetchski-attract-api/70pYtWMpcnXR0SYV/_generated/favicon/android-chrome-192x192.png\" media=\"(prefers-color-scheme: light)\">\u003clink data-mint-head rel=\"apple-touch-icon\" type=\"image/png\" sizes=\"180x180\" href=\"/mintlify-assets/_mintlify/favicons/fetchski-attract-api/70pYtWMpcnXR0SYV/_generated/favicon/apple-touch-icon.png\">\u003clink data-mint-head rel=\"icon\" type=\"image/png\" sizes=\"16x16\" href=\"/mintlify-assets/_mintlify/favicons/fetchski-attract-api/70pYtWMpcnXR0SYV/_generated/favicon/favicon-16x16.png\" media=\"(prefers-color-scheme: light)\">\u003clink data-mint-head rel=\"icon\" type=\"image/png\" sizes=\"32x32\" href=\"/mintlify-assets/_mintlify/favicons/fetchski-attract-api/70pYtWMpcnXR0SYV/_generated/favicon/favicon-32x32.png\" media=\"(prefers-color-scheme: light)\">\u003clink data-mint-head rel=\"shortcut icon\" type=\"image/x-icon\" href=\"/mintlify-assets/_mintlify/favicons/fetchski-attract-api/70pYtWMpcnXR0SYV/_generated/favicon/favicon.ico\" media=\"(prefers-color-scheme: light)\">\u003clink data-mint-head rel=\"icon\" type=\"image/png\" sizes=\"192x192\" href=\"/mintlify-assets/_mintlify/favicons/fetchski-attract-api/70pYtWMpcnXR0SYV/_generated/favicon-dark/android-chrome-192x192.png\" media=\"(prefers-color-scheme: dark)\">\u003clink data-mint-head rel=\"icon\" type=\"image/png\" sizes=\"16x16\" href=\"/mintlify-assets/_mintlify/favicons/fetchski-attract-api/70pYtWMpcnXR0SYV/_generated/favicon-dark/favicon-16x16.png\" media=\"(prefers-color-scheme: dark)\">\u003clink data-mint-head rel=\"icon\" type=\"image/png\" sizes=\"32x32\" href=\"/mintlify-assets/_mintlify/favicons/fetchski-attract-api/70pYtWMpcnXR0SYV/_generated/favicon-dark/favicon-32x32.png\" media=\"(prefers-color-scheme: dark)\">\u003clink data-mint-head rel=\"shortcut icon\" type=\"image/x-icon\" href=\"/mintlify-assets/_mintlify/favicons/fetchski-attract-api/70pYtWMpcnXR0SYV/_generated/favicon-dark/favicon.ico\" media=\"(prefers-color-scheme: dark)\">\u003cmeta data-mint-head property=\"og:title\" content=\"Set up your site - Fetchski Attract Docs\">\u003cmeta data-mint-head property=\"og:description\" content=\"A checklist that takes your new site from a fresh start to live, one step at a time.\">\u003cmeta data-mint-head property=\"og:site_name\" content=\"Fetchski Attract Docs\">\u003cmeta data-mint-head property=\"og:url\" content=\"https://docs.fetchski-attract.com/guides/get-started/set-up-your-site\">\u003cmeta data-mint-head property=\"og:type\" content=\"website\">\u003cmeta data-mint-head property=\"og:image\" content=\"https://fetchski-attract-api.mintlify.site/_mintlify/api/og/v2?division=Get+started\u0026amp;title=Set+up+your+site\u0026amp;description=A+checklist+that+takes+your+new+site+from+a+fresh+start+to+live%2C+one+step+at+a+time.\u0026amp;theme=0e1cff4688ef26ca6a5fb667\u0026amp;signature=8cb9ac4285c1fb5e3d2449e387c5cae204adfdaeeedcc77f416580f95a77d65c\">\u003cmeta data-mint-head property=\"og:image:width\" content=\"1200\">\u003cmeta data-mint-head property=\"og:image:height\" content=\"630\">\u003cmeta data-mint-head name=\"twitter:card\" content=\"summary_large_image\">\u003cmeta data-mint-head name=\"twitter:title\" content=\"Set up your site - Fetchski Attract Docs\">\u003cmeta data-mint-head name=\"twitter:description\" content=\"A checklist that takes your new site from a fresh start to live, one step at a time.\">\u003cmeta data-mint-head name=\"twitter:image\" content=\"https://fetchski-attract-api.mintlify.site/_mintlify/api/og/v2?division=Get+started\u0026amp;title=Set+up+your+site\u0026amp;description=A+checklist+that+takes+your+new+site+from+a+fresh+start+to+live%2C+one+step+at+a+time.\u0026amp;theme=0e1cff4688ef26ca6a5fb667\u0026amp;signature=8cb9ac4285c1fb5e3d2449e387c5cae204adfdaeeedcc77f416580f95a77d65c\">\u003cmeta data-mint-head name=\"twitter:image:width\" content=\"1200\">\u003cmeta data-mint-head name=\"twitter:image:height\" content=\"630\">\u003cmeta data-mint-head name=\"msapplication-config\" content=\"/mintlify-assets/_mintlify/favicons/fetchski-attract-api/70pYtWMpcnXR0SYV/_generated/favicon/browserconfig.xml\">\u003cmeta data-mint-head name=\"apple-mobile-web-app-title\" content=\"Fetchski Attract Docs\">\u003cmeta data-mint-head name=\"msapplication-TileColor\" content=\"#16a34a\">\u003clink data-mint-head rel=\"canonical\" href=\"https://docs.fetchski-attract.com/guides/get-started/set-up-your-site\">\u003clink data-mint-head rel=\"alternate\" type=\"application/xml\" href=\"/sitemap.xml\">\u003clink data-mint-head rel=\"alternate\" type=\"text/markdown\" href=\"/guides/get-started/set-up-your-site.md\">\u003cscript data-mint-head type=\"application/ld+json\">{\"@context\":\"https://schema.org\",\"@graph\":[{\"@type\":\"Organization\",\"@id\":\"https://docs.fetchski-attract.com/#organization\",\"name\":\"Fetchski Attract Docs\",\"url\":\"https://docs.fetchski-attract.com\",\"logo\":{\"@type\":\"ImageObject\",\"url\":\"https://mintcdn.com/fetchski-attract-api/mn9qfQRsqaASh7UE/logo/light.svg?fit=max\u0026auto=format\u0026n=mn9qfQRsqaASh7UE\u0026q=85\u0026s=66db13e248b70a44a5ff5f6990d4cb63\"}},{\"@type\":\"WebSite\",\"@id\":\"https://docs.fetchski-attract.com#website\",\"name\":\"Fetchski Attract Docs\",\"url\":\"https://docs.fetchski-attract.com\",\"publisher\":{\"@id\":\"https://docs.fetchski-attract.com/#organization\"}},{\"@type\":\"WebPage\",\"@id\":\"https://docs.fetchski-attract.com/guides/get-started/set-up-your-site#webpage\",\"url\":\"https://docs.fetchski-attract.com/guides/get-started/set-up-your-site\",\"name\":\"Set up your site\",\"description\":\"A checklist that takes your new site from a fresh start to live, one step at a time.\",\"dateModified\":\"2026-11-11T22:20:35.250Z\",\"isPartOf\":{\"@id\":\"https://docs.fetchski-attract.com#website\"},\"breadcrumb\":{\"@id\":\"https://docs.fetchski-attract.com/guides/get-started/set-up-your-site#breadcrumb\"}},{\"@type\":\"BreadcrumbList\",\"@id\":\"https://docs.fetchski-attract.com/guides/get-started/set-up-your-site#breadcrumb\",\"itemListElement\":[{\"@type\":\"ListItem\",\"position\":1,\"name\":\"Get started\",\"item\":\"https://docs.fetchski-attract.com\"},{\"@type\":\"ListItem\",\"position\":2,\"name\":\"Set up your site\",\"item\":\"https://docs.fetchski-attract.com/guides/get-started/set-up-your-site\"}]},{\"@type\":[\"Article\",\"TechArticle\"],\"@id\":\"https://docs.fetchski-attract.com/guides/get-started/set-up-your-site#article\",\"headline\":\"Set up your site\",\"name\":\"Set up your site\",\"description\":\"A checklist that takes your new site from a fresh start to live, one step at a time.\",\"url\":\"https://docs.fetchski-attract.com/guides/get-started/set-up-your-site\",\"mainEntityOfPage\":{\"@id\":\"https://docs.fetchski-attract.com/guides/get-started/set-up-your-site#webpage\"},\"dateModified\":\"2026-11-11T22:20:35.250Z\",\"publisher\":{\"@id\":\"https://docs.fetchski-attract.com/#organization\"},\"isPartOf\":{\"@id\":\"https://docs.fetchski-attract.com#website\"}}]}\u003c/script>\u003cscript data-mint-head type=\"application/ld+json\">{\"@context\":\"https://schema.org\",\"@type\":\"WebSite\",\"name\":\"Fetchski Attract Docs\",\"publisher\":{\"@type\":\"Organization\",\"name\":\"Fetchski Attract Docs\"},\"provider\":{\"@type\":\"Organization\",\"name\":\"Mintlify\",\"url\":\"https://mintlify.com\"}}\u003c/script>","agentPointerHref":"/guides/get-started/set-up-your-site.md","siteName":"Fetchski Attract Docs","nav":{"global":null,"tabs":[{"tab":"Guides","icon":"book-open","groups":[{"group":"Get started","icon":"rocket","pages":[{"title":"Fetchski Attract Docs","sidebarTitle":"Introduction","icon":"house","mode":"wide","href":""},{"title":"A tour of Attract","sidebarTitle":"Tour","icon":"compass","href":"/guides/get-started/tour"},{"title":"Sign in","sidebarTitle":"Sign in","icon":"right-to-bracket","href":"/guides/get-started/sign-in"},{"title":"The toolbar and the command palette","sidebarTitle":"Toolbar and ⌘K","description":"What each toolbar button does, and how to reach any screen in a few keystrokes with ⌘K.","icon":"keyboard","href":"/guides/get-started/toolbar-and-command-palette"},{"title":"Set up your site","sidebarTitle":"Set up your site","icon":"list-check","href":"/guides/get-started/set-up-your-site"},{"title":"Your profile","sidebarTitle":"Your profile","description":"Your name, photo, password and AI instructions, plus how the CMS looks for you.","icon":"circle-user","href":"/guides/get-started/your-profile"}]},{"group":"Build pages","icon":"pen-to-square","pages":[{"title":"Pages and the page tree","sidebarTitle":"Pages","icon":"sitemap","href":"/guides/build-pages/pages-and-the-page-tree"},{"title":"Start from a page template","sidebarTitle":"Page templates","icon":"clone","href":"/guides/build-pages/page-templates"},{"title":"Two ways to edit: on the page or in the page settings window","sidebarTitle":"Two ways to edit","icon":"pen-to-square","href":"/guides/build-pages/two-ways-to-edit"},{"title":"Add, move and remove sections","sidebarTitle":"Add and arrange sections","icon":"layer-group","href":"/guides/build-pages/add-move-remove-sections"},{"title":"Preview on phones and tablets","sidebarTitle":"Device preview","icon":"mobile-screen","href":"/guides/build-pages/preview-on-devices"},{"title":"Drafts, publishing and scheduling","sidebarTitle":"Publish and schedule","icon":"calendar-check","href":"/guides/build-pages/publish-and-schedule"},{"title":"Side-by-side layouts","sidebarTitle":"Layouts and columns","icon":"table-columns","href":"/guides/build-pages/side-by-side-layouts"},{"title":"Document versions","sidebarTitle":"Versions","icon":"clock-rotate-left","href":"/guides/build-pages/versions"},{"title":"Page SEO","sidebarTitle":"Page SEO","icon":"magnifying-glass","href":"/guides/build-pages/page-seo"},{"title":"Redirects","sidebarTitle":"Redirects","icon":"arrow-right-arrow-left","href":"/guides/build-pages/redirects"},{"title":"Your site in more than one language","sidebarTitle":"Languages","icon":"language","href":"/guides/build-pages/languages"}]},{"group":"Sections","icon":"grid-2","pages":[{"title":"Sections","sidebarTitle":"All sections","icon":"grid-2","href":"/guides/sections/index"},{"title":"What every section shares","sidebarTitle":"Shared options","icon":"sliders","href":"/guides/sections/what-every-section-shares"},{"title":"Page Header","sidebarTitle":"Page Header","icon":"heading","href":"/guides/sections/page-header"},{"title":"Hero","sidebarTitle":"Hero","icon":"flag","href":"/guides/sections/hero"},{"title":"Intro / Trust","sidebarTitle":"Intro / Trust","icon":"quote-left","href":"/guides/sections/intro-trust"},{"title":"Feature Cards","sidebarTitle":"Feature Cards","icon":"cards-blank","href":"/guides/sections/feature-cards"},{"title":"Stats / By the numbers","sidebarTitle":"Stats / By the numbers","icon":"chart-simple","href":"/guides/sections/stats"},{"title":"Logos / Partners","sidebarTitle":"Logos / Partners","icon":"handshake","href":"/guides/sections/logos"},{"title":"How it works / Steps","sidebarTitle":"How it works / Steps","icon":"shoe-prints","href":"/guides/sections/steps"},{"title":"Media + Text block","sidebarTitle":"Media + Text block","icon":"image-landscape","href":"/guides/sections/media-text"},{"title":"Device mocks","sidebarTitle":"Device mocks","icon":"laptop-mobile","href":"/guides/sections/device-mocks"},{"title":"Team","sidebarTitle":"Team","icon":"people-group","href":"/guides/sections/team"},{"title":"FAQ","sidebarTitle":"FAQ","icon":"circle-question","href":"/guides/sections/faq"},{"title":"Service Area Map","sidebarTitle":"Service Area Map","icon":"map-location-dot","href":"/guides/sections/service-area-map"},{"title":"Blog Preview","sidebarTitle":"Blog Preview","icon":"newspaper","href":"/guides/sections/blog-preview"},{"title":"Cookie Declaration","sidebarTitle":"Cookie Declaration","icon":"cookie-bite","href":"/guides/sections/cookie-declaration"},{"title":"Rich Text","sidebarTitle":"Rich Text","icon":"paragraph","href":"/guides/sections/rich-text"},{"title":"Images and videos (in columns and posts)","sidebarTitle":"Images and videos (in columns and posts)","icon":"photo-film","href":"/guides/sections/images-and-videos"},{"title":"Google Reviews","sidebarTitle":"Google Reviews","icon":"star","href":"/guides/sections/google-reviews"},{"title":"Testimonials","sidebarTitle":"Testimonials","icon":"comment-quote","href":"/guides/sections/testimonials"},{"title":"Instagram Feed","sidebarTitle":"Instagram Feed","icon":"camera-retro","href":"/guides/sections/instagram-feed"},{"title":"Gallery Preview and Gallery (Full)","sidebarTitle":"Gallery","icon":"images","href":"/guides/sections/gallery"},{"title":"Pricing / Packages","sidebarTitle":"Pricing / Packages","icon":"tags","href":"/guides/sections/pricing"},{"title":"Newsletter Subscription","sidebarTitle":"Newsletter Subscription","icon":"envelope-open-text","href":"/guides/sections/newsletter-signup"},{"title":"SMS Subscription","sidebarTitle":"SMS Subscription","icon":"comment-sms","href":"/guides/sections/sms-signup"},{"title":"Form","sidebarTitle":"Form","icon":"rectangle-list","href":"/guides/sections/form"},{"title":"Final CTA","sidebarTitle":"Final CTA","icon":"bullhorn","href":"/guides/sections/final-cta"}]},{"group":"Content","icon":"box-archive","pages":[{"title":"Content you reuse","sidebarTitle":"Overview","icon":"box-archive","href":"/guides/content/index"},{"title":"Blog posts, categories and authors","sidebarTitle":"Blog","icon":"pen-nib","href":"/guides/content/blog"},{"title":"Team members","sidebarTitle":"Team members","icon":"id-badge","href":"/guides/content/team-members"},{"title":"Testimonials","sidebarTitle":"Testimonials","icon":"comment-quote","href":"/guides/content/testimonials"},{"title":"FAQs and categories","sidebarTitle":"FAQs","icon":"circle-question","href":"/guides/content/faqs"},{"title":"Google reviews","sidebarTitle":"Google reviews","icon":"star","href":"/guides/content/google-reviews"},{"title":"Service areas","sidebarTitle":"Service areas","icon":"map-location-dot","href":"/guides/content/service-areas"},{"title":"Photo albums","sidebarTitle":"Photo albums","icon":"images","href":"/guides/content/photo-albums"},{"title":"Photo feeds","sidebarTitle":"Photo feeds","icon":"arrows-rotate","href":"/guides/content/photo-feeds"},{"title":"Archive, restore and delete","sidebarTitle":"Archive and delete","icon":"trash-can","href":"/guides/content/archive-restore-delete"},{"title":"Instagram posts","sidebarTitle":"Instagram posts","icon":"camera-retro","href":"/guides/content/instagram-posts"}]},{"group":"Media","icon":"photo-film","pages":[{"title":"The media library","sidebarTitle":"Media library","icon":"photo-film","href":"/guides/media/media-library"},{"title":"Folders","sidebarTitle":"Folders","icon":"folder-tree","href":"/guides/media/folders"},{"title":"Broken media","sidebarTitle":"Broken media","icon":"link-slash","href":"/guides/media/broken-media"}]},{"group":"Forms","icon":"rectangle-list","pages":[{"title":"Build a form","sidebarTitle":"Build a form","icon":"rectangle-list","href":"/guides/forms/build-a-form"},{"title":"Form submissions","sidebarTitle":"Submissions","icon":"inbox","href":"/guides/forms/form-submissions"},{"title":"Email notifications","sidebarTitle":"Email","icon":"envelope","href":"/guides/forms/email-notifications"},{"title":"Spam protection","sidebarTitle":"Spam protection","icon":"shield-halved","href":"/guides/forms/spam-protection"}]},{"group":"Site settings","icon":"gear","pages":[{"title":"Site settings","sidebarTitle":"Overview","icon":"gear","href":"/guides/site-settings/index"},{"title":"Brand","sidebarTitle":"Brand","icon":"badge","href":"/guides/site-settings/brand"},{"title":"Social links","sidebarTitle":"Social links","icon":"share-nodes","href":"/guides/site-settings/social-links"},{"title":"Site-wide SEO","sidebarTitle":"SEO","icon":"magnifying-glass-chart","href":"/guides/site-settings/seo"},{"title":"Legal details","sidebarTitle":"Legal","icon":"scale-balanced","href":"/guides/site-settings/legal"},{"title":"Cookie consent","sidebarTitle":"Cookie consent","icon":"cookie","href":"/guides/site-settings/cookie-consent"},{"title":"Service area map settings","sidebarTitle":"Service area map","icon":"map-location-dot","href":"/guides/site-settings/service-area-map"},{"title":"Maintenance mode","sidebarTitle":"Maintenance","icon":"person-digging","href":"/guides/site-settings/maintenance"}]},{"group":"Site design","icon":"palette","pages":[{"title":"Site design","sidebarTitle":"Overview","icon":"palette","href":"/guides/site-design/index"},{"title":"Colors","sidebarTitle":"Colors","icon":"swatchbook","href":"/guides/site-design/colors"},{"title":"Typography","sidebarTitle":"Typography","icon":"font","href":"/guides/site-design/typography"},{"title":"Site width","sidebarTitle":"Site width","icon":"arrows-left-right-to-line","href":"/guides/site-design/site-width"},{"title":"Motion","sidebarTitle":"Motion","icon":"wand-magic-sparkles","href":"/guides/site-design/motion"},{"title":"Header","sidebarTitle":"Header","icon":"window-maximize","href":"/guides/site-design/header"},{"title":"Footer","sidebarTitle":"Footer","icon":"window-minimize","href":"/guides/site-design/footer"},{"title":"Buttons and card styles","sidebarTitle":"Buttons and cards","icon":"hand-pointer","href":"/guides/site-design/buttons-and-card-styles"},{"title":"Custom CSS","sidebarTitle":"Custom CSS","icon":"code","href":"/guides/site-design/custom-css"}]},{"group":"Connections","icon":"plug","pages":[{"title":"Connections","sidebarTitle":"Overview","icon":"plug","href":"/guides/connections/index"},{"title":"Google Business Profile","sidebarTitle":"Google Business Profile","icon":"store","href":"/guides/connections/google-business-profile"},{"title":"Google Reviews connection","sidebarTitle":"Google Reviews","icon":"star-half-stroke","href":"/guides/connections/google-reviews"},{"title":"Google Maps","sidebarTitle":"Google Maps","icon":"map","href":"/guides/connections/google-maps"},{"title":"Google Sheets","sidebarTitle":"Google Sheets","icon":"table","href":"/guides/connections/google-sheets"},{"title":"Instagram","sidebarTitle":"Instagram","icon":"camera-retro","href":"/guides/connections/instagram"},{"title":"Photo storage","sidebarTitle":"Photo storage","icon":"cloud","href":"/guides/connections/photo-storage"},{"title":"Embed scripts","sidebarTitle":"Embed scripts","icon":"code","href":"/guides/connections/embed-scripts"},{"title":"Conversion tracking","sidebarTitle":"Conversion tracking","icon":"bullseye-arrow","href":"/guides/connections/conversion-tracking"},{"title":"Analytics","sidebarTitle":"Analytics","icon":"chart-line","href":"/guides/connections/analytics"},{"title":"Request log","sidebarTitle":"Request log","icon":"list-timeline","href":"/guides/connections/request-log"},{"title":"API keys and webhooks","sidebarTitle":"API keys and webhooks","icon":"key","href":"/guides/connections/api-keys-and-webhooks"}]},{"group":"People and access","icon":"users","pages":[{"title":"People \u0026 Roles","sidebarTitle":"People \u0026 Roles","icon":"users","href":"/guides/people/people-and-roles"},{"title":"What each role can do","sidebarTitle":"Roles","icon":"user-shield","href":"/guides/people/what-each-role-can-do"}]}]},{"tab":"FetchskiAI","icon":"sparkles","pages":[{"title":"FetchskiAI","href":"/fetchskiai/overview"}]},{"tab":"Recipes","icon":"book-open","pages":[{"title":"Recipes","href":"/recipes/laravel-ai-translate-your-site"}]},{"tab":"TypeScript","icon":"js","pages":[{"title":"TypeScript","href":"/typescript/overview"}]},{"tab":"Laravel","icon":"laravel","pages":[{"title":"Laravel","href":"/laravel/overview"}]},{"tab":"AdonisJS","icon":"https://mintlify.s3.us-west-1.amazonaws.com/fetchski-attract-api/logo/adonisjs.svg","pages":[{"title":"AdonisJS","href":"/adonisjs/overview"}]},{"tab":"API reference","icon":"code","pages":[{"title":"API reference","href":"/quickstart"}]}]},"basePath":"","title":"Set up your site - Fetchski Attract Docs","buildId":"dpl_5joLUXmnJgwqjrHAS4dxZrQTdxgh","deploymentId":"dpl_5joLUXmnJgwqjrHAS4dxZrQTdxgh","dynamics":["07c022d89b","a74be98ba7"],"chunks":["Frame-B_503rGq.js","DynamicMarkdown-BfddVCX7.js","zoom-image-lightbox-B3yYlvdS.js","lightbox-handle-r17bVUz3.js"]}


 AdonisJS