Choose photos from your media library, put them in order, and show the album in any gallery section.
Show a hand-picked set of photos, in the order you want, on any page. Build the album once from your media library, then show it in a Gallery section.Who can do this: Contributors, Editors, Admins and Owners can build and change albums. Publishing them needs an Editor, an Admin or an Owner.
Before you start
Upload your photos to the media library first, or upload them while you pick. See Media library.
Give each photo alt text in the media library. The album uses it for screen readers and as the photo’s caption in the full-size photo viewer (the lightbox) that opens when a visitor chooses a photo.
Set a focal point on photos with a clear subject. Gallery layouts that crop a photo keep that spot in view.
To show the album on a page, add a Gallery section too. See Gallery.
Build an album
1
Open the list
Press ⌘K (Ctrl+K on Windows) and choose Photo Albums under Manage. You can also press G, then L.
2
Start a new album
Choose New Photo Album. The editor opens on the Basics tab.
3
Name it
Type a Title, such as “Summer play days”. Add a Description if you like. It’s a note for your team, and Gallery sections don’t show it.
4
Choose the photos
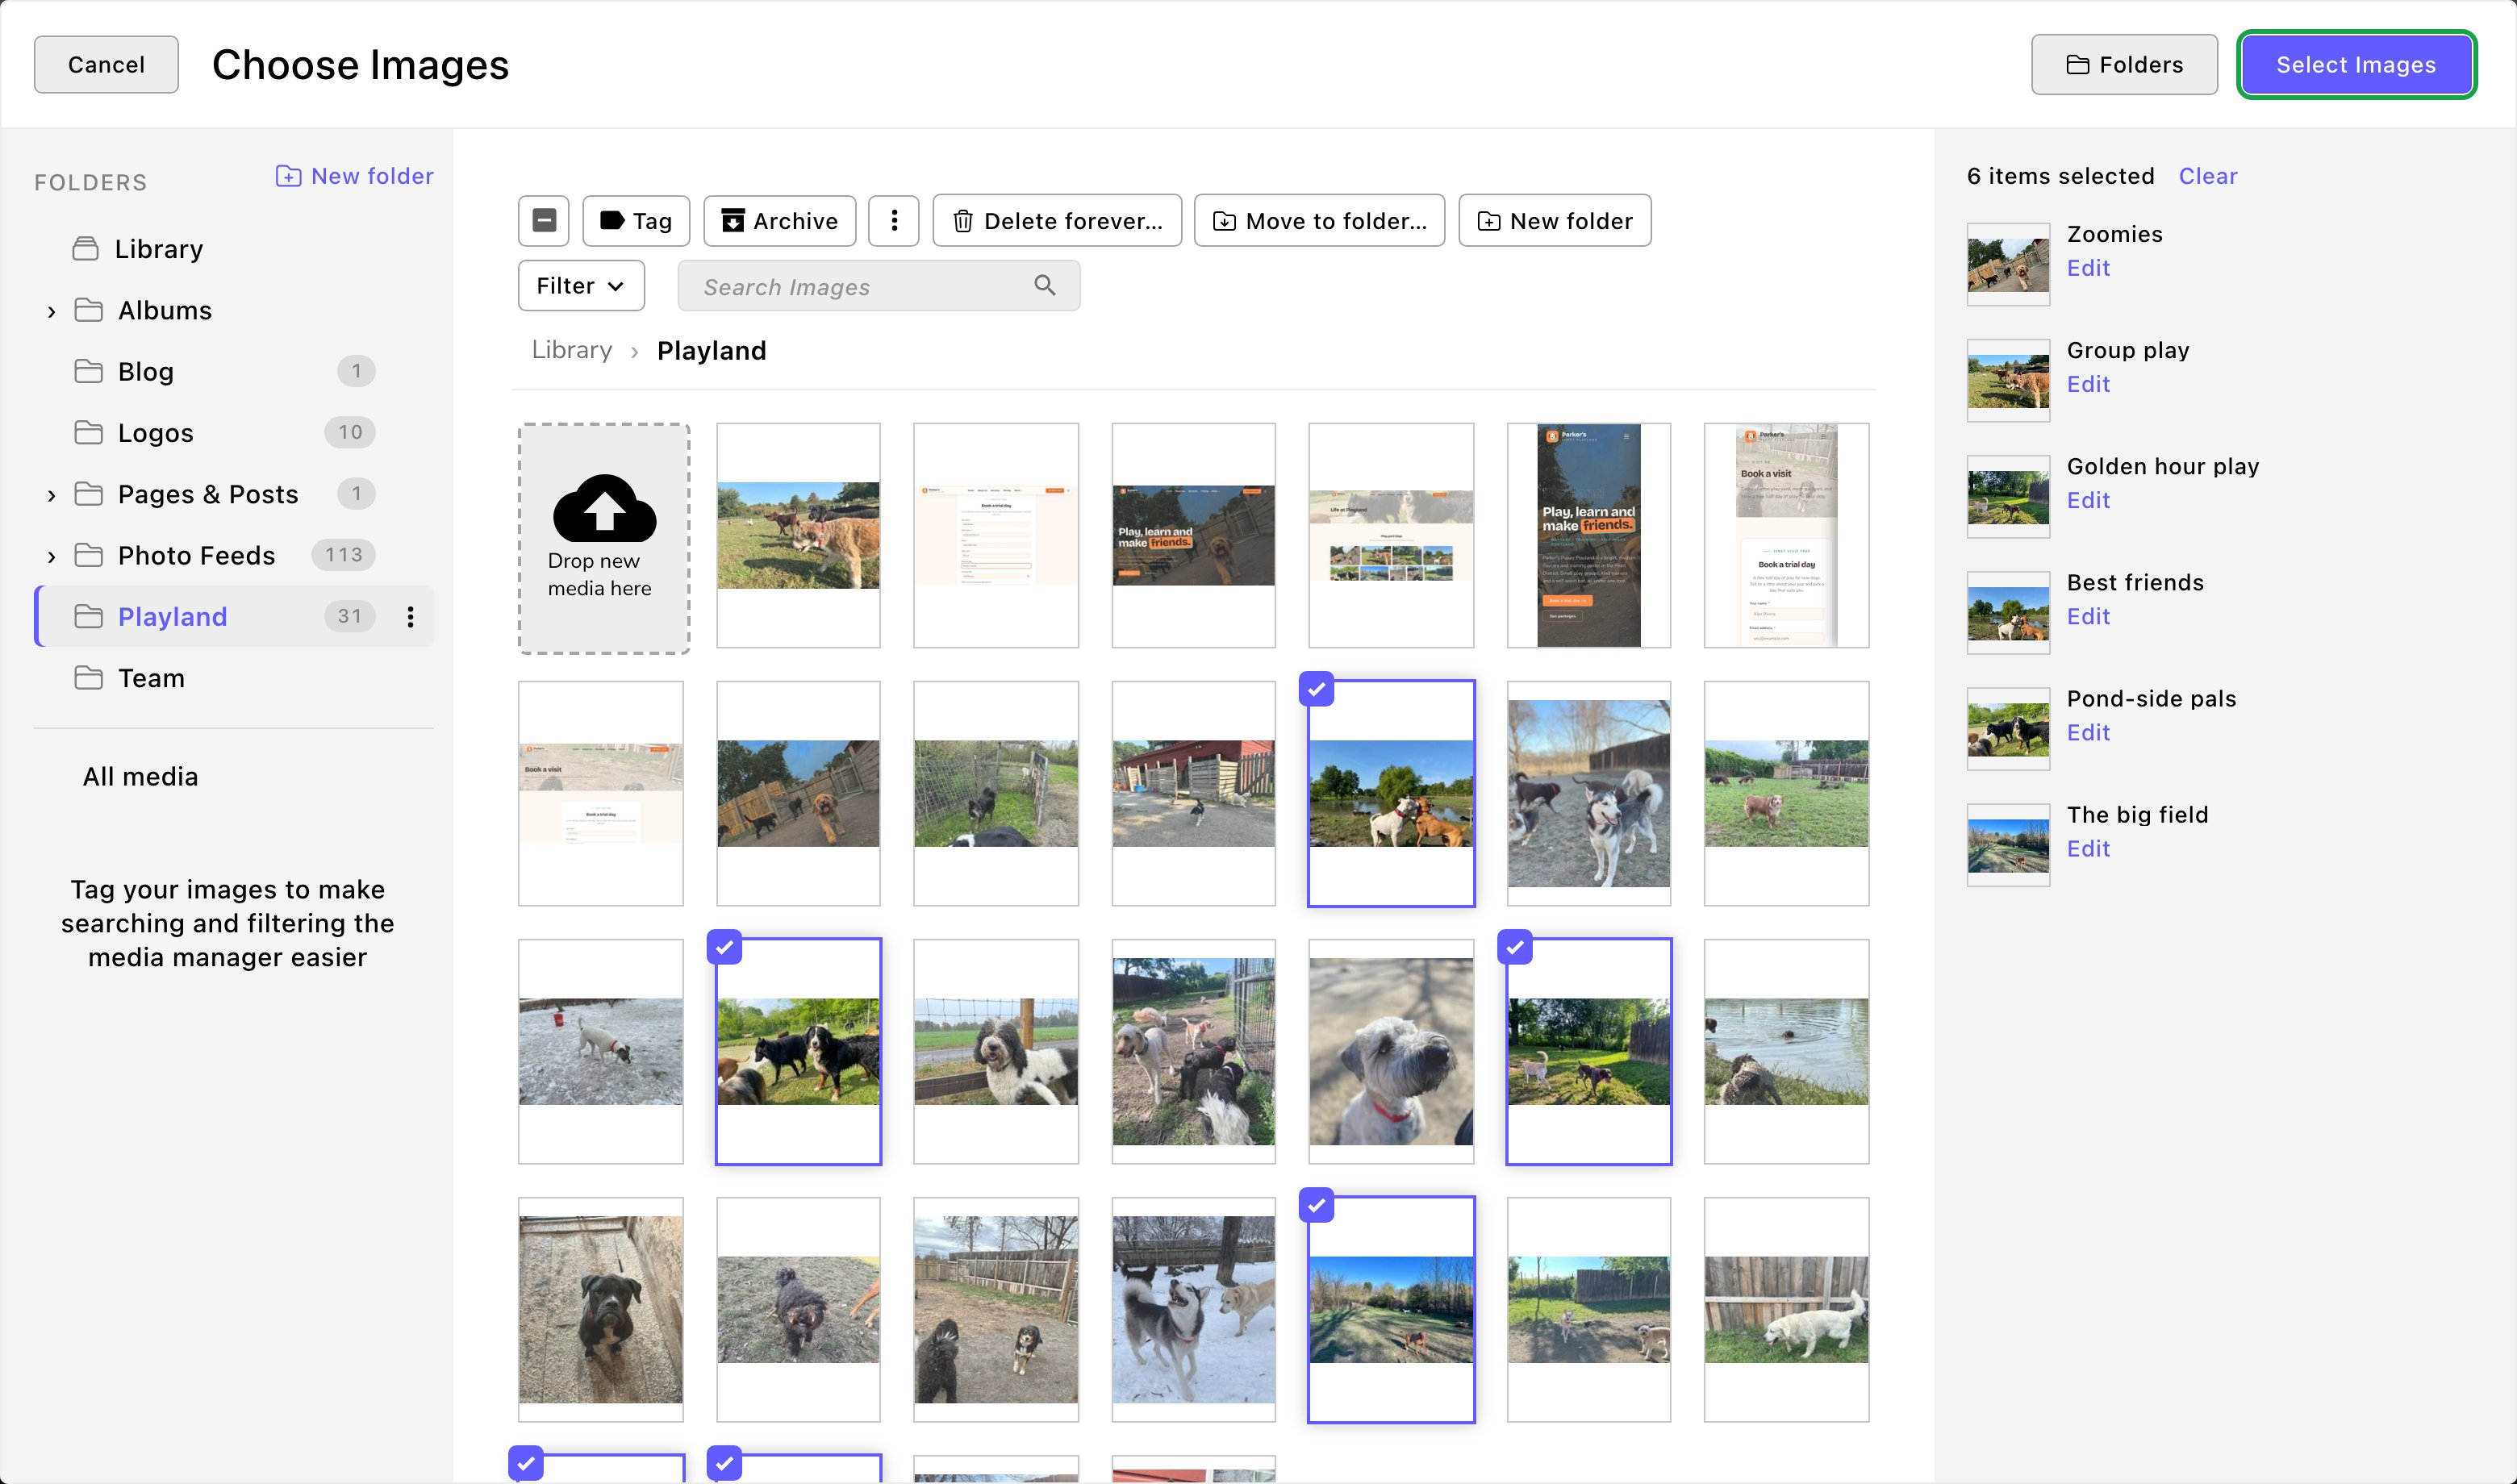
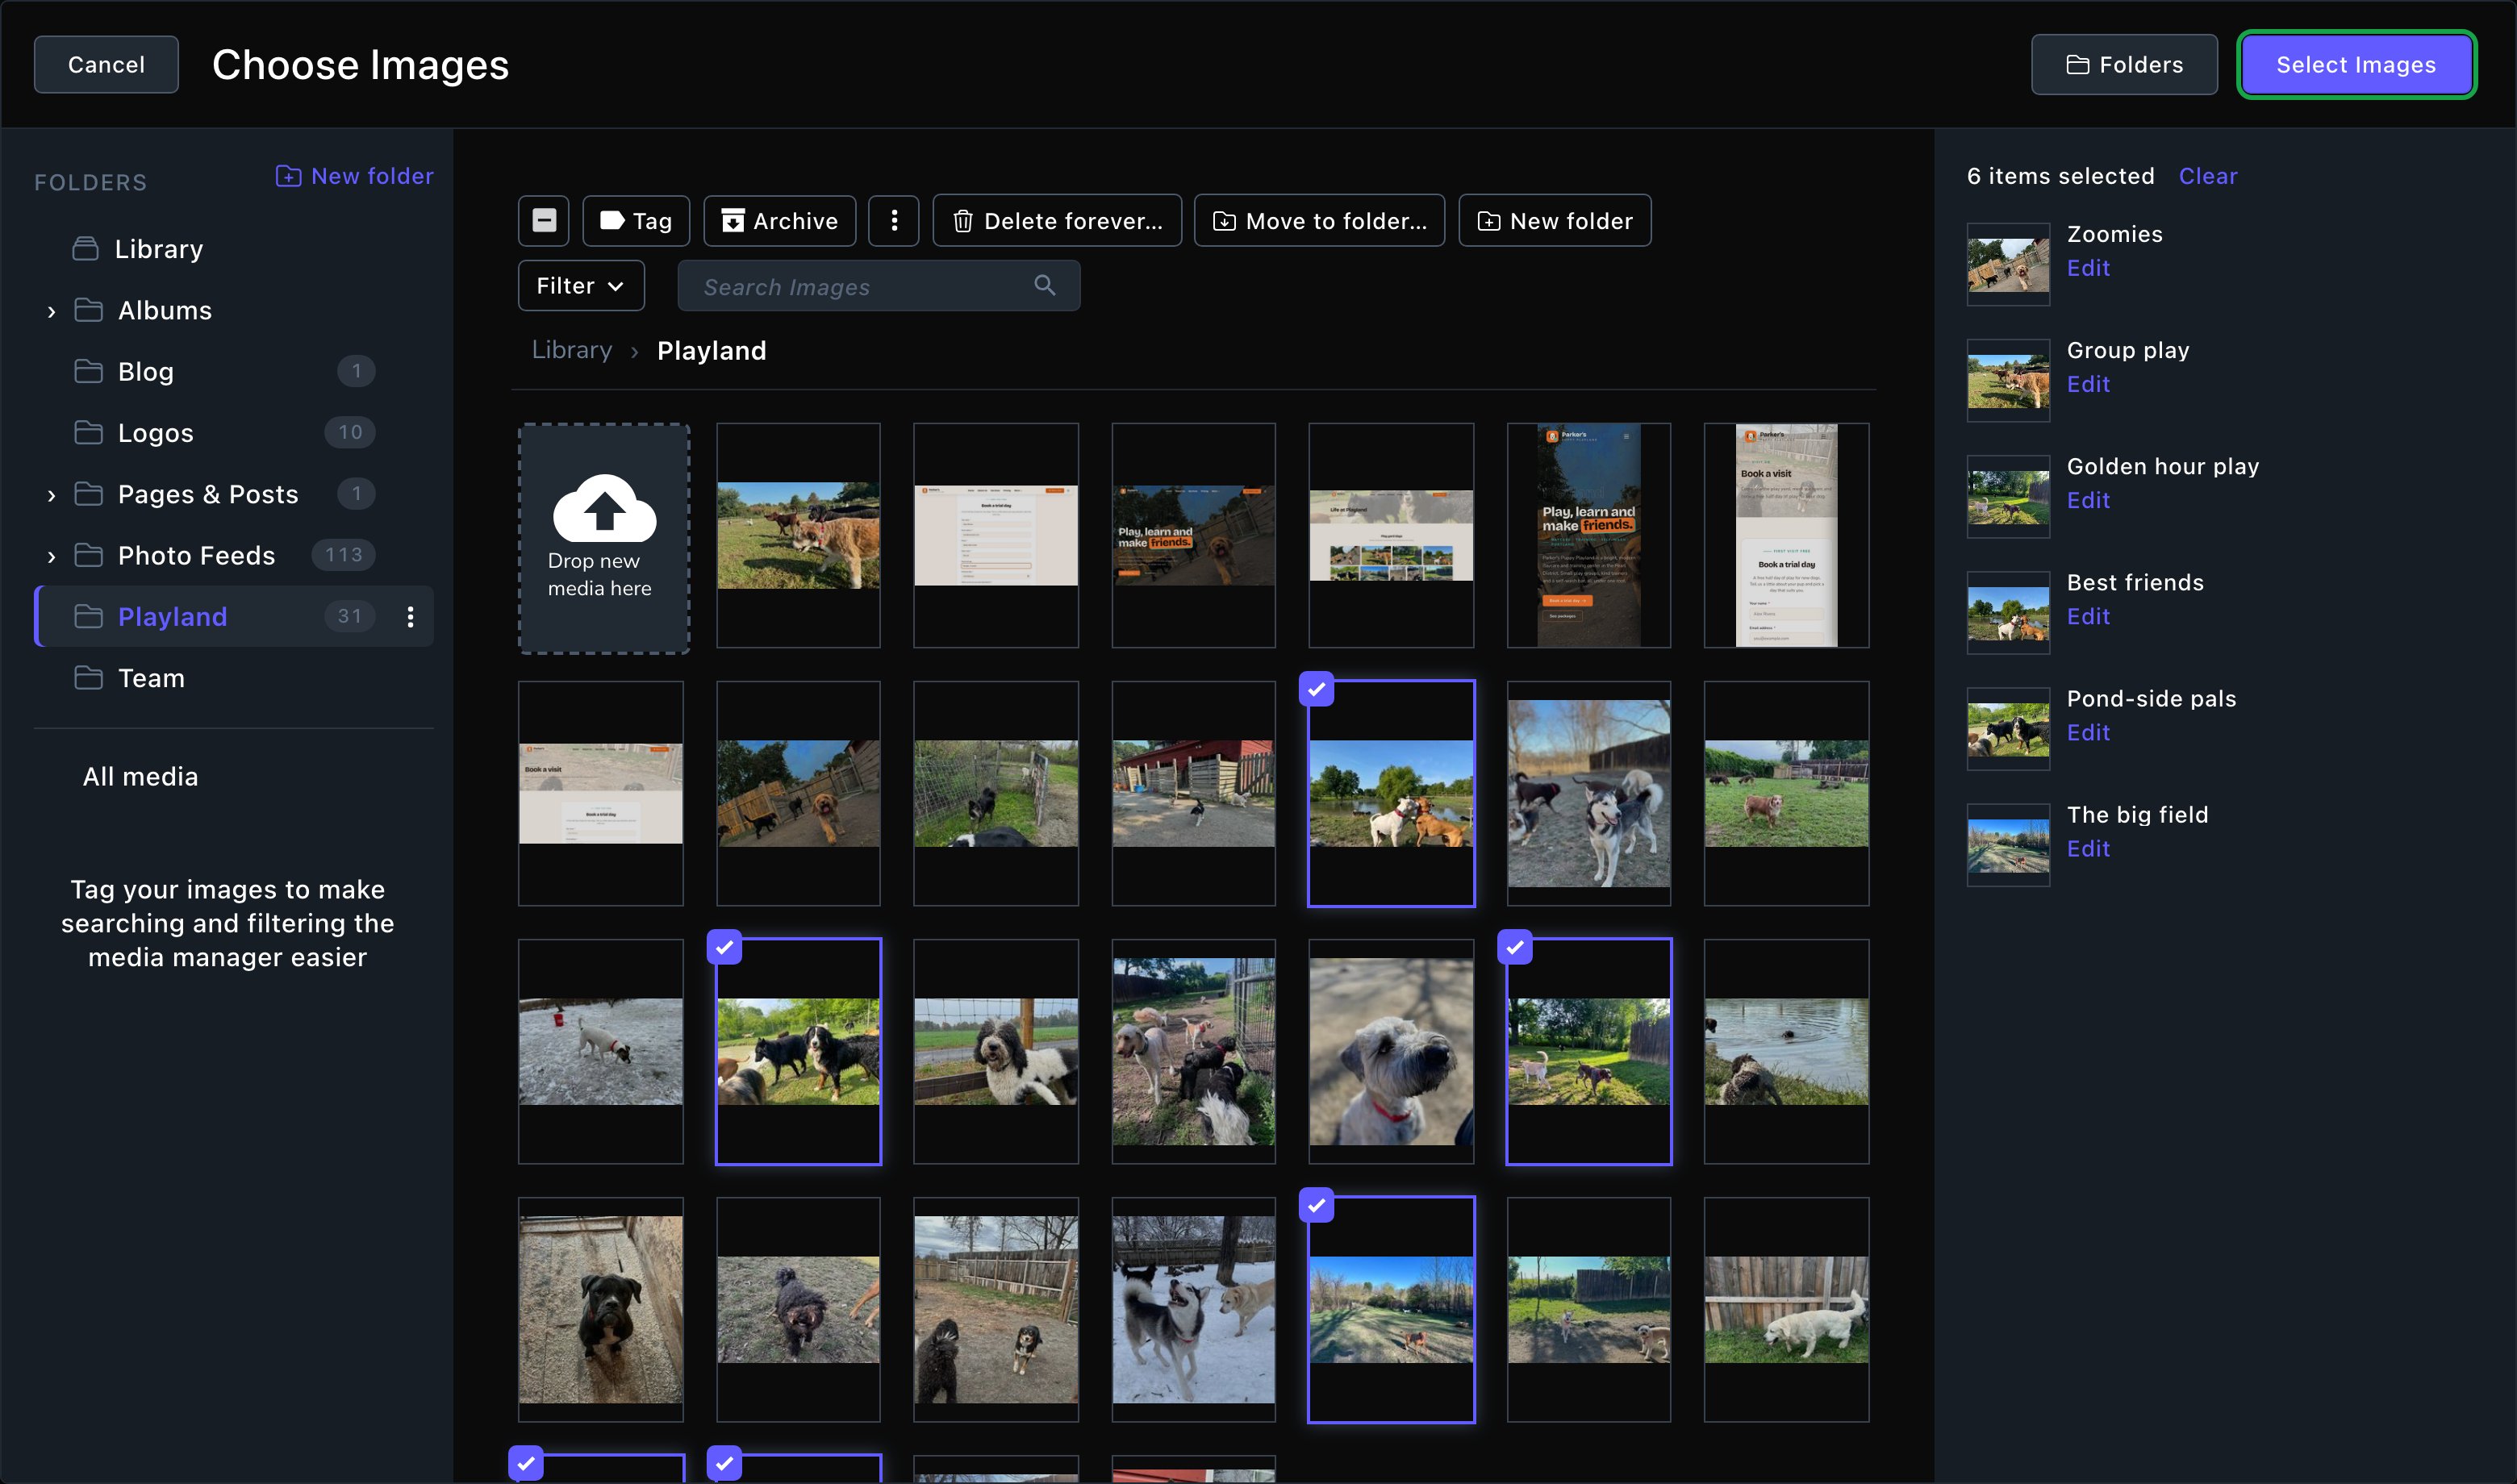
Under Photos, choose Browse Images. Select every photo you want, then choose Select Images. You can upload new photos from the same window.
Pick the album's photos from your media library.
5
Put them in order
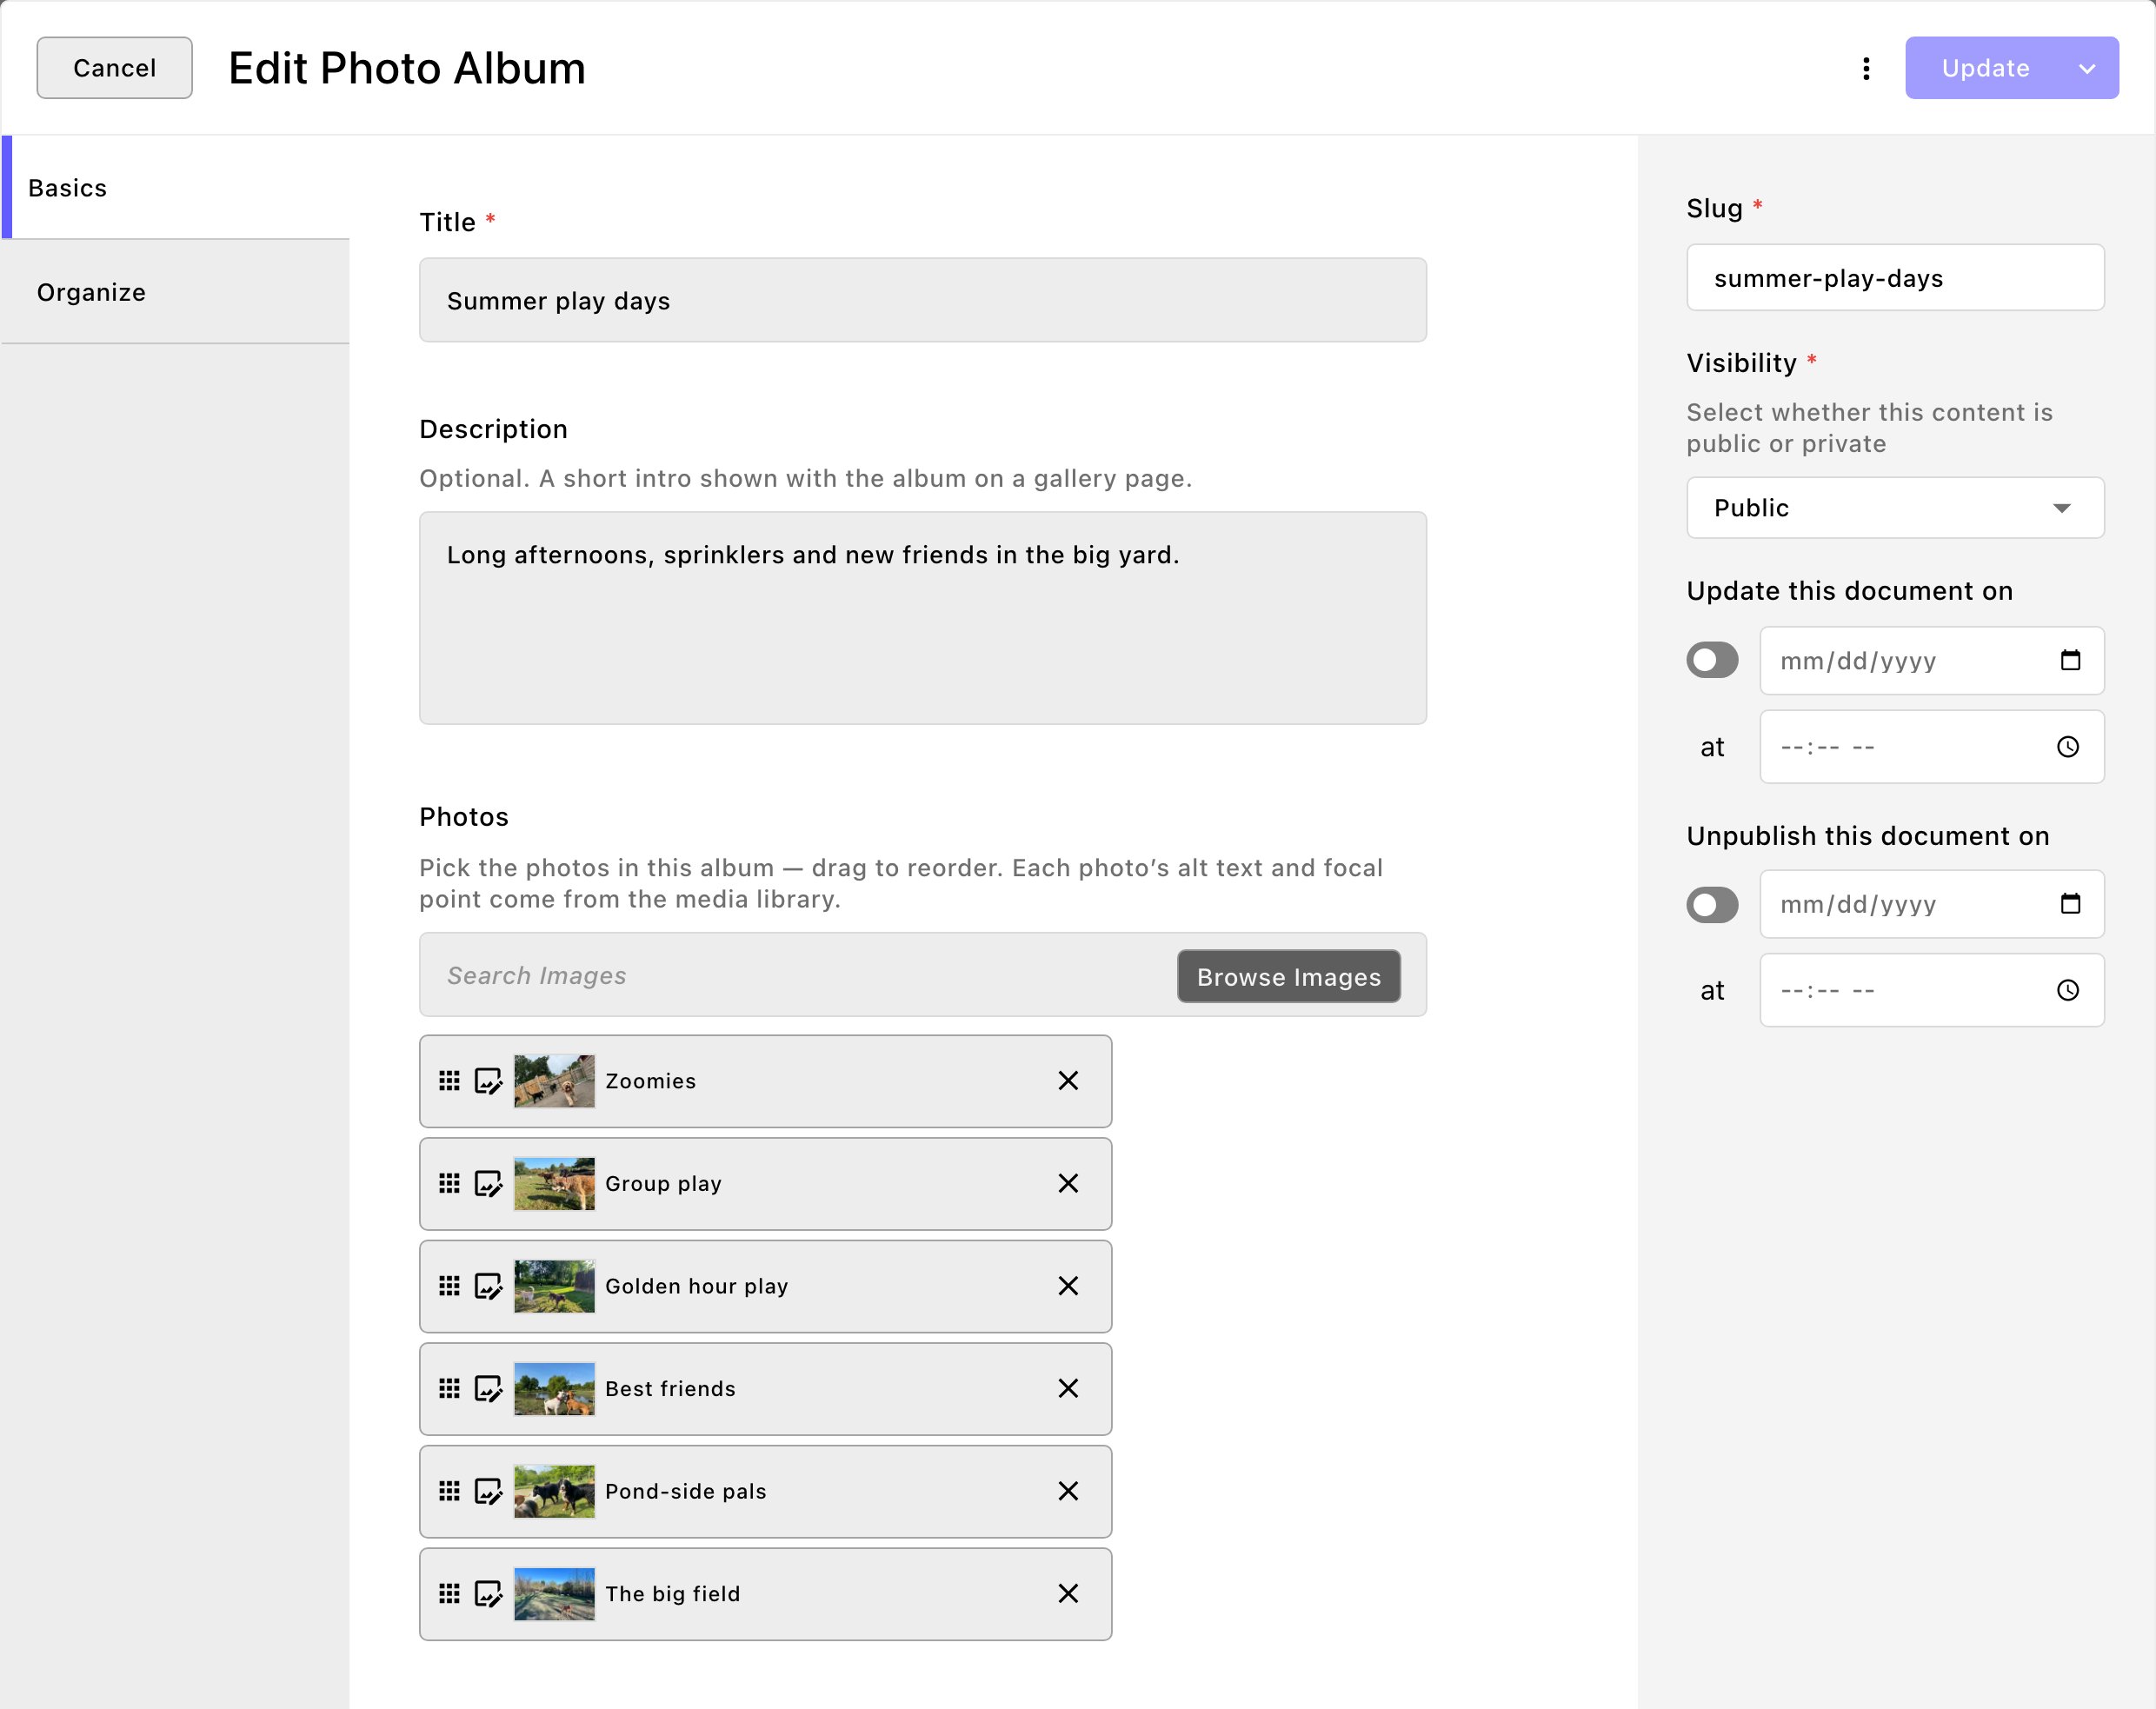
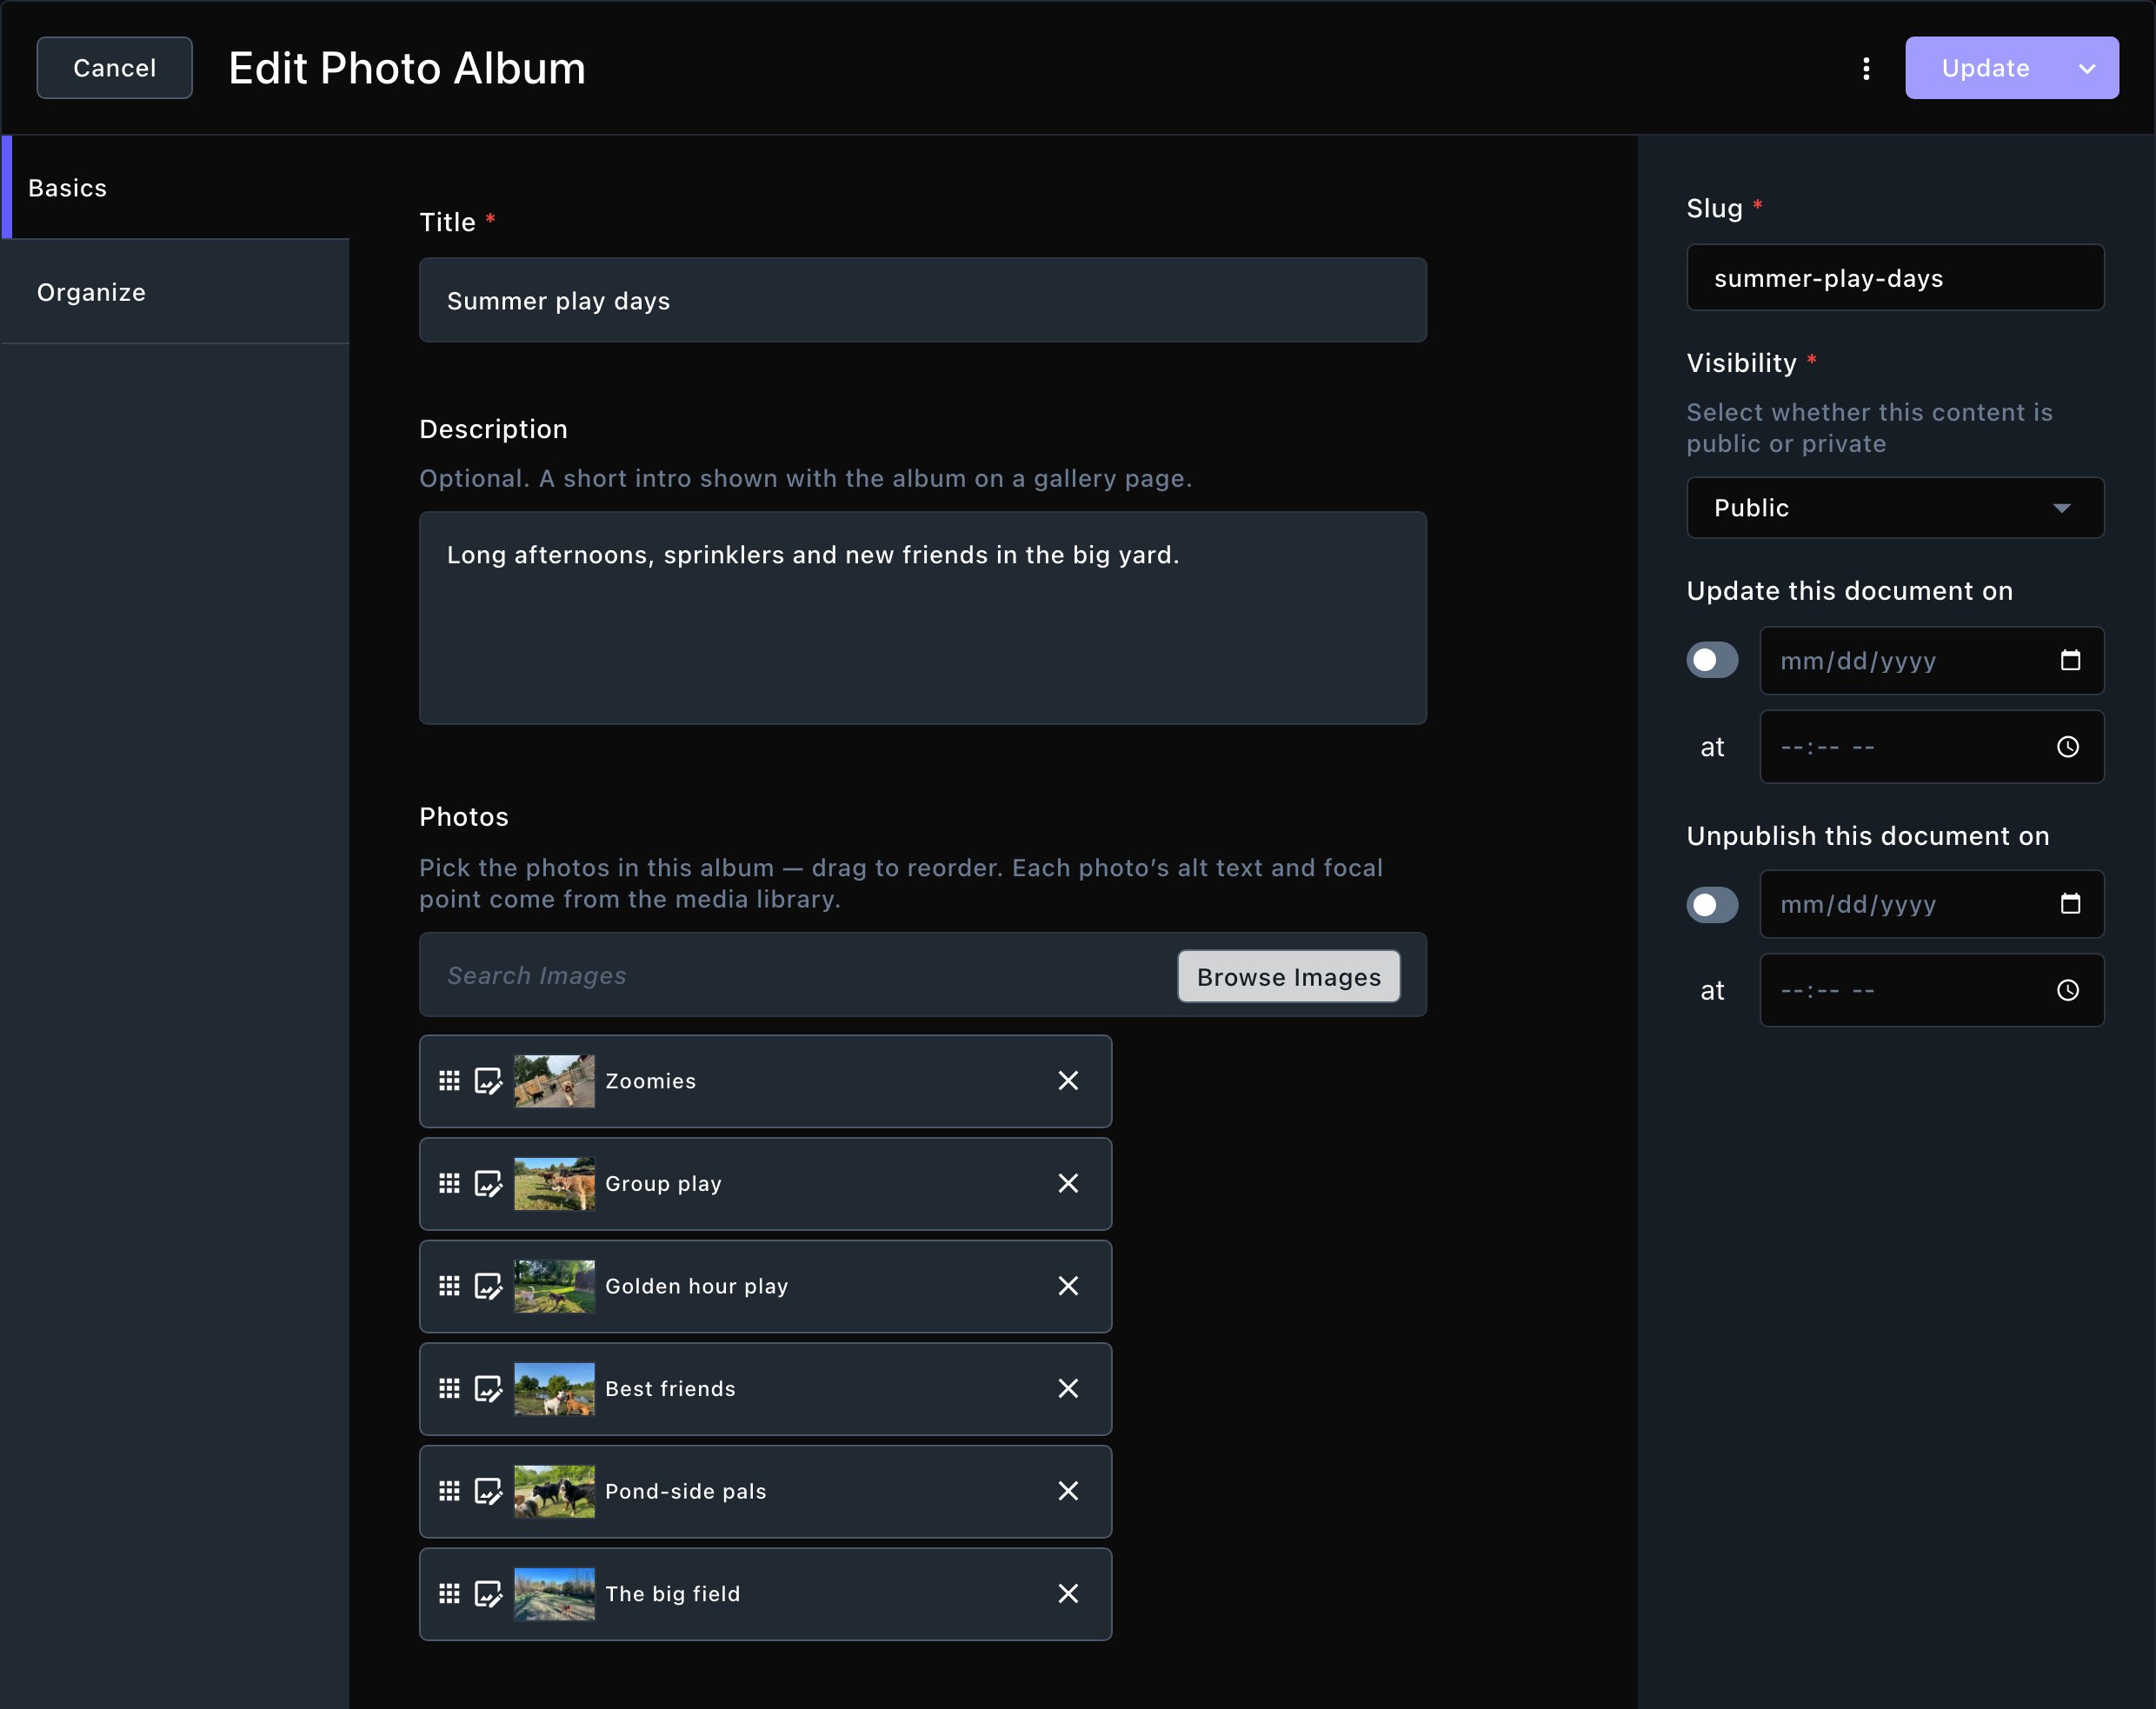
Back in the editor, drag the photos into the order you want. Galleries show them in this order.
Drag the photos into the order your gallery shows.
6
Save it
To finish later, open More save options (the arrow next to the main button) and choose Save Draft. When it’s ready, choose Publish. Contributors choose Submit instead, and an Editor publishes it.
Show it on a page
In a Gallery Preview or Gallery (Full) section, open the Gallery tab. Set Photo source to Photo Album (hand-picked, hand-ordered), then choose your album under Album.The same album can appear in any number of sections, on any number of pages. When you change the album and publish it, every section that shows it updates. See Gallery.
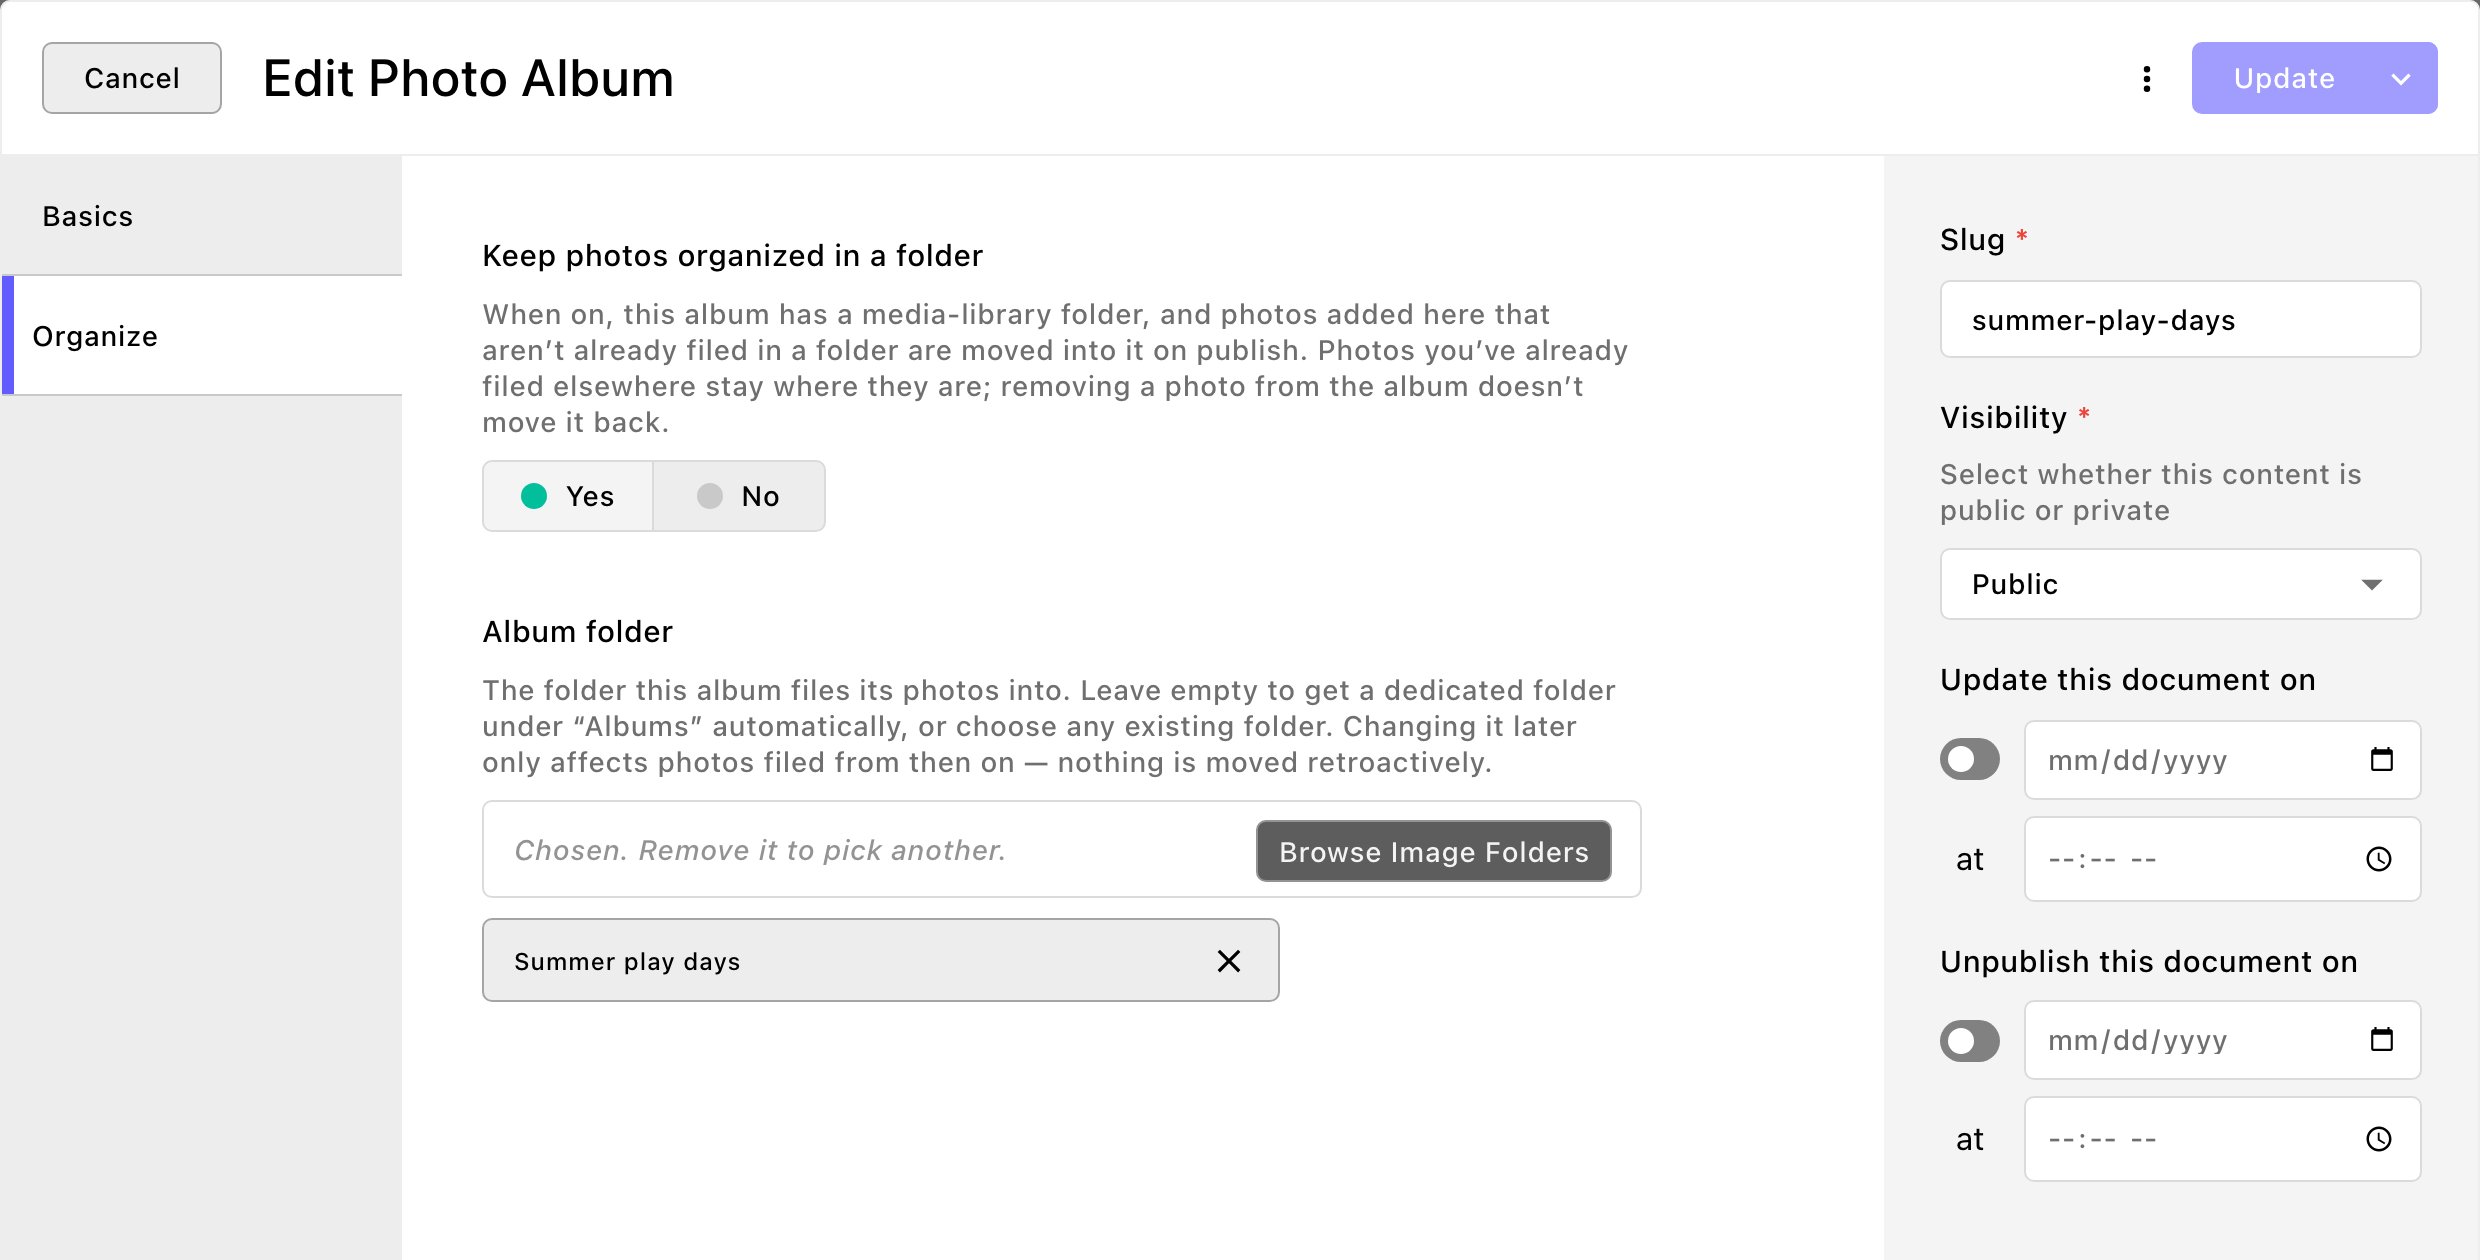
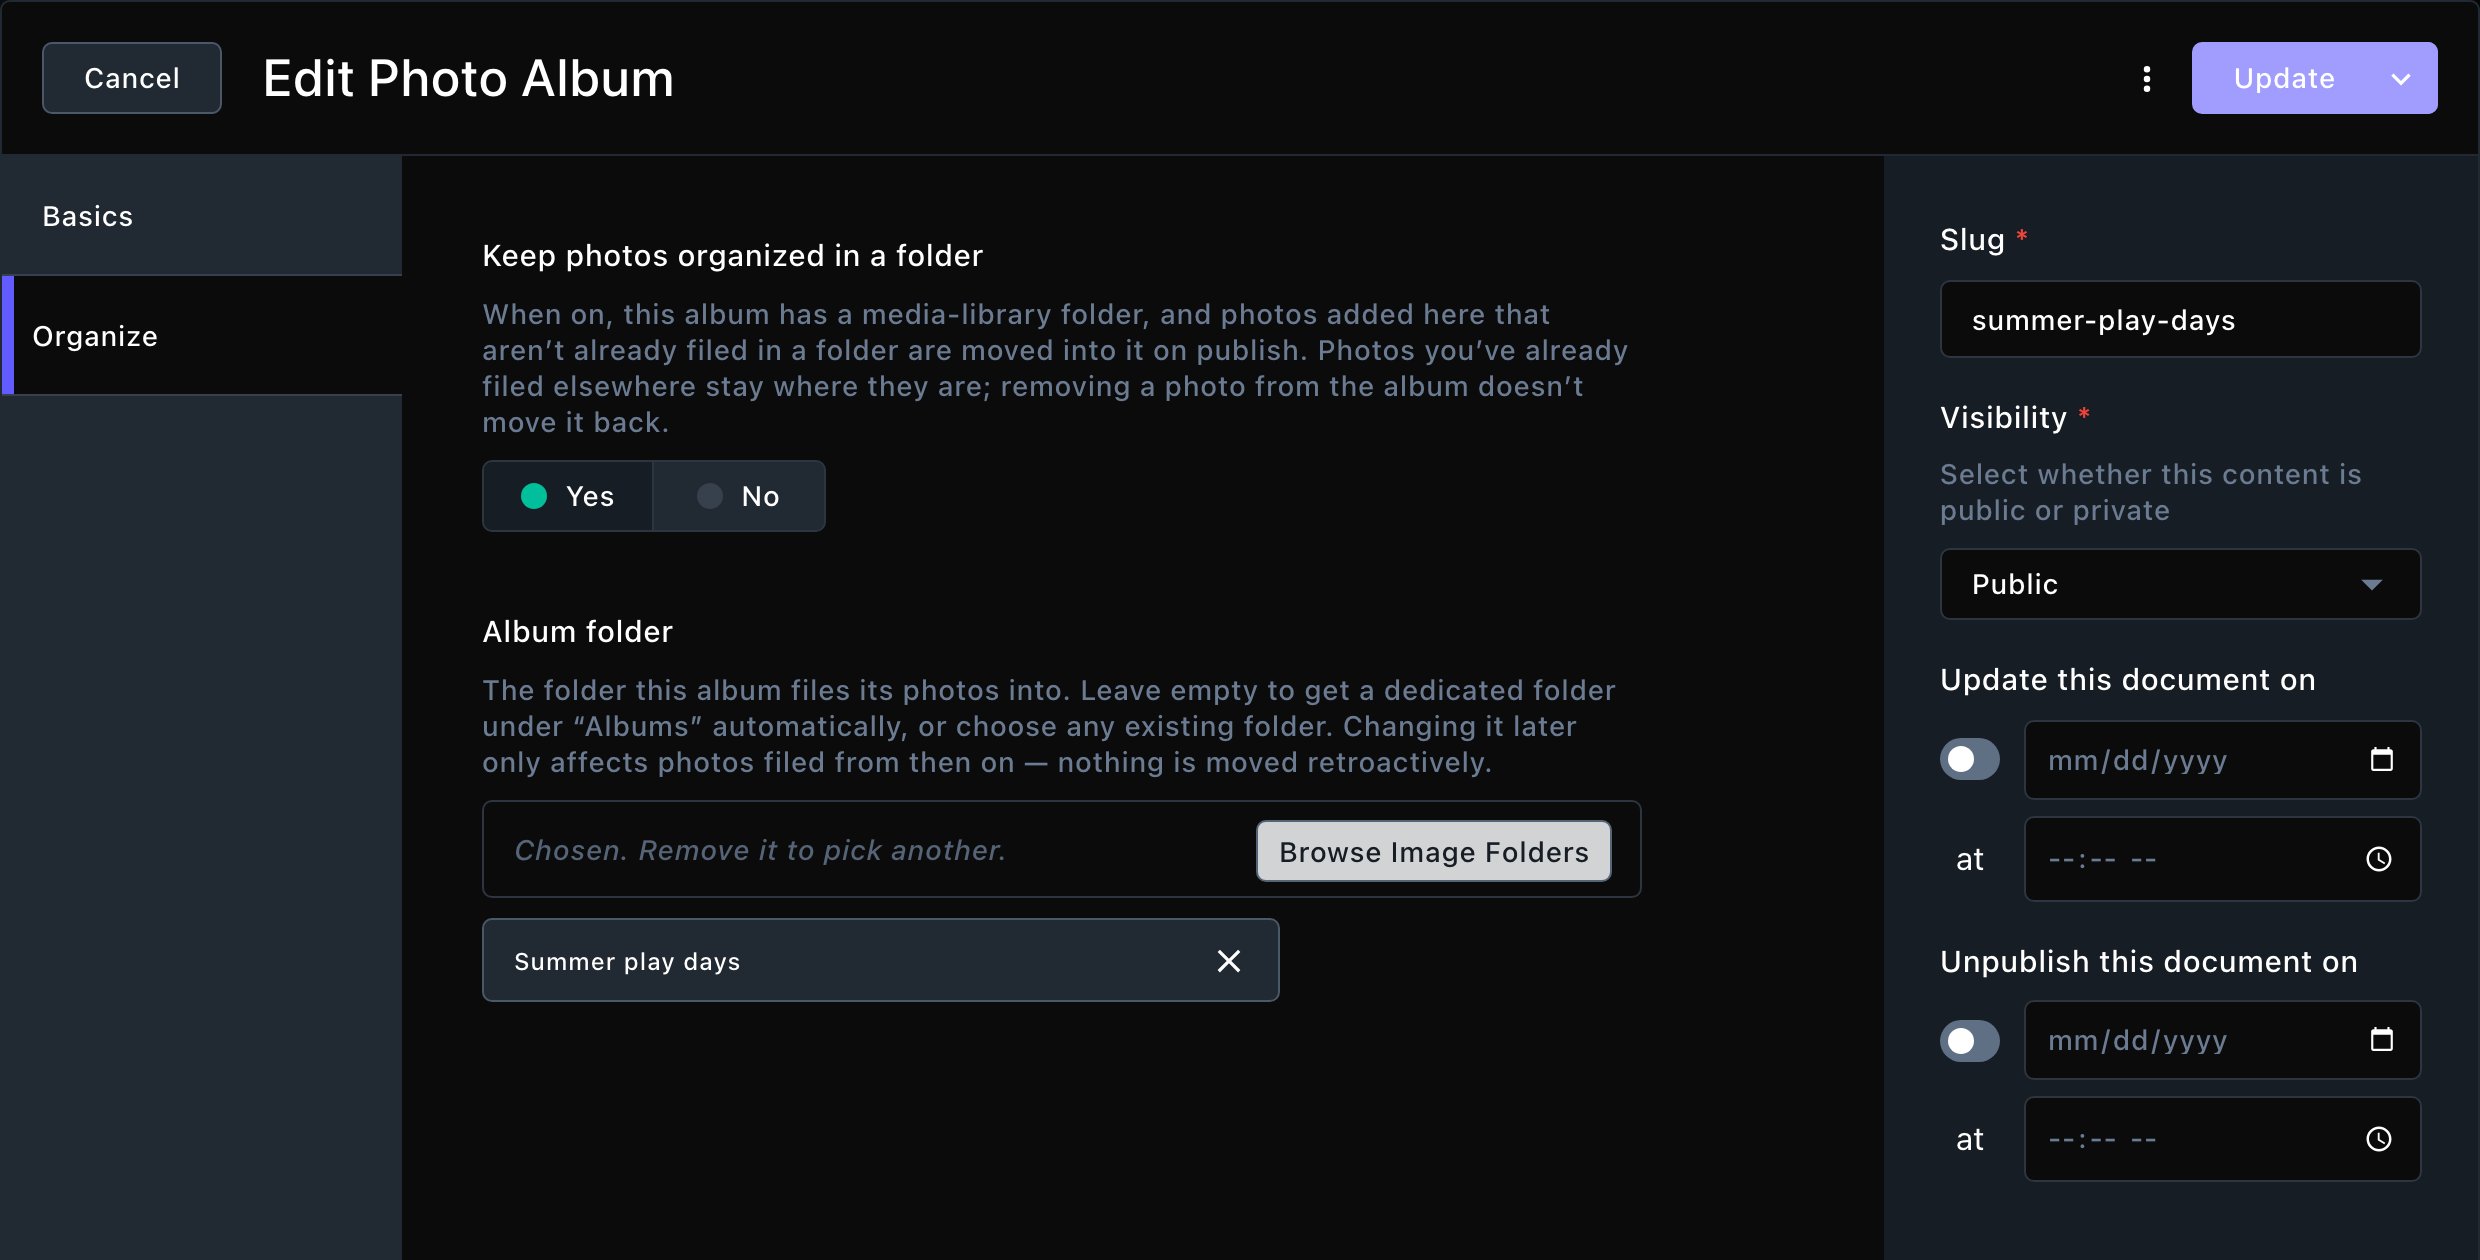
Keep its photos filed in a folder
Keep your media library tidy by filing each album’s photos in one folder. You set this on the album’s Organize tab.
Keep photos organized in a folder: on by default. When you publish, photos in the album that aren’t in any folder yet move into the album’s folder.
Album folder: the folder those photos move into. Leave it empty and Attract makes one for you, inside the Albums folder of your media library. Or choose any folder you already have.
Each album can keep its photos in its own folder.
Filing never undoes your own choices:
Photos you’ve already filed in another folder stay where they are.
Taking a photo out of the album doesn’t move it back.
If you change the folder later, only photos filed from then on go to the new one.
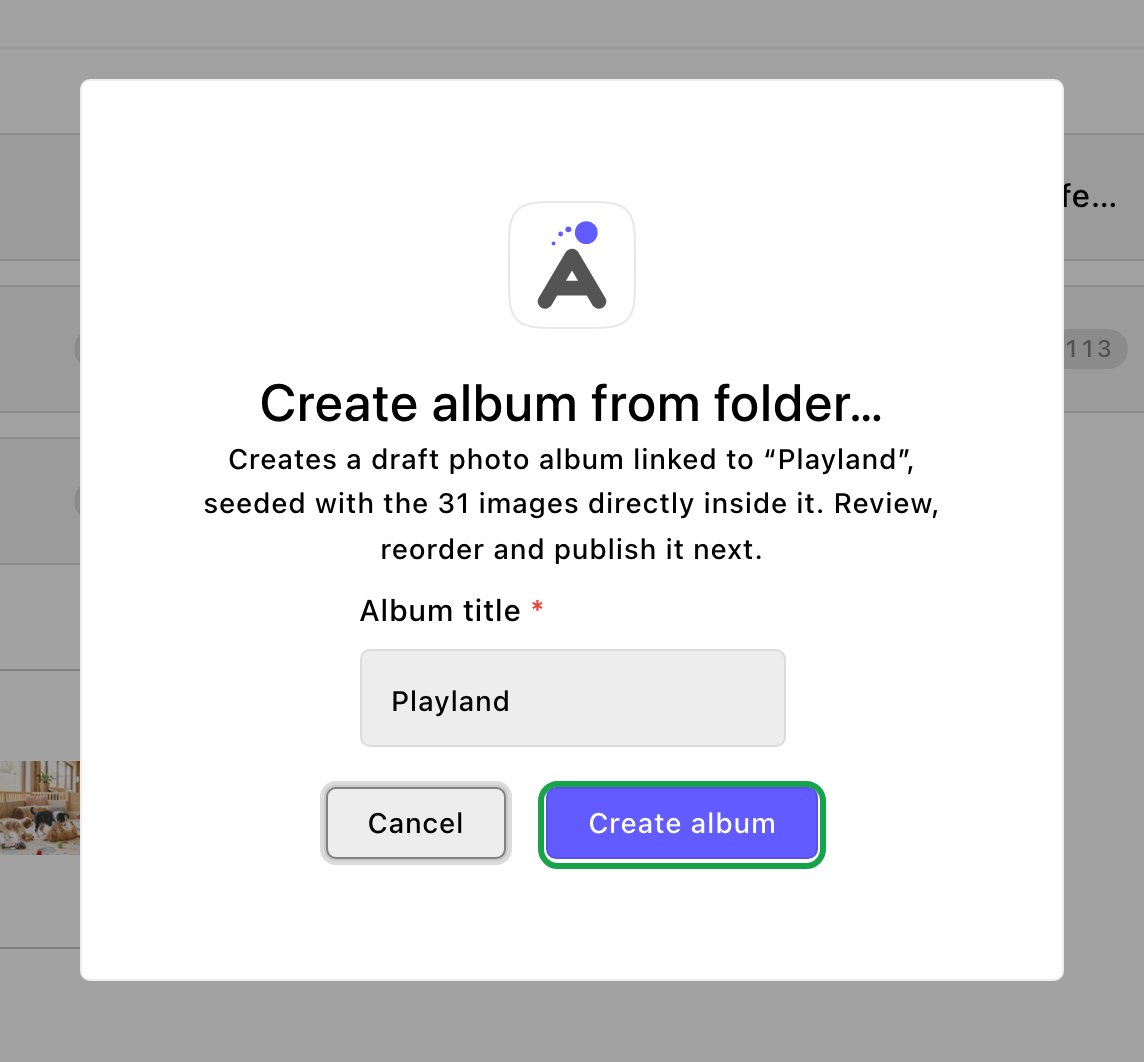
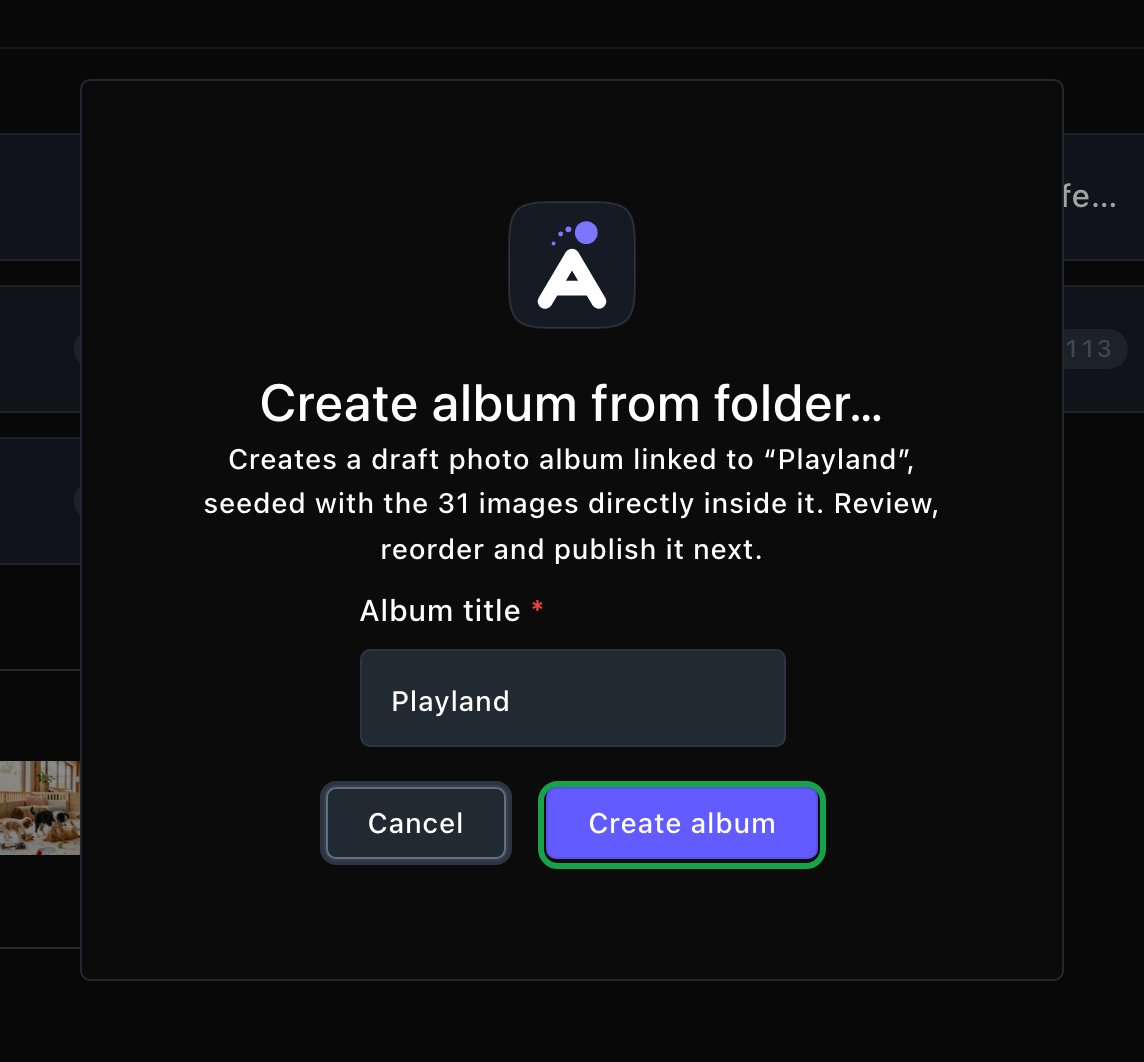
Already have a folder of photos? Turn it into an album in a few clicks.
1
Press ⌘K (Ctrl+K on Windows) and choose Images under Manage
2
Find the folder, open its Folder actions menu, and choose Create album from folder…
3
Type an Album title and choose Create album
You’ll see “Draft album “…” created.”
The new album is a draft holding the photos directly inside that folder, oldest upload first, up to 500. Photos in subfolders aren’t included. Open it in Photo Albums, put the photos in order, then publish it.
Turn a folder of photos into a draft album.
What happens next
A published album shows in every Gallery section that uses it. Visitors never see drafts. If you later archive or delete a photo the album uses, the album’s editor shows a missing-images notice so you can replace it. See Broken media.
Troubleshooting
My album isn't in a gallery section's Album list
Check the section’s Photo source is Photo Album (hand-picked, hand-ordered). The Album choice only shows for that source. Also check the album is published.
A photo has no caption in the lightbox
Captions come from each photo’s alt text. Open the photo in the media library, add alt text, and save.
This folder is managed automatically and cannot become an album
The Albums, Photo Feeds, Pages & Posts and FetchskiAI references folders are looked after by Attract. Choose a folder you made yourself.
The album “…” already uses this folder
Each folder belongs to one album. Open that album instead, or choose a different folder.
Related
Gallery
show an album on a page, in 8 layouts.
Photo feeds
fresh photos pulled in on a schedule instead of hand-picked.
Folders
organize your media library.
Archive, restore and delete
retire albums you no longer need.
⌘I
{"docsConfig":{"theme":"almond","$schema":"https://mintlify.com/docs.json","name":"Fetchski Attract Docs","colors":{"primary":"#16a34a","light":"#22c55e","dark":"#15803d"},"logo":{"light":"https://mintcdn.com/fetchski-attract-api/mn9qfQRsqaASh7UE/logo/light.svg?fit=max\u0026auto=format\u0026n=mn9qfQRsqaASh7UE\u0026q=85\u0026s=66db13e248b70a44a5ff5f6990d4cb63","dark":"https://mintcdn.com/fetchski-attract-api/mn9qfQRsqaASh7UE/logo/dark.svg?fit=max\u0026auto=format\u0026n=mn9qfQRsqaASh7UE\u0026q=85\u0026s=86904ba8d47714303521b2dcd5aa2a50","href":"/"},"favicon":"https://mintcdn.com/fetchski-attract-api/mn9qfQRsqaASh7UE/favicon.svg?fit=max\u0026auto=format\u0026n=mn9qfQRsqaASh7UE\u0026q=85\u0026s=fd4f2c0615961c9e01c9762b98c8999f","api":{"playground":{"display":"interactive"},"examples":{"defaults":"required","languages":["bash","typescript","php"]}},"appearance":{"default":"dark"},"background":{"color":{"light":"#ffffff","dark":"#0b0e13"}},"search":{"prompt":"Search the docs…"},"seo":{"metatags":{"robots":"noindex, nofollow"}},"fonts":{"family":"Inter"},"icons":{"library":"fontawesome"},"styling":{"codeblocks":"dark","latex":true},"contextual":{"options":["copy","view"],"display":"header"},"navigation":{"pages":[]}},"deployment":{"deploymentMetadataValue":{"subdomain":"fetchski-attract-api","hasAudioNarration":false,"actualSubdomain":"fetchski-attract-api","customDomains":["docs.fetchski-attract.com"],"gitSource":{"type":"github","owner":"fetchski","repo":"fetchski_cms_astro_monorepo","deployBranch":"main","contentDirectory":"docs/attract","isPrivate":true,"mountPath":"","label":"","_id":"6adb9c232f0947a18a27541d"},"entitlements":{},"buildId":"6af6df04bd8b0362cdec74ff","clientVersion":"0.0.4131","searchFilterCounts":[{"language":"default","tag":"Media","count":953},{"language":"default","tag":"Content","count":863},{"language":"default","tag":"Publishing","count":720},{"language":"default","tag":"API reference","count":484},{"language":"default","tag":"Laravel","count":472},{"language":"default","tag":"TypeScript","count":470},{"language":"default","tag":"AdonisJS","count":469},{"language":"default","tag":"Batch jobs","count":364},{"language":"default","tag":"Pages \u0026 Site","count":224},{"language":"default","tag":"Forms","count":168}]},"assistantConfig":{"enableAskAiButton":false,"enableStarterQuestions":false,"enableContextualStarterQuestions":false,"enableAskAiSearchBar":true},"basePath":"","hasChatPermissions":false,"hasWebMcpPermissions":false,"toggles":[{"name":"kill-isr","enabled":true,"variant":{"name":"disabled","enabled":false,"feature_enabled":true},"impressionData":false},{"name":"custom-rbac-roles","enabled":true,"variant":{"name":"disabled","enabled":false,"feature_enabled":true},"impressionData":false},{"name":"agent-mintlify-slack","enabled":true,"variant":{"name":"disabled","enabled":false,"feature_enabled":true},"impressionData":false},{"name":"agent-integrations-settings","enabled":true,"variant":{"name":"disabled","enabled":false,"feature_enabled":true},"impressionData":false},{"name":"rbac-expansion","enabled":true,"variant":{"name":"disabled","enabled":false,"feature_enabled":true},"impressionData":false},{"name":"automations-pr-grouping","enabled":true,"variant":{"name":"disabled","enabled":false,"feature_enabled":true},"impressionData":false},{"name":"custom-prefix","enabled":true,"variant":{"name":"disabled","enabled":false,"feature_enabled":true},"impressionData":false},{"name":"analytics-v7","enabled":true,"variant":{"name":"disabled","enabled":false,"feature_enabled":true},"impressionData":false},{"name":"user-flows-analytics","enabled":true,"variant":{"name":"disabled","enabled":false,"feature_enabled":true},"impressionData":false},{"name":"no-publish-flow","enabled":true,"variant":{"name":"disabled","enabled":false,"feature_enabled":true},"impressionData":false},{"name":"workos-onboarding","enabled":true,"variant":{"name":"disabled","enabled":false,"feature_enabled":true},"impressionData":false},{"name":"snapshot-serving-live","enabled":true,"variant":{"name":"disabled","enabled":false,"feature_enabled":true},"impressionData":false},{"name":"stripTemperatureMiddleware","enabled":true,"variant":{"name":"disabled","enabled":false,"feature_enabled":true},"impressionData":false},{"name":"support-platform-pylon-zendesk","enabled":true,"variant":{"name":"disabled","enabled":false,"feature_enabled":true},"impressionData":false},{"name":"snapshot-serving","enabled":true,"variant":{"name":"disabled","enabled":false,"feature_enabled":true},"impressionData":false},{"name":"instant-rollback","enabled":true,"variant":{"name":"disabled","enabled":false,"feature_enabled":true},"impressionData":false},{"name":"granular-notifications-server","enabled":true,"variant":{"name":"disabled","enabled":false,"feature_enabled":true},"impressionData":false},{"name":"granular-notifications","enabled":true,"variant":{"name":"disabled","enabled":false,"feature_enabled":true},"impressionData":false},{"name":"automations-fable","enabled":true,"variant":{"name":"disabled","enabled":false,"feature_enabled":true},"impressionData":false},{"name":"fixed-ai-action-pricing","enabled":true,"variant":{"name":"disabled","enabled":false,"feature_enabled":true},"impressionData":false},{"name":"automation-resolve-merge-conflict","enabled":true,"variant":{"name":"disabled","enabled":false,"feature_enabled":true},"impressionData":false},{"name":"scoped-publishing","enabled":true,"variant":{"name":"disabled","enabled":false,"feature_enabled":true},"impressionData":false},{"name":"mintql","enabled":true,"variant":{"name":"disabled","enabled":false,"feature_enabled":true},"impressionData":false},{"name":"page-level-analytics","enabled":true,"variant":{"name":"disabled","enabled":false,"feature_enabled":true},"impressionData":false},{"name":"editor-version-history-v2","enabled":true,"variant":{"name":"disabled","enabled":false,"feature_enabled":true},"impressionData":false},{"name":"billing-page-v2","enabled":true,"variant":{"name":"disabled","enabled":false,"feature_enabled":true},"impressionData":false},{"name":"full-page-search","enabled":true,"variant":{"name":"disabled","enabled":false,"feature_enabled":true},"impressionData":false},{"name":"workspace-projects","enabled":true,"variant":{"name":"disabled","enabled":false,"feature_enabled":true},"impressionData":false},{"name":"assistant-v5","enabled":true,"variant":{"name":"disabled","enabled":false,"feature_enabled":true},"impressionData":false},{"name":"fork-pr-previews","enabled":true,"variant":{"name":"disabled","enabled":false,"feature_enabled":true},"impressionData":false},{"name":"revalidation-jwt","enabled":true,"variant":{"name":"disabled","enabled":false,"feature_enabled":true},"impressionData":false},{"name":"workos-sso-scim","enabled":true,"variant":{"name":"disabled","enabled":false,"feature_enabled":true},"impressionData":false},{"name":"hobby-abuse-scan","enabled":true,"variant":{"name":"disabled","enabled":false,"feature_enabled":true},"impressionData":false},{"name":"dashboard-inbox","enabled":true,"variant":{"name":"disabled","enabled":false,"feature_enabled":true},"impressionData":false},{"name":"workos-signup","enabled":true,"variant":{"name":"disabled","enabled":false,"feature_enabled":true},"impressionData":false},{"name":"turbopuffer-dual-write","enabled":true,"variant":{"name":"disabled","enabled":false,"feature_enabled":true},"impressionData":false},{"name":"workos-enabled","enabled":true,"variant":{"name":"disabled","enabled":false,"feature_enabled":true},"impressionData":false},{"name":"approve-review-flow","enabled":true,"variant":{"name":"disabled","enabled":false,"feature_enabled":true},"impressionData":false},{"name":"editor-metadata","enabled":true,"variant":{"name":"disabled","enabled":false,"feature_enabled":true},"impressionData":false},{"name":"sso-setup-deadline-banner","enabled":true,"variant":{"name":"disabled","enabled":false,"feature_enabled":true},"impressionData":false},{"name":"turbopuffer-serve","enabled":true,"variant":{"name":"disabled","enabled":false,"feature_enabled":true},"impressionData":false},{"name":"live-agents","enabled":true,"variant":{"name":"disabled","enabled":false,"feature_enabled":true},"impressionData":false},{"name":"llms-txt-v2","enabled":true,"variant":{"name":"disabled","enabled":false,"feature_enabled":true},"impressionData":false}],"googleFontsInlined":false},"customCss":[{"filePath":"style.css","content":"@media (min-width: 1280px){:root{--content-width: 52rem}}@media (min-width: 1600px){:root{--content-width: 60rem}}@media (min-width: 1920px){:root{--content-width: 68rem}}@media (min-width: 1024px) and (max-width: 1919px){#content-container{padding-left:2rem;padding-right:2rem}div:has(>#content-area){padding-left:0}#table-of-contents{width:14rem}}html[data-page-mode=\"wide\"] #content-area{max-width:84rem}@media (min-width: 1024px){#navbar .nav-tabs{position:fixed;left:15rem;top:0;height:6rem}}@media (min-width: 1024px) and (max-width: 1599px){#navbar .nav-tabs{gap:0}#navbar .nav-tabs .nav-tabs-item{gap:0.375rem;font-size:0.9375rem;padding-inline:0.5rem}#navbar .nav-tabs .nav-tabs-item svg,#navbar .nav-tabs .nav-tabs-item img{width:1.0625rem;height:1.0625rem}}@media (min-width: 1024px) and (max-width: 1199px){#navbar .nav-tabs .nav-tabs-item svg,#navbar .nav-tabs .nav-tabs-item img{display:none}}@media (min-width: 1024px) and (max-width: 1319px){div:has(>#search-bar-entry){width:3rem!important}#search-bar-entry{justify-content:center;padding:0!important}#search-bar-entry>div>:not(svg),#search-bar-entry>:not(div){display:none}}.mdx-content{font-size:1.0625rem;line-height:1.8}@media (min-width: 1024px){.mdx-content{font-size:1.25rem;line-height:1.85}#page-title{font-size:2.875rem;line-height:1.15}#page-title+*,#header .prose{font-size:1.375rem}#sidebar-content a{font-size:1.125rem}.toc-item{font-size:1rem}}.mdx-content>[data-as=\"p\"],.mdx-content>p{margin-top:0;margin-bottom:1.75rem}.mdx-content>h2{margin-top:3.5rem;margin-bottom:1.25rem;padding-top:2rem;border-top:1px solid rgb(0 0 0 / 0.08);font-size:1.875rem;letter-spacing:-0.01em}.dark .mdx-content>h2{border-top-color:rgb(255 255 255 / 0.08)}.mdx-content>h2:first-child{margin-top:0;padding-top:0;border-top:0}.mdx-content>h3{margin-top:2.75rem;margin-bottom:1.125rem;font-size:1.4375rem}.mdx-content>h4{margin-top:2rem;margin-bottom:0.75rem}.mdx-content li{margin-top:0.625rem;margin-bottom:0.625rem}.mdx-content>ul,.mdx-content>ol{margin-bottom:1.75rem}.mdx-content :not(pre)>code{font-size:0.875em;padding:0.125rem 0.375rem;overflow-wrap:anywhere}.mdx-content table{font-size:1.0625rem;line-height:1.7}.mdx-content th,.mdx-content td{padding:0.875rem 1.5rem 0.875rem 0!important;vertical-align:top}.mdx-content th{padding-top:0.25rem!important}.mdx-content th:last-child,.mdx-content td:last-child{padding-right:0!important}.mdx-content td>code:only-child{white-space:nowrap}pre{max-height:36rem;overflow:auto}.mdx-content pre code{font-size:0.9375rem;line-height:1.75}.mdx-content>.code-block,.mdx-content>.code-group{margin-top:1.5rem;margin-bottom:2rem}.mdx-content .columns{column-gap:1.25rem;row-gap:0.5rem;margin-top:1.75rem;margin-bottom:2.25rem}.mdx-content .card{border-radius:1rem}.mdx-content .card [data-component-part=\"card-content-container\"]{padding:1.5rem 1.75rem}.mdx-content [data-component-part=\"card-title\"]{font-size:1.25rem}.mdx-content [data-component-part=\"card-content\"]{font-size:1.0625rem;line-height:1.7}.mdx-content .callout{margin-top:2rem;margin-bottom:2.25rem;padding:1.25rem 1.75rem;font-size:1.125rem;line-height:1.75}.mdx-content .steps{margin-top:1.75rem;margin-bottom:2.25rem}.mdx-content .step{padding-bottom:0.75rem}.mdx-content .accordion-group,.mdx-content>.accordion{margin-top:1.75rem;margin-bottom:2.25rem}.mdx-content .tabs{margin-top:1.75rem;margin-bottom:2.25rem}.mdx-content .tabs [role=\"tabpanel\"]{padding-top:0.375rem;padding-right:0.375rem;padding-bottom:0.375rem}.mdx-content [data-component-name=\"mermaid-container\"]{--im-node-fill: #ecfdf3;--im-node-stroke: #16a34a;--im-node-text: #0b3a1f;--im-cluster-fill: rgb(22 163 74 / 0.04);--im-cluster-stroke: rgb(22 163 74 / 0.35);--im-edge: #64748b;--im-label-bg: #ffffff;margin-top:1.75rem;margin-bottom:2.25rem;padding:2rem 1.5rem;border:1px solid rgb(0 0 0 / 0.08);border-radius:1rem;background:rgb(0 0 0 / 0.015)}.dark .mdx-content [data-component-name=\"mermaid-container\"]{--im-node-fill: #0b2e1a;--im-node-stroke: #22c55e;--im-node-text: #e7fbef;--im-cluster-fill: rgb(34 197 94 / 0.05);--im-cluster-stroke: rgb(34 197 94 / 0.35);--im-edge: #94a3b8;--im-label-bg: #0f1214;border-color:rgb(255 255 255 / 0.08);background:rgb(255 255 255 / 0.02)}.mdx-content [data-component-name=\"mermaid-container\"] svg[id^=\"mermaid\"]{display:block;margin-left:auto;margin-right:auto}.mdx-content [data-component-name=\"mermaid-container\"] .node rect,.mdx-content [data-component-name=\"mermaid-container\"] .node polygon,.mdx-content [data-component-name=\"mermaid-container\"] .node circle,.mdx-content [data-component-name=\"mermaid-container\"] .node path{fill:var(--im-node-fill)!important;stroke:var(--im-node-stroke)!important;stroke-width:1.5px!important}.mdx-content [data-component-name=\"mermaid-container\"] .node rect{rx:8px;ry:8px}.mdx-content [data-component-name=\"mermaid-container\"] .nodeLabel,.mdx-content [data-component-name=\"mermaid-container\"] .node .label{color:var(--im-node-text)!important;fill:var(--im-node-text)!important}.mdx-content [data-component-name=\"mermaid-container\"] .cluster rect{fill:var(--im-cluster-fill)!important;stroke:var(--im-cluster-stroke)!important;stroke-dasharray:6 4;rx:12px;ry:12px}.mdx-content [data-component-name=\"mermaid-container\"] .cluster-label .nodeLabel,.mdx-content [data-component-name=\"mermaid-container\"] .cluster .nodeLabel{color:var(--im-node-stroke)!important}.mdx-content [data-component-name=\"mermaid-container\"] .flowchart-link,.mdx-content [data-component-name=\"mermaid-container\"] .edgePath path{stroke:var(--im-edge)!important;stroke-width:1.5px!important}.mdx-content [data-component-name=\"mermaid-container\"] marker path,.mdx-content [data-component-name=\"mermaid-container\"] .arrowheadPath{fill:var(--im-edge)!important;stroke:var(--im-edge)!important}.mdx-content [data-component-name=\"mermaid-container\"] .edgeLabel,.mdx-content [data-component-name=\"mermaid-container\"] .edgeLabel p,.mdx-content [data-component-name=\"mermaid-container\"] .labelBkg{background-color:var(--im-label-bg)!important;color:var(--im-edge)!important}.mdx-content [data-component-name=\"mermaid-container\"] rect.actor{fill:var(--im-node-fill)!important;stroke:var(--im-node-stroke)!important;stroke-width:1.5px!important;rx:8px;ry:8px}.mdx-content [data-component-name=\"mermaid-container\"] text.actor>tspan,.mdx-content [data-component-name=\"mermaid-container\"] text.actor{fill:var(--im-node-text)!important}.mdx-content [data-component-name=\"mermaid-container\"] .actor-line{stroke:var(--im-cluster-stroke)!important}.mdx-content [data-component-name=\"mermaid-container\"] .messageLine0,.mdx-content [data-component-name=\"mermaid-container\"] .messageLine1{stroke:var(--im-edge)!important;stroke-width:1.5px!important}.mdx-content [data-component-name=\"mermaid-container\"] #arrowhead path,.mdx-content [data-component-name=\"mermaid-container\"] #crosshead path{fill:var(--im-edge)!important;stroke:var(--im-edge)!important}.mdx-content [data-component-name=\"mermaid-container\"] .note{fill:var(--im-cluster-fill)!important;stroke:var(--im-cluster-stroke)!important}.mdx-content .field .prose-sm{font-size:1.0625rem;line-height:1.8}@media (min-width: 1024px){.mdx-content .field .prose-sm{font-size:1.125rem}}.mdx-content .field{padding-top:1.25rem;padding-bottom:1.25rem}:root{--fa-accent: 22 163 74;--fa-ink: 15 23 42;--fa-button: 21 128 61;--fa-button-hover: 22 101 52;--fa-on-button: 255 255 255}.dark{--fa-accent: 34 197 94;--fa-ink: 255 255 255;--fa-button: 34 197 94;--fa-button-hover: 74 222 128;--fa-on-button: 5 46 22}.mdx-content .card{transition:border-color 150ms ease,\n background-color 150ms ease}.mdx-content a.card:hover,.mdx-content .card:has(a:hover){border-color:rgb(var(--fa-accent) / 0.45);background-color:rgb(var(--fa-accent) / 0.06)}.mdx-content .card [data-component-part=\"card-icon\"]{display:flex;width:1.75rem;height:1.75rem;margin-bottom:1rem}.mdx-content .card [data-component-part=\"card-icon\"] svg{width:1.75rem;height:1.75rem;mask-size:contain;background-color:rgb(var(--fa-accent))!important}.mdx-content .card [data-component-part=\"card-content-container\"].flex [data-component-part=\"card-icon\"]{margin-bottom:0}html[data-page-mode=\"wide\"] #header{display:none}.fa-hero{position:relative;isolation:isolate;display:grid;grid-template-columns:minmax(0, 1fr);gap:3rem;align-items:center;overflow:hidden;margin:-1.5rem 0 3.5rem;padding:3.5rem 3rem;border:1px solid rgb(var(--fa-accent) / 0.2);border-radius:1.5rem;background-color:rgb(var(--fa-accent) / 0.025);background-image:radial-gradient(\n 55% 75% at 82% 50%,\n rgb(var(--fa-accent) / 0.16),\n transparent 70%\n )}.fa-hero::before{content:'';position:absolute;inset:0;z-index:-1;background-image:linear-gradient(rgb(var(--fa-accent) / 0.1) 1px, transparent 1px),\n linear-gradient(90deg, rgb(var(--fa-accent) / 0.1) 1px, transparent 1px);background-size:2rem 2rem;background-position:-1px -1px;mask-image:radial-gradient(80% 90% at 85% 40%, #000 20%, transparent 75%);pointer-events:none}.fa-hero::after{content:'';position:absolute;top:0;right:10%;left:10%;height:1px;background:linear-gradient(\n 90deg,\n transparent,\n rgb(var(--fa-accent) / 0.8),\n transparent\n );pointer-events:none}@media (min-width: 1536px){.fa-hero{grid-template-columns:minmax(0, 0.85fr) minmax(0, 1.15fr);padding:4rem 3.5rem}}.fa-hero-code>.code-group,.fa-hero-code>.code-block{margin:0;border-color:rgb(var(--fa-accent) / 0.25);box-shadow:0 1px 0 rgb(255 255 255 / 0.04) inset,\n 0 30px 60px -24px rgb(0 0 0 / 0.55),\n 0 0 0 6px rgb(var(--fa-accent) / 0.06)}.mdx-content .fa-hero-code pre code{font-size:0.8125rem}.mdx-content .fa-hero .fa-hero-mark{margin:0 0 1.75rem}.mdx-content .fa-hero .fa-hero-mark img{display:block;width:auto;height:4rem;margin:0;border-radius:0}.mdx-content .fa-hero .fa-hero-mark .fa-hero-mark-dark,.dark .mdx-content .fa-hero .fa-hero-mark .fa-hero-mark-light{display:none}.dark .mdx-content .fa-hero .fa-hero-mark .fa-hero-mark-dark{display:block}.fa-hero h1{max-width:40rem;margin:0;font-size:3.25rem;font-weight:700;line-height:1.06;letter-spacing:-0.035em;text-wrap:balance}.fa-hero h1 .fa-hero-accent{color:rgb(var(--fa-accent))}.mdx-content .fa-hero-lede{max-width:34rem;margin:1.5rem 0 2.25rem;font-size:1.1875rem;line-height:1.7;opacity:0.78;text-wrap:pretty}.fa-hero-actions{display:flex;flex-wrap:wrap;gap:0.75rem}.mdx-content .fa-hero-facts{display:flex;flex-wrap:wrap;gap:0.5rem 1.5rem;margin-top:2rem;font-size:0.9375rem;opacity:0.8}.mdx-content .fa-hero-facts>span{display:inline-flex;align-items:center;gap:0.5rem}.mdx-content .fa-hero-facts>span::before{content:'';flex:none;width:1rem;height:1rem;background:rgb(var(--fa-accent));mask:url(\"data:image/svg+xml,%3Csvg xmlns='http://www.w3.org/2000/svg' viewBox='0 0 16 16'%3E%3Cpath d='M3.5 8.5l3 3 6-7' fill='none' stroke='%23000' stroke-width='2' stroke-linecap='round' stroke-linejoin='round'/%3E%3C/svg%3E\")\n center / contain no-repeat}.fa-button{display:inline-flex;align-items:center;gap:0.5rem;height:2.75rem;padding:0 1.125rem;border:1px solid transparent;border-radius:0.625rem;font-size:0.9375rem;font-weight:600;letter-spacing:-0.005em;text-decoration:none!important;transition:background-color 150ms ease,\n border-color 150ms ease,\n box-shadow 150ms ease,\n transform 150ms ease}.fa-button-primary{border-color:rgb(var(--fa-button) / 1);background:rgb(var(--fa-button));box-shadow:inset 0 1px 0 rgb(255 255 255 / 0.25),\n 0 8px 20px -10px rgb(var(--fa-button) / 0.9);color:rgb(var(--fa-on-button))!important}.fa-button-primary::after{content:'';width:1rem;height:1rem;background:currentcolor;mask:url(\"data:image/svg+xml,%3Csvg xmlns='http://www.w3.org/2000/svg' viewBox='0 0 16 16'%3E%3Cpath d='M3 8h9.5M8.5 4l4 4-4 4' fill='none' stroke='%23000' stroke-width='1.75' stroke-linecap='round' stroke-linejoin='round'/%3E%3C/svg%3E\")\n center / contain no-repeat;transition:transform 150ms ease}.fa-button-primary:hover{background:rgb(var(--fa-button-hover));box-shadow:inset 0 1px 0 rgb(255 255 255 / 0.25),\n 0 10px 24px -10px rgb(var(--fa-button) / 1)}.fa-button-primary:hover::after{transform:translateX(2px)}.fa-button-secondary{border-color:rgb(var(--fa-ink) / 0.16);background:rgb(var(--fa-ink) / 0.03);color:inherit!important}.fa-button-secondary:hover{border-color:rgb(var(--fa-accent) / 0.55);background:rgb(var(--fa-accent) / 0.08)}.fa-button:active{transform:translateY(1px)}.fa-button:focus-visible{outline:2px solid rgb(var(--fa-accent));outline-offset:3px}@media (prefers-reduced-motion: reduce){.fa-button,.fa-button-primary::after{transition:none}.fa-button:active,.fa-button-primary:hover::after{transform:none}}@media (max-width: 767px){.fa-hero{padding:2.5rem 1.5rem}.fa-hero h1{font-size:2.25rem}}#sidebar-content a,#sidebar-content li>button{gap:0.875rem;padding-top:0.625rem;padding-right:0.5rem;padding-bottom:0.625rem;font-size:1.125rem;line-height:1.45}#sidebar-content li+li{margin-top:0.25rem}#sidebar-content li>button>div:nth-child(2){min-width:0}#sidebar-content li>button>div:last-child{width:1.25rem;margin-left:auto;justify-content:center}#sidebar-content li>ul{margin:0.25rem 0 0.25rem 1.25rem;padding-left:0.375rem;border-left:1px solid rgb(0 0 0 / 0.1)}.dark #sidebar-content li>ul{border-left-color:rgb(255 255 255 / 0.1)}#sidebar-content li>ul>li>:is(a,button){padding-left:0.75rem!important;font-size:1.0625rem}#sidebar-content .sidebar-group-header{margin-bottom:0.625rem;font-size:0.875rem;font-weight:700;letter-spacing:0.08em;text-transform:uppercase;color:color-mix(in srgb, rgb(var(--fa-accent)) 72%, black)}.dark #sidebar-content .sidebar-group-header{color:rgb(var(--fa-accent))}#sidebar-content div:has(>.sidebar-group-header)+div:has(>.sidebar-group-header){margin-top:2.25rem}#sidebar-content a svg,#sidebar-content a img,#sidebar-content li>button>div:first-child svg,#sidebar-content li>button>div:first-child img{width:1.375rem;height:1.375rem}#sidebar-content .sidebar-group-header svg{width:1rem;height:1rem}.nav-tabs-item{gap:0.625rem;font-size:1.0625rem}.nav-tabs-item svg,.nav-tabs-item img{width:1.3125rem;height:1.3125rem}.nav-tabs-item[href^=\"/typescript\"] svg{background-color:#d4b106}.dark .nav-tabs-item[href^=\"/typescript\"] svg{background-color:#f7df1e}.nav-tabs-item[href^=\"/laravel\"] svg{background-color:#ff2d20}.nav-tabs-item[href^=\"/adonisjs\"] svg{background-color:#5a45ff}.dark .nav-tabs-item[href^=\"/adonisjs\"] svg{background-color:#8b7dff}li[data-group-tag]>button svg[style*=\"/brands/js.svg\"]{background-color:#d4b106}.dark li[data-group-tag]>button svg[style*=\"/brands/js.svg\"]{background-color:#f7df1e}li[data-group-tag]>button svg[style*=\"/brands/laravel.svg\"]{background-color:#ff2d20}#sidebar-content img[src$=\"/n8n.png\"]{transform:scale(1.35)}@media (min-width: 1024px){:root{--mintlify-slot-header-height: 6rem;--sidebar-width: 26rem}#navbar{height:6rem}#sidebar-content{top:6rem}#navbar div:has(img.nav-logo){height:100%}img.nav-logo{height:3.5rem;margin-left:0.5rem}div:has(>#search-bar-entry){position:fixed;top:1.5rem;right:7rem;z-index:40;width:clamp(11rem, calc(100vw - var(--sidebar-width) - 45rem), 24rem)}#search-bar-entry{height:3rem;padding-left:1.125rem;border-radius:0.875rem;font-size:1.0625rem}#search-bar-entry svg{width:1.125rem;height:1.125rem}}[data-switch=\"pill\"]{width:auto!important;height:auto!important;padding:0.3125rem;gap:0.25rem}.switch-option{width:2.125rem!important;height:2.125rem!important}.switch-option svg{width:1.125rem;height:1.125rem}.mdx-content .accordion-group{display:grid;gap:0.75rem;overflow:visible;border:0;border-color:transparent;border-radius:0;background:none}.mdx-content details.accordion{margin:0 0 0.75rem;border-color:transparent;border-radius:1rem!important;outline:1px solid rgb(var(--fa-ink) / 0.1);outline-offset:-1px;overflow:hidden;transition:outline-color 150ms ease,\n box-shadow 150ms ease}.mdx-content .accordion-group>details.accordion{margin:0}.mdx-content details.accordion:hover{outline-color:rgb(var(--fa-accent) / 0.35)}.mdx-content details.accordion[open]{outline-color:rgb(var(--fa-accent) / 0.45);box-shadow:inset 3px 0 0 rgb(var(--fa-accent))}.mdx-content [data-component-part=\"accordion-button\"]{gap:1rem;padding:1rem 1.25rem 1rem 1.5rem;border-radius:0!important;transition:background-color 150ms ease}.mdx-content [data-component-part=\"accordion-button\"]:hover{background:rgb(var(--fa-accent) / 0.05)}.mdx-content [data-component-part=\"accordion-button\"]:focus-visible{outline:2px solid rgb(var(--fa-accent));outline-offset:-2px}.mdx-content [data-component-part=\"accordion-caret-right\"]{order:3;width:2rem;height:2rem;border-radius:999px;background:rgb(var(--fa-ink) / 0.06);transition:background-color 150ms ease}.mdx-content [data-component-part=\"accordion-caret-right\"] svg{width:0.875rem;height:0.875rem}.mdx-content details.accordion[open] [data-component-part=\"accordion-caret-right\"]{background:rgb(var(--fa-accent) / 0.15)}.mdx-content details.accordion[open] [data-component-part=\"accordion-caret-right\"] svg{color:rgb(var(--fa-accent))}.mdx-content [data-component-part=\"accordion-icon\"]{display:inline-flex;align-items:center;justify-content:center;width:1.25rem;height:1.25rem}.mdx-content [data-component-part=\"accordion-icon\"] svg{width:1.25rem;height:1.25rem;background-color:rgb(var(--fa-accent))!important}.mdx-content [data-component-part=\"accordion-title\"]{font-size:1.1875rem}.mdx-content [data-component-part=\"accordion-content\"]{max-width:none;padding:1.5rem 2rem 1.75rem 1.5rem;border-top:1px solid rgb(var(--fa-ink) / 0.08);font-size:1.125rem;line-height:1.95}@media (min-width: 768px){.mdx-content details.accordion:has(>summary [data-component-part=\"accordion-icon\"])>[data-component-part=\"accordion-content\"]{padding-left:3.75rem}}.mdx-content [data-component-part=\"accordion-content\"]>[data-as=\"p\"],.mdx-content [data-component-part=\"accordion-content\"]>p{display:block;max-width:46rem;margin:0 0 1.25rem}.mdx-content [data-component-part=\"accordion-content\"]>:last-child{margin-bottom:0}@media (prefers-reduced-motion: reduce){.mdx-content details.accordion,.mdx-content [data-component-part=\"accordion-button\"],.mdx-content [data-component-part=\"accordion-caret-right\"]{transition:none}}[data-badge=\"true\"]{--fa-badge: 100 116 139;padding:0.125rem 0.5rem;border-radius:0.5rem;background:rgb(var(--fa-badge) / 0.14)!important;box-shadow:inset 0 0 0 1px rgb(var(--fa-badge) / 0.32);color:rgb(var(--fa-badge))!important;font-variant-numeric:tabular-nums}[data-badge=\"true\"][data-color=\"red\"]{--fa-badge: 239 68 68}[data-badge=\"true\"][data-color=\"orange\"]{--fa-badge: 245 130 32}[data-badge=\"true\"][data-color=\"yellow\"]{--fa-badge: 214 160 20}[data-badge=\"true\"][data-color=\"green\"]{--fa-badge: 22 163 74}[data-badge=\"true\"][data-color=\"blue\"]{--fa-badge: 17 145 240}.dark [data-badge=\"true\"][data-color=\"red\"]{--fa-badge: 248 113 113}.dark [data-badge=\"true\"][data-color=\"orange\"]{--fa-badge: 251 158 75}.dark [data-badge=\"true\"][data-color=\"yellow\"]{--fa-badge: 250 204 21}.dark [data-badge=\"true\"][data-color=\"green\"]{--fa-badge: 74 222 128}.dark [data-badge=\"true\"][data-color=\"blue\"]{--fa-badge: 62 165 245}.dark [data-badge=\"true\"][data-color=\"gray\"]{--fa-badge: 161 161 170}.mdx-content td [data-badge=\"true\"]+[data-badge=\"true\"]{margin-left:0.375rem}.mdx-content :is([data-as=\"p\"],p,li,td,blockquote),#header .prose,#page-title+*{color:rgb(38 43 52)}.dark .mdx-content :is([data-as=\"p\"],p,li,td,blockquote),.dark #header .prose,.dark #page-title+*{color:rgb(222 226 232)}.mdx-content :is(th,strong){font-weight:600}#sidebar-content a,#sidebar-content li>button{color:rgb(70 76 88)}.dark #sidebar-content a,.dark #sidebar-content li>button{color:rgb(196 201 210)}.toc-item a{color:inherit}.mdx-content [data-component-part=\"callout-content\"]{font-size:1.125rem;line-height:1.75}.mdx-content [data-component-part=\"callout-icon\"]{width:1.25rem;margin-top:0.25rem}.mdx-content [data-component-part=\"step-title\"]{font-size:1.25rem}.mdx-content [data-component-part=\"step-content\"],.mdx-content [data-component-part=\"tab-content\"]{font-size:1.125rem;line-height:1.85}.mdx-content [data-component-part=\"step-number\"]{margin-left:calc(0.5px - 1.125rem)}.mdx-content [data-component-part=\"step-indicator\"]{width:2.25rem;height:2.25rem;background-color:transparent;color:rgb(var(--fa-accent));font-size:1.25rem;font-weight:600}.mdx-content [data-component-part=\"step-indicator\"] svg{width:1.5rem;height:1.5rem;background-color:rgb(var(--fa-accent))!important}.mdx-content [data-component-part=\"tab-button\"]{font-size:1rem}.mdx-content [data-component-part=\"code-block-header\"],.mdx-content [data-component-part=\"code-block-header-filename\"]{font-size:0.875rem}.mdx-content [data-component-part=\"code-group-tab-bar\"]{font-size:0.9375rem}.mdx-content [data-component-part=\"field-name\"]{font-size:1.0625rem}.mdx-content [data-component-part=\"field-meta\"],.mdx-content [data-component-part=\"field-info-pill\"],.mdx-content [data-component-part=\"field-required-pill\"]{font-size:0.875rem}.mdx-content [data-component-part=\"expandable-button\"]{font-size:1rem}[data-component-part=\"pagination-title\"]{font-size:1.125rem}[data-component-part=\"pagination-label\"]{font-size:0.9375rem}.mdx-content>.multi-view-item{max-width:none;font-size:inherit;line-height:inherit}.multi-view-item>[data-as=\"p\"],.multi-view-item>p{margin-top:0;margin-bottom:1.75rem}.multi-view-item>h2{margin-top:3.5rem;margin-bottom:1.25rem;padding-top:2rem;border-top:1px solid rgb(0 0 0 / 0.08);font-size:1.875rem;letter-spacing:-0.01em}.dark .multi-view-item>h2{border-top-color:rgb(255 255 255 / 0.08)}.multi-view-item>h2:first-child{margin-top:0;padding-top:0;border-top:0}.multi-view-item>h3{margin-top:2.75rem;margin-bottom:1.125rem;font-size:1.4375rem}.multi-view-item>ul,.multi-view-item>ol{margin-bottom:1.75rem}.multi-view-item>.code-block,.multi-view-item>.code-group{margin-top:1.5rem;margin-bottom:2rem}#content-container .prose.prose-sm{font-size:1.0625rem;line-height:1.8}#sidebar-content .method-nav-pill{width:2.75rem}#sidebar-content .method-nav-pill>*{padding:0.125rem 0.375rem;font-size:0.6875rem;line-height:1.25rem}#fa-reader-values{margin-top:1.75rem;padding:1.5rem;border:1px solid rgb(var(--fa-ink) / 0.14);border-radius:1rem;background:transparent;font-size:1.0625rem;line-height:1.6;transition:border-color 150ms ease;container:fa-reader / inline-size}#fa-reader-values:hover,#fa-reader-values:focus-within{border-color:rgb(var(--fa-accent) / 0.45)}#fa-reader-values .fa-reader-line{display:grid;grid-template-columns:auto 1fr;align-items:center;gap:1rem 1.25rem}#fa-reader-values .fa-reader-toggle{grid-column:1 / -1;justify-self:start}@container fa-reader (min-width: 30rem){#fa-reader-values .fa-reader-line{grid-template-columns:auto 1fr auto}#fa-reader-values .fa-reader-line .fa-reader-toggle{grid-column:auto}}#fa-reader-values .fa-reader-icon{width:4rem;height:4rem;background:url('/logo/attract-glyph-color-a-green-on-light-scalable.svg') center / contain\n no-repeat}.dark #fa-reader-values .fa-reader-icon{background-image:url('/logo/attract-glyph-color-a-green-on-dark-scalable.svg')}#fa-reader-values .fa-reader-copy{min-width:0}#fa-reader-values .fa-reader-copy p{margin:0}#fa-reader-values .fa-reader-title{font-size:1.125rem;font-weight:600;color:rgb(var(--fa-ink))}#fa-reader-values .fa-reader-values{display:grid;grid-template-columns:auto 1fr;align-items:center;gap:0.625rem 0.875rem;margin:0.75rem 0 0}#fa-reader-values .fa-reader-values>div{display:contents}#fa-reader-values .fa-reader-values dt{font-weight:500;color:rgb(var(--fa-ink))}#fa-reader-values .fa-reader-values dd{justify-self:start;min-width:0;margin:0}#fa-reader-values code{display:inline-block;padding:0.375rem 0.875rem;border:1px solid rgb(var(--fa-accent) / 0.4);border-radius:0.5rem;background:rgb(var(--fa-ink) / 0.03);color:rgb(var(--fa-ink));font-size:0.95em;font-weight:700;line-height:1.4;overflow-wrap:anywhere}#fa-reader-values button{padding:0.625rem 1.25rem;border:1px solid rgb(var(--fa-ink) / 0.16);border-radius:0.625rem;background:rgb(var(--fa-ink) / 0.03);color:rgb(var(--fa-ink));font-weight:600;white-space:nowrap;cursor:pointer;transition:background-color 150ms ease,\n border-color 150ms ease}#fa-reader-values button:hover{border-color:rgb(var(--fa-accent) / 0.55);background:rgb(var(--fa-accent) / 0.08)}#fa-reader-values button:focus-visible,#fa-reader-values input:focus-visible{outline:2px solid rgb(var(--fa-accent));outline-offset:2px}#fa-reader-values .fa-reader-form{display:grid;grid-template-columns:1fr;gap:1.75rem 1.5rem;margin-top:1.5rem;padding:1.5rem 0.25rem 0.25rem;border-top:1px solid rgb(var(--fa-ink) / 0.1)}@media (min-width: 768px){#fa-reader-values .fa-reader-form{grid-template-columns:1fr 1fr}}#fa-reader-values .fa-reader-form[hidden]{display:none}#fa-reader-values label{display:grid;gap:0.625rem;align-content:start}#fa-reader-values label>span{font-weight:600;color:rgb(var(--fa-ink))}#fa-reader-values label em{font-style:normal;font-weight:400}#fa-reader-values input{width:100%;padding:0.75rem 1rem;border:1px solid rgb(128 128 128 / 0.4);border-radius:0.5rem;background:rgb(128 128 128 / 0.08);color:rgb(var(--fa-ink));font:inherit}#fa-reader-values small{display:block;margin-top:0.5rem;font-size:0.9375rem;line-height:1.6;color:rgb(var(--fa-ink))}#fa-reader-values .fa-reader-error{grid-column:1 / -1;margin:0;color:#dc2626}.dark #fa-reader-values .fa-reader-error{color:#f87171}#fa-reader-values .fa-reader-error:empty{display:none}#fa-reader-values .fa-reader-actions{display:flex;flex-wrap:wrap;grid-column:1 / -1;align-items:center;gap:1rem;padding-top:0.25rem}.mdx-content .n8n-canvas{--n8n-dot: rgb(0 0 0 / 0.12);--n8n-node-bg: #ffffff;--n8n-node-border: rgb(0 0 0 / 0.18);--n8n-line: #94a3b8;margin:1.75rem 0 2.25rem;padding:2rem 0.75rem 1.5rem;overflow-x:auto;border:1px solid rgb(0 0 0 / 0.08);border-radius:1rem;background-color:rgb(0 0 0 / 0.015);background-image:radial-gradient(var(--n8n-dot) 1px, transparent 1px);background-size:18px 18px}.dark .mdx-content .n8n-canvas{--n8n-dot: rgb(255 255 255 / 0.1);--n8n-node-bg: #1b1f24;--n8n-node-border: rgb(255 255 255 / 0.22);--n8n-line: #64748b;border-color:rgb(255 255 255 / 0.08);background-color:rgb(255 255 255 / 0.02)}.mdx-content .n8n-canvas-row{display:flex;align-items:flex-start;justify-content:center;min-width:max-content;margin:0 auto}.mdx-content .n8n-node{display:flex;flex-direction:column;align-items:center;width:7.25rem;text-align:center}.mdx-content .n8n-node-box{display:flex;align-items:center;justify-content:center;width:4.5rem;height:4.5rem;border:2px solid var(--n8n-node-border);border-radius:0.75rem;background:var(--n8n-node-bg);box-shadow:0 1px 3px rgb(0 0 0 / 0.08)}.mdx-content .n8n-node-trigger .n8n-node-box{border-radius:2.25rem 0.75rem 0.75rem 2.25rem}.mdx-content .n8n-node-accent .n8n-node-box{border-color:rgb(var(--fa-accent));box-shadow:0 0 0 4px rgb(var(--fa-accent) / 0.15)}.mdx-content .n8n-node-title{margin-top:0.6rem;font-size:0.95rem;font-weight:600;line-height:1.3}.mdx-content .n8n-node-note{margin-top:0.2rem;font-size:0.8rem;line-height:1.35;opacity:0.7}.mdx-content .n8n-node-box svg{width:1.9rem!important;height:1.9rem!important}.mdx-content .n8n-link{display:flex;flex-direction:column;align-items:center;width:4rem;margin:0 -1.125rem;padding-top:1.1rem}.mdx-content .n8n-link-items{height:1.1rem;font-size:0.75rem;font-weight:600;line-height:1.1rem;white-space:nowrap;color:rgb(var(--fa-accent))}.mdx-content .n8n-link-line{position:relative;width:100%;height:2px;margin-top:0.4rem;background:var(--n8n-line)}.mdx-content .n8n-link-line::after{position:absolute;top:-4px;right:-1px;border-top:5px solid transparent;border-bottom:5px solid transparent;border-left:7px solid var(--n8n-line);content:''}.mdx-content .n8n-canvas figcaption{margin-top:1.25rem;font-size:0.85rem;text-align:center;opacity:0.7}.mdx-content .n8n-signed{margin:1.5rem 0 2rem;padding:1.5rem 1.25rem 1.25rem;overflow-x:auto;border:1px solid rgb(0 0 0 / 0.08);border-radius:1rem}.dark .mdx-content .n8n-signed{border-color:rgb(255 255 255 / 0.08)}.mdx-content .n8n-signed-row{display:flex;flex-wrap:wrap;align-items:flex-start;justify-content:center;row-gap:1rem}.mdx-content .n8n-signed-part{display:flex;flex-direction:column;align-items:center;gap:0.5rem}.mdx-content .n8n-signed-value,.mdx-content .n8n-signed-dot{padding:0.35rem 0.55rem;border-radius:0.4rem;font-size:0.95rem;white-space:nowrap}.mdx-content .n8n-signed-dot{padding:0.35rem 0.15rem;background:none;font-weight:700}.mdx-content .n8n-signed-value{min-width:2.5rem;text-align:center;background:rgb(var(--n8n-part) / 0.14);box-shadow:inset 0 0 0 1px rgb(var(--n8n-part) / 0.45)}.mdx-content .n8n-signed-label{font-size:0.75rem;font-weight:600;letter-spacing:0.04em;text-transform:uppercase;color:rgb(var(--n8n-part))}.mdx-content .n8n-signed-0{--n8n-part: 37 99 235}.mdx-content .n8n-signed-1{--n8n-part: 22 163 74}.mdx-content .n8n-signed-2{--n8n-part: 217 119 6}.mdx-content .n8n-signed-3{--n8n-part: 219 39 119}.mdx-content .n8n-coming-soon-logos{display:flex;align-items:center;gap:1rem;margin-bottom:1.25rem}.mdx-content .n8n-coming-soon-logos img{width:auto;height:3.5rem;margin:0}.mdx-content .n8n-coming-soon-logos img[class^=\"n8n-mark-\"]{height:4.5rem;margin:-0.5rem}.mdx-content .n8n-coming-soon-logos .n8n-mark-dark,.dark .mdx-content .n8n-coming-soon-logos .n8n-mark-light{display:none}.dark .mdx-content .n8n-coming-soon-logos .n8n-mark-dark{display:block}.mdx-content .n8n-coming-soon-logos span{font-size:1.75rem;font-weight:600;opacity:0.6}.mdx-content .n8n-coming-soon-title{margin:0 0 0.35rem;font-size:1.25rem;font-weight:600;color:rgb(var(--fa-ink))}.mdx-content .n8n-coming-soon-title+*{margin-top:0}"}],"page":{"pagePath":"guides/content/photo-albums","slug":"/guides/content/photo-albums","pageMetadata":{"title":"Photo albums","sidebarTitle":"Photo albums","description":"Choose photos from your media library, put them in order, and show the album in any gallery section.","icon":"images","href":"/guides/content/photo-albums"},"description":{"compiledSource":"\"use strict\";\nconst {jsx: _jsx} = arguments[0];\nconst {useMDXComponents: _provideComponents} = arguments[0];\nfunction _createMdxContent(props) {\n const _components = {\n p: \"p\",\n ..._provideComponents(),\n ...props.components\n };\n return _jsx(_components.p, {\n children: \"Choose photos from your media library, put them in order, and show the album in any gallery section.\"\n });\n}\nfunction MDXContent(props = {}) {\n const {wrapper: MDXLayout} = {\n ..._provideComponents(),\n ...props.components\n };\n return MDXLayout ? _jsx(MDXLayout, {\n ...props,\n children: _jsx(_createMdxContent, {\n ...props\n })\n }) : _createMdxContent(props);\n}\nreturn {\n default: MDXContent\n};\n","frontmatter":{},"scope":{}},"pageType":"default","mdx":{"mdxSource":{"compiledSource":"\"use strict\";const{Fragment:_Fragment,jsx:_jsx,jsxs:_jsxs}=arguments[0];const{useMDXComponents:_provideComponents}=arguments[0];function _createMdxContent(props){const _components={a:`a`,li:`li`,p:`p`,strong:`strong`,ul:`ul`,..._provideComponents(),...props.components},{Accordion,AccordionGroup,Card,Columns,Frame,Heading,Icon,OptimizedImage,Step,Steps}=_components;if(!Accordion)_missingMdxReference(`Accordion`,true);if(!AccordionGroup)_missingMdxReference(`AccordionGroup`,true);if(!Card)_missingMdxReference(`Card`,true);if(!Columns)_missingMdxReference(`Columns`,true);if(!Frame)_missingMdxReference(`Frame`,true);if(!Heading)_missingMdxReference(`Heading`,true);if(!Icon)_missingMdxReference(`Icon`,true);if(!OptimizedImage)_missingMdxReference(`OptimizedImage`,true);if(!Step)_missingMdxReference(`Step`,true);if(!Steps)_missingMdxReference(`Steps`,true);return _jsxs(_Fragment,{children:[_jsx(_components.p,{children:`Show a hand-picked set of photos, in the order you want, on any page. Build the album once from your media library, then show it in a Gallery section.`}),`\n`,_jsxs(_components.p,{children:[_jsx(Icon,{icon:`user-shield`}),` `,_jsx(_components.strong,{children:`Who can do this:`}),` Contributors, Editors, Admins and Owners can build and change albums. Publishing them needs an Editor, an Admin or an Owner.`]}),`\n`,_jsx(Heading,{level:`2`,id:`before-you-start`,children:`Before you start`}),`\n`,_jsxs(_components.ul,{children:[`\n`,_jsxs(_components.li,{children:[`Upload your photos to the media library first, or upload them while you pick. See `,_jsx(_components.a,{href:`/guides/media/media-library`,children:`Media library`}),`.`]}),`\n`,_jsx(_components.li,{children:`Give each photo alt text in the media library. The album uses it for screen readers and as the photo’s caption in the full-size photo viewer (the lightbox) that opens when a visitor chooses a photo.`}),`\n`,_jsx(_components.li,{children:`Set a focal point on photos with a clear subject. Gallery layouts that crop a photo keep that spot in view.`}),`\n`,_jsxs(_components.li,{children:[`To show the album on a page, add a Gallery section too. See `,_jsx(_components.a,{href:`/guides/sections/gallery`,children:`Gallery`}),`.`]}),`\n`]}),`\n`,_jsx(Heading,{level:`2`,id:`build-an-album`,children:`Build an album`}),`\n`,_jsxs(Steps,{children:[_jsx(Step,{title:`Open the list`,children:_jsxs(_components.p,{children:[`Press ⌘K (Ctrl+K on Windows) and choose `,_jsx(_components.strong,{children:`Photo Albums`}),` under `,_jsx(_components.strong,{children:`Manage`}),`. You can also press G, then L.`]})}),_jsx(Step,{title:`Start a new album`,children:_jsxs(_components.p,{children:[`Choose `,_jsx(_components.strong,{children:`New Photo Album`}),`. The editor opens on the `,_jsx(_components.strong,{children:`Basics`}),` tab.`]})}),_jsx(Step,{title:`Name it`,children:_jsxs(_components.p,{children:[`Type a `,_jsx(_components.strong,{children:`Title`}),`, such as “Summer play days”. Add a `,_jsx(_components.strong,{children:`Description`}),` if you like. It’s a note for your team, and Gallery sections don’t show it.`]})}),_jsxs(Step,{title:`Choose the photos`,children:[_jsxs(_components.p,{children:[`Under `,_jsx(_components.strong,{children:`Photos`}),`, choose `,_jsx(_components.strong,{children:`Browse Images`}),`. Select every photo you want, then choose `,_jsx(_components.strong,{children:`Select Images`}),`. You can upload new photos from the same window.`]}),_jsxs(Frame,{caption:`Pick the album's photos from your media library.`,children:[_jsx(OptimizedImage,{className:`mint-block dark:mint-hidden`,src:`https://mintcdn.com/fetchski-attract-api/MsE85fjBwOCKqNGh/images/cms/guides/content/photo-albums/guides-content-photo-albums-browse-light.png?fit=max\u0026auto=format\u0026n=MsE85fjBwOCKqNGh\u0026q=85\u0026s=0069a2b2428f41da5776cc805da01703`,alt:`The image chooser opened from an album's Photos field, with 6 photos of puppies at play selected (check marks visible) and the confirm button ringed.`,\"data-og-width\":`3120`,width:`3120`,\"data-og-height\":`1840`,height:`1840`,\"data-path\":`images/cms/guides/content/photo-albums/guides-content-photo-albums-browse-light.png`,\"data-optimize\":`true`,\"data-opv\":`3`,srcset:`https://mintcdn.com/fetchski-attract-api/MsE85fjBwOCKqNGh/images/cms/guides/content/photo-albums/guides-content-photo-albums-browse-light.png?w=280\u0026fit=max\u0026auto=format\u0026n=MsE85fjBwOCKqNGh\u0026q=85\u0026s=bd33f7b5a9264c5a1e1bb5c2412ec169 280w, https://mintcdn.com/fetchski-attract-api/MsE85fjBwOCKqNGh/images/cms/guides/content/photo-albums/guides-content-photo-albums-browse-light.png?w=560\u0026fit=max\u0026auto=format\u0026n=MsE85fjBwOCKqNGh\u0026q=85\u0026s=2d23cc5da33abfd7173169146a153eb5 560w, https://mintcdn.com/fetchski-attract-api/MsE85fjBwOCKqNGh/images/cms/guides/content/photo-albums/guides-content-photo-albums-browse-light.png?w=840\u0026fit=max\u0026auto=format\u0026n=MsE85fjBwOCKqNGh\u0026q=85\u0026s=9808b284751a795cd5686f84e5c47f32 840w, https://mintcdn.com/fetchski-attract-api/MsE85fjBwOCKqNGh/images/cms/guides/content/photo-albums/guides-content-photo-albums-browse-light.png?w=1100\u0026fit=max\u0026auto=format\u0026n=MsE85fjBwOCKqNGh\u0026q=85\u0026s=d815c09bce79a350243c7c9ee7fc40ee 1100w, https://mintcdn.com/fetchski-attract-api/MsE85fjBwOCKqNGh/images/cms/guides/content/photo-albums/guides-content-photo-albums-browse-light.png?w=1650\u0026fit=max\u0026auto=format\u0026n=MsE85fjBwOCKqNGh\u0026q=85\u0026s=2581c2ab20ce875dd48e90be1f4cf393 1650w, https://mintcdn.com/fetchski-attract-api/MsE85fjBwOCKqNGh/images/cms/guides/content/photo-albums/guides-content-photo-albums-browse-light.png?w=2500\u0026fit=max\u0026auto=format\u0026n=MsE85fjBwOCKqNGh\u0026q=85\u0026s=859b3df1d3cb3c6cbdc20eaa92eabd78 2500w`}),_jsx(OptimizedImage,{className:`mint-hidden dark:mint-block`,src:`https://mintcdn.com/fetchski-attract-api/MsE85fjBwOCKqNGh/images/cms/guides/content/photo-albums/guides-content-photo-albums-browse-dark.png?fit=max\u0026auto=format\u0026n=MsE85fjBwOCKqNGh\u0026q=85\u0026s=25c516375c1e1f4450ed304c33d4d6a0`,alt:`The image chooser opened from an album's Photos field, with 6 photos of puppies at play selected (check marks visible) and the confirm button ringed.`,\"data-og-width\":`3120`,width:`3120`,\"data-og-height\":`1840`,height:`1840`,\"data-path\":`images/cms/guides/content/photo-albums/guides-content-photo-albums-browse-dark.png`,\"data-optimize\":`true`,\"data-opv\":`3`,srcset:`https://mintcdn.com/fetchski-attract-api/MsE85fjBwOCKqNGh/images/cms/guides/content/photo-albums/guides-content-photo-albums-browse-dark.png?w=280\u0026fit=max\u0026auto=format\u0026n=MsE85fjBwOCKqNGh\u0026q=85\u0026s=e71625b3d79a7909e359d9ee7938eeab 280w, https://mintcdn.com/fetchski-attract-api/MsE85fjBwOCKqNGh/images/cms/guides/content/photo-albums/guides-content-photo-albums-browse-dark.png?w=560\u0026fit=max\u0026auto=format\u0026n=MsE85fjBwOCKqNGh\u0026q=85\u0026s=e5bab4b835df639e84bb80602af76415 560w, https://mintcdn.com/fetchski-attract-api/MsE85fjBwOCKqNGh/images/cms/guides/content/photo-albums/guides-content-photo-albums-browse-dark.png?w=840\u0026fit=max\u0026auto=format\u0026n=MsE85fjBwOCKqNGh\u0026q=85\u0026s=867d1803a754f3f5c7e87c99b573731d 840w, https://mintcdn.com/fetchski-attract-api/MsE85fjBwOCKqNGh/images/cms/guides/content/photo-albums/guides-content-photo-albums-browse-dark.png?w=1100\u0026fit=max\u0026auto=format\u0026n=MsE85fjBwOCKqNGh\u0026q=85\u0026s=1da601f4ee91b97c926b9a6d25bf3dd6 1100w, https://mintcdn.com/fetchski-attract-api/MsE85fjBwOCKqNGh/images/cms/guides/content/photo-albums/guides-content-photo-albums-browse-dark.png?w=1650\u0026fit=max\u0026auto=format\u0026n=MsE85fjBwOCKqNGh\u0026q=85\u0026s=bcda750259d23928a7c44aa57f3bf387 1650w, https://mintcdn.com/fetchski-attract-api/MsE85fjBwOCKqNGh/images/cms/guides/content/photo-albums/guides-content-photo-albums-browse-dark.png?w=2500\u0026fit=max\u0026auto=format\u0026n=MsE85fjBwOCKqNGh\u0026q=85\u0026s=e2bd23c035f3a5f1176bb19daac0a2e1 2500w`})]})]}),_jsxs(Step,{title:`Put them in order`,children:[_jsx(_components.p,{children:`Back in the editor, drag the photos into the order you want. Galleries show them in this order.`}),_jsxs(Frame,{caption:`Drag the photos into the order your gallery shows.`,children:[_jsx(OptimizedImage,{className:`mint-block dark:mint-hidden`,src:`https://mintcdn.com/fetchski-attract-api/MsE85fjBwOCKqNGh/images/cms/guides/content/photo-albums/guides-content-photo-albums-basics-light.png?fit=max\u0026auto=format\u0026n=MsE85fjBwOCKqNGh\u0026q=85\u0026s=cb41102734530817a0cd9f760485f5f1`,alt:`The album editor on the Basics tab: Title \"Summer play days\", a one-line Description, and the Photos field holding 6 photos in order, one being dragged.`,\"data-og-width\":`2480`,width:`2480`,\"data-og-height\":`1966`,height:`1966`,\"data-path\":`images/cms/guides/content/photo-albums/guides-content-photo-albums-basics-light.png`,\"data-optimize\":`true`,\"data-opv\":`3`,srcset:`https://mintcdn.com/fetchski-attract-api/MsE85fjBwOCKqNGh/images/cms/guides/content/photo-albums/guides-content-photo-albums-basics-light.png?w=280\u0026fit=max\u0026auto=format\u0026n=MsE85fjBwOCKqNGh\u0026q=85\u0026s=25d0afb9a40b0076b7a020d262f9ab06 280w, https://mintcdn.com/fetchski-attract-api/MsE85fjBwOCKqNGh/images/cms/guides/content/photo-albums/guides-content-photo-albums-basics-light.png?w=560\u0026fit=max\u0026auto=format\u0026n=MsE85fjBwOCKqNGh\u0026q=85\u0026s=83c7a2acca89d513c1fefd5ec4aeaea2 560w, https://mintcdn.com/fetchski-attract-api/MsE85fjBwOCKqNGh/images/cms/guides/content/photo-albums/guides-content-photo-albums-basics-light.png?w=840\u0026fit=max\u0026auto=format\u0026n=MsE85fjBwOCKqNGh\u0026q=85\u0026s=388aa2463d18edc96f2345fac75017c5 840w, https://mintcdn.com/fetchski-attract-api/MsE85fjBwOCKqNGh/images/cms/guides/content/photo-albums/guides-content-photo-albums-basics-light.png?w=1100\u0026fit=max\u0026auto=format\u0026n=MsE85fjBwOCKqNGh\u0026q=85\u0026s=d190603f35cec4b3ac83d4307acf87c3 1100w, https://mintcdn.com/fetchski-attract-api/MsE85fjBwOCKqNGh/images/cms/guides/content/photo-albums/guides-content-photo-albums-basics-light.png?w=1650\u0026fit=max\u0026auto=format\u0026n=MsE85fjBwOCKqNGh\u0026q=85\u0026s=37724db17a5974012a154a8890baeed3 1650w, https://mintcdn.com/fetchski-attract-api/MsE85fjBwOCKqNGh/images/cms/guides/content/photo-albums/guides-content-photo-albums-basics-light.png?w=2500\u0026fit=max\u0026auto=format\u0026n=MsE85fjBwOCKqNGh\u0026q=85\u0026s=619df89e4eb2a2b30f8b0c31b599cdf5 2500w`}),_jsx(OptimizedImage,{className:`mint-hidden dark:mint-block`,src:`https://mintcdn.com/fetchski-attract-api/tIdeo2aKESm5opj4/images/cms/guides/content/photo-albums/guides-content-photo-albums-basics-dark.png?fit=max\u0026auto=format\u0026n=tIdeo2aKESm5opj4\u0026q=85\u0026s=fffab453e1800c44c41d2c8efb128530`,alt:`The album editor on the Basics tab: Title \"Summer play days\", a one-line Description, and the Photos field holding 6 photos in order, one being dragged.`,\"data-og-width\":`2480`,width:`2480`,\"data-og-height\":`1966`,height:`1966`,\"data-path\":`images/cms/guides/content/photo-albums/guides-content-photo-albums-basics-dark.png`,\"data-optimize\":`true`,\"data-opv\":`3`,srcset:`https://mintcdn.com/fetchski-attract-api/tIdeo2aKESm5opj4/images/cms/guides/content/photo-albums/guides-content-photo-albums-basics-dark.png?w=280\u0026fit=max\u0026auto=format\u0026n=tIdeo2aKESm5opj4\u0026q=85\u0026s=6cb85c727066554f58c19ebe3e7241f0 280w, https://mintcdn.com/fetchski-attract-api/tIdeo2aKESm5opj4/images/cms/guides/content/photo-albums/guides-content-photo-albums-basics-dark.png?w=560\u0026fit=max\u0026auto=format\u0026n=tIdeo2aKESm5opj4\u0026q=85\u0026s=e0b298d658f19f959882deda5b036f56 560w, https://mintcdn.com/fetchski-attract-api/tIdeo2aKESm5opj4/images/cms/guides/content/photo-albums/guides-content-photo-albums-basics-dark.png?w=840\u0026fit=max\u0026auto=format\u0026n=tIdeo2aKESm5opj4\u0026q=85\u0026s=2d7502b762fc1b514274aa0e5b6dc5e7 840w, https://mintcdn.com/fetchski-attract-api/tIdeo2aKESm5opj4/images/cms/guides/content/photo-albums/guides-content-photo-albums-basics-dark.png?w=1100\u0026fit=max\u0026auto=format\u0026n=tIdeo2aKESm5opj4\u0026q=85\u0026s=d0b12a0192c4cd50cea3515b028dda90 1100w, https://mintcdn.com/fetchski-attract-api/tIdeo2aKESm5opj4/images/cms/guides/content/photo-albums/guides-content-photo-albums-basics-dark.png?w=1650\u0026fit=max\u0026auto=format\u0026n=tIdeo2aKESm5opj4\u0026q=85\u0026s=dacfaca58e7b9fe30d400de3ba1b7de3 1650w, https://mintcdn.com/fetchski-attract-api/tIdeo2aKESm5opj4/images/cms/guides/content/photo-albums/guides-content-photo-albums-basics-dark.png?w=2500\u0026fit=max\u0026auto=format\u0026n=tIdeo2aKESm5opj4\u0026q=85\u0026s=fe471d5375cee45e771200a5e12bf158 2500w`})]})]}),_jsx(Step,{title:`Save it`,children:_jsxs(_components.p,{children:[`To finish later, open `,_jsx(_components.strong,{children:`More save options`}),` (the arrow next to the main button) and choose `,_jsx(_components.strong,{children:`Save Draft`}),`. When it’s ready, choose `,_jsx(_components.strong,{children:`Publish`}),`. Contributors choose `,_jsx(_components.strong,{children:`Submit`}),` instead, and an Editor publishes it.`]})})]}),`\n`,_jsx(Heading,{level:`2`,id:`show-it-on-a-page`,children:`Show it on a page`}),`\n`,_jsxs(_components.p,{children:[`In a `,_jsx(_components.strong,{children:`Gallery Preview`}),` or `,_jsx(_components.strong,{children:`Gallery (Full)`}),` section, open the `,_jsx(_components.strong,{children:`Gallery`}),` tab. Set `,_jsx(_components.strong,{children:`Photo source`}),` to `,_jsx(_components.strong,{children:`Photo Album (hand-picked, hand-ordered)`}),`, then choose your album under `,_jsx(_components.strong,{children:`Album`}),`.`]}),`\n`,_jsxs(_components.p,{children:[`The same album can appear in any number of sections, on any number of pages. When you change the album and publish it, every section that shows it updates. See `,_jsx(_components.a,{href:`/guides/sections/gallery`,children:`Gallery`}),`.`]}),`\n`,_jsx(Heading,{level:`2`,id:`keep-its-photos-filed-in-a-folder`,children:`Keep its photos filed in a folder`}),`\n`,_jsxs(_components.p,{children:[`Keep your media library tidy by filing each album’s photos in one folder. You set this on the album’s `,_jsx(_components.strong,{children:`Organize`}),` tab.`]}),`\n`,_jsxs(_components.ul,{children:[`\n`,_jsxs(_components.li,{children:[_jsx(_components.strong,{children:`Keep photos organized in a folder`}),`: on by default. When you publish, photos in the album that aren’t in any folder yet move into the album’s folder.`]}),`\n`,_jsxs(_components.li,{children:[_jsx(_components.strong,{children:`Album folder`}),`: the folder those photos move into. Leave it empty and Attract makes one for you, inside the `,_jsx(_components.strong,{children:`Albums`}),` folder of your media library. Or choose any folder you already have.`]}),`\n`]}),`\n`,_jsxs(Frame,{caption:`Each album can keep its photos in its own folder.`,children:[_jsx(OptimizedImage,{className:`mint-block dark:mint-hidden`,src:`https://mintcdn.com/fetchski-attract-api/eK8pBpUam_xD3uEM/images/cms/guides/content/photo-albums/guides-content-photo-albums-organize-light.png?fit=max\u0026auto=format\u0026n=eK8pBpUam_xD3uEM\u0026q=85\u0026s=dca9c6461374af338a57d595248dcc70`,alt:`The album editor on the Organize tab: Keep photos organized in a folder on, and the Album folder \"Summer play days\" chosen.`,\"data-og-width\":`2480`,width:`2480`,\"data-og-height\":`1260`,height:`1260`,\"data-path\":`images/cms/guides/content/photo-albums/guides-content-photo-albums-organize-light.png`,\"data-optimize\":`true`,\"data-opv\":`3`,srcset:`https://mintcdn.com/fetchski-attract-api/eK8pBpUam_xD3uEM/images/cms/guides/content/photo-albums/guides-content-photo-albums-organize-light.png?w=280\u0026fit=max\u0026auto=format\u0026n=eK8pBpUam_xD3uEM\u0026q=85\u0026s=cdc4b822cc00fbb769602bc5e2c6fd07 280w, https://mintcdn.com/fetchski-attract-api/eK8pBpUam_xD3uEM/images/cms/guides/content/photo-albums/guides-content-photo-albums-organize-light.png?w=560\u0026fit=max\u0026auto=format\u0026n=eK8pBpUam_xD3uEM\u0026q=85\u0026s=8fec51952d74de1d593ac535ebdc2918 560w, https://mintcdn.com/fetchski-attract-api/eK8pBpUam_xD3uEM/images/cms/guides/content/photo-albums/guides-content-photo-albums-organize-light.png?w=840\u0026fit=max\u0026auto=format\u0026n=eK8pBpUam_xD3uEM\u0026q=85\u0026s=c38773e5e7d427fcaa5bf75b78e4a965 840w, https://mintcdn.com/fetchski-attract-api/eK8pBpUam_xD3uEM/images/cms/guides/content/photo-albums/guides-content-photo-albums-organize-light.png?w=1100\u0026fit=max\u0026auto=format\u0026n=eK8pBpUam_xD3uEM\u0026q=85\u0026s=36a27d1902d47608c00a6622eb25e37c 1100w, https://mintcdn.com/fetchski-attract-api/eK8pBpUam_xD3uEM/images/cms/guides/content/photo-albums/guides-content-photo-albums-organize-light.png?w=1650\u0026fit=max\u0026auto=format\u0026n=eK8pBpUam_xD3uEM\u0026q=85\u0026s=26f1182c3b564ab464bd9a0736b9e3e3 1650w, https://mintcdn.com/fetchski-attract-api/eK8pBpUam_xD3uEM/images/cms/guides/content/photo-albums/guides-content-photo-albums-organize-light.png?w=2500\u0026fit=max\u0026auto=format\u0026n=eK8pBpUam_xD3uEM\u0026q=85\u0026s=0c34a0767f18439b14e26ee716a2ccf7 2500w`}),_jsx(OptimizedImage,{className:`mint-hidden dark:mint-block`,src:`https://mintcdn.com/fetchski-attract-api/eK8pBpUam_xD3uEM/images/cms/guides/content/photo-albums/guides-content-photo-albums-organize-dark.png?fit=max\u0026auto=format\u0026n=eK8pBpUam_xD3uEM\u0026q=85\u0026s=adf1009b17e331e56060b45253a5d677`,alt:`The album editor on the Organize tab: Keep photos organized in a folder on, and the Album folder \"Summer play days\" chosen.`,\"data-og-width\":`2480`,width:`2480`,\"data-og-height\":`1260`,height:`1260`,\"data-path\":`images/cms/guides/content/photo-albums/guides-content-photo-albums-organize-dark.png`,\"data-optimize\":`true`,\"data-opv\":`3`,srcset:`https://mintcdn.com/fetchski-attract-api/eK8pBpUam_xD3uEM/images/cms/guides/content/photo-albums/guides-content-photo-albums-organize-dark.png?w=280\u0026fit=max\u0026auto=format\u0026n=eK8pBpUam_xD3uEM\u0026q=85\u0026s=7a86b6e15a42c6c09f0844d4ff71317f 280w, https://mintcdn.com/fetchski-attract-api/eK8pBpUam_xD3uEM/images/cms/guides/content/photo-albums/guides-content-photo-albums-organize-dark.png?w=560\u0026fit=max\u0026auto=format\u0026n=eK8pBpUam_xD3uEM\u0026q=85\u0026s=d6fabe14f4272a475a185df5f851be7b 560w, https://mintcdn.com/fetchski-attract-api/eK8pBpUam_xD3uEM/images/cms/guides/content/photo-albums/guides-content-photo-albums-organize-dark.png?w=840\u0026fit=max\u0026auto=format\u0026n=eK8pBpUam_xD3uEM\u0026q=85\u0026s=bc4658b1386404faf1dece670ee02ebe 840w, https://mintcdn.com/fetchski-attract-api/eK8pBpUam_xD3uEM/images/cms/guides/content/photo-albums/guides-content-photo-albums-organize-dark.png?w=1100\u0026fit=max\u0026auto=format\u0026n=eK8pBpUam_xD3uEM\u0026q=85\u0026s=e2a80e5abbeeb97a39340602c75595bd 1100w, https://mintcdn.com/fetchski-attract-api/eK8pBpUam_xD3uEM/images/cms/guides/content/photo-albums/guides-content-photo-albums-organize-dark.png?w=1650\u0026fit=max\u0026auto=format\u0026n=eK8pBpUam_xD3uEM\u0026q=85\u0026s=30e5a929552c180032a4b742b02372f8 1650w, https://mintcdn.com/fetchski-attract-api/eK8pBpUam_xD3uEM/images/cms/guides/content/photo-albums/guides-content-photo-albums-organize-dark.png?w=2500\u0026fit=max\u0026auto=format\u0026n=eK8pBpUam_xD3uEM\u0026q=85\u0026s=1cdd60f92427346cc6d3cca11a9822e7 2500w`})]}),`\n`,_jsx(_components.p,{children:`Filing never undoes your own choices:`}),`\n`,_jsxs(_components.ul,{children:[`\n`,_jsx(_components.li,{children:`Photos you’ve already filed in another folder stay where they are.`}),`\n`,_jsx(_components.li,{children:`Taking a photo out of the album doesn’t move it back.`}),`\n`,_jsx(_components.li,{children:`If you change the folder later, only photos filed from then on go to the new one.`}),`\n`]}),`\n`,_jsxs(_components.p,{children:[`See `,_jsx(_components.a,{href:`/guides/media/folders`,children:`Folders`}),` to learn more about folders.`]}),`\n`,_jsx(Heading,{level:`2`,id:`make-an-album-from-a-folder`,children:`Make an album from a folder`}),`\n`,_jsx(_components.p,{children:`Already have a folder of photos? Turn it into an album in a few clicks.`}),`\n`,_jsxs(Steps,{children:[_jsx(Step,{title:`Press ⌘K (Ctrl+K on Windows) and choose Images under Manage`}),_jsx(Step,{title:`Find the folder, open its Folder actions menu, and choose Create album from folder…`}),_jsx(Step,{title:`Type an Album title and choose Create album`,children:_jsx(_components.p,{children:`You’ll see “Draft album “…” created.”`})})]}),`\n`,_jsxs(_components.p,{children:[`The new album is a draft holding the photos directly inside that folder, oldest upload first, up to 500. Photos in subfolders aren’t included. Open it in `,_jsx(_components.strong,{children:`Photo Albums`}),`, put the photos in order, then publish it.`]}),`\n`,_jsxs(Frame,{caption:`Turn a folder of photos into a draft album.`,children:[_jsx(OptimizedImage,{className:`mint-block dark:mint-hidden`,src:`https://mintcdn.com/fetchski-attract-api/MsE85fjBwOCKqNGh/images/cms/guides/content/photo-albums/guides-content-photo-albums-from-folder-light.png?fit=max\u0026auto=format\u0026n=MsE85fjBwOCKqNGh\u0026q=85\u0026s=c6309b732c02b902e89fb373633f5f18`,alt:`The Create album from folder prompt over the Images manager, Album title \"Training class graduates\", the lede naming the folder and its 12 images.`,\"data-og-width\":`1144`,width:`1144`,\"data-og-height\":`1062`,height:`1062`,\"data-path\":`images/cms/guides/content/photo-albums/guides-content-photo-albums-from-folder-light.png`,\"data-optimize\":`true`,\"data-opv\":`3`,srcset:`https://mintcdn.com/fetchski-attract-api/MsE85fjBwOCKqNGh/images/cms/guides/content/photo-albums/guides-content-photo-albums-from-folder-light.png?w=280\u0026fit=max\u0026auto=format\u0026n=MsE85fjBwOCKqNGh\u0026q=85\u0026s=7b65d0eab9f0911c8a0434d860155efc 280w, https://mintcdn.com/fetchski-attract-api/MsE85fjBwOCKqNGh/images/cms/guides/content/photo-albums/guides-content-photo-albums-from-folder-light.png?w=560\u0026fit=max\u0026auto=format\u0026n=MsE85fjBwOCKqNGh\u0026q=85\u0026s=a033ce4e85c9c8ca405dd57ea9f9b44a 560w, https://mintcdn.com/fetchski-attract-api/MsE85fjBwOCKqNGh/images/cms/guides/content/photo-albums/guides-content-photo-albums-from-folder-light.png?w=840\u0026fit=max\u0026auto=format\u0026n=MsE85fjBwOCKqNGh\u0026q=85\u0026s=b9f1e6cefa879f8033bcbbc3cdacb328 840w, https://mintcdn.com/fetchski-attract-api/MsE85fjBwOCKqNGh/images/cms/guides/content/photo-albums/guides-content-photo-albums-from-folder-light.png?w=1100\u0026fit=max\u0026auto=format\u0026n=MsE85fjBwOCKqNGh\u0026q=85\u0026s=7f13a08e3aaa935d1843eb5848188877 1100w, https://mintcdn.com/fetchski-attract-api/MsE85fjBwOCKqNGh/images/cms/guides/content/photo-albums/guides-content-photo-albums-from-folder-light.png?w=1650\u0026fit=max\u0026auto=format\u0026n=MsE85fjBwOCKqNGh\u0026q=85\u0026s=b8ce6a3f531fe5a3aedc34103109c787 1650w, https://mintcdn.com/fetchski-attract-api/MsE85fjBwOCKqNGh/images/cms/guides/content/photo-albums/guides-content-photo-albums-from-folder-light.png?w=2500\u0026fit=max\u0026auto=format\u0026n=MsE85fjBwOCKqNGh\u0026q=85\u0026s=84fda1704fb2d6ce00366fb9f3caa341 2500w`}),_jsx(OptimizedImage,{className:`mint-hidden dark:mint-block`,src:`https://mintcdn.com/fetchski-attract-api/MsE85fjBwOCKqNGh/images/cms/guides/content/photo-albums/guides-content-photo-albums-from-folder-dark.png?fit=max\u0026auto=format\u0026n=MsE85fjBwOCKqNGh\u0026q=85\u0026s=2ce7a44bf58e6f029ad0a5150ab3862a`,alt:`The Create album from folder prompt over the Images manager, Album title \"Training class graduates\", the lede naming the folder and its 12 images.`,\"data-og-width\":`1144`,width:`1144`,\"data-og-height\":`1062`,height:`1062`,\"data-path\":`images/cms/guides/content/photo-albums/guides-content-photo-albums-from-folder-dark.png`,\"data-optimize\":`true`,\"data-opv\":`3`,srcset:`https://mintcdn.com/fetchski-attract-api/MsE85fjBwOCKqNGh/images/cms/guides/content/photo-albums/guides-content-photo-albums-from-folder-dark.png?w=280\u0026fit=max\u0026auto=format\u0026n=MsE85fjBwOCKqNGh\u0026q=85\u0026s=eea1ca88fd021e66e64155766c9703a3 280w, https://mintcdn.com/fetchski-attract-api/MsE85fjBwOCKqNGh/images/cms/guides/content/photo-albums/guides-content-photo-albums-from-folder-dark.png?w=560\u0026fit=max\u0026auto=format\u0026n=MsE85fjBwOCKqNGh\u0026q=85\u0026s=cf1da23602b62889ab66afa49f0b411d 560w, https://mintcdn.com/fetchski-attract-api/MsE85fjBwOCKqNGh/images/cms/guides/content/photo-albums/guides-content-photo-albums-from-folder-dark.png?w=840\u0026fit=max\u0026auto=format\u0026n=MsE85fjBwOCKqNGh\u0026q=85\u0026s=eaa43e8292608017fb7b9acf894573b0 840w, https://mintcdn.com/fetchski-attract-api/MsE85fjBwOCKqNGh/images/cms/guides/content/photo-albums/guides-content-photo-albums-from-folder-dark.png?w=1100\u0026fit=max\u0026auto=format\u0026n=MsE85fjBwOCKqNGh\u0026q=85\u0026s=d4c11c5a0907b524233b550e38ce3767 1100w, https://mintcdn.com/fetchski-attract-api/MsE85fjBwOCKqNGh/images/cms/guides/content/photo-albums/guides-content-photo-albums-from-folder-dark.png?w=1650\u0026fit=max\u0026auto=format\u0026n=MsE85fjBwOCKqNGh\u0026q=85\u0026s=4504e00ce1708942b1868f0564e9c5df 1650w, https://mintcdn.com/fetchski-attract-api/MsE85fjBwOCKqNGh/images/cms/guides/content/photo-albums/guides-content-photo-albums-from-folder-dark.png?w=2500\u0026fit=max\u0026auto=format\u0026n=MsE85fjBwOCKqNGh\u0026q=85\u0026s=047c9bf972ca417b7e16fa150b8fb967 2500w`})]}),`\n`,_jsx(Heading,{level:`2`,id:`what-happens-next`,children:`What happens next`}),`\n`,_jsxs(_components.p,{children:[`A published album shows in every Gallery section that uses it. Visitors never see drafts. If you later archive or delete a photo the album uses, the album’s editor shows a missing-images notice so you can replace it. See `,_jsx(_components.a,{href:`/guides/media/broken-media`,children:`Broken media`}),`.`]}),`\n`,_jsx(Heading,{level:`2`,id:`troubleshooting`,children:`Troubleshooting`}),`\n`,_jsxs(AccordionGroup,{children:[_jsx(Accordion,{title:`My album isn't in a gallery section's Album list`,id:`my-album-isnt-in-a-gallery-sections-album-list`,children:_jsxs(_components.p,{children:[`Check the section’s `,_jsx(_components.strong,{children:`Photo source`}),` is `,_jsx(_components.strong,{children:`Photo Album (hand-picked, hand-ordered)`}),`. The `,_jsx(_components.strong,{children:`Album`}),` choice only shows for that source. Also check the album is published.`]})}),_jsx(Accordion,{title:`A photo has no caption in the lightbox`,id:`a-photo-has-no-caption-in-the-lightbox`,children:_jsx(_components.p,{children:`Captions come from each photo’s alt text. Open the photo in the media library, add alt text, and save.`})}),_jsx(Accordion,{title:`This folder is managed automatically and cannot become an album`,id:`this-folder-is-managed-automatically-and-cannot-become-an-album`,children:_jsxs(_components.p,{children:[`The `,_jsx(_components.strong,{children:`Albums`}),`, `,_jsx(_components.strong,{children:`Photo Feeds`}),`, `,_jsx(_components.strong,{children:`Pages \u0026 Posts`}),` and `,_jsx(_components.strong,{children:`FetchskiAI references`}),` folders are looked after by Attract. Choose a folder you made yourself.`]})}),_jsx(Accordion,{title:`The album “…” already uses this folder`,id:`the-album-already-uses-this-folder`,children:_jsx(_components.p,{children:`Each folder belongs to one album. Open that album instead, or choose a different folder.`})})]}),`\n`,_jsx(Heading,{level:`2`,id:`related`,children:`Related`}),`\n`,_jsxs(Columns,{cols:2,children:[_jsx(Card,{title:`Gallery`,icon:`images`,href:`/guides/sections/gallery`,children:_jsx(_components.p,{children:`show an album on a page, in 8 layouts.`})}),_jsx(Card,{title:`Photo feeds`,icon:`arrows-rotate`,href:`/guides/content/photo-feeds`,children:_jsx(_components.p,{children:`fresh photos pulled in on a schedule instead of hand-picked.`})}),_jsx(Card,{title:`Folders`,icon:`folder-tree`,href:`/guides/media/folders`,children:_jsx(_components.p,{children:`organize your media library.`})}),_jsx(Card,{title:`Archive, restore and delete`,icon:`trash-can`,href:`/guides/content/archive-restore-delete`,children:_jsx(_components.p,{children:`retire albums you no longer need.`})})]})]})}function MDXContent(props={}){const{wrapper:MDXLayout}={..._provideComponents(),...props.components};return MDXLayout?_jsx(MDXLayout,{...props,children:_jsx(_createMdxContent,{...props})}):_createMdxContent(props)}return{default:MDXContent};function _missingMdxReference(id,component){throw new Error(`Expected `+(component?`component`:`object`)+\" `\"+id+\"` to be defined: you likely forgot to import, pass, or provide it.\")}","frontmatter":{},"scope":{"codeStyling":"dark","config":{},"pageMetadata":{"title":"Photo albums","sidebarTitle":"Photo albums","description":"Choose photos from your media library, put them in order, and show the album in any gallery section.","icon":"images","href":"/guides/content/photo-albums"}}},"mdxSourceWithNoJs":null},"mdxExtracts":{"tableOfContents":[{"title":"Before you start","slug":"before-you-start","depth":2,"children":[]},{"title":"Build an album","slug":"build-an-album","depth":2,"children":[]},{"title":"Show it on a page","slug":"show-it-on-a-page","depth":2,"children":[]},{"title":"Keep its photos filed in a folder","slug":"keep-its-photos-filed-in-a-folder","depth":2,"children":[]},{"title":"Make an album from a folder","slug":"make-an-album-from-a-folder","depth":2,"children":[]},{"title":"What happens next","slug":"what-happens-next","depth":2,"children":[]},{"title":"Troubleshooting","slug":"troubleshooting","depth":2,"children":[]},{"title":"Related","slug":"related","depth":2,"children":[]}],"codeExamples":{}},"jsLinks":["/_mintlify/custom/fetchski-attract-api/f59e82e583443cfa/reader-values.js"],"dynamicCss":".mint-block {\n display: block\n}\n.mint-hidden {\n display: none\n}\n.dark\\:mint-block:is(.dark *) {\n display: block\n}\n.dark\\:mint-hidden:is(.dark *) {\n display: none\n}","subdomain":"fetchski-attract-api","siteName":"Fetchski Attract Docs","title":"Photo albums - Fetchski Attract Docs","navMaps":{"firstHrefInVersion":{},"firstHrefInLanguage":{}},"lastModified":"2026-11-13T09:58:32.523Z","originalFileLocation":"guides/content/photo-albums.mdx"},"headHtml":"\u003cscript data-mint-head>(function(){var d=document.documentElement,p=null;if(!p){try{p=localStorage.getItem(\"isDarkMode\")}catch(e){}if(p==='true')p='dark';else if(p==='false')p='light';if(p!=='light'\u0026\u0026p!=='dark'\u0026\u0026p!=='system')p=\"dark\"}var r=p==='system'?(matchMedia(\"(prefers-color-scheme: dark)\").matches?'dark':'light'):p;d.classList.remove(r==='dark'?'light':'dark');d.classList.add(r);d.setAttribute(\"data-theme-preference\",p)})();\u003c/script>\u003cmeta data-mint-head name=\"description\" content=\"Choose photos from your media library, put them in order, and show the album in any gallery section.\">\u003cmeta data-mint-head name=\"application-name\" content=\"Fetchski Attract Docs\">\u003cmeta data-mint-head name=\"generator\" content=\"Mintlify\">\u003cmeta data-mint-head name=\"robots\" content=\"noindex, nofollow\">\u003clink data-mint-head rel=\"icon\" type=\"image/png\" sizes=\"192x192\" href=\"/mintlify-assets/_mintlify/favicons/fetchski-attract-api/70pYtWMpcnXR0SYV/_generated/favicon/android-chrome-192x192.png\" media=\"(prefers-color-scheme: light)\">\u003clink data-mint-head rel=\"apple-touch-icon\" type=\"image/png\" sizes=\"180x180\" href=\"/mintlify-assets/_mintlify/favicons/fetchski-attract-api/70pYtWMpcnXR0SYV/_generated/favicon/apple-touch-icon.png\">\u003clink data-mint-head rel=\"icon\" type=\"image/png\" sizes=\"16x16\" href=\"/mintlify-assets/_mintlify/favicons/fetchski-attract-api/70pYtWMpcnXR0SYV/_generated/favicon/favicon-16x16.png\" media=\"(prefers-color-scheme: light)\">\u003clink data-mint-head rel=\"icon\" type=\"image/png\" sizes=\"32x32\" href=\"/mintlify-assets/_mintlify/favicons/fetchski-attract-api/70pYtWMpcnXR0SYV/_generated/favicon/favicon-32x32.png\" media=\"(prefers-color-scheme: light)\">\u003clink data-mint-head rel=\"shortcut icon\" type=\"image/x-icon\" href=\"/mintlify-assets/_mintlify/favicons/fetchski-attract-api/70pYtWMpcnXR0SYV/_generated/favicon/favicon.ico\" media=\"(prefers-color-scheme: light)\">\u003clink data-mint-head rel=\"icon\" type=\"image/png\" sizes=\"192x192\" href=\"/mintlify-assets/_mintlify/favicons/fetchski-attract-api/70pYtWMpcnXR0SYV/_generated/favicon-dark/android-chrome-192x192.png\" media=\"(prefers-color-scheme: dark)\">\u003clink data-mint-head rel=\"icon\" type=\"image/png\" sizes=\"16x16\" href=\"/mintlify-assets/_mintlify/favicons/fetchski-attract-api/70pYtWMpcnXR0SYV/_generated/favicon-dark/favicon-16x16.png\" media=\"(prefers-color-scheme: dark)\">\u003clink data-mint-head rel=\"icon\" type=\"image/png\" sizes=\"32x32\" href=\"/mintlify-assets/_mintlify/favicons/fetchski-attract-api/70pYtWMpcnXR0SYV/_generated/favicon-dark/favicon-32x32.png\" media=\"(prefers-color-scheme: dark)\">\u003clink data-mint-head rel=\"shortcut icon\" type=\"image/x-icon\" href=\"/mintlify-assets/_mintlify/favicons/fetchski-attract-api/70pYtWMpcnXR0SYV/_generated/favicon-dark/favicon.ico\" media=\"(prefers-color-scheme: dark)\">\u003cmeta data-mint-head property=\"og:title\" content=\"Photo albums - Fetchski Attract Docs\">\u003cmeta data-mint-head property=\"og:description\" content=\"Choose photos from your media library, put them in order, and show the album in any gallery section.\">\u003cmeta data-mint-head property=\"og:site_name\" content=\"Fetchski Attract Docs\">\u003cmeta data-mint-head property=\"og:url\" content=\"https://docs.fetchski-attract.com/guides/content/photo-albums\">\u003cmeta data-mint-head property=\"og:type\" content=\"website\">\u003cmeta data-mint-head property=\"og:image\" content=\"https://fetchski-attract-api.mintlify.site/_mintlify/api/og/v2?division=Content\u0026amp;title=Photo+albums\u0026amp;description=Choose+photos+from+your+media+library%2C+put+them+in+order%2C+and+show+the+album+in+any+gallery+section.\u0026amp;theme=0e1cff4688ef26ca6a5fb667\u0026amp;signature=4c2654da1cadc6dfdb5c521feb6dedc19b52d85dad1d8641762b54d2d091f23a\">\u003cmeta data-mint-head property=\"og:image:width\" content=\"1200\">\u003cmeta data-mint-head property=\"og:image:height\" content=\"630\">\u003cmeta data-mint-head name=\"twitter:card\" content=\"summary_large_image\">\u003cmeta data-mint-head name=\"twitter:title\" content=\"Photo albums - Fetchski Attract Docs\">\u003cmeta data-mint-head name=\"twitter:description\" content=\"Choose photos from your media library, put them in order, and show the album in any gallery section.\">\u003cmeta data-mint-head name=\"twitter:image\" content=\"https://fetchski-attract-api.mintlify.site/_mintlify/api/og/v2?division=Content\u0026amp;title=Photo+albums\u0026amp;description=Choose+photos+from+your+media+library%2C+put+them+in+order%2C+and+show+the+album+in+any+gallery+section.\u0026amp;theme=0e1cff4688ef26ca6a5fb667\u0026amp;signature=4c2654da1cadc6dfdb5c521feb6dedc19b52d85dad1d8641762b54d2d091f23a\">\u003cmeta data-mint-head name=\"twitter:image:width\" content=\"1200\">\u003cmeta data-mint-head name=\"twitter:image:height\" content=\"630\">\u003cmeta data-mint-head name=\"msapplication-config\" content=\"/mintlify-assets/_mintlify/favicons/fetchski-attract-api/70pYtWMpcnXR0SYV/_generated/favicon/browserconfig.xml\">\u003cmeta data-mint-head name=\"apple-mobile-web-app-title\" content=\"Fetchski Attract Docs\">\u003cmeta data-mint-head name=\"msapplication-TileColor\" content=\"#16a34a\">\u003clink data-mint-head rel=\"canonical\" href=\"https://docs.fetchski-attract.com/guides/content/photo-albums\">\u003clink data-mint-head rel=\"alternate\" type=\"application/xml\" href=\"/sitemap.xml\">\u003clink data-mint-head rel=\"alternate\" type=\"text/markdown\" href=\"/guides/content/photo-albums.md\">\u003cscript data-mint-head type=\"application/ld+json\">{\"@context\":\"https://schema.org\",\"@graph\":[{\"@type\":\"Organization\",\"@id\":\"https://docs.fetchski-attract.com/#organization\",\"name\":\"Fetchski Attract Docs\",\"url\":\"https://docs.fetchski-attract.com\",\"logo\":{\"@type\":\"ImageObject\",\"url\":\"https://mintcdn.com/fetchski-attract-api/mn9qfQRsqaASh7UE/logo/light.svg?fit=max\u0026auto=format\u0026n=mn9qfQRsqaASh7UE\u0026q=85\u0026s=66db13e248b70a44a5ff5f6990d4cb63\"}},{\"@type\":\"WebSite\",\"@id\":\"https://docs.fetchski-attract.com#website\",\"name\":\"Fetchski Attract Docs\",\"url\":\"https://docs.fetchski-attract.com\",\"publisher\":{\"@id\":\"https://docs.fetchski-attract.com/#organization\"}},{\"@type\":\"WebPage\",\"@id\":\"https://docs.fetchski-attract.com/guides/content/photo-albums#webpage\",\"url\":\"https://docs.fetchski-attract.com/guides/content/photo-albums\",\"name\":\"Photo albums\",\"description\":\"Choose photos from your media library, put them in order, and show the album in any gallery section.\",\"dateModified\":\"2026-11-13T09:58:32.523Z\",\"isPartOf\":{\"@id\":\"https://docs.fetchski-attract.com#website\"},\"breadcrumb\":{\"@id\":\"https://docs.fetchski-attract.com/guides/content/photo-albums#breadcrumb\"}},{\"@type\":\"BreadcrumbList\",\"@id\":\"https://docs.fetchski-attract.com/guides/content/photo-albums#breadcrumb\",\"itemListElement\":[{\"@type\":\"ListItem\",\"position\":1,\"name\":\"Content\",\"item\":\"https://docs.fetchski-attract.com/guides/content\"},{\"@type\":\"ListItem\",\"position\":2,\"name\":\"Photo albums\",\"item\":\"https://docs.fetchski-attract.com/guides/content/photo-albums\"}]},{\"@type\":[\"Article\",\"TechArticle\"],\"@id\":\"https://docs.fetchski-attract.com/guides/content/photo-albums#article\",\"headline\":\"Photo albums\",\"name\":\"Photo albums\",\"description\":\"Choose photos from your media library, put them in order, and show the album in any gallery section.\",\"url\":\"https://docs.fetchski-attract.com/guides/content/photo-albums\",\"mainEntityOfPage\":{\"@id\":\"https://docs.fetchski-attract.com/guides/content/photo-albums#webpage\"},\"dateModified\":\"2026-11-13T09:58:32.523Z\",\"publisher\":{\"@id\":\"https://docs.fetchski-attract.com/#organization\"},\"isPartOf\":{\"@id\":\"https://docs.fetchski-attract.com#website\"}}]}\u003c/script>\u003cscript data-mint-head type=\"application/ld+json\">{\"@context\":\"https://schema.org\",\"@type\":\"WebSite\",\"name\":\"Fetchski Attract Docs\",\"publisher\":{\"@type\":\"Organization\",\"name\":\"Fetchski Attract Docs\"},\"provider\":{\"@type\":\"Organization\",\"name\":\"Mintlify\",\"url\":\"https://mintlify.com\"}}\u003c/script>","agentPointerHref":"/guides/content/photo-albums.md","siteName":"Fetchski Attract Docs","nav":{"global":null,"tabs":[{"tab":"Guides","icon":"book-open","groups":[{"group":"Get started","icon":"rocket","pages":[{"title":"Fetchski Attract Docs","sidebarTitle":"Introduction","icon":"house","mode":"wide","href":""},{"title":"A tour of Attract","sidebarTitle":"Tour","icon":"compass","href":"/guides/get-started/tour"},{"title":"Sign in","sidebarTitle":"Sign in","icon":"right-to-bracket","href":"/guides/get-started/sign-in"},{"title":"The toolbar and the command palette","sidebarTitle":"Toolbar and ⌘K","icon":"keyboard","href":"/guides/get-started/toolbar-and-command-palette"},{"title":"Set up your site","sidebarTitle":"Set up your site","icon":"list-check","href":"/guides/get-started/set-up-your-site"},{"title":"Your profile","sidebarTitle":"Your profile","icon":"circle-user","href":"/guides/get-started/your-profile"}]},{"group":"Build pages","icon":"pen-to-square","pages":[{"title":"Pages and the page tree","sidebarTitle":"Pages","icon":"sitemap","href":"/guides/build-pages/pages-and-the-page-tree"},{"title":"Start from a page template","sidebarTitle":"Page templates","icon":"clone","href":"/guides/build-pages/page-templates"},{"title":"Two ways to edit: on the page or in the page settings window","sidebarTitle":"Two ways to edit","icon":"pen-to-square","href":"/guides/build-pages/two-ways-to-edit"},{"title":"Add, move and remove sections","sidebarTitle":"Add and arrange sections","icon":"layer-group","href":"/guides/build-pages/add-move-remove-sections"},{"title":"Preview on phones and tablets","sidebarTitle":"Device preview","icon":"mobile-screen","href":"/guides/build-pages/preview-on-devices"},{"title":"Drafts, publishing and scheduling","sidebarTitle":"Publish and schedule","icon":"calendar-check","href":"/guides/build-pages/publish-and-schedule"},{"title":"Side-by-side layouts","sidebarTitle":"Layouts and columns","icon":"table-columns","href":"/guides/build-pages/side-by-side-layouts"},{"title":"Document versions","sidebarTitle":"Versions","icon":"clock-rotate-left","href":"/guides/build-pages/versions"},{"title":"Page SEO","sidebarTitle":"Page SEO","icon":"magnifying-glass","href":"/guides/build-pages/page-seo"},{"title":"Redirects","sidebarTitle":"Redirects","icon":"arrow-right-arrow-left","href":"/guides/build-pages/redirects"},{"title":"Your site in more than one language","sidebarTitle":"Languages","icon":"language","href":"/guides/build-pages/languages"}]},{"group":"Sections","icon":"grid-2","pages":[{"title":"Sections","sidebarTitle":"All sections","icon":"grid-2","href":"/guides/sections/index"},{"title":"What every section shares","sidebarTitle":"Shared options","icon":"sliders","href":"/guides/sections/what-every-section-shares"},{"title":"Page Header","sidebarTitle":"Page Header","icon":"heading","href":"/guides/sections/page-header"},{"title":"Hero","sidebarTitle":"Hero","icon":"flag","href":"/guides/sections/hero"},{"title":"Intro / Trust","sidebarTitle":"Intro / Trust","icon":"quote-left","href":"/guides/sections/intro-trust"},{"title":"Feature Cards","sidebarTitle":"Feature Cards","icon":"cards-blank","href":"/guides/sections/feature-cards"},{"title":"Stats / By the numbers","sidebarTitle":"Stats / By the numbers","icon":"chart-simple","href":"/guides/sections/stats"},{"title":"Logos / Partners","sidebarTitle":"Logos / Partners","icon":"handshake","href":"/guides/sections/logos"},{"title":"How it works / Steps","sidebarTitle":"How it works / Steps","icon":"shoe-prints","href":"/guides/sections/steps"},{"title":"Media + Text block","sidebarTitle":"Media + Text block","icon":"image-landscape","href":"/guides/sections/media-text"},{"title":"Device mocks","sidebarTitle":"Device mocks","icon":"laptop-mobile","href":"/guides/sections/device-mocks"},{"title":"Team","sidebarTitle":"Team","icon":"people-group","href":"/guides/sections/team"},{"title":"FAQ","sidebarTitle":"FAQ","icon":"circle-question","href":"/guides/sections/faq"},{"title":"Service Area Map","sidebarTitle":"Service Area Map","icon":"map-location-dot","href":"/guides/sections/service-area-map"},{"title":"Blog Preview","sidebarTitle":"Blog Preview","icon":"newspaper","href":"/guides/sections/blog-preview"},{"title":"Cookie Declaration","sidebarTitle":"Cookie Declaration","icon":"cookie-bite","href":"/guides/sections/cookie-declaration"},{"title":"Rich Text","sidebarTitle":"Rich Text","icon":"paragraph","href":"/guides/sections/rich-text"},{"title":"Images and videos (in columns and posts)","sidebarTitle":"Images and videos (in columns and posts)","icon":"photo-film","href":"/guides/sections/images-and-videos"},{"title":"Google Reviews","sidebarTitle":"Google Reviews","icon":"star","href":"/guides/sections/google-reviews"},{"title":"Testimonials","sidebarTitle":"Testimonials","icon":"comment-quote","href":"/guides/sections/testimonials"},{"title":"Instagram Feed","sidebarTitle":"Instagram Feed","icon":"camera-retro","href":"/guides/sections/instagram-feed"},{"title":"Gallery Preview and Gallery (Full)","sidebarTitle":"Gallery","icon":"images","href":"/guides/sections/gallery"},{"title":"Pricing / Packages","sidebarTitle":"Pricing / Packages","icon":"tags","href":"/guides/sections/pricing"},{"title":"Newsletter Subscription","sidebarTitle":"Newsletter Subscription","icon":"envelope-open-text","href":"/guides/sections/newsletter-signup"},{"title":"SMS Subscription","sidebarTitle":"SMS Subscription","icon":"comment-sms","href":"/guides/sections/sms-signup"},{"title":"Form","sidebarTitle":"Form","icon":"rectangle-list","href":"/guides/sections/form"},{"title":"Final CTA","sidebarTitle":"Final CTA","icon":"bullhorn","href":"/guides/sections/final-cta"}]},{"group":"Content","icon":"box-archive","pages":[{"title":"Content you reuse","sidebarTitle":"Overview","icon":"box-archive","href":"/guides/content/index"},{"title":"Blog posts, categories and authors","sidebarTitle":"Blog","icon":"pen-nib","href":"/guides/content/blog"},{"title":"Team members","sidebarTitle":"Team members","icon":"id-badge","href":"/guides/content/team-members"},{"title":"Testimonials","sidebarTitle":"Testimonials","icon":"comment-quote","href":"/guides/content/testimonials"},{"title":"FAQs and categories","sidebarTitle":"FAQs","icon":"circle-question","href":"/guides/content/faqs"},{"title":"Google reviews","sidebarTitle":"Google reviews","icon":"star","href":"/guides/content/google-reviews"},{"title":"Service areas","sidebarTitle":"Service areas","description":"Draw or list each area you serve, with its price and description, for your Service Area Map.","icon":"map-location-dot","href":"/guides/content/service-areas"},{"title":"Photo albums","sidebarTitle":"Photo albums","icon":"images","href":"/guides/content/photo-albums"},{"title":"Photo feeds","sidebarTitle":"Photo feeds","description":"Pull a fresh set of photos from your own photo storage on a schedule, and show them in a gallery that changes by itself.","icon":"arrows-rotate","href":"/guides/content/photo-feeds"},{"title":"Archive, restore and delete","sidebarTitle":"Archive and delete","icon":"trash-can","href":"/guides/content/archive-restore-delete"},{"title":"Instagram posts","sidebarTitle":"Instagram posts","icon":"camera-retro","href":"/guides/content/instagram-posts"}]},{"group":"Media","icon":"photo-film","pages":[{"title":"The media library","sidebarTitle":"Media library","icon":"photo-film","href":"/guides/media/media-library"},{"title":"Folders","sidebarTitle":"Folders","icon":"folder-tree","href":"/guides/media/folders"},{"title":"Broken media","sidebarTitle":"Broken media","icon":"link-slash","href":"/guides/media/broken-media"}]},{"group":"Forms","icon":"rectangle-list","pages":[{"title":"Build a form","sidebarTitle":"Build a form","icon":"rectangle-list","href":"/guides/forms/build-a-form"},{"title":"Form submissions","sidebarTitle":"Submissions","icon":"inbox","href":"/guides/forms/form-submissions"},{"title":"Email notifications","sidebarTitle":"Email","icon":"envelope","href":"/guides/forms/email-notifications"},{"title":"Spam protection","sidebarTitle":"Spam protection","icon":"shield-halved","href":"/guides/forms/spam-protection"}]},{"group":"Site settings","icon":"gear","pages":[{"title":"Site settings","sidebarTitle":"Overview","icon":"gear","href":"/guides/site-settings/index"},{"title":"Brand","sidebarTitle":"Brand","icon":"badge","href":"/guides/site-settings/brand"},{"title":"Social links","sidebarTitle":"Social links","icon":"share-nodes","href":"/guides/site-settings/social-links"},{"title":"Site-wide SEO","sidebarTitle":"SEO","icon":"magnifying-glass-chart","href":"/guides/site-settings/seo"},{"title":"Legal details","sidebarTitle":"Legal","icon":"scale-balanced","href":"/guides/site-settings/legal"},{"title":"Cookie consent","sidebarTitle":"Cookie consent","icon":"cookie","href":"/guides/site-settings/cookie-consent"},{"title":"Service area map settings","sidebarTitle":"Service area map","icon":"map-location-dot","href":"/guides/site-settings/service-area-map"},{"title":"Maintenance mode","sidebarTitle":"Maintenance","icon":"person-digging","href":"/guides/site-settings/maintenance"}]},{"group":"Site design","icon":"palette","pages":[{"title":"Site design","sidebarTitle":"Overview","icon":"palette","href":"/guides/site-design/index"},{"title":"Colors","sidebarTitle":"Colors","icon":"swatchbook","href":"/guides/site-design/colors"},{"title":"Typography","sidebarTitle":"Typography","icon":"font","href":"/guides/site-design/typography"},{"title":"Site width","sidebarTitle":"Site width","icon":"arrows-left-right-to-line","href":"/guides/site-design/site-width"},{"title":"Motion","sidebarTitle":"Motion","icon":"wand-magic-sparkles","href":"/guides/site-design/motion"},{"title":"Header","sidebarTitle":"Header","icon":"window-maximize","href":"/guides/site-design/header"},{"title":"Footer","sidebarTitle":"Footer","icon":"window-minimize","href":"/guides/site-design/footer"},{"title":"Buttons and card styles","sidebarTitle":"Buttons and cards","icon":"hand-pointer","href":"/guides/site-design/buttons-and-card-styles"},{"title":"Custom CSS","sidebarTitle":"Custom CSS","icon":"code","href":"/guides/site-design/custom-css"}]},{"group":"Connections","icon":"plug","pages":[{"title":"Connections","sidebarTitle":"Overview","icon":"plug","href":"/guides/connections/index"},{"title":"Google Business Profile","sidebarTitle":"Google Business Profile","icon":"store","href":"/guides/connections/google-business-profile"},{"title":"Google Reviews connection","sidebarTitle":"Google Reviews","icon":"star-half-stroke","href":"/guides/connections/google-reviews"},{"title":"Google Maps","sidebarTitle":"Google Maps","icon":"map","href":"/guides/connections/google-maps"},{"title":"Google Sheets","sidebarTitle":"Google Sheets","icon":"table","href":"/guides/connections/google-sheets"},{"title":"Instagram","sidebarTitle":"Instagram","icon":"camera-retro","href":"/guides/connections/instagram"},{"title":"Photo storage","sidebarTitle":"Photo storage","icon":"cloud","href":"/guides/connections/photo-storage"},{"title":"Embed scripts","sidebarTitle":"Embed scripts","icon":"code","href":"/guides/connections/embed-scripts"},{"title":"Conversion tracking","sidebarTitle":"Conversion tracking","icon":"bullseye-arrow","href":"/guides/connections/conversion-tracking"},{"title":"Analytics","sidebarTitle":"Analytics","icon":"chart-line","href":"/guides/connections/analytics"},{"title":"Request log","sidebarTitle":"Request log","icon":"list-timeline","href":"/guides/connections/request-log"},{"title":"API keys and webhooks","sidebarTitle":"API keys and webhooks","icon":"key","href":"/guides/connections/api-keys-and-webhooks"}]},{"group":"People and access","icon":"users","pages":[{"title":"People \u0026 Roles","sidebarTitle":"People \u0026 Roles","icon":"users","href":"/guides/people/people-and-roles"},{"title":"What each role can do","sidebarTitle":"Roles","icon":"user-shield","href":"/guides/people/what-each-role-can-do"}]}]},{"tab":"FetchskiAI","icon":"sparkles","pages":[{"title":"FetchskiAI","href":"/fetchskiai/overview"}]},{"tab":"Recipes","icon":"book-open","pages":[{"title":"Recipes","href":"/recipes/laravel-ai-translate-your-site"}]},{"tab":"TypeScript","icon":"js","pages":[{"title":"TypeScript","href":"/typescript/overview"}]},{"tab":"Laravel","icon":"laravel","pages":[{"title":"Laravel","href":"/laravel/overview"}]},{"tab":"AdonisJS","icon":"https://mintlify.s3.us-west-1.amazonaws.com/fetchski-attract-api/logo/adonisjs.svg","pages":[{"title":"AdonisJS","href":"/adonisjs/overview"}]},{"tab":"API reference","icon":"code","pages":[{"title":"API reference","href":"/quickstart"}]}]},"basePath":"","title":"Photo albums - Fetchski Attract Docs","buildId":"dpl_5joLUXmnJgwqjrHAS4dxZrQTdxgh","deploymentId":"dpl_5joLUXmnJgwqjrHAS4dxZrQTdxgh","dynamics":["07c022d89b","a74be98ba7"],"chunks":["Frame-B_503rGq.js","DynamicMarkdown-BfddVCX7.js","zoom-image-lightbox-B3yYlvdS.js","lightbox-handle-r17bVUz3.js"]}


 AdonisJS