Add a language, translate your pages into it, and put it live when it’s ready, with its own addresses and a language switcher for visitors.
Speak to more of your customers in their own language. Add a language, translate your pages at your own pace, and switch it on for visitors when it’s ready. Each language gets its own addresses, such as /fr/about-us, and visitors get a language switcher in your site’s header.Who can do this: Admins and Owners add and remove languages. Anyone who can edit a page can translate it: Contributors, Editors, Admins and Owners. Publishing a translation works like publishing any page.
Before you start
Know each language’s code. It’s the short lowercase code for the language, such as fr for French or es for Spanish. For a language as spoken in one country, add the country: pt-br for Portuguese in Brazil.
Your site’s first language is its main language. Its pages keep the addresses they have today. Every language you add gets its code at the start of its addresses.
Add a language
1
Open Languages
Open the command palette (⌘K, or Ctrl+K on Windows) and choose Languages. The shortcut is T then ⇧L.
2
Name your main language
In Main language, write your site’s first language as its speakers write it, such as “English”. Visitors see this name in the language switcher.
3
Add the new language
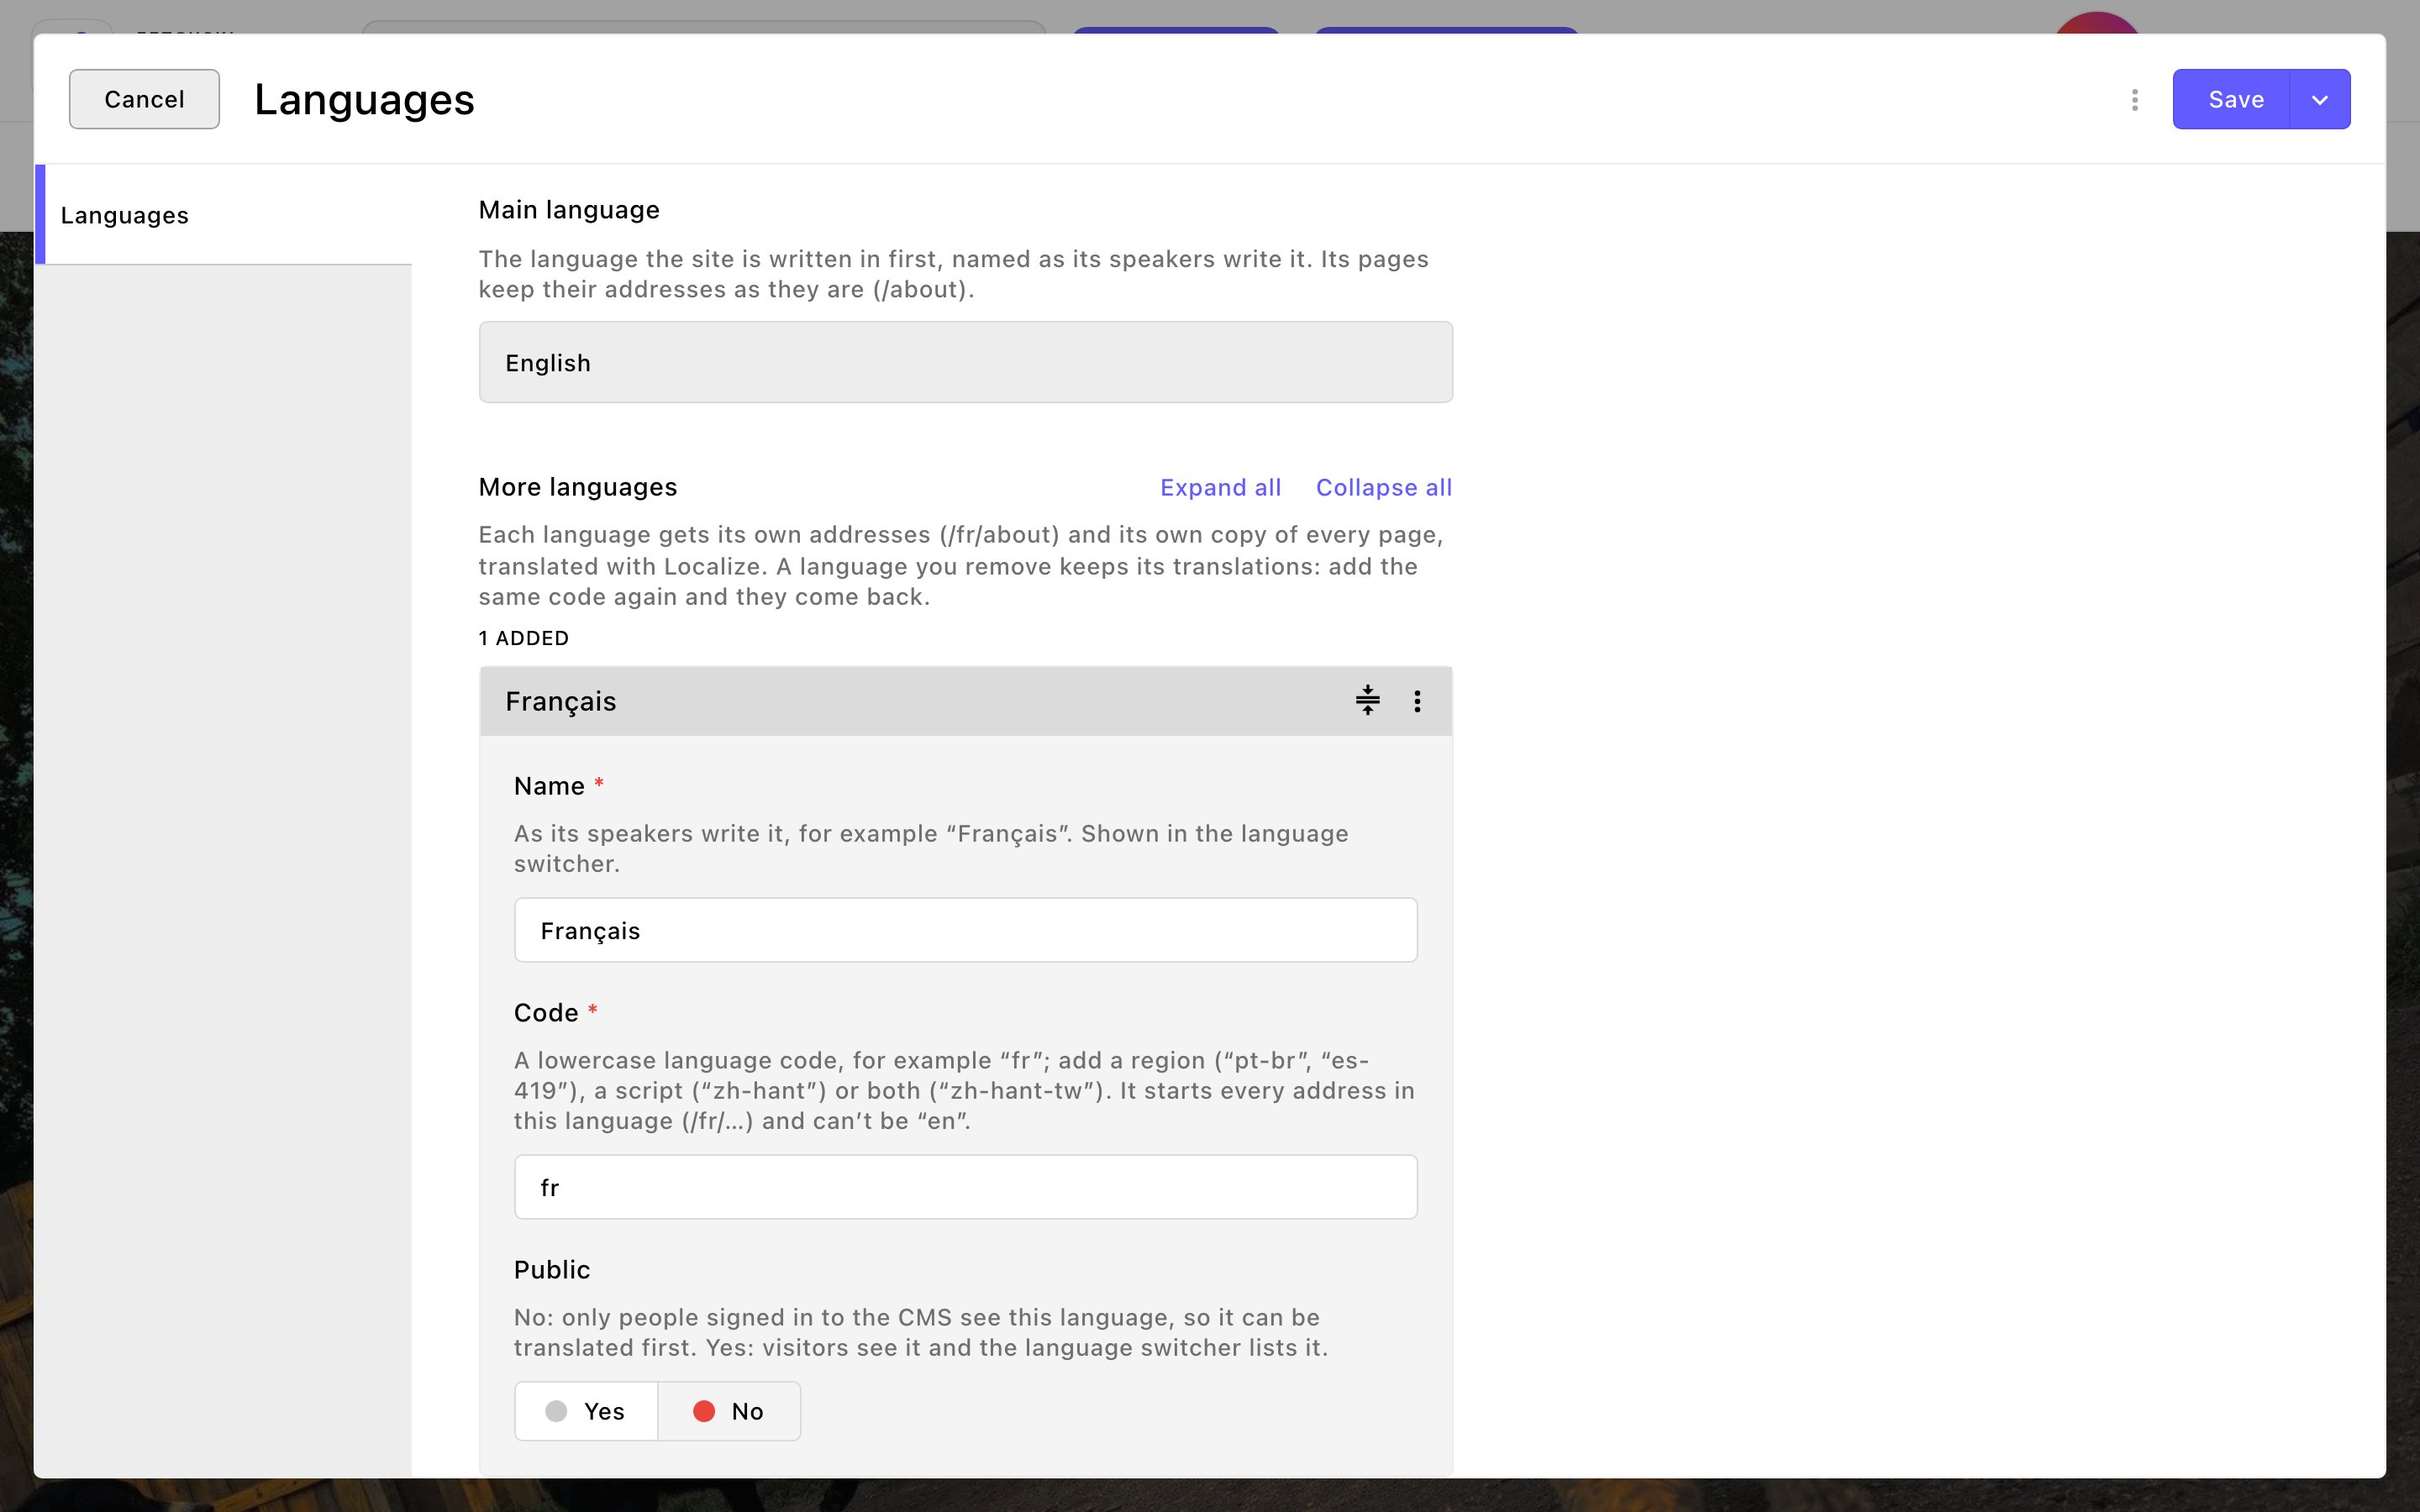
Under More languages, add a language and fill in:
Name: the language as its speakers write it, such as “Français”. The switcher shows this name.
Code: its language code, such as fr.
Public: leave it at No for now. Until it’s Yes, only people signed in to the CMS see the language, so you can translate in peace.
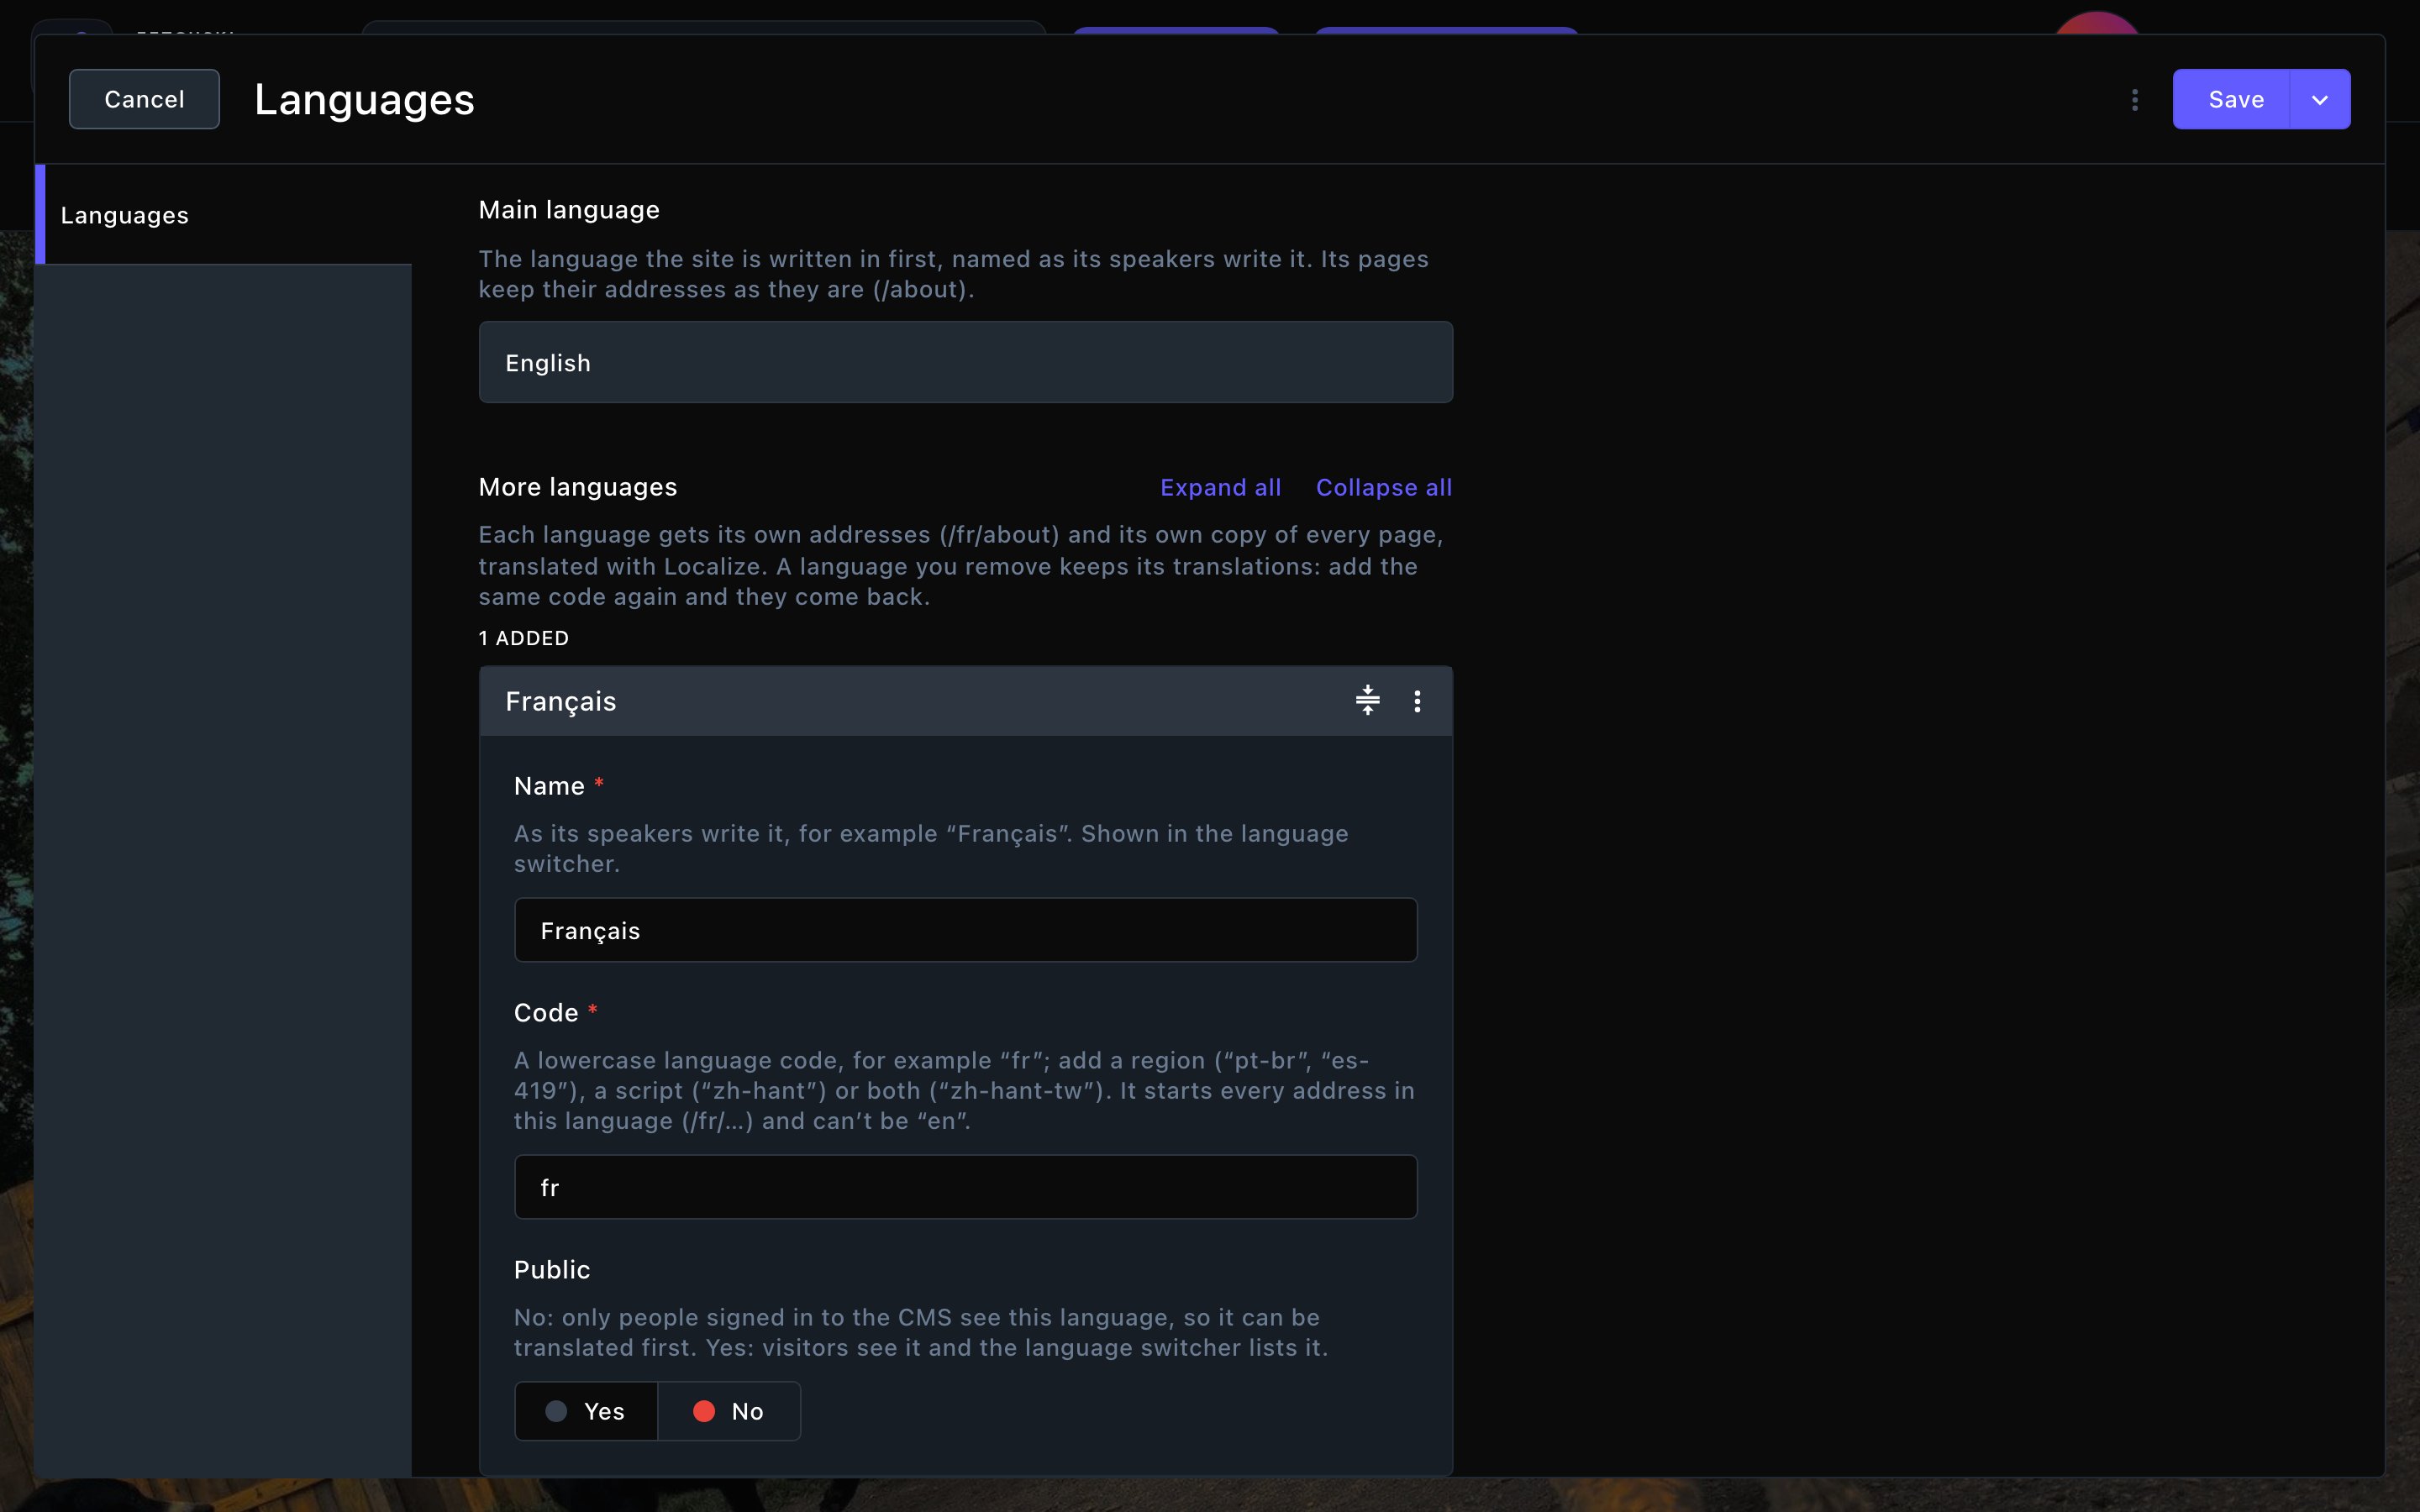
Add a language: its name, its code, and Public at No while you translate.
4
Save
Choose Save. The language is ready straight away: it gets its own home page, and its own copy of Site settings and Site design.
5
Reload the page
Reload your browser. The toolbar now shows a language menu with the current language’s code, such as EN.
Translate a page
1
Open the page in your main language
Go to the page on your site, as you would to edit it.
2
Switch language
In the toolbar, open the language menu (EN) and choose the new language. The page doesn’t exist there yet, so the CMS asks: “Switch locales and localize page to Français?” Choose Yes, localize this page and switch locales.
3
Choose what to copy
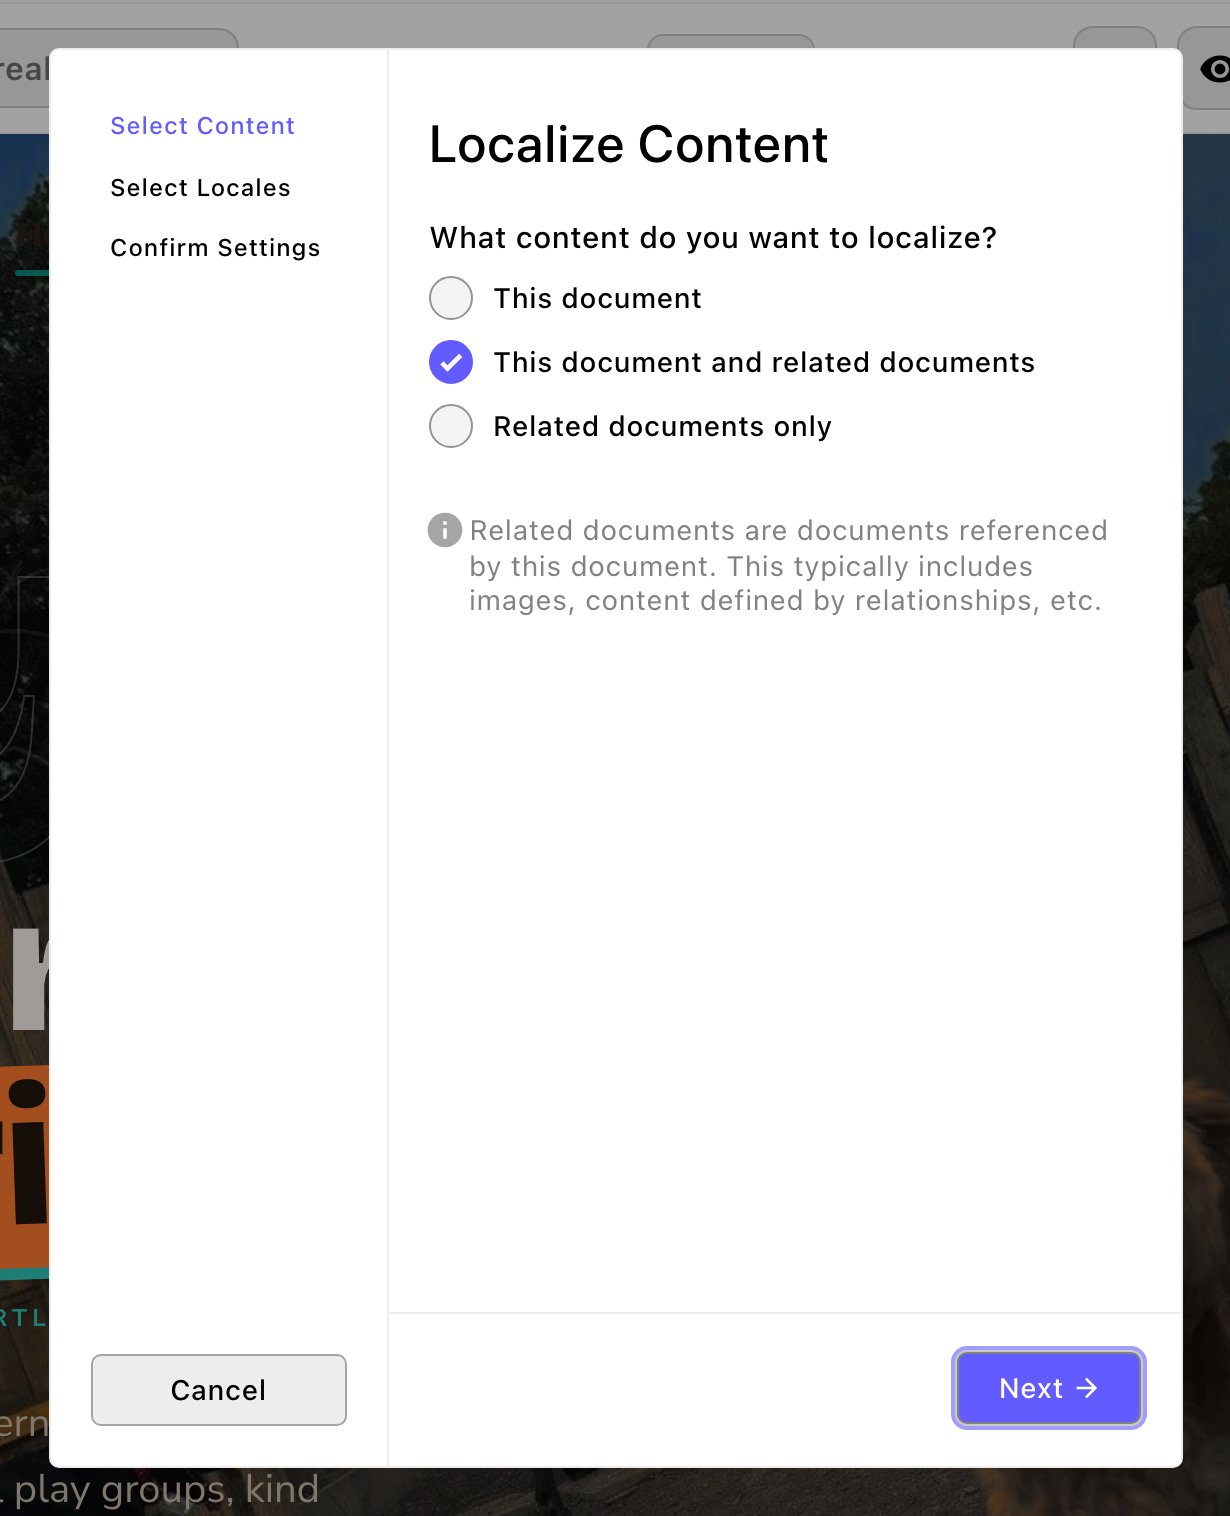
The Localize Content window opens. Under What content do you want to localize?, This document and related documents is chosen for you. It brings along what the page shows, such as its images and team members.Choose This document for the page alone. Then choose Next.
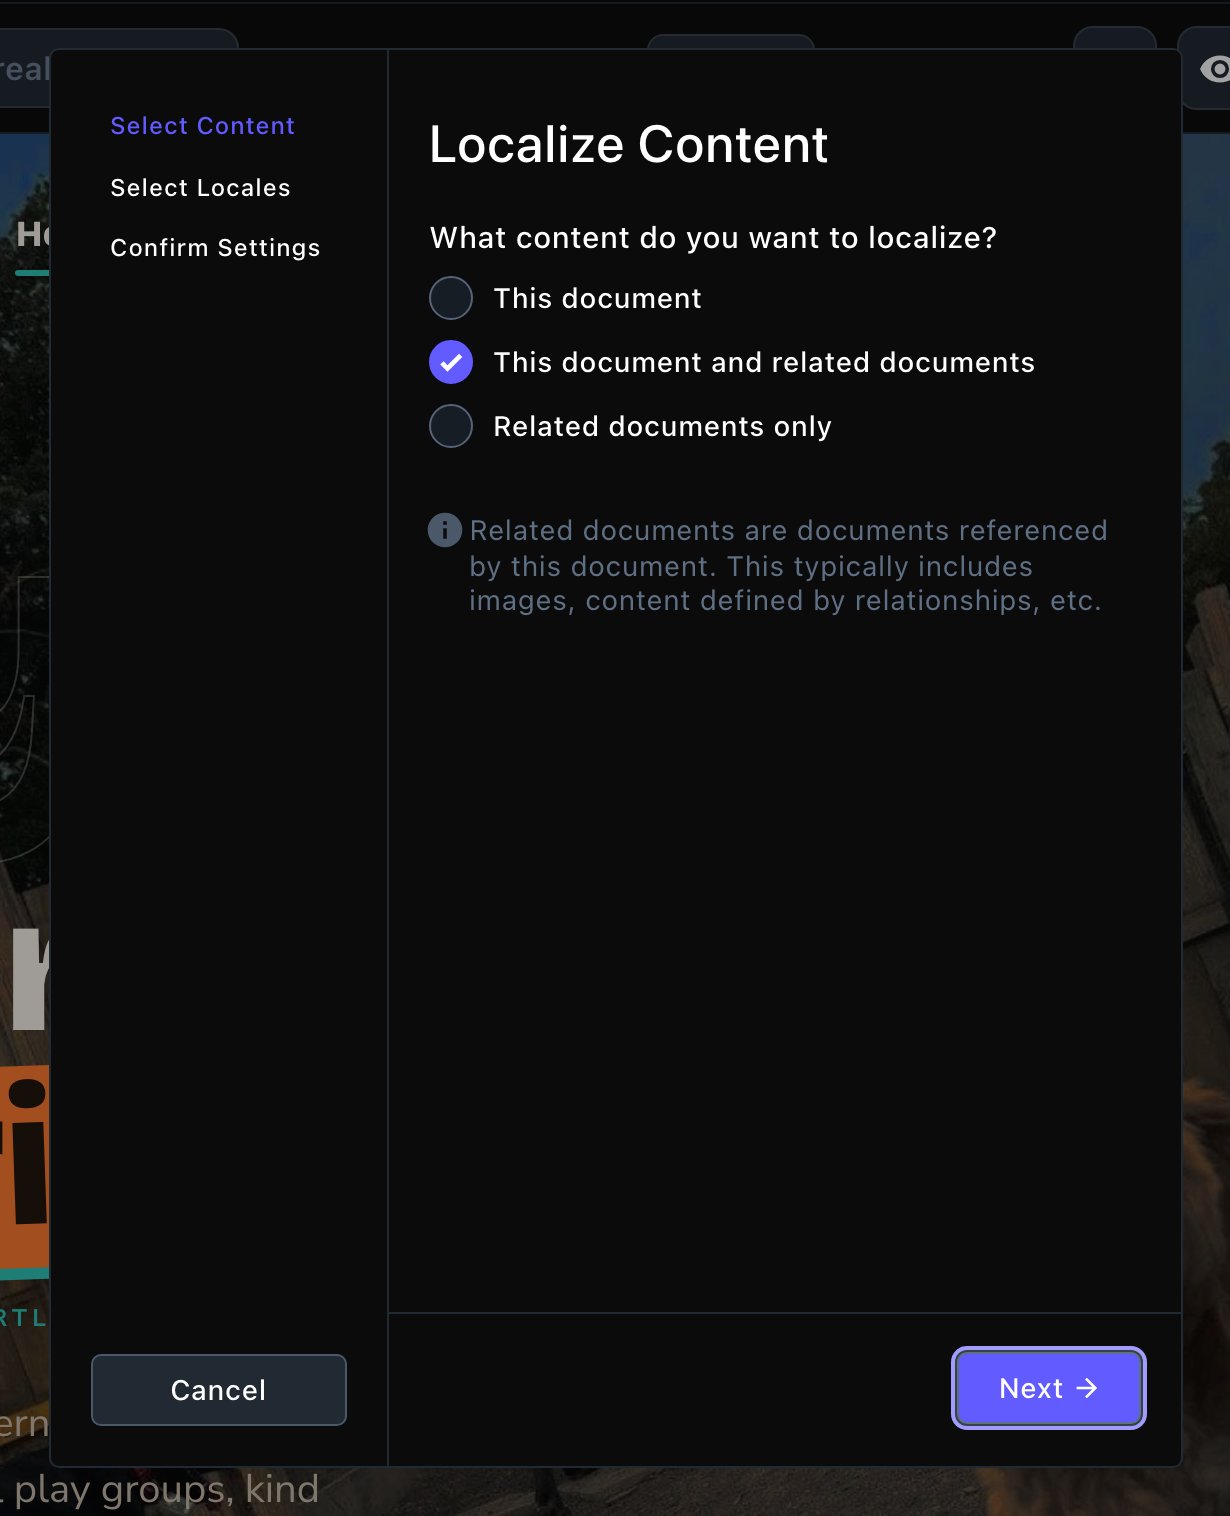
Choose what to copy into the new language.
4
Check the language and copy
Check the language is ticked under Select Locales, choose Next, then choose Localize Content.
5
Translate
You’re now on the page in the new language: a draft, with your main language’s words in it. Choose Edit and replace the words with your translation, section by section.
6
Publish
Choose Publish when the translation is ready, as with any page.
You can also start from any page or item: choose More Options (⋯) → Localize…. To translate many items at once, such as all your FAQs, open their list from the command palette, select them, and choose Localize….A page’s address is translated too. Open the page settings window in the new language and change its Slug, such as about-us to a-propos. The language’s code stays in front: /fr/a-propos.
Translate the pages your menu links to first. A page whose parent page isn’t translated yet can’t be translated: the CMS says “Localize the parent page first”.
Translate your header, footer and banners
Site settings and Site design have their own copy in each language. Switch language in the toolbar, then open them to translate:
Site design: the header’s links, its More label and button, the footer’s link groups, scrolling text, copyright line, note and social heading.
Site settings: your tagline, the maintenance message, and every word of the cookie banner and cookie preferences.
A new language starts with your main language’s links, which point at your main language’s pages. Point each one at the translated page.Everything else on those screens is shared by every language: your colors, fonts, logos, business name, contact details and social links. Change one in any language and it changes in all of them.
Shared settings go live from your main language only. To put a change to one of them live, switch to your main language and publish Site settings or Site design there. Publishing them in another language publishes that language’s own words, never a shared change.
Put the language live
When the pages that matter are translated and published:
Open Languages (⌘K, T then ⇧L).
Set the language’s Public to Yes.
Choose Save.
Visitors pick their language in your site's header.
Visitors now see:
A language switcher in your site’s header, and a Language row in the menu on phones. Each language links to the same page in that language, or to that language’s home page when the page isn’t translated.
The language’s own addresses, such as /fr/a-propos. A page you haven’t translated isn’t there in that language.
Each page marked with its language, for screen readers and browsers’ translate buttons.
Search engines learn which pages are translations of each other, and your sitemap lists every public language.
Remove a language
Open Languages, remove the language from More languages, and choose Save. Visitors stop seeing it at once. Its translations are kept: add the same code again and they come back.
Good to know
A few things don’t change with the language yet:
Your main language is always marked as English to browsers and search engines, even when your site is written in another language.
Your site’s own buttons and labels, such as “Language”, “Appearance” and “Open menu”, stay in English in every language.
Google reviews and Instagram posts show as they are in every language. They aren’t translated.
The cookie declaration’s list of cookies is the same in every language.
Each language’s pages and items are separate drafts. Publishing the French page doesn’t publish the English one, and the other way round.
Items a section shows, such as team members and testimonials, show only once they’re translated and published in that language.
Troubleshooting
“…” is not a language code
Use a lowercase code, such as fr, or a language and country, such as pt-br.
“en” is the main language’s code
en belongs to your main language. Give the new language its own code.
A page’s address starts with “/…”, and the language would hide it
A page’s address already starts with that code, such as a page at /es. Give that page a new address first (its Slug in the page settings window), or use a different code.
“/…” is already one of the site’s own addresses
Some codes are taken by your site’s own addresses, such as api or login. Choose a different code.
The language menu doesn't show in the toolbar
Reload the page after you save Languages. The menu shows only when your site has more than one language.
Visitors don't see the language switcher
Check the language’s Public is set to Yes in Languages. Until it is, only people signed in to the CMS see it.
Related
Drafts, publishing and scheduling
put each translation live.
Pages and the page tree
rename pages and change their addresses.
Site design
the header and footer each language translates.
Toolbar and command palette
every screen and shortcut.
⌘I
{"docsConfig":{"theme":"almond","$schema":"https://mintlify.com/docs.json","name":"Fetchski Attract Docs","colors":{"primary":"#16a34a","light":"#22c55e","dark":"#15803d"},"logo":{"light":"https://mintcdn.com/fetchski-attract-api/mn9qfQRsqaASh7UE/logo/light.svg?fit=max\u0026auto=format\u0026n=mn9qfQRsqaASh7UE\u0026q=85\u0026s=66db13e248b70a44a5ff5f6990d4cb63","dark":"https://mintcdn.com/fetchski-attract-api/mn9qfQRsqaASh7UE/logo/dark.svg?fit=max\u0026auto=format\u0026n=mn9qfQRsqaASh7UE\u0026q=85\u0026s=86904ba8d47714303521b2dcd5aa2a50","href":"/"},"favicon":"https://mintcdn.com/fetchski-attract-api/mn9qfQRsqaASh7UE/favicon.svg?fit=max\u0026auto=format\u0026n=mn9qfQRsqaASh7UE\u0026q=85\u0026s=fd4f2c0615961c9e01c9762b98c8999f","api":{"playground":{"display":"interactive"},"examples":{"defaults":"required","languages":["bash","typescript","php"]}},"appearance":{"default":"dark"},"background":{"color":{"light":"#ffffff","dark":"#0b0e13"}},"search":{"prompt":"Search the docs…"},"seo":{"metatags":{"robots":"noindex, nofollow"}},"fonts":{"family":"Inter"},"icons":{"library":"fontawesome"},"styling":{"codeblocks":"dark","latex":true},"contextual":{"options":["copy","view"],"display":"header"},"navigation":{"pages":[]}},"deployment":{"deploymentMetadataValue":{"subdomain":"fetchski-attract-api","hasAudioNarration":false,"actualSubdomain":"fetchski-attract-api","customDomains":["docs.fetchski-attract.com"],"gitSource":{"type":"github","owner":"fetchski","repo":"fetchski_cms_astro_monorepo","deployBranch":"main","contentDirectory":"docs/attract","isPrivate":true,"mountPath":"","label":"","_id":"6adb9c232f0947a18a27541d"},"entitlements":{},"buildId":"6af6df04bd8b0362cdec74ff","clientVersion":"0.0.4131","searchFilterCounts":[{"language":"default","tag":"Media","count":953},{"language":"default","tag":"Content","count":863},{"language":"default","tag":"Publishing","count":720},{"language":"default","tag":"API reference","count":484},{"language":"default","tag":"Laravel","count":472},{"language":"default","tag":"TypeScript","count":470},{"language":"default","tag":"AdonisJS","count":469},{"language":"default","tag":"Batch jobs","count":364},{"language":"default","tag":"Pages \u0026 Site","count":224},{"language":"default","tag":"Forms","count":168}]},"assistantConfig":{"enableAskAiButton":false,"enableStarterQuestions":false,"enableContextualStarterQuestions":false,"enableAskAiSearchBar":true},"basePath":"","hasChatPermissions":false,"hasWebMcpPermissions":false,"toggles":[{"name":"kill-isr","enabled":true,"variant":{"name":"disabled","enabled":false,"feature_enabled":true},"impressionData":false},{"name":"custom-rbac-roles","enabled":true,"variant":{"name":"disabled","enabled":false,"feature_enabled":true},"impressionData":false},{"name":"agent-mintlify-slack","enabled":true,"variant":{"name":"disabled","enabled":false,"feature_enabled":true},"impressionData":false},{"name":"agent-integrations-settings","enabled":true,"variant":{"name":"disabled","enabled":false,"feature_enabled":true},"impressionData":false},{"name":"rbac-expansion","enabled":true,"variant":{"name":"disabled","enabled":false,"feature_enabled":true},"impressionData":false},{"name":"automations-pr-grouping","enabled":true,"variant":{"name":"disabled","enabled":false,"feature_enabled":true},"impressionData":false},{"name":"custom-prefix","enabled":true,"variant":{"name":"disabled","enabled":false,"feature_enabled":true},"impressionData":false},{"name":"analytics-v7","enabled":true,"variant":{"name":"disabled","enabled":false,"feature_enabled":true},"impressionData":false},{"name":"user-flows-analytics","enabled":true,"variant":{"name":"disabled","enabled":false,"feature_enabled":true},"impressionData":false},{"name":"no-publish-flow","enabled":true,"variant":{"name":"disabled","enabled":false,"feature_enabled":true},"impressionData":false},{"name":"workos-onboarding","enabled":true,"variant":{"name":"disabled","enabled":false,"feature_enabled":true},"impressionData":false},{"name":"snapshot-serving-live","enabled":true,"variant":{"name":"disabled","enabled":false,"feature_enabled":true},"impressionData":false},{"name":"stripTemperatureMiddleware","enabled":true,"variant":{"name":"disabled","enabled":false,"feature_enabled":true},"impressionData":false},{"name":"support-platform-pylon-zendesk","enabled":true,"variant":{"name":"disabled","enabled":false,"feature_enabled":true},"impressionData":false},{"name":"snapshot-serving","enabled":true,"variant":{"name":"disabled","enabled":false,"feature_enabled":true},"impressionData":false},{"name":"instant-rollback","enabled":true,"variant":{"name":"disabled","enabled":false,"feature_enabled":true},"impressionData":false},{"name":"granular-notifications-server","enabled":true,"variant":{"name":"disabled","enabled":false,"feature_enabled":true},"impressionData":false},{"name":"granular-notifications","enabled":true,"variant":{"name":"disabled","enabled":false,"feature_enabled":true},"impressionData":false},{"name":"automations-fable","enabled":true,"variant":{"name":"disabled","enabled":false,"feature_enabled":true},"impressionData":false},{"name":"fixed-ai-action-pricing","enabled":true,"variant":{"name":"disabled","enabled":false,"feature_enabled":true},"impressionData":false},{"name":"automation-resolve-merge-conflict","enabled":true,"variant":{"name":"disabled","enabled":false,"feature_enabled":true},"impressionData":false},{"name":"scoped-publishing","enabled":true,"variant":{"name":"disabled","enabled":false,"feature_enabled":true},"impressionData":false},{"name":"mintql","enabled":true,"variant":{"name":"disabled","enabled":false,"feature_enabled":true},"impressionData":false},{"name":"page-level-analytics","enabled":true,"variant":{"name":"disabled","enabled":false,"feature_enabled":true},"impressionData":false},{"name":"editor-version-history-v2","enabled":true,"variant":{"name":"disabled","enabled":false,"feature_enabled":true},"impressionData":false},{"name":"billing-page-v2","enabled":true,"variant":{"name":"disabled","enabled":false,"feature_enabled":true},"impressionData":false},{"name":"full-page-search","enabled":true,"variant":{"name":"disabled","enabled":false,"feature_enabled":true},"impressionData":false},{"name":"workspace-projects","enabled":true,"variant":{"name":"disabled","enabled":false,"feature_enabled":true},"impressionData":false},{"name":"assistant-v5","enabled":true,"variant":{"name":"disabled","enabled":false,"feature_enabled":true},"impressionData":false},{"name":"fork-pr-previews","enabled":true,"variant":{"name":"disabled","enabled":false,"feature_enabled":true},"impressionData":false},{"name":"revalidation-jwt","enabled":true,"variant":{"name":"disabled","enabled":false,"feature_enabled":true},"impressionData":false},{"name":"workos-sso-scim","enabled":true,"variant":{"name":"disabled","enabled":false,"feature_enabled":true},"impressionData":false},{"name":"hobby-abuse-scan","enabled":true,"variant":{"name":"disabled","enabled":false,"feature_enabled":true},"impressionData":false},{"name":"dashboard-inbox","enabled":true,"variant":{"name":"disabled","enabled":false,"feature_enabled":true},"impressionData":false},{"name":"workos-signup","enabled":true,"variant":{"name":"disabled","enabled":false,"feature_enabled":true},"impressionData":false},{"name":"turbopuffer-dual-write","enabled":true,"variant":{"name":"disabled","enabled":false,"feature_enabled":true},"impressionData":false},{"name":"workos-enabled","enabled":true,"variant":{"name":"disabled","enabled":false,"feature_enabled":true},"impressionData":false},{"name":"approve-review-flow","enabled":true,"variant":{"name":"disabled","enabled":false,"feature_enabled":true},"impressionData":false},{"name":"editor-metadata","enabled":true,"variant":{"name":"disabled","enabled":false,"feature_enabled":true},"impressionData":false},{"name":"sso-setup-deadline-banner","enabled":true,"variant":{"name":"disabled","enabled":false,"feature_enabled":true},"impressionData":false},{"name":"turbopuffer-serve","enabled":true,"variant":{"name":"disabled","enabled":false,"feature_enabled":true},"impressionData":false},{"name":"live-agents","enabled":true,"variant":{"name":"disabled","enabled":false,"feature_enabled":true},"impressionData":false},{"name":"llms-txt-v2","enabled":true,"variant":{"name":"disabled","enabled":false,"feature_enabled":true},"impressionData":false}],"googleFontsInlined":false},"customCss":[{"filePath":"style.css","content":"@media (min-width: 1280px){:root{--content-width: 52rem}}@media (min-width: 1600px){:root{--content-width: 60rem}}@media (min-width: 1920px){:root{--content-width: 68rem}}@media (min-width: 1024px) and (max-width: 1919px){#content-container{padding-left:2rem;padding-right:2rem}div:has(>#content-area){padding-left:0}#table-of-contents{width:14rem}}html[data-page-mode=\"wide\"] #content-area{max-width:84rem}@media (min-width: 1024px){#navbar .nav-tabs{position:fixed;left:15rem;top:0;height:6rem}}@media (min-width: 1024px) and (max-width: 1599px){#navbar .nav-tabs{gap:0}#navbar .nav-tabs .nav-tabs-item{gap:0.375rem;font-size:0.9375rem;padding-inline:0.5rem}#navbar .nav-tabs .nav-tabs-item svg,#navbar .nav-tabs .nav-tabs-item img{width:1.0625rem;height:1.0625rem}}@media (min-width: 1024px) and (max-width: 1199px){#navbar .nav-tabs .nav-tabs-item svg,#navbar .nav-tabs .nav-tabs-item img{display:none}}@media (min-width: 1024px) and (max-width: 1319px){div:has(>#search-bar-entry){width:3rem!important}#search-bar-entry{justify-content:center;padding:0!important}#search-bar-entry>div>:not(svg),#search-bar-entry>:not(div){display:none}}.mdx-content{font-size:1.0625rem;line-height:1.8}@media (min-width: 1024px){.mdx-content{font-size:1.25rem;line-height:1.85}#page-title{font-size:2.875rem;line-height:1.15}#page-title+*,#header .prose{font-size:1.375rem}#sidebar-content a{font-size:1.125rem}.toc-item{font-size:1rem}}.mdx-content>[data-as=\"p\"],.mdx-content>p{margin-top:0;margin-bottom:1.75rem}.mdx-content>h2{margin-top:3.5rem;margin-bottom:1.25rem;padding-top:2rem;border-top:1px solid rgb(0 0 0 / 0.08);font-size:1.875rem;letter-spacing:-0.01em}.dark .mdx-content>h2{border-top-color:rgb(255 255 255 / 0.08)}.mdx-content>h2:first-child{margin-top:0;padding-top:0;border-top:0}.mdx-content>h3{margin-top:2.75rem;margin-bottom:1.125rem;font-size:1.4375rem}.mdx-content>h4{margin-top:2rem;margin-bottom:0.75rem}.mdx-content li{margin-top:0.625rem;margin-bottom:0.625rem}.mdx-content>ul,.mdx-content>ol{margin-bottom:1.75rem}.mdx-content :not(pre)>code{font-size:0.875em;padding:0.125rem 0.375rem;overflow-wrap:anywhere}.mdx-content table{font-size:1.0625rem;line-height:1.7}.mdx-content th,.mdx-content td{padding:0.875rem 1.5rem 0.875rem 0!important;vertical-align:top}.mdx-content th{padding-top:0.25rem!important}.mdx-content th:last-child,.mdx-content td:last-child{padding-right:0!important}.mdx-content td>code:only-child{white-space:nowrap}pre{max-height:36rem;overflow:auto}.mdx-content pre code{font-size:0.9375rem;line-height:1.75}.mdx-content>.code-block,.mdx-content>.code-group{margin-top:1.5rem;margin-bottom:2rem}.mdx-content .columns{column-gap:1.25rem;row-gap:0.5rem;margin-top:1.75rem;margin-bottom:2.25rem}.mdx-content .card{border-radius:1rem}.mdx-content .card [data-component-part=\"card-content-container\"]{padding:1.5rem 1.75rem}.mdx-content [data-component-part=\"card-title\"]{font-size:1.25rem}.mdx-content [data-component-part=\"card-content\"]{font-size:1.0625rem;line-height:1.7}.mdx-content .callout{margin-top:2rem;margin-bottom:2.25rem;padding:1.25rem 1.75rem;font-size:1.125rem;line-height:1.75}.mdx-content .steps{margin-top:1.75rem;margin-bottom:2.25rem}.mdx-content .step{padding-bottom:0.75rem}.mdx-content .accordion-group,.mdx-content>.accordion{margin-top:1.75rem;margin-bottom:2.25rem}.mdx-content .tabs{margin-top:1.75rem;margin-bottom:2.25rem}.mdx-content .tabs [role=\"tabpanel\"]{padding-top:0.375rem;padding-right:0.375rem;padding-bottom:0.375rem}.mdx-content [data-component-name=\"mermaid-container\"]{--im-node-fill: #ecfdf3;--im-node-stroke: #16a34a;--im-node-text: #0b3a1f;--im-cluster-fill: rgb(22 163 74 / 0.04);--im-cluster-stroke: rgb(22 163 74 / 0.35);--im-edge: #64748b;--im-label-bg: #ffffff;margin-top:1.75rem;margin-bottom:2.25rem;padding:2rem 1.5rem;border:1px solid rgb(0 0 0 / 0.08);border-radius:1rem;background:rgb(0 0 0 / 0.015)}.dark .mdx-content [data-component-name=\"mermaid-container\"]{--im-node-fill: #0b2e1a;--im-node-stroke: #22c55e;--im-node-text: #e7fbef;--im-cluster-fill: rgb(34 197 94 / 0.05);--im-cluster-stroke: rgb(34 197 94 / 0.35);--im-edge: #94a3b8;--im-label-bg: #0f1214;border-color:rgb(255 255 255 / 0.08);background:rgb(255 255 255 / 0.02)}.mdx-content [data-component-name=\"mermaid-container\"] svg[id^=\"mermaid\"]{display:block;margin-left:auto;margin-right:auto}.mdx-content [data-component-name=\"mermaid-container\"] .node rect,.mdx-content [data-component-name=\"mermaid-container\"] .node polygon,.mdx-content [data-component-name=\"mermaid-container\"] .node circle,.mdx-content [data-component-name=\"mermaid-container\"] .node path{fill:var(--im-node-fill)!important;stroke:var(--im-node-stroke)!important;stroke-width:1.5px!important}.mdx-content [data-component-name=\"mermaid-container\"] .node rect{rx:8px;ry:8px}.mdx-content [data-component-name=\"mermaid-container\"] .nodeLabel,.mdx-content [data-component-name=\"mermaid-container\"] .node .label{color:var(--im-node-text)!important;fill:var(--im-node-text)!important}.mdx-content [data-component-name=\"mermaid-container\"] .cluster rect{fill:var(--im-cluster-fill)!important;stroke:var(--im-cluster-stroke)!important;stroke-dasharray:6 4;rx:12px;ry:12px}.mdx-content [data-component-name=\"mermaid-container\"] .cluster-label .nodeLabel,.mdx-content [data-component-name=\"mermaid-container\"] .cluster .nodeLabel{color:var(--im-node-stroke)!important}.mdx-content [data-component-name=\"mermaid-container\"] .flowchart-link,.mdx-content [data-component-name=\"mermaid-container\"] .edgePath path{stroke:var(--im-edge)!important;stroke-width:1.5px!important}.mdx-content [data-component-name=\"mermaid-container\"] marker path,.mdx-content [data-component-name=\"mermaid-container\"] .arrowheadPath{fill:var(--im-edge)!important;stroke:var(--im-edge)!important}.mdx-content [data-component-name=\"mermaid-container\"] .edgeLabel,.mdx-content [data-component-name=\"mermaid-container\"] .edgeLabel p,.mdx-content [data-component-name=\"mermaid-container\"] .labelBkg{background-color:var(--im-label-bg)!important;color:var(--im-edge)!important}.mdx-content [data-component-name=\"mermaid-container\"] rect.actor{fill:var(--im-node-fill)!important;stroke:var(--im-node-stroke)!important;stroke-width:1.5px!important;rx:8px;ry:8px}.mdx-content [data-component-name=\"mermaid-container\"] text.actor>tspan,.mdx-content [data-component-name=\"mermaid-container\"] text.actor{fill:var(--im-node-text)!important}.mdx-content [data-component-name=\"mermaid-container\"] .actor-line{stroke:var(--im-cluster-stroke)!important}.mdx-content [data-component-name=\"mermaid-container\"] .messageLine0,.mdx-content [data-component-name=\"mermaid-container\"] .messageLine1{stroke:var(--im-edge)!important;stroke-width:1.5px!important}.mdx-content [data-component-name=\"mermaid-container\"] #arrowhead path,.mdx-content [data-component-name=\"mermaid-container\"] #crosshead path{fill:var(--im-edge)!important;stroke:var(--im-edge)!important}.mdx-content [data-component-name=\"mermaid-container\"] .note{fill:var(--im-cluster-fill)!important;stroke:var(--im-cluster-stroke)!important}.mdx-content .field .prose-sm{font-size:1.0625rem;line-height:1.8}@media (min-width: 1024px){.mdx-content .field .prose-sm{font-size:1.125rem}}.mdx-content .field{padding-top:1.25rem;padding-bottom:1.25rem}:root{--fa-accent: 22 163 74;--fa-ink: 15 23 42;--fa-button: 21 128 61;--fa-button-hover: 22 101 52;--fa-on-button: 255 255 255}.dark{--fa-accent: 34 197 94;--fa-ink: 255 255 255;--fa-button: 34 197 94;--fa-button-hover: 74 222 128;--fa-on-button: 5 46 22}.mdx-content .card{transition:border-color 150ms ease,\n background-color 150ms ease}.mdx-content a.card:hover,.mdx-content .card:has(a:hover){border-color:rgb(var(--fa-accent) / 0.45);background-color:rgb(var(--fa-accent) / 0.06)}.mdx-content .card [data-component-part=\"card-icon\"]{display:flex;width:1.75rem;height:1.75rem;margin-bottom:1rem}.mdx-content .card [data-component-part=\"card-icon\"] svg{width:1.75rem;height:1.75rem;mask-size:contain;background-color:rgb(var(--fa-accent))!important}.mdx-content .card [data-component-part=\"card-content-container\"].flex [data-component-part=\"card-icon\"]{margin-bottom:0}html[data-page-mode=\"wide\"] #header{display:none}.fa-hero{position:relative;isolation:isolate;display:grid;grid-template-columns:minmax(0, 1fr);gap:3rem;align-items:center;overflow:hidden;margin:-1.5rem 0 3.5rem;padding:3.5rem 3rem;border:1px solid rgb(var(--fa-accent) / 0.2);border-radius:1.5rem;background-color:rgb(var(--fa-accent) / 0.025);background-image:radial-gradient(\n 55% 75% at 82% 50%,\n rgb(var(--fa-accent) / 0.16),\n transparent 70%\n )}.fa-hero::before{content:'';position:absolute;inset:0;z-index:-1;background-image:linear-gradient(rgb(var(--fa-accent) / 0.1) 1px, transparent 1px),\n linear-gradient(90deg, rgb(var(--fa-accent) / 0.1) 1px, transparent 1px);background-size:2rem 2rem;background-position:-1px -1px;mask-image:radial-gradient(80% 90% at 85% 40%, #000 20%, transparent 75%);pointer-events:none}.fa-hero::after{content:'';position:absolute;top:0;right:10%;left:10%;height:1px;background:linear-gradient(\n 90deg,\n transparent,\n rgb(var(--fa-accent) / 0.8),\n transparent\n );pointer-events:none}@media (min-width: 1536px){.fa-hero{grid-template-columns:minmax(0, 0.85fr) minmax(0, 1.15fr);padding:4rem 3.5rem}}.fa-hero-code>.code-group,.fa-hero-code>.code-block{margin:0;border-color:rgb(var(--fa-accent) / 0.25);box-shadow:0 1px 0 rgb(255 255 255 / 0.04) inset,\n 0 30px 60px -24px rgb(0 0 0 / 0.55),\n 0 0 0 6px rgb(var(--fa-accent) / 0.06)}.mdx-content .fa-hero-code pre code{font-size:0.8125rem}.mdx-content .fa-hero .fa-hero-mark{margin:0 0 1.75rem}.mdx-content .fa-hero .fa-hero-mark img{display:block;width:auto;height:4rem;margin:0;border-radius:0}.mdx-content .fa-hero .fa-hero-mark .fa-hero-mark-dark,.dark .mdx-content .fa-hero .fa-hero-mark .fa-hero-mark-light{display:none}.dark .mdx-content .fa-hero .fa-hero-mark .fa-hero-mark-dark{display:block}.fa-hero h1{max-width:40rem;margin:0;font-size:3.25rem;font-weight:700;line-height:1.06;letter-spacing:-0.035em;text-wrap:balance}.fa-hero h1 .fa-hero-accent{color:rgb(var(--fa-accent))}.mdx-content .fa-hero-lede{max-width:34rem;margin:1.5rem 0 2.25rem;font-size:1.1875rem;line-height:1.7;opacity:0.78;text-wrap:pretty}.fa-hero-actions{display:flex;flex-wrap:wrap;gap:0.75rem}.mdx-content .fa-hero-facts{display:flex;flex-wrap:wrap;gap:0.5rem 1.5rem;margin-top:2rem;font-size:0.9375rem;opacity:0.8}.mdx-content .fa-hero-facts>span{display:inline-flex;align-items:center;gap:0.5rem}.mdx-content .fa-hero-facts>span::before{content:'';flex:none;width:1rem;height:1rem;background:rgb(var(--fa-accent));mask:url(\"data:image/svg+xml,%3Csvg xmlns='http://www.w3.org/2000/svg' viewBox='0 0 16 16'%3E%3Cpath d='M3.5 8.5l3 3 6-7' fill='none' stroke='%23000' stroke-width='2' stroke-linecap='round' stroke-linejoin='round'/%3E%3C/svg%3E\")\n center / contain no-repeat}.fa-button{display:inline-flex;align-items:center;gap:0.5rem;height:2.75rem;padding:0 1.125rem;border:1px solid transparent;border-radius:0.625rem;font-size:0.9375rem;font-weight:600;letter-spacing:-0.005em;text-decoration:none!important;transition:background-color 150ms ease,\n border-color 150ms ease,\n box-shadow 150ms ease,\n transform 150ms ease}.fa-button-primary{border-color:rgb(var(--fa-button) / 1);background:rgb(var(--fa-button));box-shadow:inset 0 1px 0 rgb(255 255 255 / 0.25),\n 0 8px 20px -10px rgb(var(--fa-button) / 0.9);color:rgb(var(--fa-on-button))!important}.fa-button-primary::after{content:'';width:1rem;height:1rem;background:currentcolor;mask:url(\"data:image/svg+xml,%3Csvg xmlns='http://www.w3.org/2000/svg' viewBox='0 0 16 16'%3E%3Cpath d='M3 8h9.5M8.5 4l4 4-4 4' fill='none' stroke='%23000' stroke-width='1.75' stroke-linecap='round' stroke-linejoin='round'/%3E%3C/svg%3E\")\n center / contain no-repeat;transition:transform 150ms ease}.fa-button-primary:hover{background:rgb(var(--fa-button-hover));box-shadow:inset 0 1px 0 rgb(255 255 255 / 0.25),\n 0 10px 24px -10px rgb(var(--fa-button) / 1)}.fa-button-primary:hover::after{transform:translateX(2px)}.fa-button-secondary{border-color:rgb(var(--fa-ink) / 0.16);background:rgb(var(--fa-ink) / 0.03);color:inherit!important}.fa-button-secondary:hover{border-color:rgb(var(--fa-accent) / 0.55);background:rgb(var(--fa-accent) / 0.08)}.fa-button:active{transform:translateY(1px)}.fa-button:focus-visible{outline:2px solid rgb(var(--fa-accent));outline-offset:3px}@media (prefers-reduced-motion: reduce){.fa-button,.fa-button-primary::after{transition:none}.fa-button:active,.fa-button-primary:hover::after{transform:none}}@media (max-width: 767px){.fa-hero{padding:2.5rem 1.5rem}.fa-hero h1{font-size:2.25rem}}#sidebar-content a,#sidebar-content li>button{gap:0.875rem;padding-top:0.625rem;padding-right:0.5rem;padding-bottom:0.625rem;font-size:1.125rem;line-height:1.45}#sidebar-content li+li{margin-top:0.25rem}#sidebar-content li>button>div:nth-child(2){min-width:0}#sidebar-content li>button>div:last-child{width:1.25rem;margin-left:auto;justify-content:center}#sidebar-content li>ul{margin:0.25rem 0 0.25rem 1.25rem;padding-left:0.375rem;border-left:1px solid rgb(0 0 0 / 0.1)}.dark #sidebar-content li>ul{border-left-color:rgb(255 255 255 / 0.1)}#sidebar-content li>ul>li>:is(a,button){padding-left:0.75rem!important;font-size:1.0625rem}#sidebar-content .sidebar-group-header{margin-bottom:0.625rem;font-size:0.875rem;font-weight:700;letter-spacing:0.08em;text-transform:uppercase;color:color-mix(in srgb, rgb(var(--fa-accent)) 72%, black)}.dark #sidebar-content .sidebar-group-header{color:rgb(var(--fa-accent))}#sidebar-content div:has(>.sidebar-group-header)+div:has(>.sidebar-group-header){margin-top:2.25rem}#sidebar-content a svg,#sidebar-content a img,#sidebar-content li>button>div:first-child svg,#sidebar-content li>button>div:first-child img{width:1.375rem;height:1.375rem}#sidebar-content .sidebar-group-header svg{width:1rem;height:1rem}.nav-tabs-item{gap:0.625rem;font-size:1.0625rem}.nav-tabs-item svg,.nav-tabs-item img{width:1.3125rem;height:1.3125rem}.nav-tabs-item[href^=\"/typescript\"] svg{background-color:#d4b106}.dark .nav-tabs-item[href^=\"/typescript\"] svg{background-color:#f7df1e}.nav-tabs-item[href^=\"/laravel\"] svg{background-color:#ff2d20}.nav-tabs-item[href^=\"/adonisjs\"] svg{background-color:#5a45ff}.dark .nav-tabs-item[href^=\"/adonisjs\"] svg{background-color:#8b7dff}li[data-group-tag]>button svg[style*=\"/brands/js.svg\"]{background-color:#d4b106}.dark li[data-group-tag]>button svg[style*=\"/brands/js.svg\"]{background-color:#f7df1e}li[data-group-tag]>button svg[style*=\"/brands/laravel.svg\"]{background-color:#ff2d20}#sidebar-content img[src$=\"/n8n.png\"]{transform:scale(1.35)}@media (min-width: 1024px){:root{--mintlify-slot-header-height: 6rem;--sidebar-width: 26rem}#navbar{height:6rem}#sidebar-content{top:6rem}#navbar div:has(img.nav-logo){height:100%}img.nav-logo{height:3.5rem;margin-left:0.5rem}div:has(>#search-bar-entry){position:fixed;top:1.5rem;right:7rem;z-index:40;width:clamp(11rem, calc(100vw - var(--sidebar-width) - 45rem), 24rem)}#search-bar-entry{height:3rem;padding-left:1.125rem;border-radius:0.875rem;font-size:1.0625rem}#search-bar-entry svg{width:1.125rem;height:1.125rem}}[data-switch=\"pill\"]{width:auto!important;height:auto!important;padding:0.3125rem;gap:0.25rem}.switch-option{width:2.125rem!important;height:2.125rem!important}.switch-option svg{width:1.125rem;height:1.125rem}.mdx-content .accordion-group{display:grid;gap:0.75rem;overflow:visible;border:0;border-color:transparent;border-radius:0;background:none}.mdx-content details.accordion{margin:0 0 0.75rem;border-color:transparent;border-radius:1rem!important;outline:1px solid rgb(var(--fa-ink) / 0.1);outline-offset:-1px;overflow:hidden;transition:outline-color 150ms ease,\n box-shadow 150ms ease}.mdx-content .accordion-group>details.accordion{margin:0}.mdx-content details.accordion:hover{outline-color:rgb(var(--fa-accent) / 0.35)}.mdx-content details.accordion[open]{outline-color:rgb(var(--fa-accent) / 0.45);box-shadow:inset 3px 0 0 rgb(var(--fa-accent))}.mdx-content [data-component-part=\"accordion-button\"]{gap:1rem;padding:1rem 1.25rem 1rem 1.5rem;border-radius:0!important;transition:background-color 150ms ease}.mdx-content [data-component-part=\"accordion-button\"]:hover{background:rgb(var(--fa-accent) / 0.05)}.mdx-content [data-component-part=\"accordion-button\"]:focus-visible{outline:2px solid rgb(var(--fa-accent));outline-offset:-2px}.mdx-content [data-component-part=\"accordion-caret-right\"]{order:3;width:2rem;height:2rem;border-radius:999px;background:rgb(var(--fa-ink) / 0.06);transition:background-color 150ms ease}.mdx-content [data-component-part=\"accordion-caret-right\"] svg{width:0.875rem;height:0.875rem}.mdx-content details.accordion[open] [data-component-part=\"accordion-caret-right\"]{background:rgb(var(--fa-accent) / 0.15)}.mdx-content details.accordion[open] [data-component-part=\"accordion-caret-right\"] svg{color:rgb(var(--fa-accent))}.mdx-content [data-component-part=\"accordion-icon\"]{display:inline-flex;align-items:center;justify-content:center;width:1.25rem;height:1.25rem}.mdx-content [data-component-part=\"accordion-icon\"] svg{width:1.25rem;height:1.25rem;background-color:rgb(var(--fa-accent))!important}.mdx-content [data-component-part=\"accordion-title\"]{font-size:1.1875rem}.mdx-content [data-component-part=\"accordion-content\"]{max-width:none;padding:1.5rem 2rem 1.75rem 1.5rem;border-top:1px solid rgb(var(--fa-ink) / 0.08);font-size:1.125rem;line-height:1.95}@media (min-width: 768px){.mdx-content details.accordion:has(>summary [data-component-part=\"accordion-icon\"])>[data-component-part=\"accordion-content\"]{padding-left:3.75rem}}.mdx-content [data-component-part=\"accordion-content\"]>[data-as=\"p\"],.mdx-content [data-component-part=\"accordion-content\"]>p{display:block;max-width:46rem;margin:0 0 1.25rem}.mdx-content [data-component-part=\"accordion-content\"]>:last-child{margin-bottom:0}@media (prefers-reduced-motion: reduce){.mdx-content details.accordion,.mdx-content [data-component-part=\"accordion-button\"],.mdx-content [data-component-part=\"accordion-caret-right\"]{transition:none}}[data-badge=\"true\"]{--fa-badge: 100 116 139;padding:0.125rem 0.5rem;border-radius:0.5rem;background:rgb(var(--fa-badge) / 0.14)!important;box-shadow:inset 0 0 0 1px rgb(var(--fa-badge) / 0.32);color:rgb(var(--fa-badge))!important;font-variant-numeric:tabular-nums}[data-badge=\"true\"][data-color=\"red\"]{--fa-badge: 239 68 68}[data-badge=\"true\"][data-color=\"orange\"]{--fa-badge: 245 130 32}[data-badge=\"true\"][data-color=\"yellow\"]{--fa-badge: 214 160 20}[data-badge=\"true\"][data-color=\"green\"]{--fa-badge: 22 163 74}[data-badge=\"true\"][data-color=\"blue\"]{--fa-badge: 17 145 240}.dark [data-badge=\"true\"][data-color=\"red\"]{--fa-badge: 248 113 113}.dark [data-badge=\"true\"][data-color=\"orange\"]{--fa-badge: 251 158 75}.dark [data-badge=\"true\"][data-color=\"yellow\"]{--fa-badge: 250 204 21}.dark [data-badge=\"true\"][data-color=\"green\"]{--fa-badge: 74 222 128}.dark [data-badge=\"true\"][data-color=\"blue\"]{--fa-badge: 62 165 245}.dark [data-badge=\"true\"][data-color=\"gray\"]{--fa-badge: 161 161 170}.mdx-content td [data-badge=\"true\"]+[data-badge=\"true\"]{margin-left:0.375rem}.mdx-content :is([data-as=\"p\"],p,li,td,blockquote),#header .prose,#page-title+*{color:rgb(38 43 52)}.dark .mdx-content :is([data-as=\"p\"],p,li,td,blockquote),.dark #header .prose,.dark #page-title+*{color:rgb(222 226 232)}.mdx-content :is(th,strong){font-weight:600}#sidebar-content a,#sidebar-content li>button{color:rgb(70 76 88)}.dark #sidebar-content a,.dark #sidebar-content li>button{color:rgb(196 201 210)}.toc-item a{color:inherit}.mdx-content [data-component-part=\"callout-content\"]{font-size:1.125rem;line-height:1.75}.mdx-content [data-component-part=\"callout-icon\"]{width:1.25rem;margin-top:0.25rem}.mdx-content [data-component-part=\"step-title\"]{font-size:1.25rem}.mdx-content [data-component-part=\"step-content\"],.mdx-content [data-component-part=\"tab-content\"]{font-size:1.125rem;line-height:1.85}.mdx-content [data-component-part=\"step-number\"]{margin-left:calc(0.5px - 1.125rem)}.mdx-content [data-component-part=\"step-indicator\"]{width:2.25rem;height:2.25rem;background-color:transparent;color:rgb(var(--fa-accent));font-size:1.25rem;font-weight:600}.mdx-content [data-component-part=\"step-indicator\"] svg{width:1.5rem;height:1.5rem;background-color:rgb(var(--fa-accent))!important}.mdx-content [data-component-part=\"tab-button\"]{font-size:1rem}.mdx-content [data-component-part=\"code-block-header\"],.mdx-content [data-component-part=\"code-block-header-filename\"]{font-size:0.875rem}.mdx-content [data-component-part=\"code-group-tab-bar\"]{font-size:0.9375rem}.mdx-content [data-component-part=\"field-name\"]{font-size:1.0625rem}.mdx-content [data-component-part=\"field-meta\"],.mdx-content [data-component-part=\"field-info-pill\"],.mdx-content [data-component-part=\"field-required-pill\"]{font-size:0.875rem}.mdx-content [data-component-part=\"expandable-button\"]{font-size:1rem}[data-component-part=\"pagination-title\"]{font-size:1.125rem}[data-component-part=\"pagination-label\"]{font-size:0.9375rem}.mdx-content>.multi-view-item{max-width:none;font-size:inherit;line-height:inherit}.multi-view-item>[data-as=\"p\"],.multi-view-item>p{margin-top:0;margin-bottom:1.75rem}.multi-view-item>h2{margin-top:3.5rem;margin-bottom:1.25rem;padding-top:2rem;border-top:1px solid rgb(0 0 0 / 0.08);font-size:1.875rem;letter-spacing:-0.01em}.dark .multi-view-item>h2{border-top-color:rgb(255 255 255 / 0.08)}.multi-view-item>h2:first-child{margin-top:0;padding-top:0;border-top:0}.multi-view-item>h3{margin-top:2.75rem;margin-bottom:1.125rem;font-size:1.4375rem}.multi-view-item>ul,.multi-view-item>ol{margin-bottom:1.75rem}.multi-view-item>.code-block,.multi-view-item>.code-group{margin-top:1.5rem;margin-bottom:2rem}#content-container .prose.prose-sm{font-size:1.0625rem;line-height:1.8}#sidebar-content .method-nav-pill{width:2.75rem}#sidebar-content .method-nav-pill>*{padding:0.125rem 0.375rem;font-size:0.6875rem;line-height:1.25rem}#fa-reader-values{margin-top:1.75rem;padding:1.5rem;border:1px solid rgb(var(--fa-ink) / 0.14);border-radius:1rem;background:transparent;font-size:1.0625rem;line-height:1.6;transition:border-color 150ms ease;container:fa-reader / inline-size}#fa-reader-values:hover,#fa-reader-values:focus-within{border-color:rgb(var(--fa-accent) / 0.45)}#fa-reader-values .fa-reader-line{display:grid;grid-template-columns:auto 1fr;align-items:center;gap:1rem 1.25rem}#fa-reader-values .fa-reader-toggle{grid-column:1 / -1;justify-self:start}@container fa-reader (min-width: 30rem){#fa-reader-values .fa-reader-line{grid-template-columns:auto 1fr auto}#fa-reader-values .fa-reader-line .fa-reader-toggle{grid-column:auto}}#fa-reader-values .fa-reader-icon{width:4rem;height:4rem;background:url('/logo/attract-glyph-color-a-green-on-light-scalable.svg') center / contain\n no-repeat}.dark #fa-reader-values .fa-reader-icon{background-image:url('/logo/attract-glyph-color-a-green-on-dark-scalable.svg')}#fa-reader-values .fa-reader-copy{min-width:0}#fa-reader-values .fa-reader-copy p{margin:0}#fa-reader-values .fa-reader-title{font-size:1.125rem;font-weight:600;color:rgb(var(--fa-ink))}#fa-reader-values .fa-reader-values{display:grid;grid-template-columns:auto 1fr;align-items:center;gap:0.625rem 0.875rem;margin:0.75rem 0 0}#fa-reader-values .fa-reader-values>div{display:contents}#fa-reader-values .fa-reader-values dt{font-weight:500;color:rgb(var(--fa-ink))}#fa-reader-values .fa-reader-values dd{justify-self:start;min-width:0;margin:0}#fa-reader-values code{display:inline-block;padding:0.375rem 0.875rem;border:1px solid rgb(var(--fa-accent) / 0.4);border-radius:0.5rem;background:rgb(var(--fa-ink) / 0.03);color:rgb(var(--fa-ink));font-size:0.95em;font-weight:700;line-height:1.4;overflow-wrap:anywhere}#fa-reader-values button{padding:0.625rem 1.25rem;border:1px solid rgb(var(--fa-ink) / 0.16);border-radius:0.625rem;background:rgb(var(--fa-ink) / 0.03);color:rgb(var(--fa-ink));font-weight:600;white-space:nowrap;cursor:pointer;transition:background-color 150ms ease,\n border-color 150ms ease}#fa-reader-values button:hover{border-color:rgb(var(--fa-accent) / 0.55);background:rgb(var(--fa-accent) / 0.08)}#fa-reader-values button:focus-visible,#fa-reader-values input:focus-visible{outline:2px solid rgb(var(--fa-accent));outline-offset:2px}#fa-reader-values .fa-reader-form{display:grid;grid-template-columns:1fr;gap:1.75rem 1.5rem;margin-top:1.5rem;padding:1.5rem 0.25rem 0.25rem;border-top:1px solid rgb(var(--fa-ink) / 0.1)}@media (min-width: 768px){#fa-reader-values .fa-reader-form{grid-template-columns:1fr 1fr}}#fa-reader-values .fa-reader-form[hidden]{display:none}#fa-reader-values label{display:grid;gap:0.625rem;align-content:start}#fa-reader-values label>span{font-weight:600;color:rgb(var(--fa-ink))}#fa-reader-values label em{font-style:normal;font-weight:400}#fa-reader-values input{width:100%;padding:0.75rem 1rem;border:1px solid rgb(128 128 128 / 0.4);border-radius:0.5rem;background:rgb(128 128 128 / 0.08);color:rgb(var(--fa-ink));font:inherit}#fa-reader-values small{display:block;margin-top:0.5rem;font-size:0.9375rem;line-height:1.6;color:rgb(var(--fa-ink))}#fa-reader-values .fa-reader-error{grid-column:1 / -1;margin:0;color:#dc2626}.dark #fa-reader-values .fa-reader-error{color:#f87171}#fa-reader-values .fa-reader-error:empty{display:none}#fa-reader-values .fa-reader-actions{display:flex;flex-wrap:wrap;grid-column:1 / -1;align-items:center;gap:1rem;padding-top:0.25rem}.mdx-content .n8n-canvas{--n8n-dot: rgb(0 0 0 / 0.12);--n8n-node-bg: #ffffff;--n8n-node-border: rgb(0 0 0 / 0.18);--n8n-line: #94a3b8;margin:1.75rem 0 2.25rem;padding:2rem 0.75rem 1.5rem;overflow-x:auto;border:1px solid rgb(0 0 0 / 0.08);border-radius:1rem;background-color:rgb(0 0 0 / 0.015);background-image:radial-gradient(var(--n8n-dot) 1px, transparent 1px);background-size:18px 18px}.dark .mdx-content .n8n-canvas{--n8n-dot: rgb(255 255 255 / 0.1);--n8n-node-bg: #1b1f24;--n8n-node-border: rgb(255 255 255 / 0.22);--n8n-line: #64748b;border-color:rgb(255 255 255 / 0.08);background-color:rgb(255 255 255 / 0.02)}.mdx-content .n8n-canvas-row{display:flex;align-items:flex-start;justify-content:center;min-width:max-content;margin:0 auto}.mdx-content .n8n-node{display:flex;flex-direction:column;align-items:center;width:7.25rem;text-align:center}.mdx-content .n8n-node-box{display:flex;align-items:center;justify-content:center;width:4.5rem;height:4.5rem;border:2px solid var(--n8n-node-border);border-radius:0.75rem;background:var(--n8n-node-bg);box-shadow:0 1px 3px rgb(0 0 0 / 0.08)}.mdx-content .n8n-node-trigger .n8n-node-box{border-radius:2.25rem 0.75rem 0.75rem 2.25rem}.mdx-content .n8n-node-accent .n8n-node-box{border-color:rgb(var(--fa-accent));box-shadow:0 0 0 4px rgb(var(--fa-accent) / 0.15)}.mdx-content .n8n-node-title{margin-top:0.6rem;font-size:0.95rem;font-weight:600;line-height:1.3}.mdx-content .n8n-node-note{margin-top:0.2rem;font-size:0.8rem;line-height:1.35;opacity:0.7}.mdx-content .n8n-node-box svg{width:1.9rem!important;height:1.9rem!important}.mdx-content .n8n-link{display:flex;flex-direction:column;align-items:center;width:4rem;margin:0 -1.125rem;padding-top:1.1rem}.mdx-content .n8n-link-items{height:1.1rem;font-size:0.75rem;font-weight:600;line-height:1.1rem;white-space:nowrap;color:rgb(var(--fa-accent))}.mdx-content .n8n-link-line{position:relative;width:100%;height:2px;margin-top:0.4rem;background:var(--n8n-line)}.mdx-content .n8n-link-line::after{position:absolute;top:-4px;right:-1px;border-top:5px solid transparent;border-bottom:5px solid transparent;border-left:7px solid var(--n8n-line);content:''}.mdx-content .n8n-canvas figcaption{margin-top:1.25rem;font-size:0.85rem;text-align:center;opacity:0.7}.mdx-content .n8n-signed{margin:1.5rem 0 2rem;padding:1.5rem 1.25rem 1.25rem;overflow-x:auto;border:1px solid rgb(0 0 0 / 0.08);border-radius:1rem}.dark .mdx-content .n8n-signed{border-color:rgb(255 255 255 / 0.08)}.mdx-content .n8n-signed-row{display:flex;flex-wrap:wrap;align-items:flex-start;justify-content:center;row-gap:1rem}.mdx-content .n8n-signed-part{display:flex;flex-direction:column;align-items:center;gap:0.5rem}.mdx-content .n8n-signed-value,.mdx-content .n8n-signed-dot{padding:0.35rem 0.55rem;border-radius:0.4rem;font-size:0.95rem;white-space:nowrap}.mdx-content .n8n-signed-dot{padding:0.35rem 0.15rem;background:none;font-weight:700}.mdx-content .n8n-signed-value{min-width:2.5rem;text-align:center;background:rgb(var(--n8n-part) / 0.14);box-shadow:inset 0 0 0 1px rgb(var(--n8n-part) / 0.45)}.mdx-content .n8n-signed-label{font-size:0.75rem;font-weight:600;letter-spacing:0.04em;text-transform:uppercase;color:rgb(var(--n8n-part))}.mdx-content .n8n-signed-0{--n8n-part: 37 99 235}.mdx-content .n8n-signed-1{--n8n-part: 22 163 74}.mdx-content .n8n-signed-2{--n8n-part: 217 119 6}.mdx-content .n8n-signed-3{--n8n-part: 219 39 119}.mdx-content .n8n-coming-soon-logos{display:flex;align-items:center;gap:1rem;margin-bottom:1.25rem}.mdx-content .n8n-coming-soon-logos img{width:auto;height:3.5rem;margin:0}.mdx-content .n8n-coming-soon-logos img[class^=\"n8n-mark-\"]{height:4.5rem;margin:-0.5rem}.mdx-content .n8n-coming-soon-logos .n8n-mark-dark,.dark .mdx-content .n8n-coming-soon-logos .n8n-mark-light{display:none}.dark .mdx-content .n8n-coming-soon-logos .n8n-mark-dark{display:block}.mdx-content .n8n-coming-soon-logos span{font-size:1.75rem;font-weight:600;opacity:0.6}.mdx-content .n8n-coming-soon-title{margin:0 0 0.35rem;font-size:1.25rem;font-weight:600;color:rgb(var(--fa-ink))}.mdx-content .n8n-coming-soon-title+*{margin-top:0}"}],"page":{"pagePath":"guides/build-pages/languages","slug":"/guides/build-pages/languages","pageMetadata":{"title":"Your site in more than one language","sidebarTitle":"Languages","description":"Add a language, translate your pages into it, and put it live when it's ready, with its own addresses and a language switcher for visitors.","icon":"language","href":"/guides/build-pages/languages"},"description":{"compiledSource":"\"use strict\";\nconst {jsx: _jsx} = arguments[0];\nconst {useMDXComponents: _provideComponents} = arguments[0];\nfunction _createMdxContent(props) {\n const _components = {\n p: \"p\",\n ..._provideComponents(),\n ...props.components\n };\n return _jsx(_components.p, {\n children: \"Add a language, translate your pages into it, and put it live when it’s ready, with its own addresses and a language switcher for visitors.\"\n });\n}\nfunction MDXContent(props = {}) {\n const {wrapper: MDXLayout} = {\n ..._provideComponents(),\n ...props.components\n };\n return MDXLayout ? _jsx(MDXLayout, {\n ...props,\n children: _jsx(_createMdxContent, {\n ...props\n })\n }) : _createMdxContent(props);\n}\nreturn {\n default: MDXContent\n};\n","frontmatter":{},"scope":{}},"pageType":"default","mdx":{"mdxSource":{"compiledSource":"\"use strict\";const{Fragment:_Fragment,jsx:_jsx,jsxs:_jsxs}=arguments[0];const{useMDXComponents:_provideComponents}=arguments[0];function _createMdxContent(props){const _components={code:`code`,li:`li`,ol:`ol`,p:`p`,strong:`strong`,ul:`ul`,..._provideComponents(),...props.components},{Accordion,AccordionGroup,Card,Columns,Frame,Heading,Icon,Note,OptimizedImage,Step,Steps,Tip,Warning}=_components;if(!Accordion)_missingMdxReference(`Accordion`,true);if(!AccordionGroup)_missingMdxReference(`AccordionGroup`,true);if(!Card)_missingMdxReference(`Card`,true);if(!Columns)_missingMdxReference(`Columns`,true);if(!Frame)_missingMdxReference(`Frame`,true);if(!Heading)_missingMdxReference(`Heading`,true);if(!Icon)_missingMdxReference(`Icon`,true);if(!Note)_missingMdxReference(`Note`,true);if(!OptimizedImage)_missingMdxReference(`OptimizedImage`,true);if(!Step)_missingMdxReference(`Step`,true);if(!Steps)_missingMdxReference(`Steps`,true);if(!Tip)_missingMdxReference(`Tip`,true);if(!Warning)_missingMdxReference(`Warning`,true);return _jsxs(_Fragment,{children:[_jsxs(_components.p,{children:[`Speak to more of your customers in their own language. Add a language, translate your pages at your own pace, and switch it on for visitors when it’s ready. Each language gets its own addresses, such as `,_jsx(_components.code,{children:`/fr/about-us`}),`, and visitors get a language switcher in your site’s header.`]}),`\n`,_jsxs(_components.p,{children:[_jsx(Icon,{icon:`user-shield`}),` `,_jsx(_components.strong,{children:`Who can do this:`}),` Admins and Owners add and remove languages. Anyone who can edit a page can translate it: Contributors, Editors, Admins and Owners. Publishing a translation works like publishing any page.`]}),`\n`,_jsx(Heading,{level:`2`,id:`before-you-start`,children:`Before you start`}),`\n`,_jsxs(_components.ul,{children:[`\n`,_jsxs(_components.li,{children:[`Know each language’s code. It’s the short lowercase code for the language, such as `,_jsx(_components.code,{children:`fr`}),` for French or `,_jsx(_components.code,{children:`es`}),` for Spanish. For a language as spoken in one country, add the country: `,_jsx(_components.code,{children:`pt-br`}),` for Portuguese in Brazil.`]}),`\n`,_jsxs(_components.li,{children:[`Your site’s first language is its `,_jsx(_components.strong,{children:`main language`}),`. Its pages keep the addresses they have today. Every language you add gets its code at the start of its addresses.`]}),`\n`]}),`\n`,_jsx(Heading,{level:`2`,id:`add-a-language`,children:`Add a language`}),`\n`,_jsxs(Steps,{children:[_jsx(Step,{title:`Open Languages`,children:_jsxs(_components.p,{children:[`Open the command palette (⌘K, or Ctrl+K on Windows) and choose `,_jsx(_components.strong,{children:`Languages`}),`. The shortcut is T then ⇧L.`]})}),_jsx(Step,{title:`Name your main language`,children:_jsxs(_components.p,{children:[`In `,_jsx(_components.strong,{children:`Main language`}),`, write your site’s first language as its speakers write it, such as “English”. Visitors see this name in the language switcher.`]})}),_jsxs(Step,{title:`Add the new language`,children:[_jsxs(_components.p,{children:[`Under `,_jsx(_components.strong,{children:`More languages`}),`, add a language and fill in:`]}),_jsxs(_components.ul,{children:[`\n`,_jsxs(_components.li,{children:[_jsx(_components.strong,{children:`Name`}),`: the language as its speakers write it, such as “Français”. The switcher shows this name.`]}),`\n`,_jsxs(_components.li,{children:[_jsx(_components.strong,{children:`Code`}),`: its language code, such as `,_jsx(_components.code,{children:`fr`}),`.`]}),`\n`,_jsxs(_components.li,{children:[_jsx(_components.strong,{children:`Public`}),`: leave it at `,_jsx(_components.strong,{children:`No`}),` for now. Until it’s `,_jsx(_components.strong,{children:`Yes`}),`, only people signed in to the CMS see the language, so you can translate in peace.`]}),`\n`]}),_jsxs(Frame,{caption:`Add a language: its name, its code, and Public at No while you translate.`,children:[_jsx(OptimizedImage,{className:`mint-block dark:mint-hidden`,src:`https://mintcdn.com/fetchski-attract-api/JTZEGvERTLgfkfin/images/cms/guides/build-pages/languages/guides-build-pages-languages-screen-light.png?fit=max\u0026auto=format\u0026n=JTZEGvERTLgfkfin\u0026q=85\u0026s=1cfa5bd87b5bcf7ef0c93891b205802f`,alt:`The Languages window: Main language English, and under More languages one row named Français with Name Français, Code fr and Public set to No.`,\"data-og-width\":`2880`,width:`2880`,\"data-og-height\":`1800`,height:`1800`,\"data-path\":`images/cms/guides/build-pages/languages/guides-build-pages-languages-screen-light.png`,\"data-optimize\":`true`,\"data-opv\":`3`,srcset:`https://mintcdn.com/fetchski-attract-api/JTZEGvERTLgfkfin/images/cms/guides/build-pages/languages/guides-build-pages-languages-screen-light.png?w=280\u0026fit=max\u0026auto=format\u0026n=JTZEGvERTLgfkfin\u0026q=85\u0026s=2a147d943f5d5ba1883d8ff4a7c7bcf0 280w, https://mintcdn.com/fetchski-attract-api/JTZEGvERTLgfkfin/images/cms/guides/build-pages/languages/guides-build-pages-languages-screen-light.png?w=560\u0026fit=max\u0026auto=format\u0026n=JTZEGvERTLgfkfin\u0026q=85\u0026s=427984481e570774ffe9f450a2f27049 560w, https://mintcdn.com/fetchski-attract-api/JTZEGvERTLgfkfin/images/cms/guides/build-pages/languages/guides-build-pages-languages-screen-light.png?w=840\u0026fit=max\u0026auto=format\u0026n=JTZEGvERTLgfkfin\u0026q=85\u0026s=09089e0e7f15061f3e7b55cef2317f65 840w, https://mintcdn.com/fetchski-attract-api/JTZEGvERTLgfkfin/images/cms/guides/build-pages/languages/guides-build-pages-languages-screen-light.png?w=1100\u0026fit=max\u0026auto=format\u0026n=JTZEGvERTLgfkfin\u0026q=85\u0026s=e4696474a644d5fe2ff9d7f410524b2b 1100w, https://mintcdn.com/fetchski-attract-api/JTZEGvERTLgfkfin/images/cms/guides/build-pages/languages/guides-build-pages-languages-screen-light.png?w=1650\u0026fit=max\u0026auto=format\u0026n=JTZEGvERTLgfkfin\u0026q=85\u0026s=d12a378ee06141cc6a9082544b5b6cac 1650w, https://mintcdn.com/fetchski-attract-api/JTZEGvERTLgfkfin/images/cms/guides/build-pages/languages/guides-build-pages-languages-screen-light.png?w=2500\u0026fit=max\u0026auto=format\u0026n=JTZEGvERTLgfkfin\u0026q=85\u0026s=7a36bab7c0545e16d52456d23f155f93 2500w`}),_jsx(OptimizedImage,{className:`mint-hidden dark:mint-block`,src:`https://mintcdn.com/fetchski-attract-api/JTZEGvERTLgfkfin/images/cms/guides/build-pages/languages/guides-build-pages-languages-screen-dark.png?fit=max\u0026auto=format\u0026n=JTZEGvERTLgfkfin\u0026q=85\u0026s=d21ef702c664ba08fa0fd9e4821a8031`,alt:`The Languages window: Main language English, and under More languages one row named Français with Name Français, Code fr and Public set to No.`,\"data-og-width\":`2880`,width:`2880`,\"data-og-height\":`1800`,height:`1800`,\"data-path\":`images/cms/guides/build-pages/languages/guides-build-pages-languages-screen-dark.png`,\"data-optimize\":`true`,\"data-opv\":`3`,srcset:`https://mintcdn.com/fetchski-attract-api/JTZEGvERTLgfkfin/images/cms/guides/build-pages/languages/guides-build-pages-languages-screen-dark.png?w=280\u0026fit=max\u0026auto=format\u0026n=JTZEGvERTLgfkfin\u0026q=85\u0026s=74f55d8cfe3754e9eaf443f58d739a0b 280w, https://mintcdn.com/fetchski-attract-api/JTZEGvERTLgfkfin/images/cms/guides/build-pages/languages/guides-build-pages-languages-screen-dark.png?w=560\u0026fit=max\u0026auto=format\u0026n=JTZEGvERTLgfkfin\u0026q=85\u0026s=c61004bfe2a7b19f0adf1c09f0f87796 560w, https://mintcdn.com/fetchski-attract-api/JTZEGvERTLgfkfin/images/cms/guides/build-pages/languages/guides-build-pages-languages-screen-dark.png?w=840\u0026fit=max\u0026auto=format\u0026n=JTZEGvERTLgfkfin\u0026q=85\u0026s=5e60032b15d82b10788cf7f2c8d7e741 840w, https://mintcdn.com/fetchski-attract-api/JTZEGvERTLgfkfin/images/cms/guides/build-pages/languages/guides-build-pages-languages-screen-dark.png?w=1100\u0026fit=max\u0026auto=format\u0026n=JTZEGvERTLgfkfin\u0026q=85\u0026s=d6315e16cbfc9e9e7ed5212496f5efbe 1100w, https://mintcdn.com/fetchski-attract-api/JTZEGvERTLgfkfin/images/cms/guides/build-pages/languages/guides-build-pages-languages-screen-dark.png?w=1650\u0026fit=max\u0026auto=format\u0026n=JTZEGvERTLgfkfin\u0026q=85\u0026s=fa500f9b91d9087bcd05a9d05102b9f7 1650w, https://mintcdn.com/fetchski-attract-api/JTZEGvERTLgfkfin/images/cms/guides/build-pages/languages/guides-build-pages-languages-screen-dark.png?w=2500\u0026fit=max\u0026auto=format\u0026n=JTZEGvERTLgfkfin\u0026q=85\u0026s=d34dca5e7c310b1200d28ad548ade881 2500w`})]})]}),_jsx(Step,{title:`Save`,children:_jsxs(_components.p,{children:[`Choose `,_jsx(_components.strong,{children:`Save`}),`. The language is ready straight away: it gets its own home page, and its own copy of `,_jsx(_components.strong,{children:`Site settings`}),` and `,_jsx(_components.strong,{children:`Site design`}),`.`]})}),_jsx(Step,{title:`Reload the page`,children:_jsxs(_components.p,{children:[`Reload your browser. The toolbar now shows a language menu with the current language’s code, such as `,_jsx(_components.strong,{children:`EN`}),`.`]})})]}),`\n`,_jsx(Heading,{level:`2`,id:`translate-a-page`,children:`Translate a page`}),`\n`,_jsxs(Steps,{children:[_jsx(Step,{title:`Open the page in your main language`,children:_jsx(_components.p,{children:`Go to the page on your site, as you would to edit it.`})}),_jsx(Step,{title:`Switch language`,children:_jsxs(_components.p,{children:[`In the toolbar, open the language menu (`,_jsx(_components.strong,{children:`EN`}),`) and choose the new language. The page doesn’t exist there yet, so the CMS asks: “Switch locales and localize page to Français?” Choose `,_jsx(_components.strong,{children:`Yes, localize this page and switch locales`}),`.`]})}),_jsxs(Step,{title:`Choose what to copy`,children:[_jsxs(_components.p,{children:[`The `,_jsx(_components.strong,{children:`Localize Content`}),` window opens. Under `,_jsx(_components.strong,{children:`What content do you want to localize?`}),`, `,_jsx(_components.strong,{children:`This document and related documents`}),` is chosen for you. It brings along what the page shows, such as its images and team members.`]}),_jsxs(_components.p,{children:[`Choose `,_jsx(_components.strong,{children:`This document`}),` for the page alone. Then choose `,_jsx(_components.strong,{children:`Next`}),`.`]}),_jsxs(Frame,{caption:`Choose what to copy into the new language.`,children:[_jsx(OptimizedImage,{className:`mint-block dark:mint-hidden`,src:`https://mintcdn.com/fetchski-attract-api/JTZEGvERTLgfkfin/images/cms/guides/build-pages/languages/guides-build-pages-languages-localize-light.png?fit=max\u0026auto=format\u0026n=JTZEGvERTLgfkfin\u0026q=85\u0026s=3098863fb51bb98317c6d02789d9f81b`,alt:`The Localize Content window at its first step, Select Content: What content do you want to localize? with This document, This document and related documents (chosen) and Related documents only, and a Next button.`,\"data-og-width\":`1230`,width:`1230`,\"data-og-height\":`1516`,height:`1516`,\"data-path\":`images/cms/guides/build-pages/languages/guides-build-pages-languages-localize-light.png`,\"data-optimize\":`true`,\"data-opv\":`3`,srcset:`https://mintcdn.com/fetchski-attract-api/JTZEGvERTLgfkfin/images/cms/guides/build-pages/languages/guides-build-pages-languages-localize-light.png?w=280\u0026fit=max\u0026auto=format\u0026n=JTZEGvERTLgfkfin\u0026q=85\u0026s=224e7bad2798b1d20692d5ace8d9b0d1 280w, https://mintcdn.com/fetchski-attract-api/JTZEGvERTLgfkfin/images/cms/guides/build-pages/languages/guides-build-pages-languages-localize-light.png?w=560\u0026fit=max\u0026auto=format\u0026n=JTZEGvERTLgfkfin\u0026q=85\u0026s=33cc8e90fb95eb0c97fddb9f9707547e 560w, https://mintcdn.com/fetchski-attract-api/JTZEGvERTLgfkfin/images/cms/guides/build-pages/languages/guides-build-pages-languages-localize-light.png?w=840\u0026fit=max\u0026auto=format\u0026n=JTZEGvERTLgfkfin\u0026q=85\u0026s=c85126264999061fccb125778476e58d 840w, https://mintcdn.com/fetchski-attract-api/JTZEGvERTLgfkfin/images/cms/guides/build-pages/languages/guides-build-pages-languages-localize-light.png?w=1100\u0026fit=max\u0026auto=format\u0026n=JTZEGvERTLgfkfin\u0026q=85\u0026s=481a008a76f084eacb42df3ae56811e1 1100w, https://mintcdn.com/fetchski-attract-api/JTZEGvERTLgfkfin/images/cms/guides/build-pages/languages/guides-build-pages-languages-localize-light.png?w=1650\u0026fit=max\u0026auto=format\u0026n=JTZEGvERTLgfkfin\u0026q=85\u0026s=9c5f74a25258ed94c8ed146d6017e5d3 1650w, https://mintcdn.com/fetchski-attract-api/JTZEGvERTLgfkfin/images/cms/guides/build-pages/languages/guides-build-pages-languages-localize-light.png?w=2500\u0026fit=max\u0026auto=format\u0026n=JTZEGvERTLgfkfin\u0026q=85\u0026s=cdfcfb12df61f0f2c058a3be84e98eec 2500w`}),_jsx(OptimizedImage,{className:`mint-hidden dark:mint-block`,src:`https://mintcdn.com/fetchski-attract-api/JTZEGvERTLgfkfin/images/cms/guides/build-pages/languages/guides-build-pages-languages-localize-dark.png?fit=max\u0026auto=format\u0026n=JTZEGvERTLgfkfin\u0026q=85\u0026s=5799310adb9f677d9a3f2a0edd1f0071`,alt:`The Localize Content window at its first step, Select Content: What content do you want to localize? with This document, This document and related documents (chosen) and Related documents only, and a Next button.`,\"data-og-width\":`1230`,width:`1230`,\"data-og-height\":`1516`,height:`1516`,\"data-path\":`images/cms/guides/build-pages/languages/guides-build-pages-languages-localize-dark.png`,\"data-optimize\":`true`,\"data-opv\":`3`,srcset:`https://mintcdn.com/fetchski-attract-api/JTZEGvERTLgfkfin/images/cms/guides/build-pages/languages/guides-build-pages-languages-localize-dark.png?w=280\u0026fit=max\u0026auto=format\u0026n=JTZEGvERTLgfkfin\u0026q=85\u0026s=9dd381bc30eb15d1752520136357d6a1 280w, https://mintcdn.com/fetchski-attract-api/JTZEGvERTLgfkfin/images/cms/guides/build-pages/languages/guides-build-pages-languages-localize-dark.png?w=560\u0026fit=max\u0026auto=format\u0026n=JTZEGvERTLgfkfin\u0026q=85\u0026s=863a2ac5cdb3f30ab3d0773edd3d08b0 560w, https://mintcdn.com/fetchski-attract-api/JTZEGvERTLgfkfin/images/cms/guides/build-pages/languages/guides-build-pages-languages-localize-dark.png?w=840\u0026fit=max\u0026auto=format\u0026n=JTZEGvERTLgfkfin\u0026q=85\u0026s=4340fb9f32fa73fb25e199c0964a52a7 840w, https://mintcdn.com/fetchski-attract-api/JTZEGvERTLgfkfin/images/cms/guides/build-pages/languages/guides-build-pages-languages-localize-dark.png?w=1100\u0026fit=max\u0026auto=format\u0026n=JTZEGvERTLgfkfin\u0026q=85\u0026s=4831ce3ab520d40be598e7b3d5f70c4d 1100w, https://mintcdn.com/fetchski-attract-api/JTZEGvERTLgfkfin/images/cms/guides/build-pages/languages/guides-build-pages-languages-localize-dark.png?w=1650\u0026fit=max\u0026auto=format\u0026n=JTZEGvERTLgfkfin\u0026q=85\u0026s=03afb77573ef6cd9bffbe890653790fa 1650w, https://mintcdn.com/fetchski-attract-api/JTZEGvERTLgfkfin/images/cms/guides/build-pages/languages/guides-build-pages-languages-localize-dark.png?w=2500\u0026fit=max\u0026auto=format\u0026n=JTZEGvERTLgfkfin\u0026q=85\u0026s=c2f031bcdda3688a1c403f0a9b902ff3 2500w`})]})]}),_jsx(Step,{title:`Check the language and copy`,children:_jsxs(_components.p,{children:[`Check the language is ticked under `,_jsx(_components.strong,{children:`Select Locales`}),`, choose `,_jsx(_components.strong,{children:`Next`}),`, then choose `,_jsx(_components.strong,{children:`Localize Content`}),`.`]})}),_jsx(Step,{title:`Translate`,children:_jsxs(_components.p,{children:[`You’re now on the page in the new language: a draft, with your main language’s words in it. Choose `,_jsx(_components.strong,{children:`Edit`}),` and replace the words with your translation, section by section.`]})}),_jsx(Step,{title:`Publish`,children:_jsxs(_components.p,{children:[`Choose `,_jsx(_components.strong,{children:`Publish`}),` when the translation is ready, as with any page.`]})})]}),`\n`,_jsxs(_components.p,{children:[`You can also start from any page or item: choose `,_jsx(_components.strong,{children:`More Options`}),` (⋯) → `,_jsx(_components.strong,{children:`Localize…`}),`. To translate many items at once, such as all your FAQs, open their list from the command palette, select them, and choose `,_jsx(_components.strong,{children:`Localize…`}),`.`]}),`\n`,_jsxs(_components.p,{children:[`A page’s address is translated too. Open the page settings window in the new language and change its `,_jsx(_components.strong,{children:`Slug`}),`, such as `,_jsx(_components.code,{children:`about-us`}),` to `,_jsx(_components.code,{children:`a-propos`}),`. The language’s code stays in front: `,_jsx(_components.code,{children:`/fr/a-propos`}),`.`]}),`\n`,_jsx(Tip,{children:_jsx(_components.p,{children:`Translate the pages your menu links to first. A page whose parent page isn’t translated yet can’t be translated: the CMS says “Localize the parent page first”.`})}),`\n`,_jsx(Heading,{level:`2`,id:`translate-your-header-footer-and-banners`,children:`Translate your header, footer and banners`}),`\n`,_jsxs(_components.p,{children:[_jsx(_components.strong,{children:`Site settings`}),` and `,_jsx(_components.strong,{children:`Site design`}),` have their own copy in each language. Switch language in the toolbar, then open them to translate:`]}),`\n`,_jsxs(_components.ul,{children:[`\n`,_jsxs(_components.li,{children:[_jsx(_components.strong,{children:`Site design`}),`: the header’s links, its `,_jsx(_components.strong,{children:`More`}),` label and button, the footer’s link groups, scrolling text, copyright line, note and social heading.`]}),`\n`,_jsxs(_components.li,{children:[_jsx(_components.strong,{children:`Site settings`}),`: your tagline, the maintenance message, and every word of the cookie banner and cookie preferences.`]}),`\n`]}),`\n`,_jsx(_components.p,{children:`A new language starts with your main language’s links, which point at your main language’s pages. Point each one at the translated page.`}),`\n`,_jsx(_components.p,{children:`Everything else on those screens is shared by every language: your colors, fonts, logos, business name, contact details and social links. Change one in any language and it changes in all of them.`}),`\n`,_jsx(Note,{children:_jsxs(_components.p,{children:[`Shared settings go live from your main language only. To put a change to one of them live, switch to your main language and publish `,_jsx(_components.strong,{children:`Site settings`}),` or `,_jsx(_components.strong,{children:`Site design`}),` there. Publishing them in another language publishes that language’s own words, never a shared change.`]})}),`\n`,_jsx(Heading,{level:`2`,id:`put-the-language-live`,children:`Put the language live`}),`\n`,_jsx(_components.p,{children:`When the pages that matter are translated and published:`}),`\n`,_jsxs(_components.ol,{children:[`\n`,_jsxs(_components.li,{children:[`Open `,_jsx(_components.strong,{children:`Languages`}),` (⌘K, T then ⇧L).`]}),`\n`,_jsxs(_components.li,{children:[`Set the language’s `,_jsx(_components.strong,{children:`Public`}),` to `,_jsx(_components.strong,{children:`Yes`}),`.`]}),`\n`,_jsxs(_components.li,{children:[`Choose `,_jsx(_components.strong,{children:`Save`}),`.`]}),`\n`]}),`\n`,_jsxs(Frame,{caption:`Visitors pick their language in your site's header.`,children:[_jsx(OptimizedImage,{className:`mint-block dark:mint-hidden`,src:`https://mintcdn.com/fetchski-attract-api/JTZEGvERTLgfkfin/images/cms/guides/build-pages/languages/guides-build-pages-languages-switcher-light.png?fit=max\u0026auto=format\u0026n=JTZEGvERTLgfkfin\u0026q=85\u0026s=5add949eba2ca39c00590d8e882a5a16`,alt:`Parker's site header with the language switcher open under the EN button, listing English (current) and Français.`,\"data-og-width\":`2880`,width:`2880`,\"data-og-height\":`414`,height:`414`,\"data-path\":`images/cms/guides/build-pages/languages/guides-build-pages-languages-switcher-light.png`,\"data-optimize\":`true`,\"data-opv\":`3`,srcset:`https://mintcdn.com/fetchski-attract-api/JTZEGvERTLgfkfin/images/cms/guides/build-pages/languages/guides-build-pages-languages-switcher-light.png?w=280\u0026fit=max\u0026auto=format\u0026n=JTZEGvERTLgfkfin\u0026q=85\u0026s=8d4ccd57f490cfa63484bac75bb72361 280w, https://mintcdn.com/fetchski-attract-api/JTZEGvERTLgfkfin/images/cms/guides/build-pages/languages/guides-build-pages-languages-switcher-light.png?w=560\u0026fit=max\u0026auto=format\u0026n=JTZEGvERTLgfkfin\u0026q=85\u0026s=26860ae71f7d52173d78cf78d5f2c21e 560w, https://mintcdn.com/fetchski-attract-api/JTZEGvERTLgfkfin/images/cms/guides/build-pages/languages/guides-build-pages-languages-switcher-light.png?w=840\u0026fit=max\u0026auto=format\u0026n=JTZEGvERTLgfkfin\u0026q=85\u0026s=e9713f4211f960cac25bc4be63cca460 840w, https://mintcdn.com/fetchski-attract-api/JTZEGvERTLgfkfin/images/cms/guides/build-pages/languages/guides-build-pages-languages-switcher-light.png?w=1100\u0026fit=max\u0026auto=format\u0026n=JTZEGvERTLgfkfin\u0026q=85\u0026s=b2b4e92d02193ada168d6993b0b4e2dc 1100w, https://mintcdn.com/fetchski-attract-api/JTZEGvERTLgfkfin/images/cms/guides/build-pages/languages/guides-build-pages-languages-switcher-light.png?w=1650\u0026fit=max\u0026auto=format\u0026n=JTZEGvERTLgfkfin\u0026q=85\u0026s=c100c9d3f53c5a820f59cf3772a540cd 1650w, https://mintcdn.com/fetchski-attract-api/JTZEGvERTLgfkfin/images/cms/guides/build-pages/languages/guides-build-pages-languages-switcher-light.png?w=2500\u0026fit=max\u0026auto=format\u0026n=JTZEGvERTLgfkfin\u0026q=85\u0026s=b321bdaa5abde056b4463800679e4028 2500w`}),_jsx(OptimizedImage,{className:`mint-hidden dark:mint-block`,src:`https://mintcdn.com/fetchski-attract-api/JTZEGvERTLgfkfin/images/cms/guides/build-pages/languages/guides-build-pages-languages-switcher-dark.png?fit=max\u0026auto=format\u0026n=JTZEGvERTLgfkfin\u0026q=85\u0026s=b9ba8126ed17ad3882f9e643a6800a6f`,alt:`Parker's site header with the language switcher open under the EN button, listing English (current) and Français.`,\"data-og-width\":`2880`,width:`2880`,\"data-og-height\":`414`,height:`414`,\"data-path\":`images/cms/guides/build-pages/languages/guides-build-pages-languages-switcher-dark.png`,\"data-optimize\":`true`,\"data-opv\":`3`,srcset:`https://mintcdn.com/fetchski-attract-api/JTZEGvERTLgfkfin/images/cms/guides/build-pages/languages/guides-build-pages-languages-switcher-dark.png?w=280\u0026fit=max\u0026auto=format\u0026n=JTZEGvERTLgfkfin\u0026q=85\u0026s=4c10e7d9ad055cf9c0e6504543afb2d5 280w, https://mintcdn.com/fetchski-attract-api/JTZEGvERTLgfkfin/images/cms/guides/build-pages/languages/guides-build-pages-languages-switcher-dark.png?w=560\u0026fit=max\u0026auto=format\u0026n=JTZEGvERTLgfkfin\u0026q=85\u0026s=27284130c6ced240ed04564025c6b27a 560w, https://mintcdn.com/fetchski-attract-api/JTZEGvERTLgfkfin/images/cms/guides/build-pages/languages/guides-build-pages-languages-switcher-dark.png?w=840\u0026fit=max\u0026auto=format\u0026n=JTZEGvERTLgfkfin\u0026q=85\u0026s=0144415419423295806aeb0f25124673 840w, https://mintcdn.com/fetchski-attract-api/JTZEGvERTLgfkfin/images/cms/guides/build-pages/languages/guides-build-pages-languages-switcher-dark.png?w=1100\u0026fit=max\u0026auto=format\u0026n=JTZEGvERTLgfkfin\u0026q=85\u0026s=aebf13439189f601f17ee0aded2ddbb2 1100w, https://mintcdn.com/fetchski-attract-api/JTZEGvERTLgfkfin/images/cms/guides/build-pages/languages/guides-build-pages-languages-switcher-dark.png?w=1650\u0026fit=max\u0026auto=format\u0026n=JTZEGvERTLgfkfin\u0026q=85\u0026s=4afd04db091409909a2baa7b4474bd5f 1650w, https://mintcdn.com/fetchski-attract-api/JTZEGvERTLgfkfin/images/cms/guides/build-pages/languages/guides-build-pages-languages-switcher-dark.png?w=2500\u0026fit=max\u0026auto=format\u0026n=JTZEGvERTLgfkfin\u0026q=85\u0026s=60cf79280340aeb0bb1b5854eac32a98 2500w`})]}),`\n`,_jsx(_components.p,{children:`Visitors now see:`}),`\n`,_jsxs(_components.ul,{children:[`\n`,_jsxs(_components.li,{children:[_jsx(_components.strong,{children:`A language switcher`}),` in your site’s header, and a `,_jsx(_components.strong,{children:`Language`}),` row in the menu on phones. Each language links to the same page in that language, or to that language’s home page when the page isn’t translated.`]}),`\n`,_jsxs(_components.li,{children:[_jsx(_components.strong,{children:`The language’s own addresses`}),`, such as `,_jsx(_components.code,{children:`/fr/a-propos`}),`. A page you haven’t translated isn’t there in that language.`]}),`\n`,_jsxs(_components.li,{children:[_jsx(_components.strong,{children:`Each page marked with its language`}),`, for screen readers and browsers’ translate buttons.`]}),`\n`]}),`\n`,_jsx(_components.p,{children:`Search engines learn which pages are translations of each other, and your sitemap lists every public language.`}),`\n`,_jsx(Heading,{level:`2`,id:`remove-a-language`,children:`Remove a language`}),`\n`,_jsxs(_components.p,{children:[`Open `,_jsx(_components.strong,{children:`Languages`}),`, remove the language from `,_jsx(_components.strong,{children:`More languages`}),`, and choose `,_jsx(_components.strong,{children:`Save`}),`. Visitors stop seeing it at once. Its translations are kept: add the same code again and they come back.`]}),`\n`,_jsx(Heading,{level:`2`,id:`good-to-know`,children:`Good to know`}),`\n`,_jsxs(Warning,{children:[_jsx(_components.p,{children:`A few things don’t change with the language yet:`}),_jsxs(_components.ul,{children:[`\n`,_jsxs(_components.li,{children:[_jsx(_components.strong,{children:`Your main language is always marked as English`}),` to browsers and search engines, even when your site is written in another language.`]}),`\n`,_jsxs(_components.li,{children:[_jsx(_components.strong,{children:`Your site’s own buttons and labels`}),`, such as “Language”, “Appearance” and “Open menu”, stay in English in every language.`]}),`\n`,_jsxs(_components.li,{children:[_jsx(_components.strong,{children:`Google reviews and Instagram posts`}),` show as they are in every language. They aren’t translated.`]}),`\n`,_jsxs(_components.li,{children:[_jsx(_components.strong,{children:`The cookie declaration’s list of cookies`}),` is the same in every language.`]}),`\n`]})]}),`\n`,_jsxs(_components.ul,{children:[`\n`,_jsx(_components.li,{children:`Each language’s pages and items are separate drafts. Publishing the French page doesn’t publish the English one, and the other way round.`}),`\n`,_jsx(_components.li,{children:`Items a section shows, such as team members and testimonials, show only once they’re translated and published in that language.`}),`\n`]}),`\n`,_jsx(Heading,{level:`2`,id:`troubleshooting`,children:`Troubleshooting`}),`\n`,_jsxs(AccordionGroup,{children:[_jsx(Accordion,{title:`“…” is not a language code`,id:`is-not-a-language-code`,children:_jsxs(_components.p,{children:[`Use a lowercase code, such as `,_jsx(_components.code,{children:`fr`}),`, or a language and country, such as `,_jsx(_components.code,{children:`pt-br`}),`.`]})}),_jsx(Accordion,{title:`“en” is the main language’s code`,id:`en-is-the-main-languages-code`,children:_jsxs(_components.p,{children:[_jsx(_components.code,{children:`en`}),` belongs to your main language. Give the new language its own code.`]})}),_jsx(Accordion,{title:`A page’s address starts with “/…”, and the language would hide it`,id:`a-pages-address-starts-with-and-the-language-would-hide-it`,children:_jsxs(_components.p,{children:[`A page’s address already starts with that code, such as a page at `,_jsx(_components.code,{children:`/es`}),`. Give that page a new address first (its `,_jsx(_components.strong,{children:`Slug`}),` in the page settings window), or use a different code.`]})}),_jsx(Accordion,{title:`“/…” is already one of the site’s own addresses`,id:`is-already-one-of-the-sites-own-addresses`,children:_jsxs(_components.p,{children:[`Some codes are taken by your site’s own addresses, such as `,_jsx(_components.code,{children:`api`}),` or `,_jsx(_components.code,{children:`login`}),`. Choose a different code.`]})}),_jsx(Accordion,{title:`The language menu doesn't show in the toolbar`,id:`the-language-menu-doesnt-show-in-the-toolbar`,children:_jsxs(_components.p,{children:[`Reload the page after you save `,_jsx(_components.strong,{children:`Languages`}),`. The menu shows only when your site has more than one language.`]})}),_jsx(Accordion,{title:`Visitors don't see the language switcher`,id:`visitors-dont-see-the-language-switcher`,children:_jsxs(_components.p,{children:[`Check the language’s `,_jsx(_components.strong,{children:`Public`}),` is set to `,_jsx(_components.strong,{children:`Yes`}),` in `,_jsx(_components.strong,{children:`Languages`}),`. Until it is, only people signed in to the CMS see it.`]})})]}),`\n`,_jsx(Heading,{level:`2`,id:`related`,children:`Related`}),`\n`,_jsxs(Columns,{cols:2,children:[_jsx(Card,{title:`Drafts, publishing and scheduling`,icon:`calendar-check`,href:`/guides/build-pages/publish-and-schedule`,children:_jsx(_components.p,{children:`put each translation live.`})}),_jsx(Card,{title:`Pages and the page tree`,icon:`sitemap`,href:`/guides/build-pages/pages-and-the-page-tree`,children:_jsx(_components.p,{children:`rename pages and change their addresses.`})}),_jsx(Card,{title:`Site design`,icon:`palette`,href:`/guides/site-design/index`,children:_jsx(_components.p,{children:`the header and footer each language translates.`})}),_jsx(Card,{title:`Toolbar and command palette`,icon:`keyboard`,href:`/guides/get-started/toolbar-and-command-palette`,children:_jsx(_components.p,{children:`every screen and shortcut.`})})]})]})}function MDXContent(props={}){const{wrapper:MDXLayout}={..._provideComponents(),...props.components};return MDXLayout?_jsx(MDXLayout,{...props,children:_jsx(_createMdxContent,{...props})}):_createMdxContent(props)}return{default:MDXContent};function _missingMdxReference(id,component){throw new Error(`Expected `+(component?`component`:`object`)+\" `\"+id+\"` to be defined: you likely forgot to import, pass, or provide it.\")}","frontmatter":{},"scope":{"codeStyling":"dark","config":{},"pageMetadata":{"title":"Your site in more than one language","sidebarTitle":"Languages","description":"Add a language, translate your pages into it, and put it live when it's ready, with its own addresses and a language switcher for visitors.","icon":"language","href":"/guides/build-pages/languages"}}},"mdxSourceWithNoJs":null},"mdxExtracts":{"tableOfContents":[{"title":"Before you start","slug":"before-you-start","depth":2,"children":[]},{"title":"Add a language","slug":"add-a-language","depth":2,"children":[]},{"title":"Translate a page","slug":"translate-a-page","depth":2,"children":[]},{"title":"Translate your header, footer and banners","slug":"translate-your-header-footer-and-banners","depth":2,"children":[]},{"title":"Put the language live","slug":"put-the-language-live","depth":2,"children":[]},{"title":"Remove a language","slug":"remove-a-language","depth":2,"children":[]},{"title":"Good to know","slug":"good-to-know","depth":2,"children":[]},{"title":"Troubleshooting","slug":"troubleshooting","depth":2,"children":[]},{"title":"Related","slug":"related","depth":2,"children":[]}],"codeExamples":{}},"jsLinks":["/_mintlify/custom/fetchski-attract-api/f59e82e583443cfa/reader-values.js"],"dynamicCss":".mint-block {\n display: block\n}\n.mint-hidden {\n display: none\n}\n.dark\\:mint-block:is(.dark *) {\n display: block\n}\n.dark\\:mint-hidden:is(.dark *) {\n display: none\n}","subdomain":"fetchski-attract-api","siteName":"Fetchski Attract Docs","title":"Your site in more than one language - Fetchski Attract Docs","navMaps":{"firstHrefInVersion":{},"firstHrefInLanguage":{}},"lastModified":"2026-11-12T10:18:36.709Z","originalFileLocation":"guides/build-pages/languages.mdx"},"headHtml":"\u003cscript data-mint-head>(function(){var d=document.documentElement,p=null;if(!p){try{p=localStorage.getItem(\"isDarkMode\")}catch(e){}if(p==='true')p='dark';else if(p==='false')p='light';if(p!=='light'\u0026\u0026p!=='dark'\u0026\u0026p!=='system')p=\"dark\"}var r=p==='system'?(matchMedia(\"(prefers-color-scheme: dark)\").matches?'dark':'light'):p;d.classList.remove(r==='dark'?'light':'dark');d.classList.add(r);d.setAttribute(\"data-theme-preference\",p)})();\u003c/script>\u003cmeta data-mint-head name=\"description\" content=\"Add a language, translate your pages into it, and put it live when it\u0026#x27;s ready, with its own addresses and a language switcher for visitors.\">\u003cmeta data-mint-head name=\"application-name\" content=\"Fetchski Attract Docs\">\u003cmeta data-mint-head name=\"generator\" content=\"Mintlify\">\u003cmeta data-mint-head name=\"robots\" content=\"noindex, nofollow\">\u003clink data-mint-head rel=\"icon\" type=\"image/png\" sizes=\"192x192\" href=\"/mintlify-assets/_mintlify/favicons/fetchski-attract-api/70pYtWMpcnXR0SYV/_generated/favicon/android-chrome-192x192.png\" media=\"(prefers-color-scheme: light)\">\u003clink data-mint-head rel=\"apple-touch-icon\" type=\"image/png\" sizes=\"180x180\" href=\"/mintlify-assets/_mintlify/favicons/fetchski-attract-api/70pYtWMpcnXR0SYV/_generated/favicon/apple-touch-icon.png\">\u003clink data-mint-head rel=\"icon\" type=\"image/png\" sizes=\"16x16\" href=\"/mintlify-assets/_mintlify/favicons/fetchski-attract-api/70pYtWMpcnXR0SYV/_generated/favicon/favicon-16x16.png\" media=\"(prefers-color-scheme: light)\">\u003clink data-mint-head rel=\"icon\" type=\"image/png\" sizes=\"32x32\" href=\"/mintlify-assets/_mintlify/favicons/fetchski-attract-api/70pYtWMpcnXR0SYV/_generated/favicon/favicon-32x32.png\" media=\"(prefers-color-scheme: light)\">\u003clink data-mint-head rel=\"shortcut icon\" type=\"image/x-icon\" href=\"/mintlify-assets/_mintlify/favicons/fetchski-attract-api/70pYtWMpcnXR0SYV/_generated/favicon/favicon.ico\" media=\"(prefers-color-scheme: light)\">\u003clink data-mint-head rel=\"icon\" type=\"image/png\" sizes=\"192x192\" href=\"/mintlify-assets/_mintlify/favicons/fetchski-attract-api/70pYtWMpcnXR0SYV/_generated/favicon-dark/android-chrome-192x192.png\" media=\"(prefers-color-scheme: dark)\">\u003clink data-mint-head rel=\"icon\" type=\"image/png\" sizes=\"16x16\" href=\"/mintlify-assets/_mintlify/favicons/fetchski-attract-api/70pYtWMpcnXR0SYV/_generated/favicon-dark/favicon-16x16.png\" media=\"(prefers-color-scheme: dark)\">\u003clink data-mint-head rel=\"icon\" type=\"image/png\" sizes=\"32x32\" href=\"/mintlify-assets/_mintlify/favicons/fetchski-attract-api/70pYtWMpcnXR0SYV/_generated/favicon-dark/favicon-32x32.png\" media=\"(prefers-color-scheme: dark)\">\u003clink data-mint-head rel=\"shortcut icon\" type=\"image/x-icon\" href=\"/mintlify-assets/_mintlify/favicons/fetchski-attract-api/70pYtWMpcnXR0SYV/_generated/favicon-dark/favicon.ico\" media=\"(prefers-color-scheme: dark)\">\u003cmeta data-mint-head property=\"og:title\" content=\"Your site in more than one language - Fetchski Attract Docs\">\u003cmeta data-mint-head property=\"og:description\" content=\"Add a language, translate your pages into it, and put it live when it\u0026#x27;s ready, with its own addresses and a language switcher for visitors.\">\u003cmeta data-mint-head property=\"og:site_name\" content=\"Fetchski Attract Docs\">\u003cmeta data-mint-head property=\"og:url\" content=\"https://docs.fetchski-attract.com/guides/build-pages/languages\">\u003cmeta data-mint-head property=\"og:type\" content=\"website\">\u003cmeta data-mint-head property=\"og:image\" content=\"https://fetchski-attract-api.mintlify.site/_mintlify/api/og/v2?division=Build+pages\u0026amp;title=Your+site+in+more+than+one+language\u0026amp;description=Add+a+language%2C+translate+your+pages+into+it%2C+and+put+it+live+when+it%27s+ready%2C+with+its+own+addresses+and+a+language+switcher+for+visitors.\u0026amp;theme=0e1cff4688ef26ca6a5fb667\u0026amp;signature=d94efe338d579e0605c48292deea6f302b4bb1238d580f9927747268a5a8ef76\">\u003cmeta data-mint-head property=\"og:image:width\" content=\"1200\">\u003cmeta data-mint-head property=\"og:image:height\" content=\"630\">\u003cmeta data-mint-head name=\"twitter:card\" content=\"summary_large_image\">\u003cmeta data-mint-head name=\"twitter:title\" content=\"Your site in more than one language - Fetchski Attract Docs\">\u003cmeta data-mint-head name=\"twitter:description\" content=\"Add a language, translate your pages into it, and put it live when it\u0026#x27;s ready, with its own addresses and a language switcher for visitors.\">\u003cmeta data-mint-head name=\"twitter:image\" content=\"https://fetchski-attract-api.mintlify.site/_mintlify/api/og/v2?division=Build+pages\u0026amp;title=Your+site+in+more+than+one+language\u0026amp;description=Add+a+language%2C+translate+your+pages+into+it%2C+and+put+it+live+when+it%27s+ready%2C+with+its+own+addresses+and+a+language+switcher+for+visitors.\u0026amp;theme=0e1cff4688ef26ca6a5fb667\u0026amp;signature=d94efe338d579e0605c48292deea6f302b4bb1238d580f9927747268a5a8ef76\">\u003cmeta data-mint-head name=\"twitter:image:width\" content=\"1200\">\u003cmeta data-mint-head name=\"twitter:image:height\" content=\"630\">\u003cmeta data-mint-head name=\"msapplication-config\" content=\"/mintlify-assets/_mintlify/favicons/fetchski-attract-api/70pYtWMpcnXR0SYV/_generated/favicon/browserconfig.xml\">\u003cmeta data-mint-head name=\"apple-mobile-web-app-title\" content=\"Fetchski Attract Docs\">\u003cmeta data-mint-head name=\"msapplication-TileColor\" content=\"#16a34a\">\u003clink data-mint-head rel=\"canonical\" href=\"https://docs.fetchski-attract.com/guides/build-pages/languages\">\u003clink data-mint-head rel=\"alternate\" type=\"application/xml\" href=\"/sitemap.xml\">\u003clink data-mint-head rel=\"alternate\" type=\"text/markdown\" href=\"/guides/build-pages/languages.md\">\u003cscript data-mint-head type=\"application/ld+json\">{\"@context\":\"https://schema.org\",\"@graph\":[{\"@type\":\"Organization\",\"@id\":\"https://docs.fetchski-attract.com/#organization\",\"name\":\"Fetchski Attract Docs\",\"url\":\"https://docs.fetchski-attract.com\",\"logo\":{\"@type\":\"ImageObject\",\"url\":\"https://mintcdn.com/fetchski-attract-api/mn9qfQRsqaASh7UE/logo/light.svg?fit=max\u0026auto=format\u0026n=mn9qfQRsqaASh7UE\u0026q=85\u0026s=66db13e248b70a44a5ff5f6990d4cb63\"}},{\"@type\":\"WebSite\",\"@id\":\"https://docs.fetchski-attract.com#website\",\"name\":\"Fetchski Attract Docs\",\"url\":\"https://docs.fetchski-attract.com\",\"publisher\":{\"@id\":\"https://docs.fetchski-attract.com/#organization\"}},{\"@type\":\"WebPage\",\"@id\":\"https://docs.fetchski-attract.com/guides/build-pages/languages#webpage\",\"url\":\"https://docs.fetchski-attract.com/guides/build-pages/languages\",\"name\":\"Your site in more than one language\",\"description\":\"Add a language, translate your pages into it, and put it live when it's ready, with its own addresses and a language switcher for visitors.\",\"dateModified\":\"2026-11-12T10:18:36.709Z\",\"isPartOf\":{\"@id\":\"https://docs.fetchski-attract.com#website\"},\"breadcrumb\":{\"@id\":\"https://docs.fetchski-attract.com/guides/build-pages/languages#breadcrumb\"}},{\"@type\":\"BreadcrumbList\",\"@id\":\"https://docs.fetchski-attract.com/guides/build-pages/languages#breadcrumb\",\"itemListElement\":[{\"@type\":\"ListItem\",\"position\":1,\"name\":\"Build pages\",\"item\":\"https://docs.fetchski-attract.com/guides/build-pages/pages-and-the-page-tree\"},{\"@type\":\"ListItem\",\"position\":2,\"name\":\"Your site in more than one language\",\"item\":\"https://docs.fetchski-attract.com/guides/build-pages/languages\"}]},{\"@type\":[\"Article\",\"TechArticle\"],\"@id\":\"https://docs.fetchski-attract.com/guides/build-pages/languages#article\",\"headline\":\"Your site in more than one language\",\"name\":\"Your site in more than one language\",\"description\":\"Add a language, translate your pages into it, and put it live when it's ready, with its own addresses and a language switcher for visitors.\",\"url\":\"https://docs.fetchski-attract.com/guides/build-pages/languages\",\"mainEntityOfPage\":{\"@id\":\"https://docs.fetchski-attract.com/guides/build-pages/languages#webpage\"},\"dateModified\":\"2026-11-12T10:18:36.709Z\",\"publisher\":{\"@id\":\"https://docs.fetchski-attract.com/#organization\"},\"isPartOf\":{\"@id\":\"https://docs.fetchski-attract.com#website\"}}]}\u003c/script>\u003cscript data-mint-head type=\"application/ld+json\">{\"@context\":\"https://schema.org\",\"@type\":\"WebSite\",\"name\":\"Fetchski Attract Docs\",\"publisher\":{\"@type\":\"Organization\",\"name\":\"Fetchski Attract Docs\"},\"provider\":{\"@type\":\"Organization\",\"name\":\"Mintlify\",\"url\":\"https://mintlify.com\"}}\u003c/script>","agentPointerHref":"/guides/build-pages/languages.md","siteName":"Fetchski Attract Docs","nav":{"global":null,"tabs":[{"tab":"Guides","icon":"book-open","groups":[{"group":"Get started","icon":"rocket","pages":[{"title":"Fetchski Attract Docs","sidebarTitle":"Introduction","icon":"house","mode":"wide","href":""},{"title":"A tour of Attract","sidebarTitle":"Tour","icon":"compass","href":"/guides/get-started/tour"},{"title":"Sign in","sidebarTitle":"Sign in","icon":"right-to-bracket","href":"/guides/get-started/sign-in"},{"title":"The toolbar and the command palette","sidebarTitle":"Toolbar and ⌘K","icon":"keyboard","href":"/guides/get-started/toolbar-and-command-palette"},{"title":"Set up your site","sidebarTitle":"Set up your site","icon":"list-check","href":"/guides/get-started/set-up-your-site"},{"title":"Your profile","sidebarTitle":"Your profile","icon":"circle-user","href":"/guides/get-started/your-profile"}]},{"group":"Build pages","icon":"pen-to-square","pages":[{"title":"Pages and the page tree","sidebarTitle":"Pages","icon":"sitemap","href":"/guides/build-pages/pages-and-the-page-tree"},{"title":"Start from a page template","sidebarTitle":"Page templates","icon":"clone","href":"/guides/build-pages/page-templates"},{"title":"Two ways to edit: on the page or in the page settings window","sidebarTitle":"Two ways to edit","icon":"pen-to-square","href":"/guides/build-pages/two-ways-to-edit"},{"title":"Add, move and remove sections","sidebarTitle":"Add and arrange sections","icon":"layer-group","href":"/guides/build-pages/add-move-remove-sections"},{"title":"Preview on phones and tablets","sidebarTitle":"Device preview","icon":"mobile-screen","href":"/guides/build-pages/preview-on-devices"},{"title":"Drafts, publishing and scheduling","sidebarTitle":"Publish and schedule","icon":"calendar-check","href":"/guides/build-pages/publish-and-schedule"},{"title":"Side-by-side layouts","sidebarTitle":"Layouts and columns","icon":"table-columns","href":"/guides/build-pages/side-by-side-layouts"},{"title":"Document versions","sidebarTitle":"Versions","icon":"clock-rotate-left","href":"/guides/build-pages/versions"},{"title":"Page SEO","sidebarTitle":"Page SEO","icon":"magnifying-glass","href":"/guides/build-pages/page-seo"},{"title":"Redirects","sidebarTitle":"Redirects","description":"Send visitors from an old web address to the right page, so old links and search results keep working.","icon":"arrow-right-arrow-left","href":"/guides/build-pages/redirects"},{"title":"Your site in more than one language","sidebarTitle":"Languages","icon":"language","href":"/guides/build-pages/languages"}]},{"group":"Sections","icon":"grid-2","pages":[{"title":"Sections","sidebarTitle":"All sections","description":"Every section you can add to a page, grouped the way the Add Content menu groups them.","icon":"grid-2","href":"/guides/sections/index"},{"title":"What every section shares","sidebarTitle":"Shared options","icon":"sliders","href":"/guides/sections/what-every-section-shares"},{"title":"Page Header","sidebarTitle":"Page Header","icon":"heading","href":"/guides/sections/page-header"},{"title":"Hero","sidebarTitle":"Hero","icon":"flag","href":"/guides/sections/hero"},{"title":"Intro / Trust","sidebarTitle":"Intro / Trust","icon":"quote-left","href":"/guides/sections/intro-trust"},{"title":"Feature Cards","sidebarTitle":"Feature Cards","icon":"cards-blank","href":"/guides/sections/feature-cards"},{"title":"Stats / By the numbers","sidebarTitle":"Stats / By the numbers","icon":"chart-simple","href":"/guides/sections/stats"},{"title":"Logos / Partners","sidebarTitle":"Logos / Partners","icon":"handshake","href":"/guides/sections/logos"},{"title":"How it works / Steps","sidebarTitle":"How it works / Steps","icon":"shoe-prints","href":"/guides/sections/steps"},{"title":"Media + Text block","sidebarTitle":"Media + Text block","icon":"image-landscape","href":"/guides/sections/media-text"},{"title":"Device mocks","sidebarTitle":"Device mocks","icon":"laptop-mobile","href":"/guides/sections/device-mocks"},{"title":"Team","sidebarTitle":"Team","icon":"people-group","href":"/guides/sections/team"},{"title":"FAQ","sidebarTitle":"FAQ","icon":"circle-question","href":"/guides/sections/faq"},{"title":"Service Area Map","sidebarTitle":"Service Area Map","icon":"map-location-dot","href":"/guides/sections/service-area-map"},{"title":"Blog Preview","sidebarTitle":"Blog Preview","icon":"newspaper","href":"/guides/sections/blog-preview"},{"title":"Cookie Declaration","sidebarTitle":"Cookie Declaration","icon":"cookie-bite","href":"/guides/sections/cookie-declaration"},{"title":"Rich Text","sidebarTitle":"Rich Text","icon":"paragraph","href":"/guides/sections/rich-text"},{"title":"Images and videos (in columns and posts)","sidebarTitle":"Images and videos (in columns and posts)","icon":"photo-film","href":"/guides/sections/images-and-videos"},{"title":"Google Reviews","sidebarTitle":"Google Reviews","icon":"star","href":"/guides/sections/google-reviews"},{"title":"Testimonials","sidebarTitle":"Testimonials","icon":"comment-quote","href":"/guides/sections/testimonials"},{"title":"Instagram Feed","sidebarTitle":"Instagram Feed","icon":"camera-retro","href":"/guides/sections/instagram-feed"},{"title":"Gallery Preview and Gallery (Full)","sidebarTitle":"Gallery","icon":"images","href":"/guides/sections/gallery"},{"title":"Pricing / Packages","sidebarTitle":"Pricing / Packages","icon":"tags","href":"/guides/sections/pricing"},{"title":"Newsletter Subscription","sidebarTitle":"Newsletter Subscription","icon":"envelope-open-text","href":"/guides/sections/newsletter-signup"},{"title":"SMS Subscription","sidebarTitle":"SMS Subscription","icon":"comment-sms","href":"/guides/sections/sms-signup"},{"title":"Form","sidebarTitle":"Form","icon":"rectangle-list","href":"/guides/sections/form"},{"title":"Final CTA","sidebarTitle":"Final CTA","icon":"bullhorn","href":"/guides/sections/final-cta"}]},{"group":"Content","icon":"box-archive","pages":[{"title":"Content you reuse","sidebarTitle":"Overview","icon":"box-archive","href":"/guides/content/index"},{"title":"Blog posts, categories and authors","sidebarTitle":"Blog","icon":"pen-nib","href":"/guides/content/blog"},{"title":"Team members","sidebarTitle":"Team members","icon":"id-badge","href":"/guides/content/team-members"},{"title":"Testimonials","sidebarTitle":"Testimonials","icon":"comment-quote","href":"/guides/content/testimonials"},{"title":"FAQs and categories","sidebarTitle":"FAQs","icon":"circle-question","href":"/guides/content/faqs"},{"title":"Google reviews","sidebarTitle":"Google reviews","icon":"star","href":"/guides/content/google-reviews"},{"title":"Service areas","sidebarTitle":"Service areas","icon":"map-location-dot","href":"/guides/content/service-areas"},{"title":"Photo albums","sidebarTitle":"Photo albums","icon":"images","href":"/guides/content/photo-albums"},{"title":"Photo feeds","sidebarTitle":"Photo feeds","icon":"arrows-rotate","href":"/guides/content/photo-feeds"},{"title":"Archive, restore and delete","sidebarTitle":"Archive and delete","icon":"trash-can","href":"/guides/content/archive-restore-delete"},{"title":"Instagram posts","sidebarTitle":"Instagram posts","icon":"camera-retro","href":"/guides/content/instagram-posts"}]},{"group":"Media","icon":"photo-film","pages":[{"title":"The media library","sidebarTitle":"Media library","icon":"photo-film","href":"/guides/media/media-library"},{"title":"Folders","sidebarTitle":"Folders","icon":"folder-tree","href":"/guides/media/folders"},{"title":"Broken media","sidebarTitle":"Broken media","icon":"link-slash","href":"/guides/media/broken-media"}]},{"group":"Forms","icon":"rectangle-list","pages":[{"title":"Build a form","sidebarTitle":"Build a form","icon":"rectangle-list","href":"/guides/forms/build-a-form"},{"title":"Form submissions","sidebarTitle":"Submissions","icon":"inbox","href":"/guides/forms/form-submissions"},{"title":"Email notifications","sidebarTitle":"Email","icon":"envelope","href":"/guides/forms/email-notifications"},{"title":"Spam protection","sidebarTitle":"Spam protection","icon":"shield-halved","href":"/guides/forms/spam-protection"}]},{"group":"Site settings","icon":"gear","pages":[{"title":"Site settings","sidebarTitle":"Overview","icon":"gear","href":"/guides/site-settings/index"},{"title":"Brand","sidebarTitle":"Brand","icon":"badge","href":"/guides/site-settings/brand"},{"title":"Social links","sidebarTitle":"Social links","icon":"share-nodes","href":"/guides/site-settings/social-links"},{"title":"Site-wide SEO","sidebarTitle":"SEO","icon":"magnifying-glass-chart","href":"/guides/site-settings/seo"},{"title":"Legal details","sidebarTitle":"Legal","icon":"scale-balanced","href":"/guides/site-settings/legal"},{"title":"Cookie consent","sidebarTitle":"Cookie consent","icon":"cookie","href":"/guides/site-settings/cookie-consent"},{"title":"Service area map settings","sidebarTitle":"Service area map","icon":"map-location-dot","href":"/guides/site-settings/service-area-map"},{"title":"Maintenance mode","sidebarTitle":"Maintenance","icon":"person-digging","href":"/guides/site-settings/maintenance"}]},{"group":"Site design","icon":"palette","pages":[{"title":"Site design","sidebarTitle":"Overview","icon":"palette","href":"/guides/site-design/index"},{"title":"Colors","sidebarTitle":"Colors","icon":"swatchbook","href":"/guides/site-design/colors"},{"title":"Typography","sidebarTitle":"Typography","icon":"font","href":"/guides/site-design/typography"},{"title":"Site width","sidebarTitle":"Site width","icon":"arrows-left-right-to-line","href":"/guides/site-design/site-width"},{"title":"Motion","sidebarTitle":"Motion","icon":"wand-magic-sparkles","href":"/guides/site-design/motion"},{"title":"Header","sidebarTitle":"Header","icon":"window-maximize","href":"/guides/site-design/header"},{"title":"Footer","sidebarTitle":"Footer","icon":"window-minimize","href":"/guides/site-design/footer"},{"title":"Buttons and card styles","sidebarTitle":"Buttons and cards","icon":"hand-pointer","href":"/guides/site-design/buttons-and-card-styles"},{"title":"Custom CSS","sidebarTitle":"Custom CSS","icon":"code","href":"/guides/site-design/custom-css"}]},{"group":"Connections","icon":"plug","pages":[{"title":"Connections","sidebarTitle":"Overview","icon":"plug","href":"/guides/connections/index"},{"title":"Google Business Profile","sidebarTitle":"Google Business Profile","icon":"store","href":"/guides/connections/google-business-profile"},{"title":"Google Reviews connection","sidebarTitle":"Google Reviews","icon":"star-half-stroke","href":"/guides/connections/google-reviews"},{"title":"Google Maps","sidebarTitle":"Google Maps","icon":"map","href":"/guides/connections/google-maps"},{"title":"Google Sheets","sidebarTitle":"Google Sheets","icon":"table","href":"/guides/connections/google-sheets"},{"title":"Instagram","sidebarTitle":"Instagram","icon":"camera-retro","href":"/guides/connections/instagram"},{"title":"Photo storage","sidebarTitle":"Photo storage","icon":"cloud","href":"/guides/connections/photo-storage"},{"title":"Embed scripts","sidebarTitle":"Embed scripts","icon":"code","href":"/guides/connections/embed-scripts"},{"title":"Conversion tracking","sidebarTitle":"Conversion tracking","icon":"bullseye-arrow","href":"/guides/connections/conversion-tracking"},{"title":"Analytics","sidebarTitle":"Analytics","icon":"chart-line","href":"/guides/connections/analytics"},{"title":"Request log","sidebarTitle":"Request log","icon":"list-timeline","href":"/guides/connections/request-log"},{"title":"API keys and webhooks","sidebarTitle":"API keys and webhooks","icon":"key","href":"/guides/connections/api-keys-and-webhooks"}]},{"group":"People and access","icon":"users","pages":[{"title":"People \u0026 Roles","sidebarTitle":"People \u0026 Roles","icon":"users","href":"/guides/people/people-and-roles"},{"title":"What each role can do","sidebarTitle":"Roles","icon":"user-shield","href":"/guides/people/what-each-role-can-do"}]}]},{"tab":"FetchskiAI","icon":"sparkles","pages":[{"title":"FetchskiAI","href":"/fetchskiai/overview"}]},{"tab":"Recipes","icon":"book-open","pages":[{"title":"Recipes","href":"/recipes/laravel-ai-translate-your-site"}]},{"tab":"TypeScript","icon":"js","pages":[{"title":"TypeScript","href":"/typescript/overview"}]},{"tab":"Laravel","icon":"laravel","pages":[{"title":"Laravel","href":"/laravel/overview"}]},{"tab":"AdonisJS","icon":"https://mintlify.s3.us-west-1.amazonaws.com/fetchski-attract-api/logo/adonisjs.svg","pages":[{"title":"AdonisJS","href":"/adonisjs/overview"}]},{"tab":"API reference","icon":"code","pages":[{"title":"API reference","href":"/quickstart"}]}]},"basePath":"","title":"Your site in more than one language - Fetchski Attract Docs","buildId":"dpl_5joLUXmnJgwqjrHAS4dxZrQTdxgh","deploymentId":"dpl_5joLUXmnJgwqjrHAS4dxZrQTdxgh","dynamics":["07c022d89b","a74be98ba7"],"chunks":["Frame-B_503rGq.js","DynamicMarkdown-BfddVCX7.js","zoom-image-lightbox-B3yYlvdS.js","lightbox-handle-r17bVUz3.js"]}


 AdonisJS