Connect your Google listing once, then edit its details, reply to reviews, post updates and read its performance without leaving the CMS.
Connect your Google Business Profile once, and you can run your listing from the CMS. Change your hours and details, reply to reviews, publish Google posts, add photos and see how people find you on Search and Maps.Who can do this: Admins and Owners.
Before you start
A Google account that manages your listing. You approve the connection while signed in to it.
About 30 minutes in Google Cloud, Google’s site for developer tools. The card’s setup guide links every page you need.
Your listing is your business’s profile on Google Search and Maps: one listing per business location. The CMS also calls it a profile or a location. The Google account is separate: it’s the sign-in you use to manage those listings.Three different approvals are involved:
A verified listing. Google must already have verified your listing, and it must have been active for at least 60 days. You do this on Google’s site, before you start.
Google’s approval of your access request. You ask Google, with a form, to let your project use its Business Profile tools. This is the step that makes you wait: approval isn’t instant, so send the form first.
Your permission when you sign in. At the end, you sign in with Google and allow the CMS to manage your listings. This takes a minute.
Connect your listing
1
Open the card
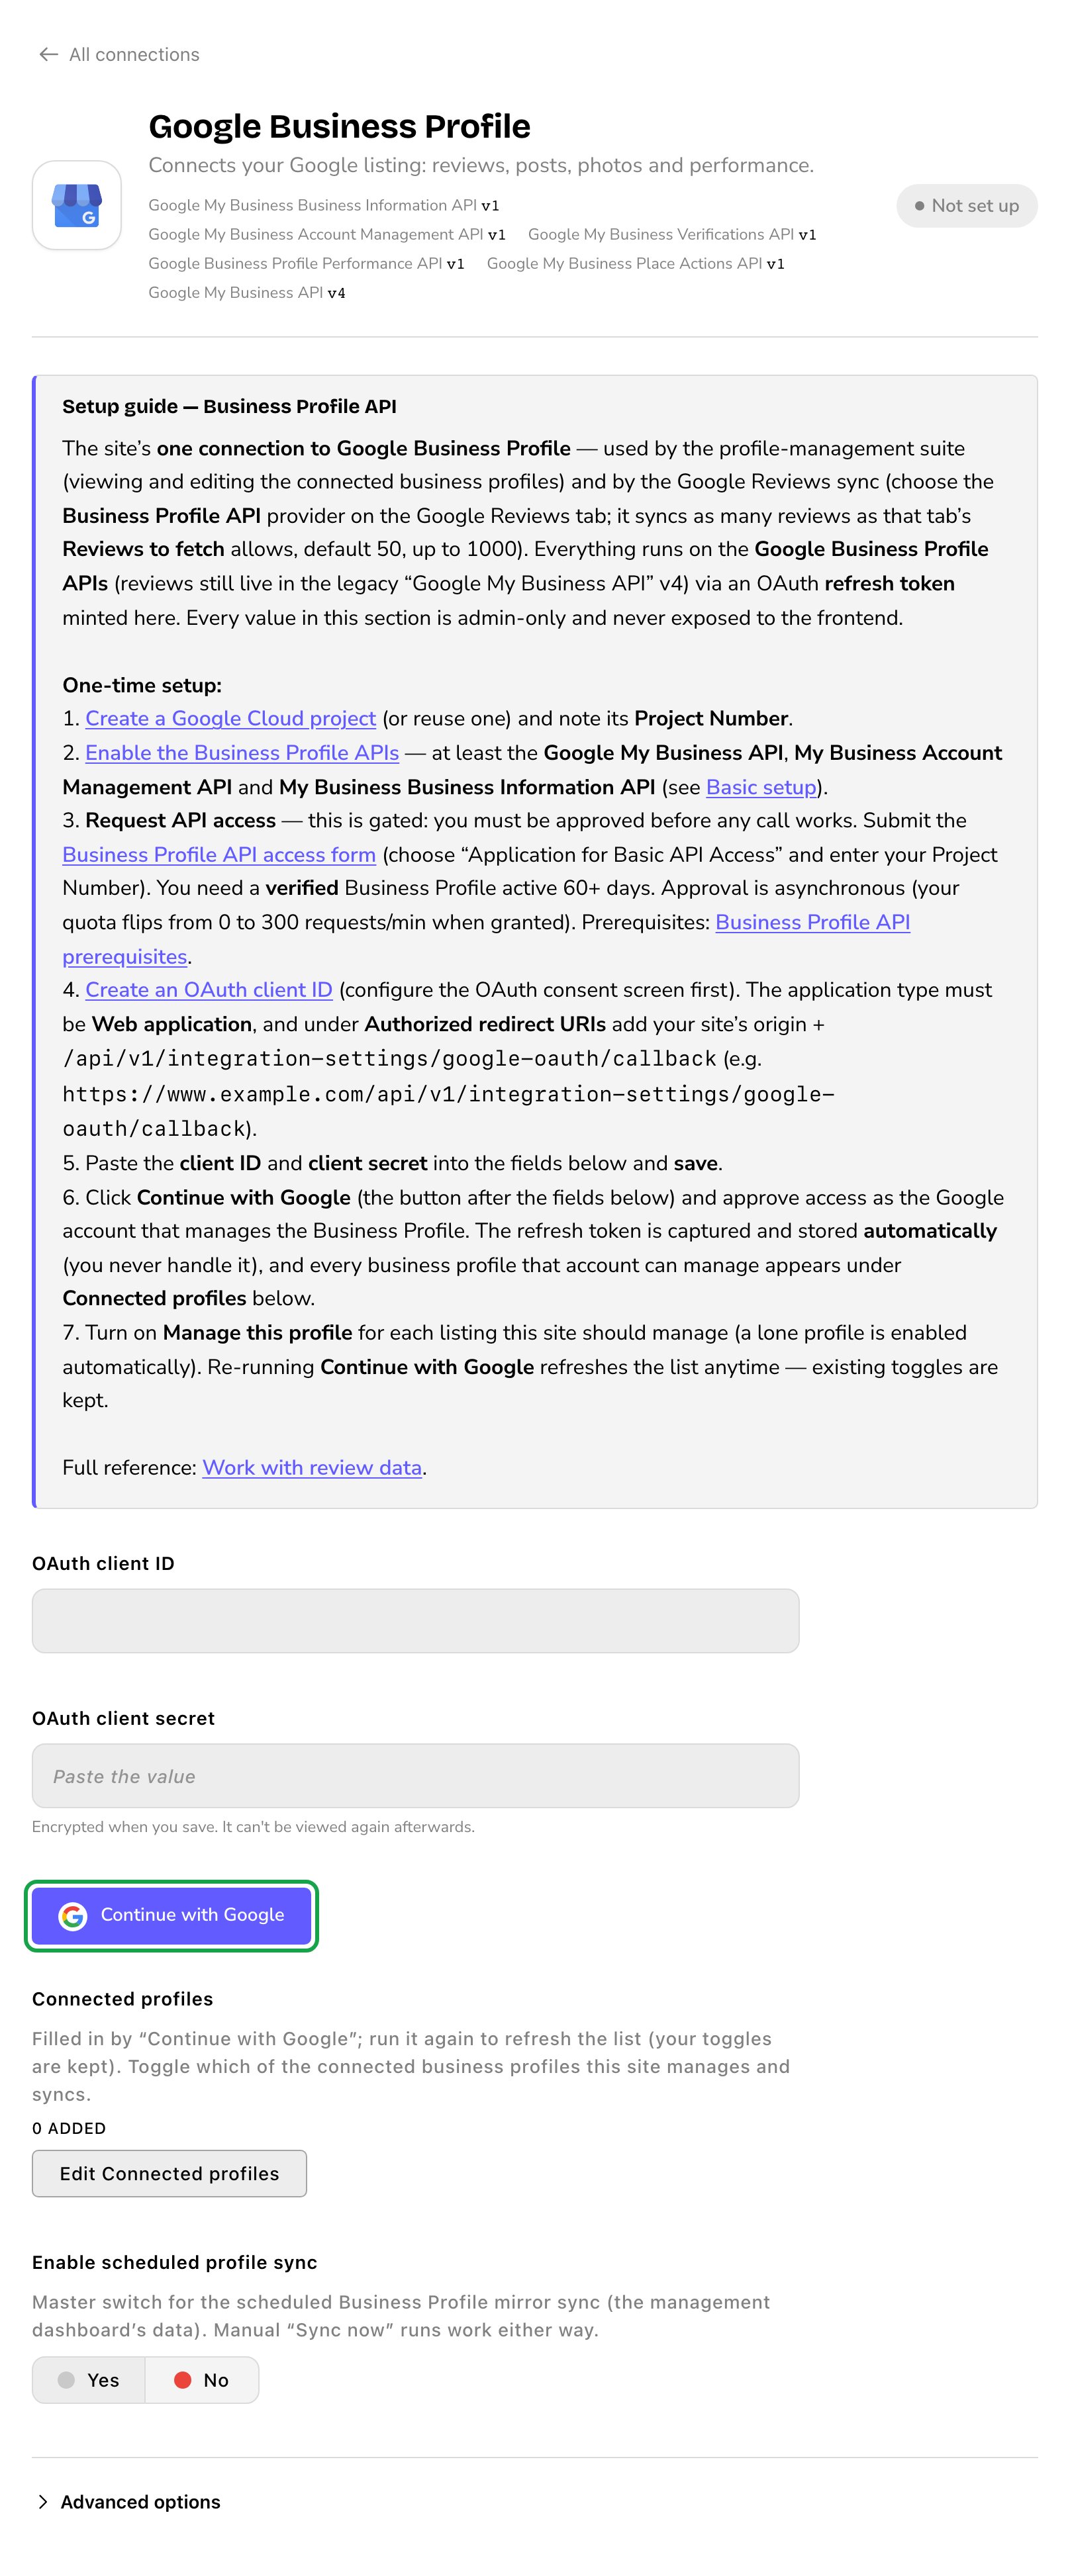
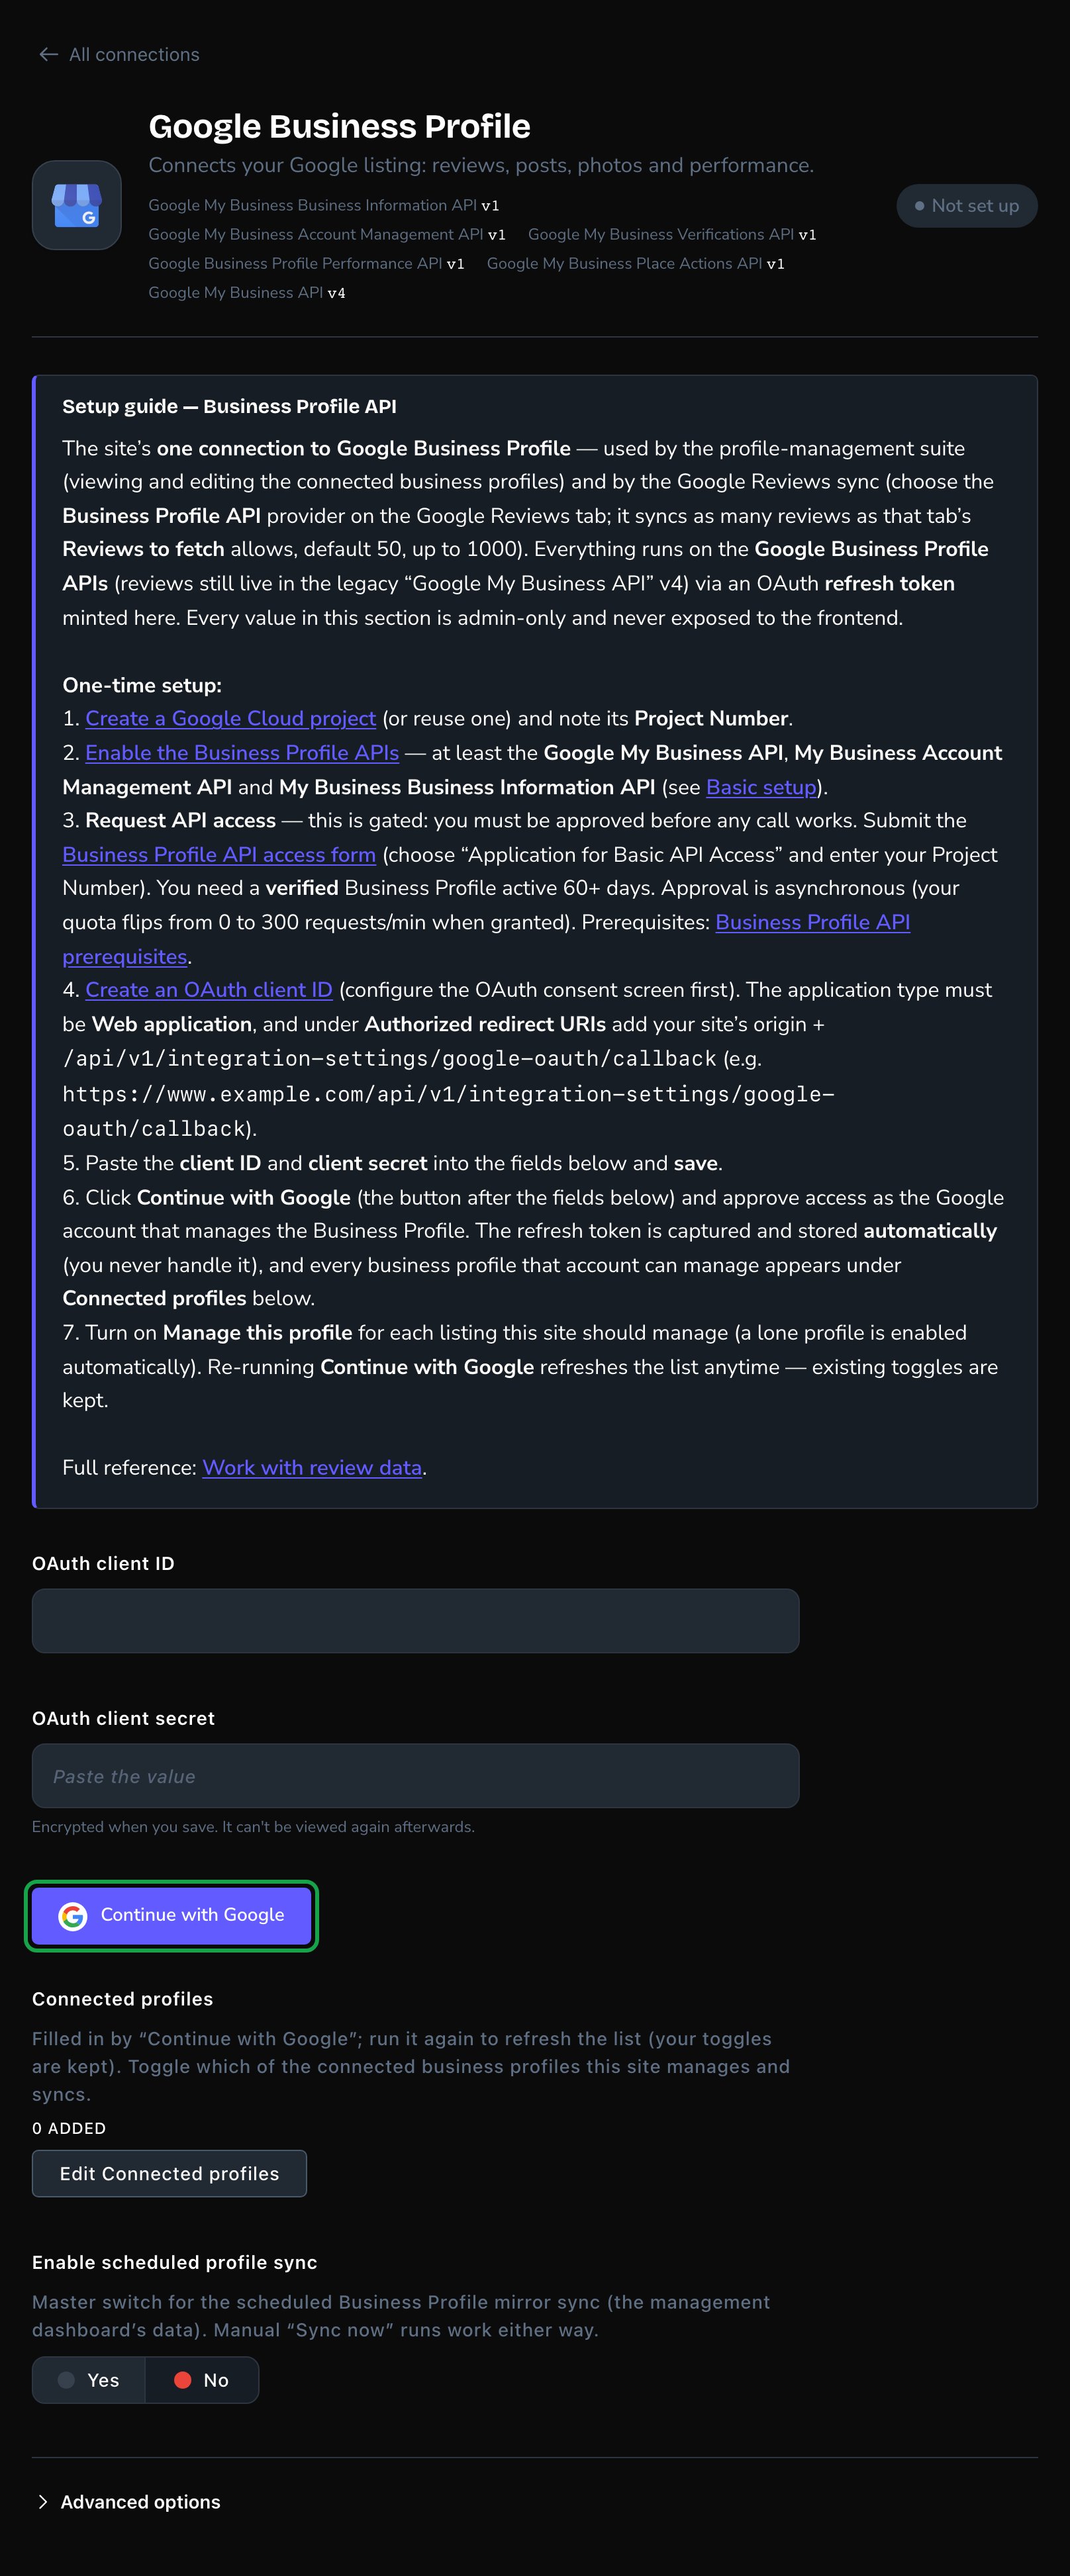
Open Connections from the toolbar or the command palette (⌘K, or Ctrl+K on Windows). The toolbar is the bar across the top of your site once you’re signed in; see The toolbar. Under Google, choose Google Business Profile. Its badge says Not set up.
2
Follow the setup guide
Setup guide — Business Profile API walks you through Google Cloud:
Create a project, or use one you have, and note its project number.
Turn on the Business Profile tools the guide lists.
Request access with Google’s form, choosing Application for Basic API Access. Wait for Google’s approval.
Create an OAuth client ID of the type Web application. Google gives you two values, a client ID and a client secret: together they’re the login details for this connection.
Under Authorized redirect URIs, add your return address: where Google sends you back after you sign in. It’s your site’s address followed by /api/v1/integration-settings/google-oauth/callback. Copy that ending from the setup guide exactly. For example, https://parkerspuppyplayland.example/api/v1/integration-settings/google-oauth/callback.
3
Paste the client details
Copy Google’s client ID into OAuth client ID and its client secret into OAuth client secret.
4
Save
Choose Save. The badge changes to Finish setting up, with the line “Press “Continue with Google” to connect your listing.”
Save the client details, then choose Continue with Google.
5
Connect
Open Connections again, go to the card and choose Continue with Google. A new browser tab opens. Sign in with the Google account that manages your listing, and allow access.
6
Check the result
The tab shows Google connected and lists every listing that account can manage. Close the tab.
7
Reopen Connections
Back in the CMS, close Connections and open it again, so it shows your new listings. If you’ve changed anything since step 4, choose Save to close it; otherwise choose Cancel.
8
Choose your listings
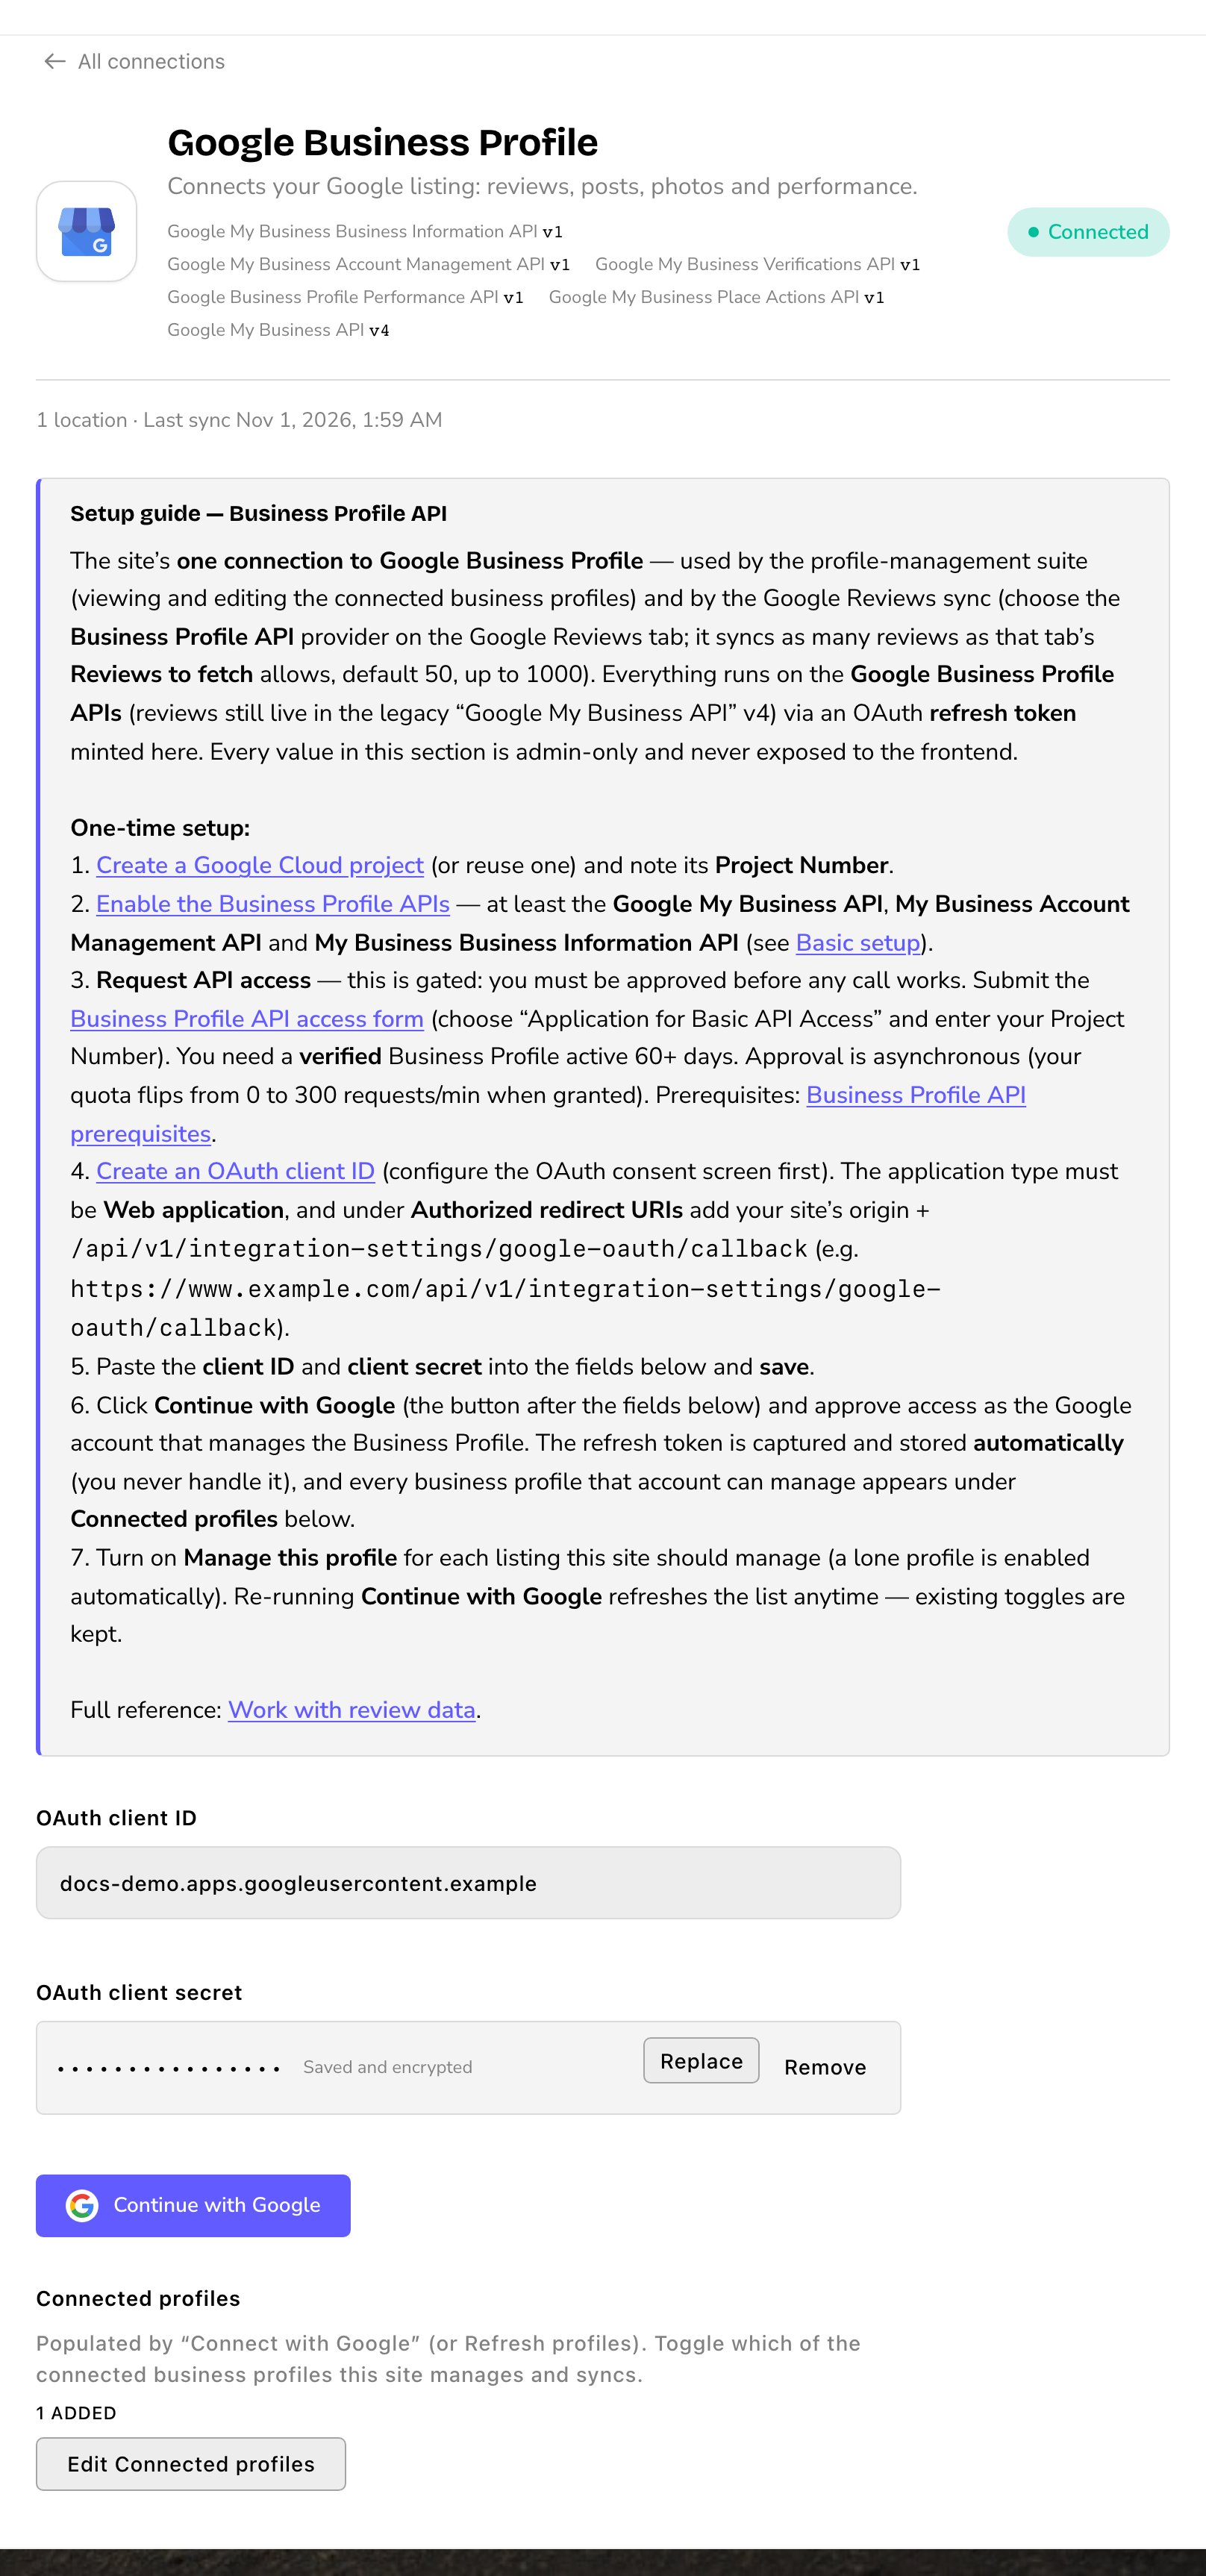
Under Connected profiles, choose Edit Connected profiles. Turn on Manage this profile for each listing this site should manage. If there’s only one, it’s already on. Choose Save in the list window to keep the list.
9
Keep it up to date
Turn on Enable scheduled profile sync. The CMS then copies your listings from Google every 12 hours. To change that, open Advanced options → Sync how often.
10
Save
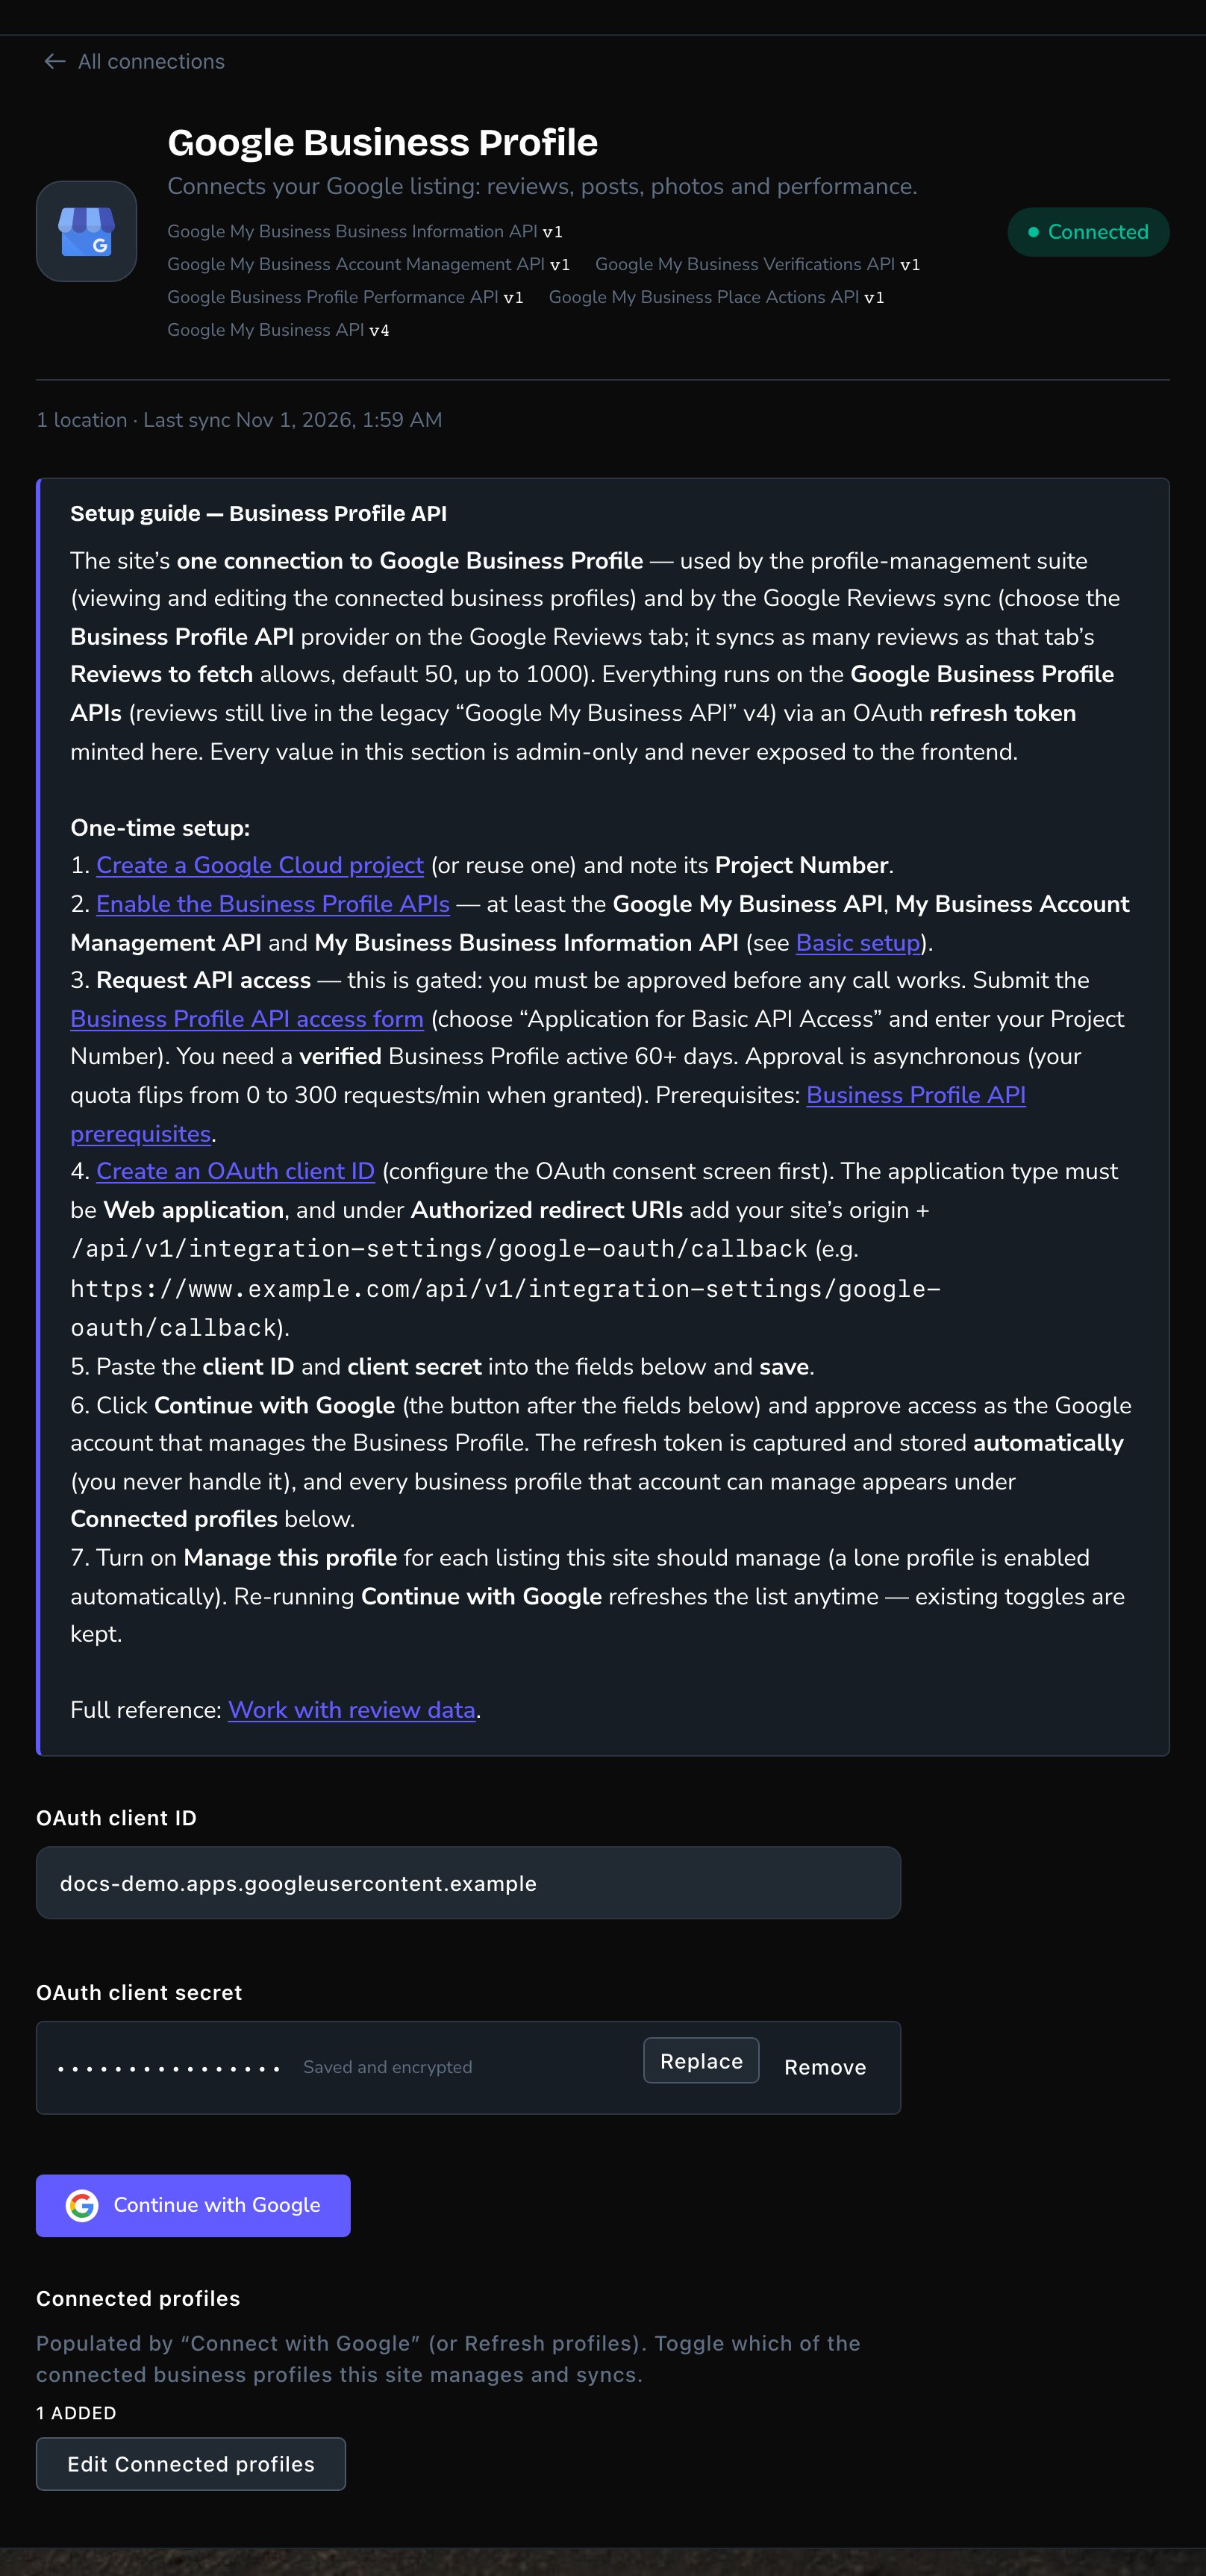
Choose Save to save everything. The badge reads Connected, with how many listings it manages and when it last synced.
Connected: choose which listings this site manages.
The same connection powers your Google reviews. To bring reviews onto your site, see Google Reviews.
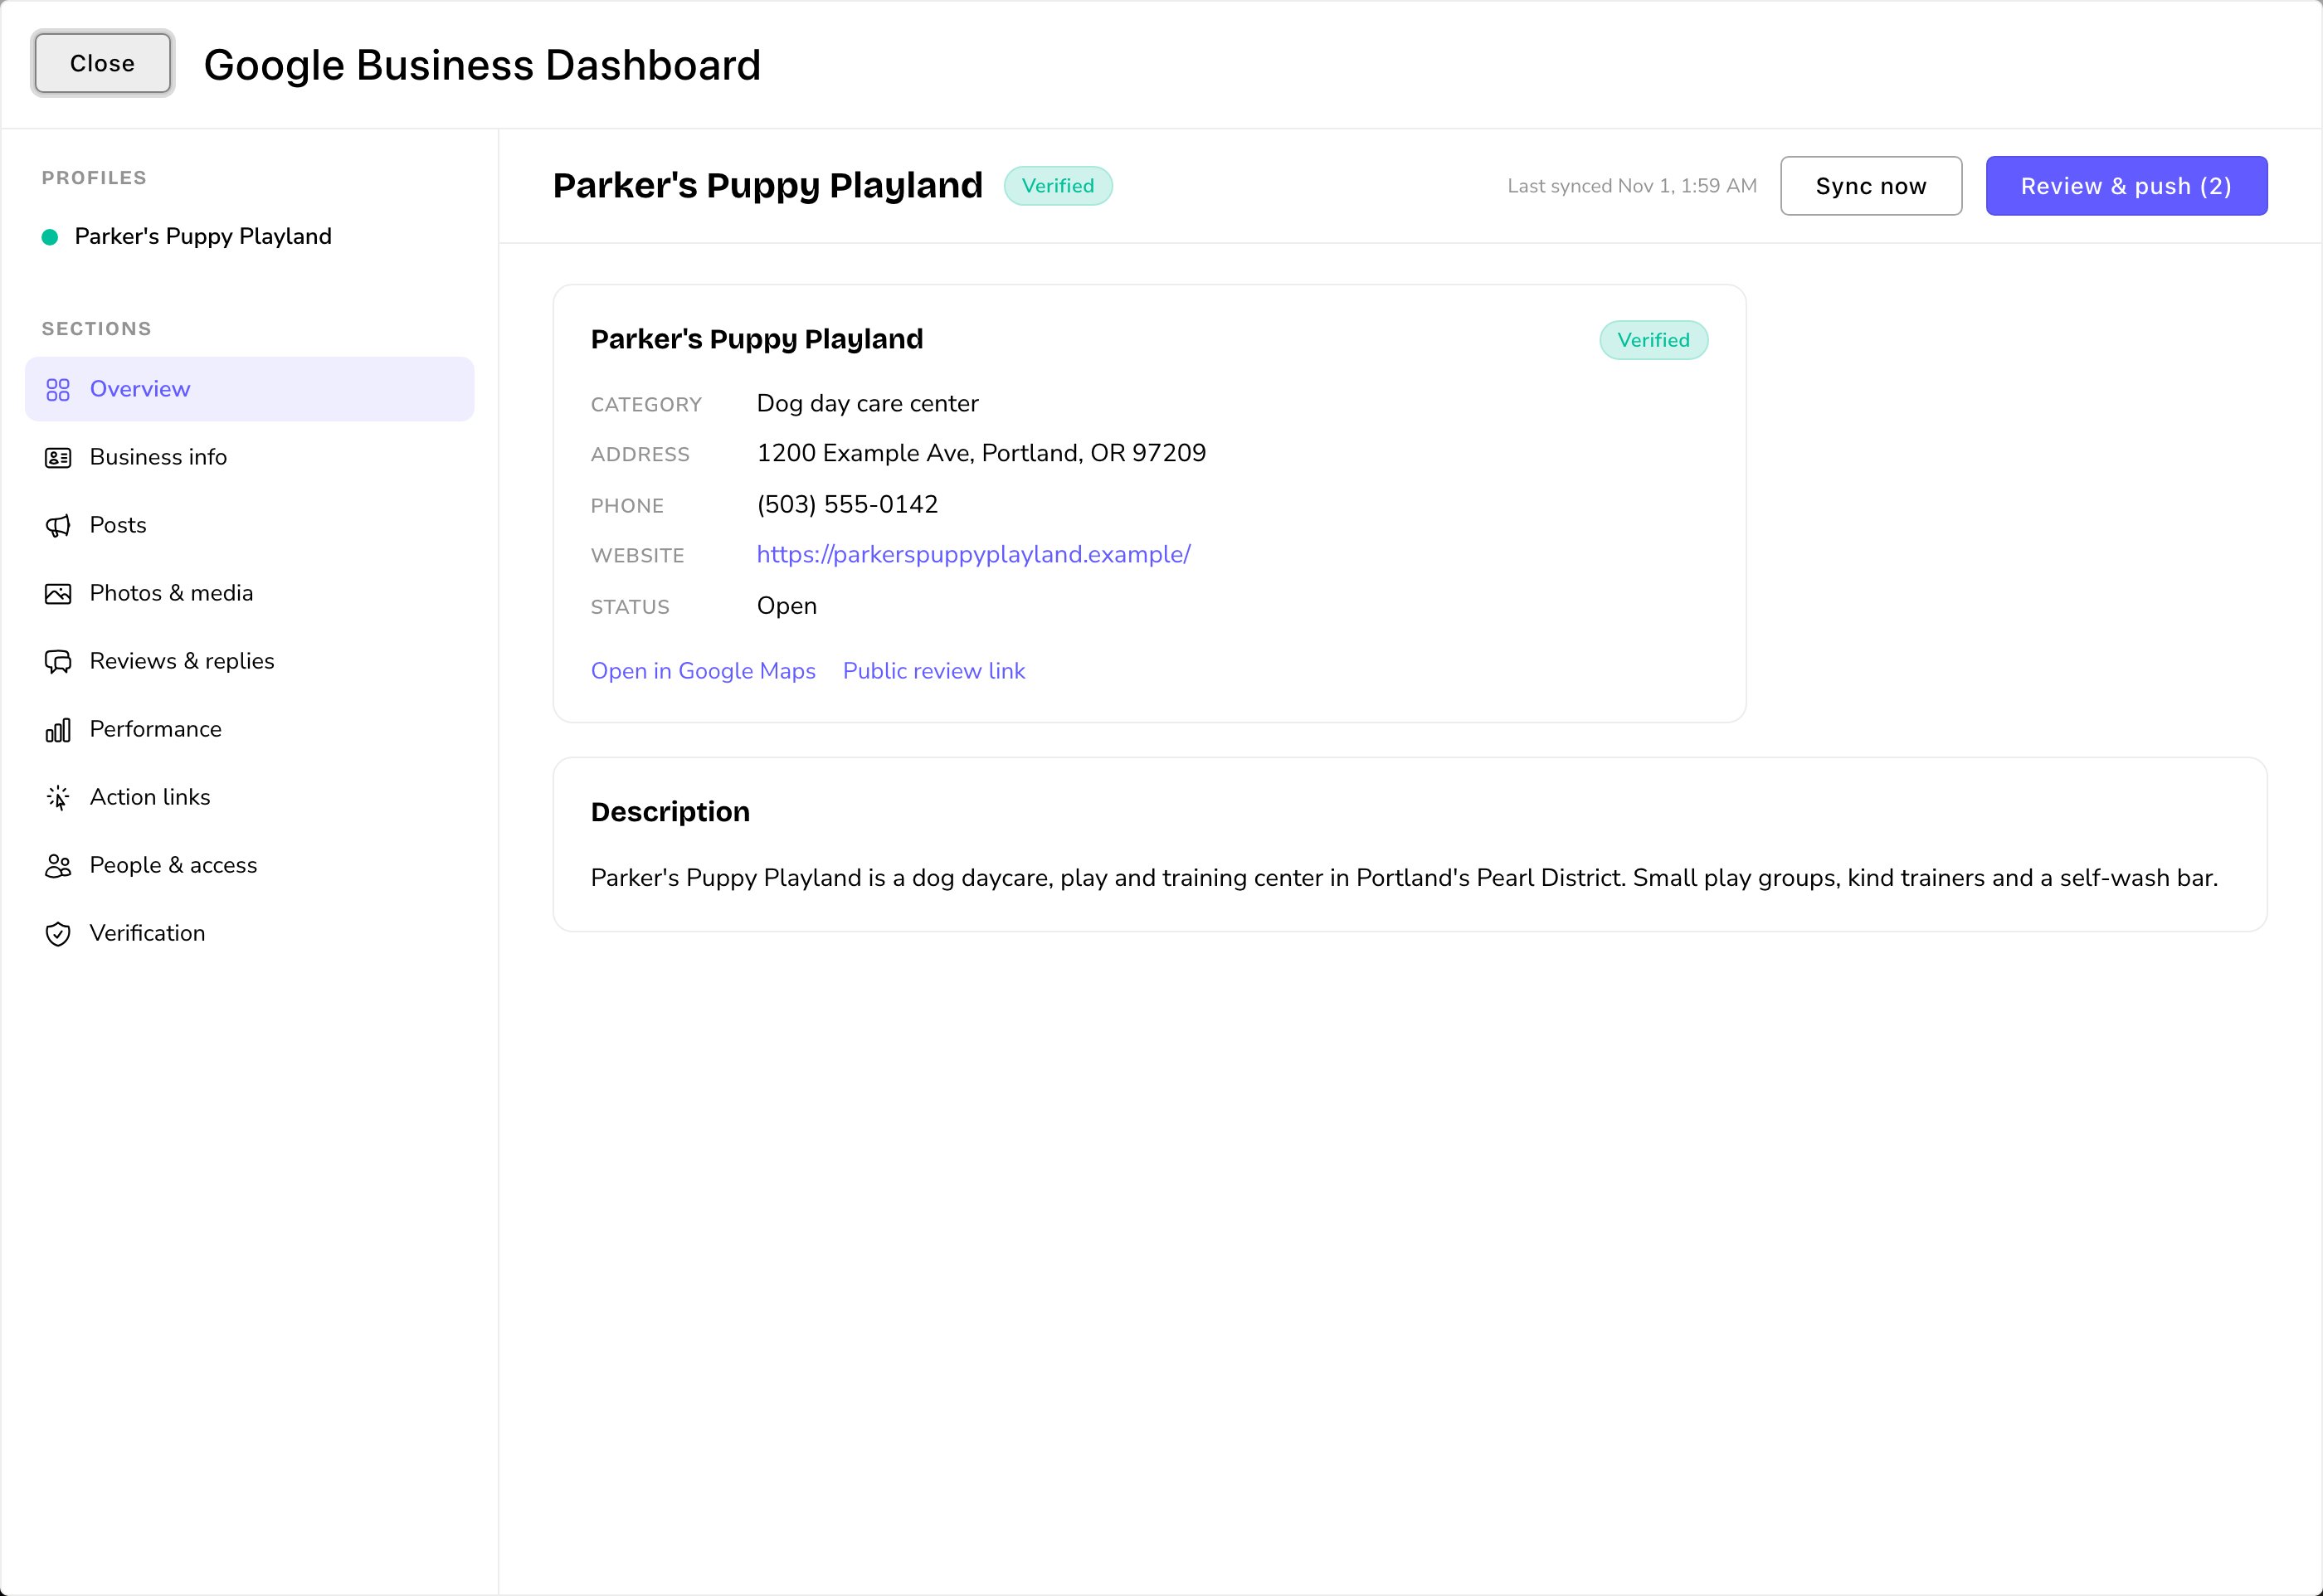
Open the Google Business Dashboard
Open the command palette and choose Google Business Dashboard. The shortcut is T then B (press T, let go, then press B, while you’re not typing in a box; see Keyboard shortcuts). The first time, choose Sync profiles now to copy your listings in.The dashboard lists your listings on the left. Choose All profiles to see them all at once, or one listing to work on it. Below them are its sections: Overview, Business info, Posts, Photos & media, Reviews & replies, Performance, Action links, People & access and Verification. Sync now at the top fetches the latest from Google.
The Google Business Dashboard, with every section on the left.
Change your listing’s details
Changes wait in the CMS until you send them to Google together. Two words on the buttons: to stage a change is to save it in the CMS, waiting; to push is to send the changes you pick to Google. Nothing reaches Google until you push.
1
Edit a card
In Business info, choose Edit on a card, such as Regular hours or Description. Make your change.
2
Stage it
Choose Stage change. The card shows Edited. Repeat for any other cards.
3
Review
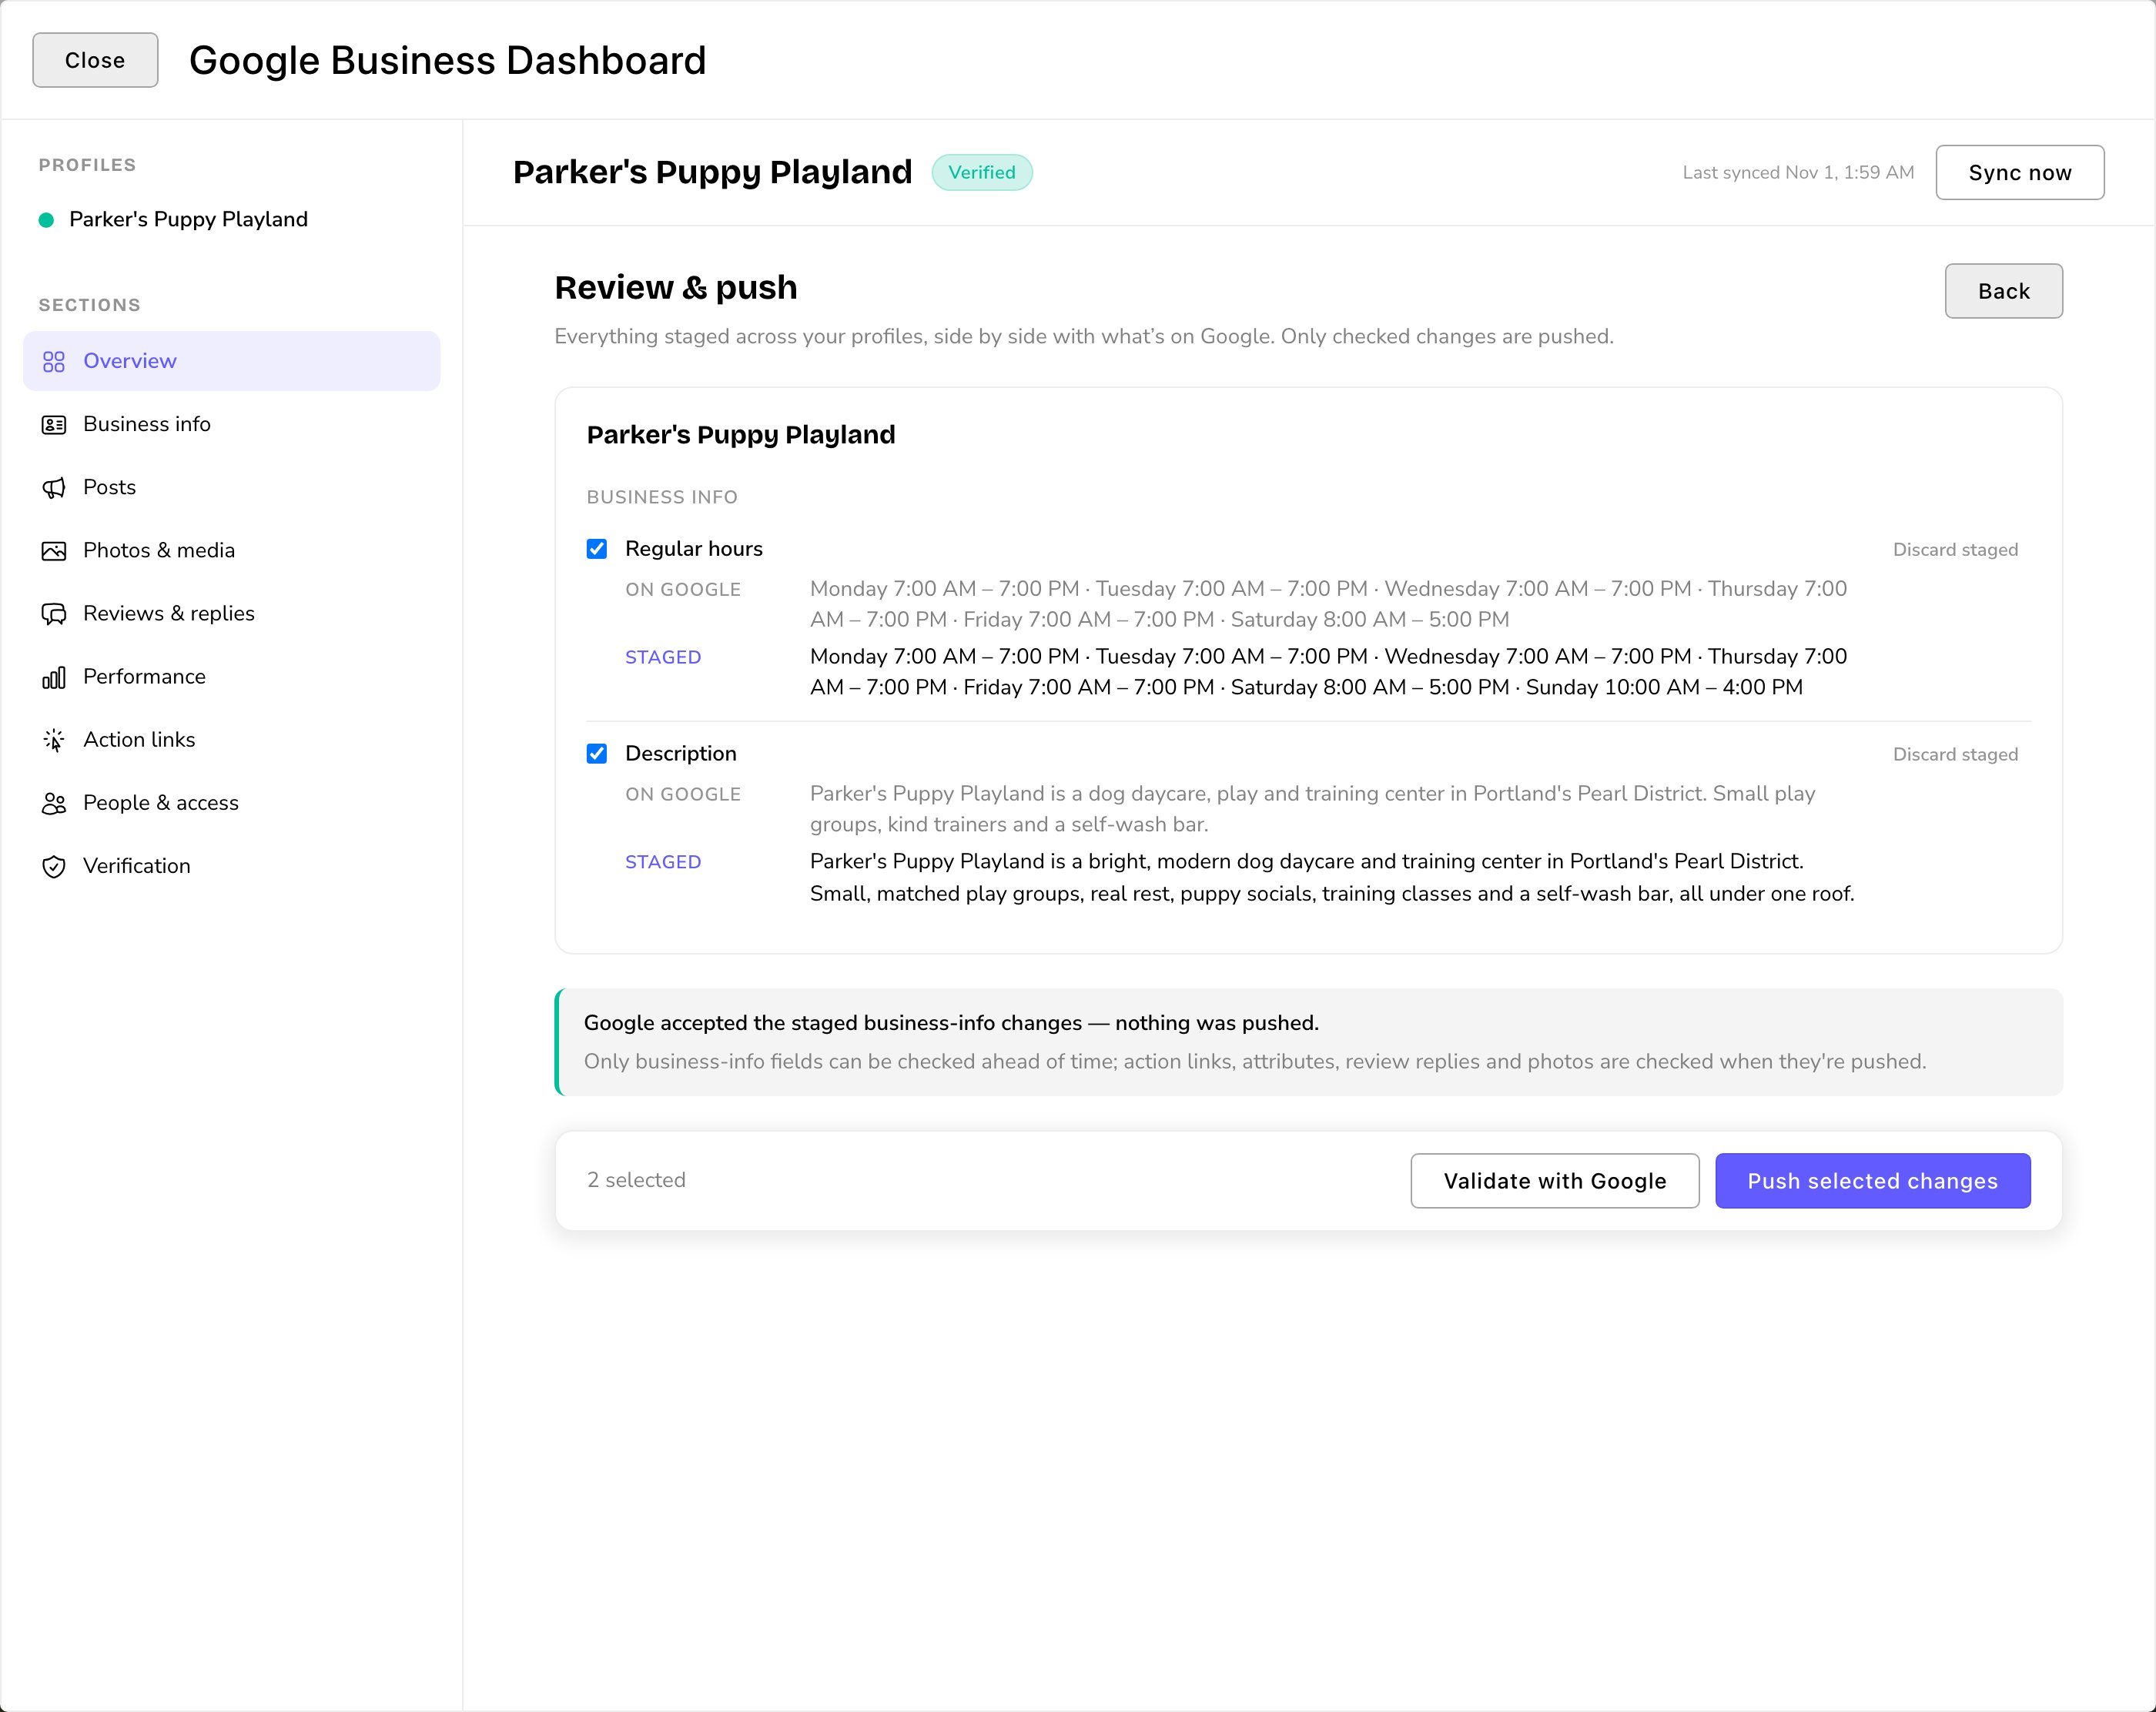
Choose Review & push at the top. It lists every staged change, with what’s On Google beside what you Staged. Uncheck anything you don’t want to send yet.
4
Check it first (optional)
Choose Validate with Google. Google checks your business-info changes without saving them, and the result shows above the buttons.
5
Push
Choose Push selected changes. When it’s done, you see a summary such as “2 pushed · 1 sent — in Google’s review queue · 0 failed (stay staged)”.
Review & push: see every staged change beside what's on Google, then push.
Each card’s badge tells you where things stand:
Live: matches Google.
Edited: you staged a change that isn’t pushed yet. Discard staged throws it away.
Pending at Google: Google is reviewing a change before it goes live.
Updated on Google: Google, or someone on Google, changed it. Open Compare with what’s on Google now, then choose Use Google’s version or Keep mine.
Reply to reviews
Reviews & replies lists the reviews your Google Reviews connection has fetched. Set its Review provider to Business Profile API — OAuth, all reviews and Enable scheduled sync to Yes. It keeps only 5-star reviews at first. To reply to lower ratings, lower its Minimum star rating to keep.In Reviews & replies, filter by All, Unanswered or Staged. Choose Reply on a review, write your answer and choose Stage reply. Replies go out with Review & push, like other changes.Google checks every reply before it shows publicly. Until then the reply says Sent — in Google’s review queue. If Google refuses one, it shows Rejected by Google, with Google’s reason when it gives one. To choose which reviews show on your site, choose Open the Reviews manager.
Post updates, events and offers
In Posts, choose New post. Pick the Post type, write the Summary, and add a photo or a Button if you like. Then choose Publish to Google.Posts don’t wait for Review & push. They go to Google right away. Google may still review a post first. Its badge shows Live, In Google’s review queue or Rejected by Google.
Photos
In Photos & media, Your photos shows your listing’s photos and From customers shows your customers’ photos. To add one, choose Add a photo and pick it from your media library. Then choose its Category and choose Stage upload. You can also Change category or Remove your own photos.Photos go to Google with Review & push. Google fetches each photo from your site, so your site must be public.Customers’ photos are read-only here. To report one, use Google’s own Business Profile tools.
Performance, action links and more
Performance: how many people saw your listing on Search and Maps, and how many called, visited your website or asked for directions. Switch between 30 days, 90 days and 12 months. Update data fetches the latest. Google’s most recent days can take a while to fill in.
Action links: the booking or ordering buttons Google shows on your listing. Choose Add link to add one. Google decides which kinds your listing can have, based on its categories.
People & access: who can manage your listing on Google. To change it, choose Manage in Google Business Profile ↗.
Verification: your listing’s verification status, and what Google asks you to do next. You verify on Google’s site.
The Google Business Profile lists
Three lists, named GBP for Google Business Profile, in the command palette show what the CMS has copied from Google:
GBP Locations: your listings. Choose Go to GBP Locations (G then Shift+B: hold Shift for the B)
GBP Posts: choose Go to GBP Posts (G then Shift+P)
GBP Media Items: choose Go to GBP Media Items (G then Shift+M)
These lists are for looking things up. You make changes in the dashboard, and each list has Open Dashboard to take you there. GBP Locations also has Sync now.
What happens next
Staged changes stay in the CMS until you push them. After a push, Google may hold a change in its own review before it goes live. Posts are the exception: they’re sent the moment you publish them.With scheduled sync on, the CMS fetches each listing from Google on its own. It also fetches performance data once a day.
Google’s limits. Google accepts 100 new posts and photo uploads a day for your site, shared between them. Extra uploads stay staged: push them again the next day. Google also allows only 10 edits a minute per listing, so a big push takes a few minutes.
Troubleshooting
Not ready to connect
The new tab says:“Enter the OAuth client ID and client secret in the vault, SAVE, then click Continue with Google again.”Paste both into the card, choose Save, then choose Continue with Google again.
Connect link expired
You took more than 10 minutes, or used an old tab. Go back to the card and choose Continue with Google again.
Google declined the connection" or "Connection failed
Google didn’t allow access. Check that the redirect address in your OAuth client matches the setup guide exactly, and that you signed in with the account that manages your listing. Then try again.
Google connected" mentions "quota exceeded
The connection is saved, but Google hasn’t approved your access request yet. Wait for Google’s approval email, then choose Sync profiles now in the dashboard.
The dashboard says "Connect Google Business Profile first" or "Choose the profiles to manage
The connection isn’t finished, or no listing has Manage this profile on. Choose Open Connections and finish the steps above.
Performance shows no data, or Google refuses a post
Google holds back some features until a listing is verified. Check Verification in the dashboard, and finish verifying on Google’s site.
Related
Google Reviews
show your Google reviews on your site.
Google reviews
the reviews your site shows; feature your favorites.
Connections
every outside service your site uses.
⌘I
{"docsConfig":{"theme":"almond","$schema":"https://mintlify.com/docs.json","name":"Fetchski Attract Docs","colors":{"primary":"#16a34a","light":"#22c55e","dark":"#15803d"},"logo":{"light":"https://mintcdn.com/fetchski-attract-api/mn9qfQRsqaASh7UE/logo/light.svg?fit=max\u0026auto=format\u0026n=mn9qfQRsqaASh7UE\u0026q=85\u0026s=66db13e248b70a44a5ff5f6990d4cb63","dark":"https://mintcdn.com/fetchski-attract-api/mn9qfQRsqaASh7UE/logo/dark.svg?fit=max\u0026auto=format\u0026n=mn9qfQRsqaASh7UE\u0026q=85\u0026s=86904ba8d47714303521b2dcd5aa2a50","href":"/"},"favicon":"https://mintcdn.com/fetchski-attract-api/mn9qfQRsqaASh7UE/favicon.svg?fit=max\u0026auto=format\u0026n=mn9qfQRsqaASh7UE\u0026q=85\u0026s=fd4f2c0615961c9e01c9762b98c8999f","api":{"playground":{"display":"interactive"},"examples":{"defaults":"required","languages":["bash","typescript","php"]}},"appearance":{"default":"dark"},"background":{"color":{"light":"#ffffff","dark":"#0b0e13"}},"search":{"prompt":"Search the docs…"},"seo":{"metatags":{"robots":"noindex, nofollow"}},"fonts":{"family":"Inter"},"icons":{"library":"fontawesome"},"styling":{"codeblocks":"dark","latex":true},"contextual":{"options":["copy","view"],"display":"header"},"navigation":{"pages":[]}},"deployment":{"deploymentMetadataValue":{"subdomain":"fetchski-attract-api","hasAudioNarration":false,"actualSubdomain":"fetchski-attract-api","customDomains":["docs.fetchski-attract.com"],"gitSource":{"type":"github","owner":"fetchski","repo":"fetchski_cms_astro_monorepo","deployBranch":"main","contentDirectory":"docs/attract","isPrivate":true,"mountPath":"","label":"","_id":"6adb9c232f0947a18a27541d"},"entitlements":{},"buildId":"6af6df04bd8b0362cdec74ff","clientVersion":"0.0.4131","searchFilterCounts":[{"language":"default","tag":"Media","count":953},{"language":"default","tag":"Content","count":863},{"language":"default","tag":"Publishing","count":720},{"language":"default","tag":"API reference","count":484},{"language":"default","tag":"Laravel","count":472},{"language":"default","tag":"TypeScript","count":470},{"language":"default","tag":"AdonisJS","count":469},{"language":"default","tag":"Batch jobs","count":364},{"language":"default","tag":"Pages \u0026 Site","count":224},{"language":"default","tag":"Forms","count":168}]},"assistantConfig":{"enableAskAiButton":false,"enableStarterQuestions":false,"enableContextualStarterQuestions":false,"enableAskAiSearchBar":true},"basePath":"","hasChatPermissions":false,"hasWebMcpPermissions":false,"toggles":[{"name":"kill-isr","enabled":true,"variant":{"name":"disabled","enabled":false,"feature_enabled":true},"impressionData":false},{"name":"custom-rbac-roles","enabled":true,"variant":{"name":"disabled","enabled":false,"feature_enabled":true},"impressionData":false},{"name":"agent-mintlify-slack","enabled":true,"variant":{"name":"disabled","enabled":false,"feature_enabled":true},"impressionData":false},{"name":"agent-integrations-settings","enabled":true,"variant":{"name":"disabled","enabled":false,"feature_enabled":true},"impressionData":false},{"name":"rbac-expansion","enabled":true,"variant":{"name":"disabled","enabled":false,"feature_enabled":true},"impressionData":false},{"name":"automations-pr-grouping","enabled":true,"variant":{"name":"disabled","enabled":false,"feature_enabled":true},"impressionData":false},{"name":"custom-prefix","enabled":true,"variant":{"name":"disabled","enabled":false,"feature_enabled":true},"impressionData":false},{"name":"analytics-v7","enabled":true,"variant":{"name":"disabled","enabled":false,"feature_enabled":true},"impressionData":false},{"name":"user-flows-analytics","enabled":true,"variant":{"name":"disabled","enabled":false,"feature_enabled":true},"impressionData":false},{"name":"no-publish-flow","enabled":true,"variant":{"name":"disabled","enabled":false,"feature_enabled":true},"impressionData":false},{"name":"workos-onboarding","enabled":true,"variant":{"name":"disabled","enabled":false,"feature_enabled":true},"impressionData":false},{"name":"snapshot-serving-live","enabled":true,"variant":{"name":"disabled","enabled":false,"feature_enabled":true},"impressionData":false},{"name":"stripTemperatureMiddleware","enabled":true,"variant":{"name":"disabled","enabled":false,"feature_enabled":true},"impressionData":false},{"name":"support-platform-pylon-zendesk","enabled":true,"variant":{"name":"disabled","enabled":false,"feature_enabled":true},"impressionData":false},{"name":"snapshot-serving","enabled":true,"variant":{"name":"disabled","enabled":false,"feature_enabled":true},"impressionData":false},{"name":"instant-rollback","enabled":true,"variant":{"name":"disabled","enabled":false,"feature_enabled":true},"impressionData":false},{"name":"granular-notifications-server","enabled":true,"variant":{"name":"disabled","enabled":false,"feature_enabled":true},"impressionData":false},{"name":"granular-notifications","enabled":true,"variant":{"name":"disabled","enabled":false,"feature_enabled":true},"impressionData":false},{"name":"automations-fable","enabled":true,"variant":{"name":"disabled","enabled":false,"feature_enabled":true},"impressionData":false},{"name":"fixed-ai-action-pricing","enabled":true,"variant":{"name":"disabled","enabled":false,"feature_enabled":true},"impressionData":false},{"name":"automation-resolve-merge-conflict","enabled":true,"variant":{"name":"disabled","enabled":false,"feature_enabled":true},"impressionData":false},{"name":"scoped-publishing","enabled":true,"variant":{"name":"disabled","enabled":false,"feature_enabled":true},"impressionData":false},{"name":"mintql","enabled":true,"variant":{"name":"disabled","enabled":false,"feature_enabled":true},"impressionData":false},{"name":"page-level-analytics","enabled":true,"variant":{"name":"disabled","enabled":false,"feature_enabled":true},"impressionData":false},{"name":"editor-version-history-v2","enabled":true,"variant":{"name":"disabled","enabled":false,"feature_enabled":true},"impressionData":false},{"name":"billing-page-v2","enabled":true,"variant":{"name":"disabled","enabled":false,"feature_enabled":true},"impressionData":false},{"name":"full-page-search","enabled":true,"variant":{"name":"disabled","enabled":false,"feature_enabled":true},"impressionData":false},{"name":"workspace-projects","enabled":true,"variant":{"name":"disabled","enabled":false,"feature_enabled":true},"impressionData":false},{"name":"assistant-v5","enabled":true,"variant":{"name":"disabled","enabled":false,"feature_enabled":true},"impressionData":false},{"name":"fork-pr-previews","enabled":true,"variant":{"name":"disabled","enabled":false,"feature_enabled":true},"impressionData":false},{"name":"revalidation-jwt","enabled":true,"variant":{"name":"disabled","enabled":false,"feature_enabled":true},"impressionData":false},{"name":"workos-sso-scim","enabled":true,"variant":{"name":"disabled","enabled":false,"feature_enabled":true},"impressionData":false},{"name":"hobby-abuse-scan","enabled":true,"variant":{"name":"disabled","enabled":false,"feature_enabled":true},"impressionData":false},{"name":"dashboard-inbox","enabled":true,"variant":{"name":"disabled","enabled":false,"feature_enabled":true},"impressionData":false},{"name":"workos-signup","enabled":true,"variant":{"name":"disabled","enabled":false,"feature_enabled":true},"impressionData":false},{"name":"turbopuffer-dual-write","enabled":true,"variant":{"name":"disabled","enabled":false,"feature_enabled":true},"impressionData":false},{"name":"workos-enabled","enabled":true,"variant":{"name":"disabled","enabled":false,"feature_enabled":true},"impressionData":false},{"name":"approve-review-flow","enabled":true,"variant":{"name":"disabled","enabled":false,"feature_enabled":true},"impressionData":false},{"name":"editor-metadata","enabled":true,"variant":{"name":"disabled","enabled":false,"feature_enabled":true},"impressionData":false},{"name":"sso-setup-deadline-banner","enabled":true,"variant":{"name":"disabled","enabled":false,"feature_enabled":true},"impressionData":false},{"name":"turbopuffer-serve","enabled":true,"variant":{"name":"disabled","enabled":false,"feature_enabled":true},"impressionData":false},{"name":"live-agents","enabled":true,"variant":{"name":"disabled","enabled":false,"feature_enabled":true},"impressionData":false},{"name":"llms-txt-v2","enabled":true,"variant":{"name":"disabled","enabled":false,"feature_enabled":true},"impressionData":false}],"googleFontsInlined":false},"customCss":[{"filePath":"style.css","content":"@media (min-width: 1280px){:root{--content-width: 52rem}}@media (min-width: 1600px){:root{--content-width: 60rem}}@media (min-width: 1920px){:root{--content-width: 68rem}}@media (min-width: 1024px) and (max-width: 1919px){#content-container{padding-left:2rem;padding-right:2rem}div:has(>#content-area){padding-left:0}#table-of-contents{width:14rem}}html[data-page-mode=\"wide\"] #content-area{max-width:84rem}@media (min-width: 1024px){#navbar .nav-tabs{position:fixed;left:15rem;top:0;height:6rem}}@media (min-width: 1024px) and (max-width: 1599px){#navbar .nav-tabs{gap:0}#navbar .nav-tabs .nav-tabs-item{gap:0.375rem;font-size:0.9375rem;padding-inline:0.5rem}#navbar .nav-tabs .nav-tabs-item svg,#navbar .nav-tabs .nav-tabs-item img{width:1.0625rem;height:1.0625rem}}@media (min-width: 1024px) and (max-width: 1199px){#navbar .nav-tabs .nav-tabs-item svg,#navbar .nav-tabs .nav-tabs-item img{display:none}}@media (min-width: 1024px) and (max-width: 1319px){div:has(>#search-bar-entry){width:3rem!important}#search-bar-entry{justify-content:center;padding:0!important}#search-bar-entry>div>:not(svg),#search-bar-entry>:not(div){display:none}}.mdx-content{font-size:1.0625rem;line-height:1.8}@media (min-width: 1024px){.mdx-content{font-size:1.25rem;line-height:1.85}#page-title{font-size:2.875rem;line-height:1.15}#page-title+*,#header .prose{font-size:1.375rem}#sidebar-content a{font-size:1.125rem}.toc-item{font-size:1rem}}.mdx-content>[data-as=\"p\"],.mdx-content>p{margin-top:0;margin-bottom:1.75rem}.mdx-content>h2{margin-top:3.5rem;margin-bottom:1.25rem;padding-top:2rem;border-top:1px solid rgb(0 0 0 / 0.08);font-size:1.875rem;letter-spacing:-0.01em}.dark .mdx-content>h2{border-top-color:rgb(255 255 255 / 0.08)}.mdx-content>h2:first-child{margin-top:0;padding-top:0;border-top:0}.mdx-content>h3{margin-top:2.75rem;margin-bottom:1.125rem;font-size:1.4375rem}.mdx-content>h4{margin-top:2rem;margin-bottom:0.75rem}.mdx-content li{margin-top:0.625rem;margin-bottom:0.625rem}.mdx-content>ul,.mdx-content>ol{margin-bottom:1.75rem}.mdx-content :not(pre)>code{font-size:0.875em;padding:0.125rem 0.375rem;overflow-wrap:anywhere}.mdx-content table{font-size:1.0625rem;line-height:1.7}.mdx-content th,.mdx-content td{padding:0.875rem 1.5rem 0.875rem 0!important;vertical-align:top}.mdx-content th{padding-top:0.25rem!important}.mdx-content th:last-child,.mdx-content td:last-child{padding-right:0!important}.mdx-content td>code:only-child{white-space:nowrap}pre{max-height:36rem;overflow:auto}.mdx-content pre code{font-size:0.9375rem;line-height:1.75}.mdx-content>.code-block,.mdx-content>.code-group{margin-top:1.5rem;margin-bottom:2rem}.mdx-content .columns{column-gap:1.25rem;row-gap:0.5rem;margin-top:1.75rem;margin-bottom:2.25rem}.mdx-content .card{border-radius:1rem}.mdx-content .card [data-component-part=\"card-content-container\"]{padding:1.5rem 1.75rem}.mdx-content [data-component-part=\"card-title\"]{font-size:1.25rem}.mdx-content [data-component-part=\"card-content\"]{font-size:1.0625rem;line-height:1.7}.mdx-content .callout{margin-top:2rem;margin-bottom:2.25rem;padding:1.25rem 1.75rem;font-size:1.125rem;line-height:1.75}.mdx-content .steps{margin-top:1.75rem;margin-bottom:2.25rem}.mdx-content .step{padding-bottom:0.75rem}.mdx-content .accordion-group,.mdx-content>.accordion{margin-top:1.75rem;margin-bottom:2.25rem}.mdx-content .tabs{margin-top:1.75rem;margin-bottom:2.25rem}.mdx-content .tabs [role=\"tabpanel\"]{padding-top:0.375rem;padding-right:0.375rem;padding-bottom:0.375rem}.mdx-content [data-component-name=\"mermaid-container\"]{--im-node-fill: #ecfdf3;--im-node-stroke: #16a34a;--im-node-text: #0b3a1f;--im-cluster-fill: rgb(22 163 74 / 0.04);--im-cluster-stroke: rgb(22 163 74 / 0.35);--im-edge: #64748b;--im-label-bg: #ffffff;margin-top:1.75rem;margin-bottom:2.25rem;padding:2rem 1.5rem;border:1px solid rgb(0 0 0 / 0.08);border-radius:1rem;background:rgb(0 0 0 / 0.015)}.dark .mdx-content [data-component-name=\"mermaid-container\"]{--im-node-fill: #0b2e1a;--im-node-stroke: #22c55e;--im-node-text: #e7fbef;--im-cluster-fill: rgb(34 197 94 / 0.05);--im-cluster-stroke: rgb(34 197 94 / 0.35);--im-edge: #94a3b8;--im-label-bg: #0f1214;border-color:rgb(255 255 255 / 0.08);background:rgb(255 255 255 / 0.02)}.mdx-content [data-component-name=\"mermaid-container\"] svg[id^=\"mermaid\"]{display:block;margin-left:auto;margin-right:auto}.mdx-content [data-component-name=\"mermaid-container\"] .node rect,.mdx-content [data-component-name=\"mermaid-container\"] .node polygon,.mdx-content [data-component-name=\"mermaid-container\"] .node circle,.mdx-content [data-component-name=\"mermaid-container\"] .node path{fill:var(--im-node-fill)!important;stroke:var(--im-node-stroke)!important;stroke-width:1.5px!important}.mdx-content [data-component-name=\"mermaid-container\"] .node rect{rx:8px;ry:8px}.mdx-content [data-component-name=\"mermaid-container\"] .nodeLabel,.mdx-content [data-component-name=\"mermaid-container\"] .node .label{color:var(--im-node-text)!important;fill:var(--im-node-text)!important}.mdx-content [data-component-name=\"mermaid-container\"] .cluster rect{fill:var(--im-cluster-fill)!important;stroke:var(--im-cluster-stroke)!important;stroke-dasharray:6 4;rx:12px;ry:12px}.mdx-content [data-component-name=\"mermaid-container\"] .cluster-label .nodeLabel,.mdx-content [data-component-name=\"mermaid-container\"] .cluster .nodeLabel{color:var(--im-node-stroke)!important}.mdx-content [data-component-name=\"mermaid-container\"] .flowchart-link,.mdx-content [data-component-name=\"mermaid-container\"] .edgePath path{stroke:var(--im-edge)!important;stroke-width:1.5px!important}.mdx-content [data-component-name=\"mermaid-container\"] marker path,.mdx-content [data-component-name=\"mermaid-container\"] .arrowheadPath{fill:var(--im-edge)!important;stroke:var(--im-edge)!important}.mdx-content [data-component-name=\"mermaid-container\"] .edgeLabel,.mdx-content [data-component-name=\"mermaid-container\"] .edgeLabel p,.mdx-content [data-component-name=\"mermaid-container\"] .labelBkg{background-color:var(--im-label-bg)!important;color:var(--im-edge)!important}.mdx-content [data-component-name=\"mermaid-container\"] rect.actor{fill:var(--im-node-fill)!important;stroke:var(--im-node-stroke)!important;stroke-width:1.5px!important;rx:8px;ry:8px}.mdx-content [data-component-name=\"mermaid-container\"] text.actor>tspan,.mdx-content [data-component-name=\"mermaid-container\"] text.actor{fill:var(--im-node-text)!important}.mdx-content [data-component-name=\"mermaid-container\"] .actor-line{stroke:var(--im-cluster-stroke)!important}.mdx-content [data-component-name=\"mermaid-container\"] .messageLine0,.mdx-content [data-component-name=\"mermaid-container\"] .messageLine1{stroke:var(--im-edge)!important;stroke-width:1.5px!important}.mdx-content [data-component-name=\"mermaid-container\"] #arrowhead path,.mdx-content [data-component-name=\"mermaid-container\"] #crosshead path{fill:var(--im-edge)!important;stroke:var(--im-edge)!important}.mdx-content [data-component-name=\"mermaid-container\"] .note{fill:var(--im-cluster-fill)!important;stroke:var(--im-cluster-stroke)!important}.mdx-content .field .prose-sm{font-size:1.0625rem;line-height:1.8}@media (min-width: 1024px){.mdx-content .field .prose-sm{font-size:1.125rem}}.mdx-content .field{padding-top:1.25rem;padding-bottom:1.25rem}:root{--fa-accent: 22 163 74;--fa-ink: 15 23 42;--fa-button: 21 128 61;--fa-button-hover: 22 101 52;--fa-on-button: 255 255 255}.dark{--fa-accent: 34 197 94;--fa-ink: 255 255 255;--fa-button: 34 197 94;--fa-button-hover: 74 222 128;--fa-on-button: 5 46 22}.mdx-content .card{transition:border-color 150ms ease,\n background-color 150ms ease}.mdx-content a.card:hover,.mdx-content .card:has(a:hover){border-color:rgb(var(--fa-accent) / 0.45);background-color:rgb(var(--fa-accent) / 0.06)}.mdx-content .card [data-component-part=\"card-icon\"]{display:flex;width:1.75rem;height:1.75rem;margin-bottom:1rem}.mdx-content .card [data-component-part=\"card-icon\"] svg{width:1.75rem;height:1.75rem;mask-size:contain;background-color:rgb(var(--fa-accent))!important}.mdx-content .card [data-component-part=\"card-content-container\"].flex [data-component-part=\"card-icon\"]{margin-bottom:0}html[data-page-mode=\"wide\"] #header{display:none}.fa-hero{position:relative;isolation:isolate;display:grid;grid-template-columns:minmax(0, 1fr);gap:3rem;align-items:center;overflow:hidden;margin:-1.5rem 0 3.5rem;padding:3.5rem 3rem;border:1px solid rgb(var(--fa-accent) / 0.2);border-radius:1.5rem;background-color:rgb(var(--fa-accent) / 0.025);background-image:radial-gradient(\n 55% 75% at 82% 50%,\n rgb(var(--fa-accent) / 0.16),\n transparent 70%\n )}.fa-hero::before{content:'';position:absolute;inset:0;z-index:-1;background-image:linear-gradient(rgb(var(--fa-accent) / 0.1) 1px, transparent 1px),\n linear-gradient(90deg, rgb(var(--fa-accent) / 0.1) 1px, transparent 1px);background-size:2rem 2rem;background-position:-1px -1px;mask-image:radial-gradient(80% 90% at 85% 40%, #000 20%, transparent 75%);pointer-events:none}.fa-hero::after{content:'';position:absolute;top:0;right:10%;left:10%;height:1px;background:linear-gradient(\n 90deg,\n transparent,\n rgb(var(--fa-accent) / 0.8),\n transparent\n );pointer-events:none}@media (min-width: 1536px){.fa-hero{grid-template-columns:minmax(0, 0.85fr) minmax(0, 1.15fr);padding:4rem 3.5rem}}.fa-hero-code>.code-group,.fa-hero-code>.code-block{margin:0;border-color:rgb(var(--fa-accent) / 0.25);box-shadow:0 1px 0 rgb(255 255 255 / 0.04) inset,\n 0 30px 60px -24px rgb(0 0 0 / 0.55),\n 0 0 0 6px rgb(var(--fa-accent) / 0.06)}.mdx-content .fa-hero-code pre code{font-size:0.8125rem}.mdx-content .fa-hero .fa-hero-mark{margin:0 0 1.75rem}.mdx-content .fa-hero .fa-hero-mark img{display:block;width:auto;height:4rem;margin:0;border-radius:0}.mdx-content .fa-hero .fa-hero-mark .fa-hero-mark-dark,.dark .mdx-content .fa-hero .fa-hero-mark .fa-hero-mark-light{display:none}.dark .mdx-content .fa-hero .fa-hero-mark .fa-hero-mark-dark{display:block}.fa-hero h1{max-width:40rem;margin:0;font-size:3.25rem;font-weight:700;line-height:1.06;letter-spacing:-0.035em;text-wrap:balance}.fa-hero h1 .fa-hero-accent{color:rgb(var(--fa-accent))}.mdx-content .fa-hero-lede{max-width:34rem;margin:1.5rem 0 2.25rem;font-size:1.1875rem;line-height:1.7;opacity:0.78;text-wrap:pretty}.fa-hero-actions{display:flex;flex-wrap:wrap;gap:0.75rem}.mdx-content .fa-hero-facts{display:flex;flex-wrap:wrap;gap:0.5rem 1.5rem;margin-top:2rem;font-size:0.9375rem;opacity:0.8}.mdx-content .fa-hero-facts>span{display:inline-flex;align-items:center;gap:0.5rem}.mdx-content .fa-hero-facts>span::before{content:'';flex:none;width:1rem;height:1rem;background:rgb(var(--fa-accent));mask:url(\"data:image/svg+xml,%3Csvg xmlns='http://www.w3.org/2000/svg' viewBox='0 0 16 16'%3E%3Cpath d='M3.5 8.5l3 3 6-7' fill='none' stroke='%23000' stroke-width='2' stroke-linecap='round' stroke-linejoin='round'/%3E%3C/svg%3E\")\n center / contain no-repeat}.fa-button{display:inline-flex;align-items:center;gap:0.5rem;height:2.75rem;padding:0 1.125rem;border:1px solid transparent;border-radius:0.625rem;font-size:0.9375rem;font-weight:600;letter-spacing:-0.005em;text-decoration:none!important;transition:background-color 150ms ease,\n border-color 150ms ease,\n box-shadow 150ms ease,\n transform 150ms ease}.fa-button-primary{border-color:rgb(var(--fa-button) / 1);background:rgb(var(--fa-button));box-shadow:inset 0 1px 0 rgb(255 255 255 / 0.25),\n 0 8px 20px -10px rgb(var(--fa-button) / 0.9);color:rgb(var(--fa-on-button))!important}.fa-button-primary::after{content:'';width:1rem;height:1rem;background:currentcolor;mask:url(\"data:image/svg+xml,%3Csvg xmlns='http://www.w3.org/2000/svg' viewBox='0 0 16 16'%3E%3Cpath d='M3 8h9.5M8.5 4l4 4-4 4' fill='none' stroke='%23000' stroke-width='1.75' stroke-linecap='round' stroke-linejoin='round'/%3E%3C/svg%3E\")\n center / contain no-repeat;transition:transform 150ms ease}.fa-button-primary:hover{background:rgb(var(--fa-button-hover));box-shadow:inset 0 1px 0 rgb(255 255 255 / 0.25),\n 0 10px 24px -10px rgb(var(--fa-button) / 1)}.fa-button-primary:hover::after{transform:translateX(2px)}.fa-button-secondary{border-color:rgb(var(--fa-ink) / 0.16);background:rgb(var(--fa-ink) / 0.03);color:inherit!important}.fa-button-secondary:hover{border-color:rgb(var(--fa-accent) / 0.55);background:rgb(var(--fa-accent) / 0.08)}.fa-button:active{transform:translateY(1px)}.fa-button:focus-visible{outline:2px solid rgb(var(--fa-accent));outline-offset:3px}@media (prefers-reduced-motion: reduce){.fa-button,.fa-button-primary::after{transition:none}.fa-button:active,.fa-button-primary:hover::after{transform:none}}@media (max-width: 767px){.fa-hero{padding:2.5rem 1.5rem}.fa-hero h1{font-size:2.25rem}}#sidebar-content a,#sidebar-content li>button{gap:0.875rem;padding-top:0.625rem;padding-right:0.5rem;padding-bottom:0.625rem;font-size:1.125rem;line-height:1.45}#sidebar-content li+li{margin-top:0.25rem}#sidebar-content li>button>div:nth-child(2){min-width:0}#sidebar-content li>button>div:last-child{width:1.25rem;margin-left:auto;justify-content:center}#sidebar-content li>ul{margin:0.25rem 0 0.25rem 1.25rem;padding-left:0.375rem;border-left:1px solid rgb(0 0 0 / 0.1)}.dark #sidebar-content li>ul{border-left-color:rgb(255 255 255 / 0.1)}#sidebar-content li>ul>li>:is(a,button){padding-left:0.75rem!important;font-size:1.0625rem}#sidebar-content .sidebar-group-header{margin-bottom:0.625rem;font-size:0.875rem;font-weight:700;letter-spacing:0.08em;text-transform:uppercase;color:color-mix(in srgb, rgb(var(--fa-accent)) 72%, black)}.dark #sidebar-content .sidebar-group-header{color:rgb(var(--fa-accent))}#sidebar-content div:has(>.sidebar-group-header)+div:has(>.sidebar-group-header){margin-top:2.25rem}#sidebar-content a svg,#sidebar-content a img,#sidebar-content li>button>div:first-child svg,#sidebar-content li>button>div:first-child img{width:1.375rem;height:1.375rem}#sidebar-content .sidebar-group-header svg{width:1rem;height:1rem}.nav-tabs-item{gap:0.625rem;font-size:1.0625rem}.nav-tabs-item svg,.nav-tabs-item img{width:1.3125rem;height:1.3125rem}.nav-tabs-item[href^=\"/typescript\"] svg{background-color:#d4b106}.dark .nav-tabs-item[href^=\"/typescript\"] svg{background-color:#f7df1e}.nav-tabs-item[href^=\"/laravel\"] svg{background-color:#ff2d20}.nav-tabs-item[href^=\"/adonisjs\"] svg{background-color:#5a45ff}.dark .nav-tabs-item[href^=\"/adonisjs\"] svg{background-color:#8b7dff}li[data-group-tag]>button svg[style*=\"/brands/js.svg\"]{background-color:#d4b106}.dark li[data-group-tag]>button svg[style*=\"/brands/js.svg\"]{background-color:#f7df1e}li[data-group-tag]>button svg[style*=\"/brands/laravel.svg\"]{background-color:#ff2d20}#sidebar-content img[src$=\"/n8n.png\"]{transform:scale(1.35)}@media (min-width: 1024px){:root{--mintlify-slot-header-height: 6rem;--sidebar-width: 26rem}#navbar{height:6rem}#sidebar-content{top:6rem}#navbar div:has(img.nav-logo){height:100%}img.nav-logo{height:3.5rem;margin-left:0.5rem}div:has(>#search-bar-entry){position:fixed;top:1.5rem;right:7rem;z-index:40;width:clamp(11rem, calc(100vw - var(--sidebar-width) - 45rem), 24rem)}#search-bar-entry{height:3rem;padding-left:1.125rem;border-radius:0.875rem;font-size:1.0625rem}#search-bar-entry svg{width:1.125rem;height:1.125rem}}[data-switch=\"pill\"]{width:auto!important;height:auto!important;padding:0.3125rem;gap:0.25rem}.switch-option{width:2.125rem!important;height:2.125rem!important}.switch-option svg{width:1.125rem;height:1.125rem}.mdx-content .accordion-group{display:grid;gap:0.75rem;overflow:visible;border:0;border-color:transparent;border-radius:0;background:none}.mdx-content details.accordion{margin:0 0 0.75rem;border-color:transparent;border-radius:1rem!important;outline:1px solid rgb(var(--fa-ink) / 0.1);outline-offset:-1px;overflow:hidden;transition:outline-color 150ms ease,\n box-shadow 150ms ease}.mdx-content .accordion-group>details.accordion{margin:0}.mdx-content details.accordion:hover{outline-color:rgb(var(--fa-accent) / 0.35)}.mdx-content details.accordion[open]{outline-color:rgb(var(--fa-accent) / 0.45);box-shadow:inset 3px 0 0 rgb(var(--fa-accent))}.mdx-content [data-component-part=\"accordion-button\"]{gap:1rem;padding:1rem 1.25rem 1rem 1.5rem;border-radius:0!important;transition:background-color 150ms ease}.mdx-content [data-component-part=\"accordion-button\"]:hover{background:rgb(var(--fa-accent) / 0.05)}.mdx-content [data-component-part=\"accordion-button\"]:focus-visible{outline:2px solid rgb(var(--fa-accent));outline-offset:-2px}.mdx-content [data-component-part=\"accordion-caret-right\"]{order:3;width:2rem;height:2rem;border-radius:999px;background:rgb(var(--fa-ink) / 0.06);transition:background-color 150ms ease}.mdx-content [data-component-part=\"accordion-caret-right\"] svg{width:0.875rem;height:0.875rem}.mdx-content details.accordion[open] [data-component-part=\"accordion-caret-right\"]{background:rgb(var(--fa-accent) / 0.15)}.mdx-content details.accordion[open] [data-component-part=\"accordion-caret-right\"] svg{color:rgb(var(--fa-accent))}.mdx-content [data-component-part=\"accordion-icon\"]{display:inline-flex;align-items:center;justify-content:center;width:1.25rem;height:1.25rem}.mdx-content [data-component-part=\"accordion-icon\"] svg{width:1.25rem;height:1.25rem;background-color:rgb(var(--fa-accent))!important}.mdx-content [data-component-part=\"accordion-title\"]{font-size:1.1875rem}.mdx-content [data-component-part=\"accordion-content\"]{max-width:none;padding:1.5rem 2rem 1.75rem 1.5rem;border-top:1px solid rgb(var(--fa-ink) / 0.08);font-size:1.125rem;line-height:1.95}@media (min-width: 768px){.mdx-content details.accordion:has(>summary [data-component-part=\"accordion-icon\"])>[data-component-part=\"accordion-content\"]{padding-left:3.75rem}}.mdx-content [data-component-part=\"accordion-content\"]>[data-as=\"p\"],.mdx-content [data-component-part=\"accordion-content\"]>p{display:block;max-width:46rem;margin:0 0 1.25rem}.mdx-content [data-component-part=\"accordion-content\"]>:last-child{margin-bottom:0}@media (prefers-reduced-motion: reduce){.mdx-content details.accordion,.mdx-content [data-component-part=\"accordion-button\"],.mdx-content [data-component-part=\"accordion-caret-right\"]{transition:none}}[data-badge=\"true\"]{--fa-badge: 100 116 139;padding:0.125rem 0.5rem;border-radius:0.5rem;background:rgb(var(--fa-badge) / 0.14)!important;box-shadow:inset 0 0 0 1px rgb(var(--fa-badge) / 0.32);color:rgb(var(--fa-badge))!important;font-variant-numeric:tabular-nums}[data-badge=\"true\"][data-color=\"red\"]{--fa-badge: 239 68 68}[data-badge=\"true\"][data-color=\"orange\"]{--fa-badge: 245 130 32}[data-badge=\"true\"][data-color=\"yellow\"]{--fa-badge: 214 160 20}[data-badge=\"true\"][data-color=\"green\"]{--fa-badge: 22 163 74}[data-badge=\"true\"][data-color=\"blue\"]{--fa-badge: 17 145 240}.dark [data-badge=\"true\"][data-color=\"red\"]{--fa-badge: 248 113 113}.dark [data-badge=\"true\"][data-color=\"orange\"]{--fa-badge: 251 158 75}.dark [data-badge=\"true\"][data-color=\"yellow\"]{--fa-badge: 250 204 21}.dark [data-badge=\"true\"][data-color=\"green\"]{--fa-badge: 74 222 128}.dark [data-badge=\"true\"][data-color=\"blue\"]{--fa-badge: 62 165 245}.dark [data-badge=\"true\"][data-color=\"gray\"]{--fa-badge: 161 161 170}.mdx-content td [data-badge=\"true\"]+[data-badge=\"true\"]{margin-left:0.375rem}.mdx-content :is([data-as=\"p\"],p,li,td,blockquote),#header .prose,#page-title+*{color:rgb(38 43 52)}.dark .mdx-content :is([data-as=\"p\"],p,li,td,blockquote),.dark #header .prose,.dark #page-title+*{color:rgb(222 226 232)}.mdx-content :is(th,strong){font-weight:600}#sidebar-content a,#sidebar-content li>button{color:rgb(70 76 88)}.dark #sidebar-content a,.dark #sidebar-content li>button{color:rgb(196 201 210)}.toc-item a{color:inherit}.mdx-content [data-component-part=\"callout-content\"]{font-size:1.125rem;line-height:1.75}.mdx-content [data-component-part=\"callout-icon\"]{width:1.25rem;margin-top:0.25rem}.mdx-content [data-component-part=\"step-title\"]{font-size:1.25rem}.mdx-content [data-component-part=\"step-content\"],.mdx-content [data-component-part=\"tab-content\"]{font-size:1.125rem;line-height:1.85}.mdx-content [data-component-part=\"step-number\"]{margin-left:calc(0.5px - 1.125rem)}.mdx-content [data-component-part=\"step-indicator\"]{width:2.25rem;height:2.25rem;background-color:transparent;color:rgb(var(--fa-accent));font-size:1.25rem;font-weight:600}.mdx-content [data-component-part=\"step-indicator\"] svg{width:1.5rem;height:1.5rem;background-color:rgb(var(--fa-accent))!important}.mdx-content [data-component-part=\"tab-button\"]{font-size:1rem}.mdx-content [data-component-part=\"code-block-header\"],.mdx-content [data-component-part=\"code-block-header-filename\"]{font-size:0.875rem}.mdx-content [data-component-part=\"code-group-tab-bar\"]{font-size:0.9375rem}.mdx-content [data-component-part=\"field-name\"]{font-size:1.0625rem}.mdx-content [data-component-part=\"field-meta\"],.mdx-content [data-component-part=\"field-info-pill\"],.mdx-content [data-component-part=\"field-required-pill\"]{font-size:0.875rem}.mdx-content [data-component-part=\"expandable-button\"]{font-size:1rem}[data-component-part=\"pagination-title\"]{font-size:1.125rem}[data-component-part=\"pagination-label\"]{font-size:0.9375rem}.mdx-content>.multi-view-item{max-width:none;font-size:inherit;line-height:inherit}.multi-view-item>[data-as=\"p\"],.multi-view-item>p{margin-top:0;margin-bottom:1.75rem}.multi-view-item>h2{margin-top:3.5rem;margin-bottom:1.25rem;padding-top:2rem;border-top:1px solid rgb(0 0 0 / 0.08);font-size:1.875rem;letter-spacing:-0.01em}.dark .multi-view-item>h2{border-top-color:rgb(255 255 255 / 0.08)}.multi-view-item>h2:first-child{margin-top:0;padding-top:0;border-top:0}.multi-view-item>h3{margin-top:2.75rem;margin-bottom:1.125rem;font-size:1.4375rem}.multi-view-item>ul,.multi-view-item>ol{margin-bottom:1.75rem}.multi-view-item>.code-block,.multi-view-item>.code-group{margin-top:1.5rem;margin-bottom:2rem}#content-container .prose.prose-sm{font-size:1.0625rem;line-height:1.8}#sidebar-content .method-nav-pill{width:2.75rem}#sidebar-content .method-nav-pill>*{padding:0.125rem 0.375rem;font-size:0.6875rem;line-height:1.25rem}#fa-reader-values{margin-top:1.75rem;padding:1.5rem;border:1px solid rgb(var(--fa-ink) / 0.14);border-radius:1rem;background:transparent;font-size:1.0625rem;line-height:1.6;transition:border-color 150ms ease;container:fa-reader / inline-size}#fa-reader-values:hover,#fa-reader-values:focus-within{border-color:rgb(var(--fa-accent) / 0.45)}#fa-reader-values .fa-reader-line{display:grid;grid-template-columns:auto 1fr;align-items:center;gap:1rem 1.25rem}#fa-reader-values .fa-reader-toggle{grid-column:1 / -1;justify-self:start}@container fa-reader (min-width: 30rem){#fa-reader-values .fa-reader-line{grid-template-columns:auto 1fr auto}#fa-reader-values .fa-reader-line .fa-reader-toggle{grid-column:auto}}#fa-reader-values .fa-reader-icon{width:4rem;height:4rem;background:url('/logo/attract-glyph-color-a-green-on-light-scalable.svg') center / contain\n no-repeat}.dark #fa-reader-values .fa-reader-icon{background-image:url('/logo/attract-glyph-color-a-green-on-dark-scalable.svg')}#fa-reader-values .fa-reader-copy{min-width:0}#fa-reader-values .fa-reader-copy p{margin:0}#fa-reader-values .fa-reader-title{font-size:1.125rem;font-weight:600;color:rgb(var(--fa-ink))}#fa-reader-values .fa-reader-values{display:grid;grid-template-columns:auto 1fr;align-items:center;gap:0.625rem 0.875rem;margin:0.75rem 0 0}#fa-reader-values .fa-reader-values>div{display:contents}#fa-reader-values .fa-reader-values dt{font-weight:500;color:rgb(var(--fa-ink))}#fa-reader-values .fa-reader-values dd{justify-self:start;min-width:0;margin:0}#fa-reader-values code{display:inline-block;padding:0.375rem 0.875rem;border:1px solid rgb(var(--fa-accent) / 0.4);border-radius:0.5rem;background:rgb(var(--fa-ink) / 0.03);color:rgb(var(--fa-ink));font-size:0.95em;font-weight:700;line-height:1.4;overflow-wrap:anywhere}#fa-reader-values button{padding:0.625rem 1.25rem;border:1px solid rgb(var(--fa-ink) / 0.16);border-radius:0.625rem;background:rgb(var(--fa-ink) / 0.03);color:rgb(var(--fa-ink));font-weight:600;white-space:nowrap;cursor:pointer;transition:background-color 150ms ease,\n border-color 150ms ease}#fa-reader-values button:hover{border-color:rgb(var(--fa-accent) / 0.55);background:rgb(var(--fa-accent) / 0.08)}#fa-reader-values button:focus-visible,#fa-reader-values input:focus-visible{outline:2px solid rgb(var(--fa-accent));outline-offset:2px}#fa-reader-values .fa-reader-form{display:grid;grid-template-columns:1fr;gap:1.75rem 1.5rem;margin-top:1.5rem;padding:1.5rem 0.25rem 0.25rem;border-top:1px solid rgb(var(--fa-ink) / 0.1)}@media (min-width: 768px){#fa-reader-values .fa-reader-form{grid-template-columns:1fr 1fr}}#fa-reader-values .fa-reader-form[hidden]{display:none}#fa-reader-values label{display:grid;gap:0.625rem;align-content:start}#fa-reader-values label>span{font-weight:600;color:rgb(var(--fa-ink))}#fa-reader-values label em{font-style:normal;font-weight:400}#fa-reader-values input{width:100%;padding:0.75rem 1rem;border:1px solid rgb(128 128 128 / 0.4);border-radius:0.5rem;background:rgb(128 128 128 / 0.08);color:rgb(var(--fa-ink));font:inherit}#fa-reader-values small{display:block;margin-top:0.5rem;font-size:0.9375rem;line-height:1.6;color:rgb(var(--fa-ink))}#fa-reader-values .fa-reader-error{grid-column:1 / -1;margin:0;color:#dc2626}.dark #fa-reader-values .fa-reader-error{color:#f87171}#fa-reader-values .fa-reader-error:empty{display:none}#fa-reader-values .fa-reader-actions{display:flex;flex-wrap:wrap;grid-column:1 / -1;align-items:center;gap:1rem;padding-top:0.25rem}.mdx-content .n8n-canvas{--n8n-dot: rgb(0 0 0 / 0.12);--n8n-node-bg: #ffffff;--n8n-node-border: rgb(0 0 0 / 0.18);--n8n-line: #94a3b8;margin:1.75rem 0 2.25rem;padding:2rem 0.75rem 1.5rem;overflow-x:auto;border:1px solid rgb(0 0 0 / 0.08);border-radius:1rem;background-color:rgb(0 0 0 / 0.015);background-image:radial-gradient(var(--n8n-dot) 1px, transparent 1px);background-size:18px 18px}.dark .mdx-content .n8n-canvas{--n8n-dot: rgb(255 255 255 / 0.1);--n8n-node-bg: #1b1f24;--n8n-node-border: rgb(255 255 255 / 0.22);--n8n-line: #64748b;border-color:rgb(255 255 255 / 0.08);background-color:rgb(255 255 255 / 0.02)}.mdx-content .n8n-canvas-row{display:flex;align-items:flex-start;justify-content:center;min-width:max-content;margin:0 auto}.mdx-content .n8n-node{display:flex;flex-direction:column;align-items:center;width:7.25rem;text-align:center}.mdx-content .n8n-node-box{display:flex;align-items:center;justify-content:center;width:4.5rem;height:4.5rem;border:2px solid var(--n8n-node-border);border-radius:0.75rem;background:var(--n8n-node-bg);box-shadow:0 1px 3px rgb(0 0 0 / 0.08)}.mdx-content .n8n-node-trigger .n8n-node-box{border-radius:2.25rem 0.75rem 0.75rem 2.25rem}.mdx-content .n8n-node-accent .n8n-node-box{border-color:rgb(var(--fa-accent));box-shadow:0 0 0 4px rgb(var(--fa-accent) / 0.15)}.mdx-content .n8n-node-title{margin-top:0.6rem;font-size:0.95rem;font-weight:600;line-height:1.3}.mdx-content .n8n-node-note{margin-top:0.2rem;font-size:0.8rem;line-height:1.35;opacity:0.7}.mdx-content .n8n-node-box svg{width:1.9rem!important;height:1.9rem!important}.mdx-content .n8n-link{display:flex;flex-direction:column;align-items:center;width:4rem;margin:0 -1.125rem;padding-top:1.1rem}.mdx-content .n8n-link-items{height:1.1rem;font-size:0.75rem;font-weight:600;line-height:1.1rem;white-space:nowrap;color:rgb(var(--fa-accent))}.mdx-content .n8n-link-line{position:relative;width:100%;height:2px;margin-top:0.4rem;background:var(--n8n-line)}.mdx-content .n8n-link-line::after{position:absolute;top:-4px;right:-1px;border-top:5px solid transparent;border-bottom:5px solid transparent;border-left:7px solid var(--n8n-line);content:''}.mdx-content .n8n-canvas figcaption{margin-top:1.25rem;font-size:0.85rem;text-align:center;opacity:0.7}.mdx-content .n8n-signed{margin:1.5rem 0 2rem;padding:1.5rem 1.25rem 1.25rem;overflow-x:auto;border:1px solid rgb(0 0 0 / 0.08);border-radius:1rem}.dark .mdx-content .n8n-signed{border-color:rgb(255 255 255 / 0.08)}.mdx-content .n8n-signed-row{display:flex;flex-wrap:wrap;align-items:flex-start;justify-content:center;row-gap:1rem}.mdx-content .n8n-signed-part{display:flex;flex-direction:column;align-items:center;gap:0.5rem}.mdx-content .n8n-signed-value,.mdx-content .n8n-signed-dot{padding:0.35rem 0.55rem;border-radius:0.4rem;font-size:0.95rem;white-space:nowrap}.mdx-content .n8n-signed-dot{padding:0.35rem 0.15rem;background:none;font-weight:700}.mdx-content .n8n-signed-value{min-width:2.5rem;text-align:center;background:rgb(var(--n8n-part) / 0.14);box-shadow:inset 0 0 0 1px rgb(var(--n8n-part) / 0.45)}.mdx-content .n8n-signed-label{font-size:0.75rem;font-weight:600;letter-spacing:0.04em;text-transform:uppercase;color:rgb(var(--n8n-part))}.mdx-content .n8n-signed-0{--n8n-part: 37 99 235}.mdx-content .n8n-signed-1{--n8n-part: 22 163 74}.mdx-content .n8n-signed-2{--n8n-part: 217 119 6}.mdx-content .n8n-signed-3{--n8n-part: 219 39 119}.mdx-content .n8n-coming-soon-logos{display:flex;align-items:center;gap:1rem;margin-bottom:1.25rem}.mdx-content .n8n-coming-soon-logos img{width:auto;height:3.5rem;margin:0}.mdx-content .n8n-coming-soon-logos img[class^=\"n8n-mark-\"]{height:4.5rem;margin:-0.5rem}.mdx-content .n8n-coming-soon-logos .n8n-mark-dark,.dark .mdx-content .n8n-coming-soon-logos .n8n-mark-light{display:none}.dark .mdx-content .n8n-coming-soon-logos .n8n-mark-dark{display:block}.mdx-content .n8n-coming-soon-logos span{font-size:1.75rem;font-weight:600;opacity:0.6}.mdx-content .n8n-coming-soon-title{margin:0 0 0.35rem;font-size:1.25rem;font-weight:600;color:rgb(var(--fa-ink))}.mdx-content .n8n-coming-soon-title+*{margin-top:0}"}],"page":{"pagePath":"guides/connections/google-business-profile","slug":"/guides/connections/google-business-profile","pageMetadata":{"title":"Google Business Profile","sidebarTitle":"Google Business Profile","description":"Connect your Google listing once, then edit its details, reply to reviews, post updates and read its performance without leaving the CMS.","icon":"store","href":"/guides/connections/google-business-profile"},"description":{"compiledSource":"\"use strict\";\nconst {jsx: _jsx} = arguments[0];\nconst {useMDXComponents: _provideComponents} = arguments[0];\nfunction _createMdxContent(props) {\n const _components = {\n p: \"p\",\n ..._provideComponents(),\n ...props.components\n };\n return _jsx(_components.p, {\n children: \"Connect your Google listing once, then edit its details, reply to reviews, post updates and read its performance without leaving the CMS.\"\n });\n}\nfunction MDXContent(props = {}) {\n const {wrapper: MDXLayout} = {\n ..._provideComponents(),\n ...props.components\n };\n return MDXLayout ? _jsx(MDXLayout, {\n ...props,\n children: _jsx(_createMdxContent, {\n ...props\n })\n }) : _createMdxContent(props);\n}\nreturn {\n default: MDXContent\n};\n","frontmatter":{},"scope":{}},"pageType":"default","mdx":{"mdxSource":{"compiledSource":"\"use strict\";const{Fragment:_Fragment,jsx:_jsx,jsxs:_jsxs}=arguments[0];const{useMDXComponents:_provideComponents}=arguments[0];function _createMdxContent(props){const _components={a:`a`,code:`code`,li:`li`,p:`p`,strong:`strong`,ul:`ul`,..._provideComponents(),...props.components},{Accordion,AccordionGroup,Card,Columns,Frame,Heading,Icon,OptimizedImage,Step,Steps,Warning}=_components;if(!Accordion)_missingMdxReference(`Accordion`,true);if(!AccordionGroup)_missingMdxReference(`AccordionGroup`,true);if(!Card)_missingMdxReference(`Card`,true);if(!Columns)_missingMdxReference(`Columns`,true);if(!Frame)_missingMdxReference(`Frame`,true);if(!Heading)_missingMdxReference(`Heading`,true);if(!Icon)_missingMdxReference(`Icon`,true);if(!OptimizedImage)_missingMdxReference(`OptimizedImage`,true);if(!Step)_missingMdxReference(`Step`,true);if(!Steps)_missingMdxReference(`Steps`,true);if(!Warning)_missingMdxReference(`Warning`,true);return _jsxs(_Fragment,{children:[_jsx(_components.p,{children:`Connect your Google Business Profile once, and you can run your listing from the CMS. Change your hours and details, reply to reviews, publish Google posts, add photos and see how people find you on Search and Maps.`}),`\n`,_jsxs(_components.p,{children:[_jsx(Icon,{icon:`user-shield`}),` `,_jsx(_components.strong,{children:`Who can do this:`}),` Admins and Owners.`]}),`\n`,_jsx(Heading,{level:`2`,id:`before-you-start`,children:`Before you start`}),`\n`,_jsxs(_components.ul,{children:[`\n`,_jsxs(_components.li,{children:[_jsx(_components.strong,{children:`A Google account that manages your listing.`}),` You approve the connection while signed in to it.`]}),`\n`,_jsxs(_components.li,{children:[_jsx(_components.strong,{children:`About 30 minutes`}),` in Google Cloud, Google’s site for developer tools. The card’s setup guide links every page you need.`]}),`\n`]}),`\n`,_jsx(_components.p,{children:`Your listing is your business’s profile on Google Search and Maps: one listing per business location. The CMS also calls it a profile or a location. The Google account is separate: it’s the sign-in you use to manage those listings.`}),`\n`,_jsx(_components.p,{children:`Three different approvals are involved:`}),`\n`,_jsxs(_components.ul,{children:[`\n`,_jsxs(_components.li,{children:[_jsx(_components.strong,{children:`A verified listing.`}),` Google must already have verified your listing, and it must have been active for at least 60 days. You do this on Google’s site, before you start.`]}),`\n`,_jsxs(_components.li,{children:[_jsx(_components.strong,{children:`Google’s approval of your access request.`}),` You ask Google, with a form, to let your project use its Business Profile tools. This is the step that makes you wait: approval isn’t instant, so send the form first.`]}),`\n`,_jsxs(_components.li,{children:[_jsx(_components.strong,{children:`Your permission when you sign in.`}),` At the end, you sign in with Google and allow the CMS to manage your listings. This takes a minute.`]}),`\n`]}),`\n`,_jsx(Heading,{level:`2`,id:`connect-your-listing`,children:`Connect your listing`}),`\n`,_jsxs(Steps,{children:[_jsx(Step,{title:`Open the card`,children:_jsxs(_components.p,{children:[`Open `,_jsx(_components.strong,{children:`Connections`}),` from the toolbar or the command palette (⌘K, or Ctrl+K on Windows). The toolbar is the bar across the top of your site once you’re signed in; see `,_jsx(_components.a,{href:`/guides/get-started/toolbar-and-command-palette#the-toolbar`,children:`The toolbar`}),`. Under `,_jsx(_components.strong,{children:`Google`}),`, choose `,_jsx(_components.strong,{children:`Google Business Profile`}),`. Its badge says `,_jsx(_components.strong,{children:`Not set up`}),`.`]})}),_jsxs(Step,{title:`Follow the setup guide`,children:[_jsxs(_components.p,{children:[_jsx(_components.strong,{children:`Setup guide — Business Profile API`}),` walks you through Google Cloud:`]}),_jsxs(_components.ul,{children:[`\n`,_jsx(_components.li,{children:`Create a project, or use one you have, and note its project number.`}),`\n`,_jsx(_components.li,{children:`Turn on the Business Profile tools the guide lists.`}),`\n`,_jsxs(_components.li,{children:[`Request access with Google’s form, choosing `,_jsx(_components.strong,{children:`Application for Basic API Access`}),`. Wait for Google’s approval.`]}),`\n`,_jsxs(_components.li,{children:[`Create an OAuth client ID of the type `,_jsx(_components.strong,{children:`Web application`}),`. Google gives you two values, a client ID and a client secret: together they’re the login details for this connection.`]}),`\n`,_jsxs(_components.li,{children:[`Under `,_jsx(_components.strong,{children:`Authorized redirect URIs`}),`, add your return address: where Google sends you back after you sign in. It’s your site’s address followed by `,_jsx(_components.code,{children:`/api/v1/integration-settings/google-oauth/callback`}),`. Copy that ending from the setup guide exactly. For example, `,_jsx(_components.code,{children:`https://parkerspuppyplayland.example/api/v1/integration-settings/google-oauth/callback`}),`.`]}),`\n`]})]}),_jsx(Step,{title:`Paste the client details`,children:_jsxs(_components.p,{children:[`Copy Google’s client ID into `,_jsx(_components.strong,{children:`OAuth client ID`}),` and its client secret into `,_jsx(_components.strong,{children:`OAuth client secret`}),`.`]})}),_jsxs(Step,{title:`Save`,children:[_jsxs(_components.p,{children:[`Choose `,_jsx(_components.strong,{children:`Save`}),`. The badge changes to `,_jsx(_components.strong,{children:`Finish setting up`}),`, with the line “Press “Continue with Google” to connect your listing.”`]}),_jsxs(Frame,{caption:`Save the client details, then choose Continue with Google.`,children:[_jsx(OptimizedImage,{className:`mint-block dark:mint-hidden`,src:`https://mintcdn.com/fetchski-attract-api/MsE85fjBwOCKqNGh/images/cms/guides/connections/google-business-profile/guides-connections-gbp-card-ready-light.png?fit=max\u0026auto=format\u0026n=MsE85fjBwOCKqNGh\u0026q=85\u0026s=6f3e049f08358d39901f323730c1602a`,alt:`The Google Business Profile card with the setup guide box, OAuth client ID filled with a sample value, OAuth client secret saved (dots, Saved and encrypted).`,\"data-og-width\":`1616`,width:`1616`,\"data-og-height\":`3892`,height:`3892`,\"data-path\":`images/cms/guides/connections/google-business-profile/guides-connections-gbp-card-ready-light.png`,\"data-optimize\":`true`,\"data-opv\":`3`,srcset:`https://mintcdn.com/fetchski-attract-api/MsE85fjBwOCKqNGh/images/cms/guides/connections/google-business-profile/guides-connections-gbp-card-ready-light.png?w=280\u0026fit=max\u0026auto=format\u0026n=MsE85fjBwOCKqNGh\u0026q=85\u0026s=7cbd67525fd5c73fd0740693d9c29468 280w, https://mintcdn.com/fetchski-attract-api/MsE85fjBwOCKqNGh/images/cms/guides/connections/google-business-profile/guides-connections-gbp-card-ready-light.png?w=560\u0026fit=max\u0026auto=format\u0026n=MsE85fjBwOCKqNGh\u0026q=85\u0026s=9fd478127ddac2f9955fdac6252df30d 560w, https://mintcdn.com/fetchski-attract-api/MsE85fjBwOCKqNGh/images/cms/guides/connections/google-business-profile/guides-connections-gbp-card-ready-light.png?w=840\u0026fit=max\u0026auto=format\u0026n=MsE85fjBwOCKqNGh\u0026q=85\u0026s=428fbe289bd592257f5b2d2e9d7d5bad 840w, https://mintcdn.com/fetchski-attract-api/MsE85fjBwOCKqNGh/images/cms/guides/connections/google-business-profile/guides-connections-gbp-card-ready-light.png?w=1100\u0026fit=max\u0026auto=format\u0026n=MsE85fjBwOCKqNGh\u0026q=85\u0026s=cc36bed5957a7a25eeb686b146cb318d 1100w, https://mintcdn.com/fetchski-attract-api/MsE85fjBwOCKqNGh/images/cms/guides/connections/google-business-profile/guides-connections-gbp-card-ready-light.png?w=1650\u0026fit=max\u0026auto=format\u0026n=MsE85fjBwOCKqNGh\u0026q=85\u0026s=4d6317fb948d212fb7ca86a13711e619 1650w, https://mintcdn.com/fetchski-attract-api/MsE85fjBwOCKqNGh/images/cms/guides/connections/google-business-profile/guides-connections-gbp-card-ready-light.png?w=2500\u0026fit=max\u0026auto=format\u0026n=MsE85fjBwOCKqNGh\u0026q=85\u0026s=1d3df2d5f2e7a6b49ad9dc94d74d2526 2500w`}),_jsx(OptimizedImage,{className:`mint-hidden dark:mint-block`,src:`https://mintcdn.com/fetchski-attract-api/MsE85fjBwOCKqNGh/images/cms/guides/connections/google-business-profile/guides-connections-gbp-card-ready-dark.png?fit=max\u0026auto=format\u0026n=MsE85fjBwOCKqNGh\u0026q=85\u0026s=629a576113fad669cd498dfe6d9c99da`,alt:`The Google Business Profile card with the setup guide box, OAuth client ID filled with a sample value, OAuth client secret saved (dots, Saved and encrypted).`,\"data-og-width\":`1616`,width:`1616`,\"data-og-height\":`3892`,height:`3892`,\"data-path\":`images/cms/guides/connections/google-business-profile/guides-connections-gbp-card-ready-dark.png`,\"data-optimize\":`true`,\"data-opv\":`3`,srcset:`https://mintcdn.com/fetchski-attract-api/MsE85fjBwOCKqNGh/images/cms/guides/connections/google-business-profile/guides-connections-gbp-card-ready-dark.png?w=280\u0026fit=max\u0026auto=format\u0026n=MsE85fjBwOCKqNGh\u0026q=85\u0026s=92d290cdc5babd5f3b49c96d4b24811a 280w, https://mintcdn.com/fetchski-attract-api/MsE85fjBwOCKqNGh/images/cms/guides/connections/google-business-profile/guides-connections-gbp-card-ready-dark.png?w=560\u0026fit=max\u0026auto=format\u0026n=MsE85fjBwOCKqNGh\u0026q=85\u0026s=be83586eec9699d717cf430e76cd4da2 560w, https://mintcdn.com/fetchski-attract-api/MsE85fjBwOCKqNGh/images/cms/guides/connections/google-business-profile/guides-connections-gbp-card-ready-dark.png?w=840\u0026fit=max\u0026auto=format\u0026n=MsE85fjBwOCKqNGh\u0026q=85\u0026s=fac4ce71690b5075dd304a3a9ddeafa6 840w, https://mintcdn.com/fetchski-attract-api/MsE85fjBwOCKqNGh/images/cms/guides/connections/google-business-profile/guides-connections-gbp-card-ready-dark.png?w=1100\u0026fit=max\u0026auto=format\u0026n=MsE85fjBwOCKqNGh\u0026q=85\u0026s=6dc8ae2fcd4665a81502b2075b14520d 1100w, https://mintcdn.com/fetchski-attract-api/MsE85fjBwOCKqNGh/images/cms/guides/connections/google-business-profile/guides-connections-gbp-card-ready-dark.png?w=1650\u0026fit=max\u0026auto=format\u0026n=MsE85fjBwOCKqNGh\u0026q=85\u0026s=73704c8c50075993c456945bae6feab3 1650w, https://mintcdn.com/fetchski-attract-api/MsE85fjBwOCKqNGh/images/cms/guides/connections/google-business-profile/guides-connections-gbp-card-ready-dark.png?w=2500\u0026fit=max\u0026auto=format\u0026n=MsE85fjBwOCKqNGh\u0026q=85\u0026s=e75c4f7c55a22ba254f29edbb26a7b68 2500w`})]})]}),_jsx(Step,{title:`Connect`,children:_jsxs(_components.p,{children:[`Open `,_jsx(_components.strong,{children:`Connections`}),` again, go to the card and choose `,_jsx(_components.strong,{children:`Continue with Google`}),`. A new browser tab opens. Sign in with the Google account that manages your listing, and allow access.`]})}),_jsx(Step,{title:`Check the result`,children:_jsxs(_components.p,{children:[`The tab shows `,_jsx(_components.strong,{children:`Google connected`}),` and lists every listing that account can manage. Close the tab.`]})}),_jsx(Step,{title:`Reopen Connections`,children:_jsxs(_components.p,{children:[`Back in the CMS, close Connections and open it again, so it shows your new listings. If you’ve changed anything since step 4, choose `,_jsx(_components.strong,{children:`Save`}),` to close it; otherwise choose `,_jsx(_components.strong,{children:`Cancel`}),`.`]})}),_jsx(Step,{title:`Choose your listings`,children:_jsxs(_components.p,{children:[`Under `,_jsx(_components.strong,{children:`Connected profiles`}),`, choose `,_jsx(_components.strong,{children:`Edit Connected profiles`}),`. Turn on `,_jsx(_components.strong,{children:`Manage this profile`}),` for each listing this site should manage. If there’s only one, it’s already on. Choose `,_jsx(_components.strong,{children:`Save`}),` in the list window to keep the list.`]})}),_jsx(Step,{title:`Keep it up to date`,children:_jsxs(_components.p,{children:[`Turn on `,_jsx(_components.strong,{children:`Enable scheduled profile sync`}),`. The CMS then copies your listings from Google every 12 hours. To change that, open `,_jsx(_components.strong,{children:`Advanced options`}),` → `,_jsx(_components.strong,{children:`Sync how often`}),`.`]})}),_jsx(Step,{title:`Save`,children:_jsxs(_components.p,{children:[`Choose `,_jsx(_components.strong,{children:`Save`}),` to save everything. The badge reads `,_jsx(_components.strong,{children:`Connected`}),`, with how many listings it manages and when it last synced.`]})})]}),`\n`,_jsxs(Frame,{caption:`Connected: choose which listings this site manages.`,children:[_jsx(OptimizedImage,{className:`mint-block dark:mint-hidden`,src:`https://mintcdn.com/fetchski-attract-api/tIdeo2aKESm5opj4/images/cms/guides/connections/google-business-profile/guides-connections-gbp-card-connected-light.png?fit=max\u0026auto=format\u0026n=tIdeo2aKESm5opj4\u0026q=85\u0026s=58b3a483ccbf419bc92d4ac57ac64a96`,alt:`The Google Business Profile card after connecting: the Connected badge with \"1 location · Last sync …\".`,\"data-og-width\":`1616`,width:`1616`,\"data-og-height\":`3452`,height:`3452`,\"data-path\":`images/cms/guides/connections/google-business-profile/guides-connections-gbp-card-connected-light.png`,\"data-optimize\":`true`,\"data-opv\":`3`,srcset:`https://mintcdn.com/fetchski-attract-api/tIdeo2aKESm5opj4/images/cms/guides/connections/google-business-profile/guides-connections-gbp-card-connected-light.png?w=280\u0026fit=max\u0026auto=format\u0026n=tIdeo2aKESm5opj4\u0026q=85\u0026s=14a6ee0121f90e4b4b4f942a33e3ac89 280w, https://mintcdn.com/fetchski-attract-api/tIdeo2aKESm5opj4/images/cms/guides/connections/google-business-profile/guides-connections-gbp-card-connected-light.png?w=560\u0026fit=max\u0026auto=format\u0026n=tIdeo2aKESm5opj4\u0026q=85\u0026s=a774a67e931d55726578bb15f92859fc 560w, https://mintcdn.com/fetchski-attract-api/tIdeo2aKESm5opj4/images/cms/guides/connections/google-business-profile/guides-connections-gbp-card-connected-light.png?w=840\u0026fit=max\u0026auto=format\u0026n=tIdeo2aKESm5opj4\u0026q=85\u0026s=838a63dba00b15d4a35a369dd26707a7 840w, https://mintcdn.com/fetchski-attract-api/tIdeo2aKESm5opj4/images/cms/guides/connections/google-business-profile/guides-connections-gbp-card-connected-light.png?w=1100\u0026fit=max\u0026auto=format\u0026n=tIdeo2aKESm5opj4\u0026q=85\u0026s=46ce72e1a0a8b4a867d47120e38c3ee2 1100w, https://mintcdn.com/fetchski-attract-api/tIdeo2aKESm5opj4/images/cms/guides/connections/google-business-profile/guides-connections-gbp-card-connected-light.png?w=1650\u0026fit=max\u0026auto=format\u0026n=tIdeo2aKESm5opj4\u0026q=85\u0026s=f8c0716f6109dff7a261bf89bf77ee29 1650w, https://mintcdn.com/fetchski-attract-api/tIdeo2aKESm5opj4/images/cms/guides/connections/google-business-profile/guides-connections-gbp-card-connected-light.png?w=2500\u0026fit=max\u0026auto=format\u0026n=tIdeo2aKESm5opj4\u0026q=85\u0026s=ec1147253f9f3bf52951628ac086ad6b 2500w`}),_jsx(OptimizedImage,{className:`mint-hidden dark:mint-block`,src:`https://mintcdn.com/fetchski-attract-api/tIdeo2aKESm5opj4/images/cms/guides/connections/google-business-profile/guides-connections-gbp-card-connected-dark.png?fit=max\u0026auto=format\u0026n=tIdeo2aKESm5opj4\u0026q=85\u0026s=9df45b42b18c2cf141d7b05955b0c4d0`,alt:`The Google Business Profile card after connecting: the Connected badge with \"1 location · Last sync …\".`,\"data-og-width\":`1616`,width:`1616`,\"data-og-height\":`3452`,height:`3452`,\"data-path\":`images/cms/guides/connections/google-business-profile/guides-connections-gbp-card-connected-dark.png`,\"data-optimize\":`true`,\"data-opv\":`3`,srcset:`https://mintcdn.com/fetchski-attract-api/tIdeo2aKESm5opj4/images/cms/guides/connections/google-business-profile/guides-connections-gbp-card-connected-dark.png?w=280\u0026fit=max\u0026auto=format\u0026n=tIdeo2aKESm5opj4\u0026q=85\u0026s=4e58c67b4833051c9bc19e881517ced2 280w, https://mintcdn.com/fetchski-attract-api/tIdeo2aKESm5opj4/images/cms/guides/connections/google-business-profile/guides-connections-gbp-card-connected-dark.png?w=560\u0026fit=max\u0026auto=format\u0026n=tIdeo2aKESm5opj4\u0026q=85\u0026s=752c7bab72087346eeb68718cfcd1323 560w, https://mintcdn.com/fetchski-attract-api/tIdeo2aKESm5opj4/images/cms/guides/connections/google-business-profile/guides-connections-gbp-card-connected-dark.png?w=840\u0026fit=max\u0026auto=format\u0026n=tIdeo2aKESm5opj4\u0026q=85\u0026s=8bf94dbf83fe191cf831b1c40a07c2e2 840w, https://mintcdn.com/fetchski-attract-api/tIdeo2aKESm5opj4/images/cms/guides/connections/google-business-profile/guides-connections-gbp-card-connected-dark.png?w=1100\u0026fit=max\u0026auto=format\u0026n=tIdeo2aKESm5opj4\u0026q=85\u0026s=198766a40fc70751dd716c9550e535fe 1100w, https://mintcdn.com/fetchski-attract-api/tIdeo2aKESm5opj4/images/cms/guides/connections/google-business-profile/guides-connections-gbp-card-connected-dark.png?w=1650\u0026fit=max\u0026auto=format\u0026n=tIdeo2aKESm5opj4\u0026q=85\u0026s=22bad6625a8253883bbd8066268e596a 1650w, https://mintcdn.com/fetchski-attract-api/tIdeo2aKESm5opj4/images/cms/guides/connections/google-business-profile/guides-connections-gbp-card-connected-dark.png?w=2500\u0026fit=max\u0026auto=format\u0026n=tIdeo2aKESm5opj4\u0026q=85\u0026s=e358677d6f9a6f8a7c28595d32221268 2500w`})]}),`\n`,_jsxs(_components.p,{children:[`The same connection powers your Google reviews. To bring reviews onto your site, see `,_jsx(_components.a,{href:`/guides/connections/google-reviews`,children:`Google Reviews`}),`.`]}),`\n`,_jsx(Heading,{level:`2`,id:`open-the-google-business-dashboard`,children:`Open the Google Business Dashboard`}),`\n`,_jsxs(_components.p,{children:[`Open the command palette and choose `,_jsx(_components.strong,{children:`Google Business Dashboard`}),`. The shortcut is T then B (press T, let go, then press B, while you’re not typing in a box; see `,_jsx(_components.a,{href:`/guides/get-started/toolbar-and-command-palette#keyboard-shortcuts`,children:`Keyboard shortcuts`}),`). The first time, choose `,_jsx(_components.strong,{children:`Sync profiles now`}),` to copy your listings in.`]}),`\n`,_jsxs(_components.p,{children:[`The dashboard lists your listings on the left. Choose `,_jsx(_components.strong,{children:`All profiles`}),` to see them all at once, or one listing to work on it. Below them are its sections: `,_jsx(_components.strong,{children:`Overview`}),`, `,_jsx(_components.strong,{children:`Business info`}),`, `,_jsx(_components.strong,{children:`Posts`}),`, `,_jsx(_components.strong,{children:`Photos \u0026 media`}),`, `,_jsx(_components.strong,{children:`Reviews \u0026 replies`}),`, `,_jsx(_components.strong,{children:`Performance`}),`, `,_jsx(_components.strong,{children:`Action links`}),`, `,_jsx(_components.strong,{children:`People \u0026 access`}),` and `,_jsx(_components.strong,{children:`Verification`}),`. `,_jsx(_components.strong,{children:`Sync now`}),` at the top fetches the latest from Google.`]}),`\n`,_jsxs(Frame,{caption:`The Google Business Dashboard, with every section on the left.`,children:[_jsx(OptimizedImage,{className:`mint-block dark:mint-hidden`,src:`https://mintcdn.com/fetchski-attract-api/tIdeo2aKESm5opj4/images/cms/guides/connections/google-business-profile/guides-connections-gbp-dashboard-overview-light.png?fit=max\u0026auto=format\u0026n=tIdeo2aKESm5opj4\u0026q=85\u0026s=4ceedec6c75e684b5e34c832f681046f`,alt:`The Google Business Dashboard on Overview for Parker's Puppy Playland: the listing on the left with its health badge, the section list.`,\"data-og-width\":`2800`,width:`2800`,\"data-og-height\":`1924`,height:`1924`,\"data-path\":`images/cms/guides/connections/google-business-profile/guides-connections-gbp-dashboard-overview-light.png`,\"data-optimize\":`true`,\"data-opv\":`3`,srcset:`https://mintcdn.com/fetchski-attract-api/tIdeo2aKESm5opj4/images/cms/guides/connections/google-business-profile/guides-connections-gbp-dashboard-overview-light.png?w=280\u0026fit=max\u0026auto=format\u0026n=tIdeo2aKESm5opj4\u0026q=85\u0026s=2f971564250c918926538ed7211e7f0b 280w, https://mintcdn.com/fetchski-attract-api/tIdeo2aKESm5opj4/images/cms/guides/connections/google-business-profile/guides-connections-gbp-dashboard-overview-light.png?w=560\u0026fit=max\u0026auto=format\u0026n=tIdeo2aKESm5opj4\u0026q=85\u0026s=7915f5d8130b629c99b157d6922858a0 560w, https://mintcdn.com/fetchski-attract-api/tIdeo2aKESm5opj4/images/cms/guides/connections/google-business-profile/guides-connections-gbp-dashboard-overview-light.png?w=840\u0026fit=max\u0026auto=format\u0026n=tIdeo2aKESm5opj4\u0026q=85\u0026s=b778c44a19565fc28ef90fb9ba61342f 840w, https://mintcdn.com/fetchski-attract-api/tIdeo2aKESm5opj4/images/cms/guides/connections/google-business-profile/guides-connections-gbp-dashboard-overview-light.png?w=1100\u0026fit=max\u0026auto=format\u0026n=tIdeo2aKESm5opj4\u0026q=85\u0026s=1222f76d9463beeaafc952713b6f6366 1100w, https://mintcdn.com/fetchski-attract-api/tIdeo2aKESm5opj4/images/cms/guides/connections/google-business-profile/guides-connections-gbp-dashboard-overview-light.png?w=1650\u0026fit=max\u0026auto=format\u0026n=tIdeo2aKESm5opj4\u0026q=85\u0026s=20bce2891ed79d24f94f9fbee4e815ab 1650w, https://mintcdn.com/fetchski-attract-api/tIdeo2aKESm5opj4/images/cms/guides/connections/google-business-profile/guides-connections-gbp-dashboard-overview-light.png?w=2500\u0026fit=max\u0026auto=format\u0026n=tIdeo2aKESm5opj4\u0026q=85\u0026s=6a521fc1a93cdc2761dcc3d5c474f3ec 2500w`}),_jsx(OptimizedImage,{className:`mint-hidden dark:mint-block`,src:`https://mintcdn.com/fetchski-attract-api/tIdeo2aKESm5opj4/images/cms/guides/connections/google-business-profile/guides-connections-gbp-dashboard-overview-dark.png?fit=max\u0026auto=format\u0026n=tIdeo2aKESm5opj4\u0026q=85\u0026s=0c868d7f90d842bbb4363522f57f8d2f`,alt:`The Google Business Dashboard on Overview for Parker's Puppy Playland: the listing on the left with its health badge, the section list.`,\"data-og-width\":`2800`,width:`2800`,\"data-og-height\":`1924`,height:`1924`,\"data-path\":`images/cms/guides/connections/google-business-profile/guides-connections-gbp-dashboard-overview-dark.png`,\"data-optimize\":`true`,\"data-opv\":`3`,srcset:`https://mintcdn.com/fetchski-attract-api/tIdeo2aKESm5opj4/images/cms/guides/connections/google-business-profile/guides-connections-gbp-dashboard-overview-dark.png?w=280\u0026fit=max\u0026auto=format\u0026n=tIdeo2aKESm5opj4\u0026q=85\u0026s=3020df79e0fe4e34c87c68bd8b1bb3fb 280w, https://mintcdn.com/fetchski-attract-api/tIdeo2aKESm5opj4/images/cms/guides/connections/google-business-profile/guides-connections-gbp-dashboard-overview-dark.png?w=560\u0026fit=max\u0026auto=format\u0026n=tIdeo2aKESm5opj4\u0026q=85\u0026s=a4524df0e69d45a73ccc92993686de1b 560w, https://mintcdn.com/fetchski-attract-api/tIdeo2aKESm5opj4/images/cms/guides/connections/google-business-profile/guides-connections-gbp-dashboard-overview-dark.png?w=840\u0026fit=max\u0026auto=format\u0026n=tIdeo2aKESm5opj4\u0026q=85\u0026s=80c7a9b9d3fdd9a15111d95783da75dc 840w, https://mintcdn.com/fetchski-attract-api/tIdeo2aKESm5opj4/images/cms/guides/connections/google-business-profile/guides-connections-gbp-dashboard-overview-dark.png?w=1100\u0026fit=max\u0026auto=format\u0026n=tIdeo2aKESm5opj4\u0026q=85\u0026s=10c2162f23e61e1a76a0edfb4f527a46 1100w, https://mintcdn.com/fetchski-attract-api/tIdeo2aKESm5opj4/images/cms/guides/connections/google-business-profile/guides-connections-gbp-dashboard-overview-dark.png?w=1650\u0026fit=max\u0026auto=format\u0026n=tIdeo2aKESm5opj4\u0026q=85\u0026s=dde2bac6dd91da20e2a28323dbb08f14 1650w, https://mintcdn.com/fetchski-attract-api/tIdeo2aKESm5opj4/images/cms/guides/connections/google-business-profile/guides-connections-gbp-dashboard-overview-dark.png?w=2500\u0026fit=max\u0026auto=format\u0026n=tIdeo2aKESm5opj4\u0026q=85\u0026s=66d442391c8cd86c5470cb20bca8d760 2500w`})]}),`\n`,_jsx(Heading,{level:`2`,id:`change-your-listing’s-details`,children:`Change your listing’s details`}),`\n`,_jsxs(_components.p,{children:[`Changes wait in the CMS until you send them to Google together. Two words on the buttons: to `,_jsx(_components.strong,{children:`stage`}),` a change is to save it in the CMS, waiting; to `,_jsx(_components.strong,{children:`push`}),` is to send the changes you pick to Google. Nothing reaches Google until you push.`]}),`\n`,_jsxs(Steps,{children:[_jsx(Step,{title:`Edit a card`,children:_jsxs(_components.p,{children:[`In `,_jsx(_components.strong,{children:`Business info`}),`, choose `,_jsx(_components.strong,{children:`Edit`}),` on a card, such as `,_jsx(_components.strong,{children:`Regular hours`}),` or `,_jsx(_components.strong,{children:`Description`}),`. Make your change.`]})}),_jsx(Step,{title:`Stage it`,children:_jsxs(_components.p,{children:[`Choose `,_jsx(_components.strong,{children:`Stage change`}),`. The card shows `,_jsx(_components.strong,{children:`Edited`}),`. Repeat for any other cards.`]})}),_jsx(Step,{title:`Review`,children:_jsxs(_components.p,{children:[`Choose `,_jsx(_components.strong,{children:`Review \u0026 push`}),` at the top. It lists every staged change, with what’s `,_jsx(_components.strong,{children:`On Google`}),` beside what you `,_jsx(_components.strong,{children:`Staged`}),`. Uncheck anything you don’t want to send yet.`]})}),_jsx(Step,{title:`Check it first (optional)`,children:_jsxs(_components.p,{children:[`Choose `,_jsx(_components.strong,{children:`Validate with Google`}),`. Google checks your business-info changes without saving them, and the result shows above the buttons.`]})}),_jsx(Step,{title:`Push`,children:_jsxs(_components.p,{children:[`Choose `,_jsx(_components.strong,{children:`Push selected changes`}),`. When it’s done, you see a summary such as “2 pushed · 1 sent — in Google’s review queue · 0 failed (stay staged)”.`]})})]}),`\n`,_jsxs(Frame,{caption:`Review \u0026 push: see every staged change beside what's on Google, then push.`,children:[_jsx(OptimizedImage,{className:`mint-block dark:mint-hidden`,src:`https://mintcdn.com/fetchski-attract-api/tIdeo2aKESm5opj4/images/cms/guides/connections/google-business-profile/guides-connections-gbp-review-push-light.png?fit=max\u0026auto=format\u0026n=tIdeo2aKESm5opj4\u0026q=85\u0026s=eccb8c56aba81ceeb9307860cd218f41`,alt:`The Review \u0026 push view with two staged changes for Parker's Puppy Playland (Regular hours and Description), each showing On Google and Staged values with its checkbox.`,\"data-og-width\":`2800`,width:`2800`,\"data-og-height\":`2224`,height:`2224`,\"data-path\":`images/cms/guides/connections/google-business-profile/guides-connections-gbp-review-push-light.png`,\"data-optimize\":`true`,\"data-opv\":`3`,srcset:`https://mintcdn.com/fetchski-attract-api/tIdeo2aKESm5opj4/images/cms/guides/connections/google-business-profile/guides-connections-gbp-review-push-light.png?w=280\u0026fit=max\u0026auto=format\u0026n=tIdeo2aKESm5opj4\u0026q=85\u0026s=42c3d619913414cd528ae7e160f519b2 280w, https://mintcdn.com/fetchski-attract-api/tIdeo2aKESm5opj4/images/cms/guides/connections/google-business-profile/guides-connections-gbp-review-push-light.png?w=560\u0026fit=max\u0026auto=format\u0026n=tIdeo2aKESm5opj4\u0026q=85\u0026s=6428bdc876c8a882e8d7243240887b34 560w, https://mintcdn.com/fetchski-attract-api/tIdeo2aKESm5opj4/images/cms/guides/connections/google-business-profile/guides-connections-gbp-review-push-light.png?w=840\u0026fit=max\u0026auto=format\u0026n=tIdeo2aKESm5opj4\u0026q=85\u0026s=9b1a4a3eafadf73691eed28b7d581898 840w, https://mintcdn.com/fetchski-attract-api/tIdeo2aKESm5opj4/images/cms/guides/connections/google-business-profile/guides-connections-gbp-review-push-light.png?w=1100\u0026fit=max\u0026auto=format\u0026n=tIdeo2aKESm5opj4\u0026q=85\u0026s=d5a986446f38dd87d102354f5e5c9f8f 1100w, https://mintcdn.com/fetchski-attract-api/tIdeo2aKESm5opj4/images/cms/guides/connections/google-business-profile/guides-connections-gbp-review-push-light.png?w=1650\u0026fit=max\u0026auto=format\u0026n=tIdeo2aKESm5opj4\u0026q=85\u0026s=1f5cd91a0cd8c1a246a75dce71ee36b3 1650w, https://mintcdn.com/fetchski-attract-api/tIdeo2aKESm5opj4/images/cms/guides/connections/google-business-profile/guides-connections-gbp-review-push-light.png?w=2500\u0026fit=max\u0026auto=format\u0026n=tIdeo2aKESm5opj4\u0026q=85\u0026s=bdcf1b449924978f5fce82dfd116e751 2500w`}),_jsx(OptimizedImage,{className:`mint-hidden dark:mint-block`,src:`https://mintcdn.com/fetchski-attract-api/tIdeo2aKESm5opj4/images/cms/guides/connections/google-business-profile/guides-connections-gbp-review-push-dark.png?fit=max\u0026auto=format\u0026n=tIdeo2aKESm5opj4\u0026q=85\u0026s=b528e722bca4213b8a9110e2caf9803f`,alt:`The Review \u0026 push view with two staged changes for Parker's Puppy Playland (Regular hours and Description), each showing On Google and Staged values with its checkbox.`,\"data-og-width\":`2800`,width:`2800`,\"data-og-height\":`2224`,height:`2224`,\"data-path\":`images/cms/guides/connections/google-business-profile/guides-connections-gbp-review-push-dark.png`,\"data-optimize\":`true`,\"data-opv\":`3`,srcset:`https://mintcdn.com/fetchski-attract-api/tIdeo2aKESm5opj4/images/cms/guides/connections/google-business-profile/guides-connections-gbp-review-push-dark.png?w=280\u0026fit=max\u0026auto=format\u0026n=tIdeo2aKESm5opj4\u0026q=85\u0026s=499e4709e4ecff77fffcf36ab1102377 280w, https://mintcdn.com/fetchski-attract-api/tIdeo2aKESm5opj4/images/cms/guides/connections/google-business-profile/guides-connections-gbp-review-push-dark.png?w=560\u0026fit=max\u0026auto=format\u0026n=tIdeo2aKESm5opj4\u0026q=85\u0026s=30ecb729d2bf6941c1911fef5f64e390 560w, https://mintcdn.com/fetchski-attract-api/tIdeo2aKESm5opj4/images/cms/guides/connections/google-business-profile/guides-connections-gbp-review-push-dark.png?w=840\u0026fit=max\u0026auto=format\u0026n=tIdeo2aKESm5opj4\u0026q=85\u0026s=cb65718a004c89836d853283fd3e8a87 840w, https://mintcdn.com/fetchski-attract-api/tIdeo2aKESm5opj4/images/cms/guides/connections/google-business-profile/guides-connections-gbp-review-push-dark.png?w=1100\u0026fit=max\u0026auto=format\u0026n=tIdeo2aKESm5opj4\u0026q=85\u0026s=3f9e9e373484c36b8c3167225abf5669 1100w, https://mintcdn.com/fetchski-attract-api/tIdeo2aKESm5opj4/images/cms/guides/connections/google-business-profile/guides-connections-gbp-review-push-dark.png?w=1650\u0026fit=max\u0026auto=format\u0026n=tIdeo2aKESm5opj4\u0026q=85\u0026s=8065db045a184c2acfde00e3ed9fa757 1650w, https://mintcdn.com/fetchski-attract-api/tIdeo2aKESm5opj4/images/cms/guides/connections/google-business-profile/guides-connections-gbp-review-push-dark.png?w=2500\u0026fit=max\u0026auto=format\u0026n=tIdeo2aKESm5opj4\u0026q=85\u0026s=620018e43bf5f78efb17e95929ec093b 2500w`})]}),`\n`,_jsx(_components.p,{children:`Each card’s badge tells you where things stand:`}),`\n`,_jsxs(_components.ul,{children:[`\n`,_jsxs(_components.li,{children:[_jsx(_components.strong,{children:`Live`}),`: matches Google.`]}),`\n`,_jsxs(_components.li,{children:[_jsx(_components.strong,{children:`Edited`}),`: you staged a change that isn’t pushed yet. `,_jsx(_components.strong,{children:`Discard staged`}),` throws it away.`]}),`\n`,_jsxs(_components.li,{children:[_jsx(_components.strong,{children:`Pending at Google`}),`: Google is reviewing a change before it goes live.`]}),`\n`,_jsxs(_components.li,{children:[_jsx(_components.strong,{children:`Updated on Google`}),`: Google, or someone on Google, changed it. Open `,_jsx(_components.strong,{children:`Compare with what’s on Google now`}),`, then choose `,_jsx(_components.strong,{children:`Use Google’s version`}),` or `,_jsx(_components.strong,{children:`Keep mine`}),`.`]}),`\n`]}),`\n`,_jsx(Heading,{level:`2`,id:`reply-to-reviews`,children:`Reply to reviews`}),`\n`,_jsxs(_components.p,{children:[_jsx(_components.strong,{children:`Reviews \u0026 replies`}),` lists the reviews your `,_jsx(_components.a,{href:`/guides/connections/google-reviews`,children:`Google Reviews connection`}),` has fetched. Set its `,_jsx(_components.strong,{children:`Review provider`}),` to `,_jsx(_components.strong,{children:`Business Profile API — OAuth, all reviews`}),` and `,_jsx(_components.strong,{children:`Enable scheduled sync`}),` to `,_jsx(_components.strong,{children:`Yes`}),`. It keeps only 5-star reviews at first. To reply to lower ratings, lower its `,_jsx(_components.strong,{children:`Minimum star rating to keep`}),`.`]}),`\n`,_jsxs(_components.p,{children:[`In `,_jsx(_components.strong,{children:`Reviews \u0026 replies`}),`, filter by `,_jsx(_components.strong,{children:`All`}),`, `,_jsx(_components.strong,{children:`Unanswered`}),` or `,_jsx(_components.strong,{children:`Staged`}),`. Choose `,_jsx(_components.strong,{children:`Reply`}),` on a review, write your answer and choose `,_jsx(_components.strong,{children:`Stage reply`}),`. Replies go out with `,_jsx(_components.strong,{children:`Review \u0026 push`}),`, like other changes.`]}),`\n`,_jsxs(_components.p,{children:[`Google checks every reply before it shows publicly. Until then the reply says `,_jsx(_components.strong,{children:`Sent — in Google’s review queue`}),`. If Google refuses one, it shows `,_jsx(_components.strong,{children:`Rejected by Google`}),`, with Google’s reason when it gives one. To choose which reviews show on your site, choose `,_jsx(_components.strong,{children:`Open the Reviews manager`}),`.`]}),`\n`,_jsx(Heading,{level:`2`,id:`post-updates-events-and-offers`,children:`Post updates, events and offers`}),`\n`,_jsxs(_components.p,{children:[`In `,_jsx(_components.strong,{children:`Posts`}),`, choose `,_jsx(_components.strong,{children:`New post`}),`. Pick the `,_jsx(_components.strong,{children:`Post type`}),`, write the `,_jsx(_components.strong,{children:`Summary`}),`, and add a photo or a `,_jsx(_components.strong,{children:`Button`}),` if you like. Then choose `,_jsx(_components.strong,{children:`Publish to Google`}),`.`]}),`\n`,_jsxs(_components.p,{children:[`Posts don’t wait for `,_jsx(_components.strong,{children:`Review \u0026 push`}),`. They go to Google right away. Google may still review a post first. Its badge shows `,_jsx(_components.strong,{children:`Live`}),`, `,_jsx(_components.strong,{children:`In Google’s review queue`}),` or `,_jsx(_components.strong,{children:`Rejected by Google`}),`.`]}),`\n`,_jsx(Heading,{level:`2`,id:`photos`,children:`Photos`}),`\n`,_jsxs(_components.p,{children:[`In `,_jsx(_components.strong,{children:`Photos \u0026 media`}),`, `,_jsx(_components.strong,{children:`Your photos`}),` shows your listing’s photos and `,_jsx(_components.strong,{children:`From customers`}),` shows your customers’ photos. To add one, choose `,_jsx(_components.strong,{children:`Add a photo`}),` and pick it from your media library. Then choose its `,_jsx(_components.strong,{children:`Category`}),` and choose `,_jsx(_components.strong,{children:`Stage upload`}),`. You can also `,_jsx(_components.strong,{children:`Change category`}),` or `,_jsx(_components.strong,{children:`Remove`}),` your own photos.`]}),`\n`,_jsxs(_components.p,{children:[`Photos go to Google with `,_jsx(_components.strong,{children:`Review \u0026 push`}),`. Google fetches each photo from your site, so your site must be public.`]}),`\n`,_jsx(_components.p,{children:`Customers’ photos are read-only here. To report one, use Google’s own Business Profile tools.`}),`\n`,_jsx(Heading,{level:`2`,id:`performance-action-links-and-more`,children:`Performance, action links and more`}),`\n`,_jsxs(_components.ul,{children:[`\n`,_jsxs(_components.li,{children:[_jsx(_components.strong,{children:`Performance`}),`: how many people saw your listing on Search and Maps, and how many called, visited your website or asked for directions. Switch between `,_jsx(_components.strong,{children:`30 days`}),`, `,_jsx(_components.strong,{children:`90 days`}),` and `,_jsx(_components.strong,{children:`12 months`}),`. `,_jsx(_components.strong,{children:`Update data`}),` fetches the latest. Google’s most recent days can take a while to fill in.`]}),`\n`,_jsxs(_components.li,{children:[_jsx(_components.strong,{children:`Action links`}),`: the booking or ordering buttons Google shows on your listing. Choose `,_jsx(_components.strong,{children:`Add link`}),` to add one. Google decides which kinds your listing can have, based on its categories.`]}),`\n`,_jsxs(_components.li,{children:[_jsx(_components.strong,{children:`People \u0026 access`}),`: who can manage your listing on Google. To change it, choose `,_jsx(_components.strong,{children:`Manage in Google Business Profile ↗`}),`.`]}),`\n`,_jsxs(_components.li,{children:[_jsx(_components.strong,{children:`Verification`}),`: your listing’s verification status, and what Google asks you to do next. You verify on Google’s site.`]}),`\n`]}),`\n`,_jsx(Heading,{level:`2`,id:`the-google-business-profile-lists`,children:`The Google Business Profile lists`}),`\n`,_jsx(_components.p,{children:`Three lists, named GBP for Google Business Profile, in the command palette show what the CMS has copied from Google:`}),`\n`,_jsxs(_components.ul,{children:[`\n`,_jsxs(_components.li,{children:[_jsx(_components.strong,{children:`GBP Locations`}),`: your listings. Choose `,_jsx(_components.strong,{children:`Go to GBP Locations`}),` (G then Shift+B: hold Shift for the B)`]}),`\n`,_jsxs(_components.li,{children:[_jsx(_components.strong,{children:`GBP Posts`}),`: choose `,_jsx(_components.strong,{children:`Go to GBP Posts`}),` (G then Shift+P)`]}),`\n`,_jsxs(_components.li,{children:[_jsx(_components.strong,{children:`GBP Media Items`}),`: choose `,_jsx(_components.strong,{children:`Go to GBP Media Items`}),` (G then Shift+M)`]}),`\n`]}),`\n`,_jsxs(_components.p,{children:[`These lists are for looking things up. You make changes in the dashboard, and each list has `,_jsx(_components.strong,{children:`Open Dashboard`}),` to take you there. `,_jsx(_components.strong,{children:`GBP Locations`}),` also has `,_jsx(_components.strong,{children:`Sync now`}),`.`]}),`\n`,_jsx(Heading,{level:`2`,id:`what-happens-next`,children:`What happens next`}),`\n`,_jsx(_components.p,{children:`Staged changes stay in the CMS until you push them. After a push, Google may hold a change in its own review before it goes live. Posts are the exception: they’re sent the moment you publish them.`}),`\n`,_jsx(_components.p,{children:`With scheduled sync on, the CMS fetches each listing from Google on its own. It also fetches performance data once a day.`}),`\n`,_jsx(Warning,{children:_jsxs(_components.p,{children:[_jsx(_components.strong,{children:`Google’s limits.`}),` Google accepts 100 new posts and photo uploads a day for your site, shared between them. Extra uploads stay staged: push them again the next day. Google also allows only 10 edits a minute per listing, so a big push takes a few minutes.`]})}),`\n`,_jsx(Heading,{level:`2`,id:`troubleshooting`,children:`Troubleshooting`}),`\n`,_jsxs(AccordionGroup,{children:[_jsxs(Accordion,{title:`Not ready to connect`,id:`not-ready-to-connect`,children:[_jsx(_components.p,{children:`The new tab says:`}),_jsx(_components.p,{children:`“Enter the OAuth client ID and client secret in the vault, SAVE, then click Continue with Google again.”`}),_jsxs(_components.p,{children:[`Paste both into the card, choose `,_jsx(_components.strong,{children:`Save`}),`, then choose `,_jsx(_components.strong,{children:`Continue with Google`}),` again.`]})]}),_jsx(Accordion,{title:`Connect link expired`,id:`connect-link-expired`,children:_jsxs(_components.p,{children:[`You took more than 10 minutes, or used an old tab. Go back to the card and choose `,_jsx(_components.strong,{children:`Continue with Google`}),` again.`]})}),_jsx(Accordion,{title:`Google declined the connection\" or \"Connection failed`,id:`google-declined-the-connection-or-connection-failed`,children:_jsx(_components.p,{children:`Google didn’t allow access. Check that the redirect address in your OAuth client matches the setup guide exactly, and that you signed in with the account that manages your listing. Then try again.`})}),_jsx(Accordion,{title:`Google connected\" mentions \"quota exceeded`,id:`google-connected-mentions-quota-exceeded`,children:_jsxs(_components.p,{children:[`The connection is saved, but Google hasn’t approved your access request yet. Wait for Google’s approval email, then choose `,_jsx(_components.strong,{children:`Sync profiles now`}),` in the dashboard.`]})}),_jsx(Accordion,{title:`The dashboard says \"Connect Google Business Profile first\" or \"Choose the profiles to manage`,id:`the-dashboard-says-connect-google-business-profile-first-or-choose-the-profiles-to-manage`,children:_jsxs(_components.p,{children:[`The connection isn’t finished, or no listing has `,_jsx(_components.strong,{children:`Manage this profile`}),` on. Choose `,_jsx(_components.strong,{children:`Open Connections`}),` and finish the steps above.`]})}),_jsx(Accordion,{title:`Performance shows no data, or Google refuses a post`,id:`performance-shows-no-data-or-google-refuses-a-post`,children:_jsxs(_components.p,{children:[`Google holds back some features until a listing is verified. Check `,_jsx(_components.strong,{children:`Verification`}),` in the dashboard, and finish verifying on Google’s site.`]})})]}),`\n`,_jsx(Heading,{level:`2`,id:`related`,children:`Related`}),`\n`,_jsxs(Columns,{cols:2,children:[_jsx(Card,{title:`Google Reviews`,icon:`star-half-stroke`,href:`/guides/connections/google-reviews`,children:_jsx(_components.p,{children:`show your Google reviews on your site.`})}),_jsx(Card,{title:`Google reviews`,icon:`star`,href:`/guides/content/google-reviews`,children:_jsx(_components.p,{children:`the reviews your site shows; feature your favorites.`})}),_jsx(Card,{title:`Connections`,icon:`plug`,href:`/guides/connections/index`,children:_jsx(_components.p,{children:`every outside service your site uses.`})})]})]})}function MDXContent(props={}){const{wrapper:MDXLayout}={..._provideComponents(),...props.components};return MDXLayout?_jsx(MDXLayout,{...props,children:_jsx(_createMdxContent,{...props})}):_createMdxContent(props)}return{default:MDXContent};function _missingMdxReference(id,component){throw new Error(`Expected `+(component?`component`:`object`)+\" `\"+id+\"` to be defined: you likely forgot to import, pass, or provide it.\")}","frontmatter":{},"scope":{"codeStyling":"dark","config":{},"pageMetadata":{"title":"Google Business Profile","sidebarTitle":"Google Business Profile","description":"Connect your Google listing once, then edit its details, reply to reviews, post updates and read its performance without leaving the CMS.","icon":"store","href":"/guides/connections/google-business-profile"}}},"mdxSourceWithNoJs":null},"mdxExtracts":{"tableOfContents":[{"title":"Before you start","slug":"before-you-start","depth":2,"children":[]},{"title":"Connect your listing","slug":"connect-your-listing","depth":2,"children":[]},{"title":"Open the Google Business Dashboard","slug":"open-the-google-business-dashboard","depth":2,"children":[]},{"title":"Change your listing’s details","slug":"change-your-listing’s-details","depth":2,"children":[]},{"title":"Reply to reviews","slug":"reply-to-reviews","depth":2,"children":[]},{"title":"Post updates, events and offers","slug":"post-updates-events-and-offers","depth":2,"children":[]},{"title":"Photos","slug":"photos","depth":2,"children":[]},{"title":"Performance, action links and more","slug":"performance-action-links-and-more","depth":2,"children":[]},{"title":"The Google Business Profile lists","slug":"the-google-business-profile-lists","depth":2,"children":[]},{"title":"What happens next","slug":"what-happens-next","depth":2,"children":[]},{"title":"Troubleshooting","slug":"troubleshooting","depth":2,"children":[]},{"title":"Related","slug":"related","depth":2,"children":[]}],"codeExamples":{}},"jsLinks":["/_mintlify/custom/fetchski-attract-api/f59e82e583443cfa/reader-values.js"],"dynamicCss":".mint-block {\n display: block\n}\n.mint-hidden {\n display: none\n}\n.dark\\:mint-block:is(.dark *) {\n display: block\n}\n.dark\\:mint-hidden:is(.dark *) {\n display: none\n}","subdomain":"fetchski-attract-api","siteName":"Fetchski Attract Docs","title":"Google Business Profile - Fetchski Attract Docs","navMaps":{"firstHrefInVersion":{},"firstHrefInLanguage":{}},"lastModified":"2026-11-03T15:56:46.631Z","originalFileLocation":"guides/connections/google-business-profile.mdx"},"headHtml":"\u003cscript data-mint-head>(function(){var d=document.documentElement,p=null;if(!p){try{p=localStorage.getItem(\"isDarkMode\")}catch(e){}if(p==='true')p='dark';else if(p==='false')p='light';if(p!=='light'\u0026\u0026p!=='dark'\u0026\u0026p!=='system')p=\"dark\"}var r=p==='system'?(matchMedia(\"(prefers-color-scheme: dark)\").matches?'dark':'light'):p;d.classList.remove(r==='dark'?'light':'dark');d.classList.add(r);d.setAttribute(\"data-theme-preference\",p)})();\u003c/script>\u003cmeta data-mint-head name=\"description\" content=\"Connect your Google listing once, then edit its details, reply to reviews, post updates and read its performance without leaving the CMS.\">\u003cmeta data-mint-head name=\"application-name\" content=\"Fetchski Attract Docs\">\u003cmeta data-mint-head name=\"generator\" content=\"Mintlify\">\u003cmeta data-mint-head name=\"robots\" content=\"noindex, nofollow\">\u003clink data-mint-head rel=\"icon\" type=\"image/png\" sizes=\"192x192\" href=\"/mintlify-assets/_mintlify/favicons/fetchski-attract-api/70pYtWMpcnXR0SYV/_generated/favicon/android-chrome-192x192.png\" media=\"(prefers-color-scheme: light)\">\u003clink data-mint-head rel=\"apple-touch-icon\" type=\"image/png\" sizes=\"180x180\" href=\"/mintlify-assets/_mintlify/favicons/fetchski-attract-api/70pYtWMpcnXR0SYV/_generated/favicon/apple-touch-icon.png\">\u003clink data-mint-head rel=\"icon\" type=\"image/png\" sizes=\"16x16\" href=\"/mintlify-assets/_mintlify/favicons/fetchski-attract-api/70pYtWMpcnXR0SYV/_generated/favicon/favicon-16x16.png\" media=\"(prefers-color-scheme: light)\">\u003clink data-mint-head rel=\"icon\" type=\"image/png\" sizes=\"32x32\" href=\"/mintlify-assets/_mintlify/favicons/fetchski-attract-api/70pYtWMpcnXR0SYV/_generated/favicon/favicon-32x32.png\" media=\"(prefers-color-scheme: light)\">\u003clink data-mint-head rel=\"shortcut icon\" type=\"image/x-icon\" href=\"/mintlify-assets/_mintlify/favicons/fetchski-attract-api/70pYtWMpcnXR0SYV/_generated/favicon/favicon.ico\" media=\"(prefers-color-scheme: light)\">\u003clink data-mint-head rel=\"icon\" type=\"image/png\" sizes=\"192x192\" href=\"/mintlify-assets/_mintlify/favicons/fetchski-attract-api/70pYtWMpcnXR0SYV/_generated/favicon-dark/android-chrome-192x192.png\" media=\"(prefers-color-scheme: dark)\">\u003clink data-mint-head rel=\"icon\" type=\"image/png\" sizes=\"16x16\" href=\"/mintlify-assets/_mintlify/favicons/fetchski-attract-api/70pYtWMpcnXR0SYV/_generated/favicon-dark/favicon-16x16.png\" media=\"(prefers-color-scheme: dark)\">\u003clink data-mint-head rel=\"icon\" type=\"image/png\" sizes=\"32x32\" href=\"/mintlify-assets/_mintlify/favicons/fetchski-attract-api/70pYtWMpcnXR0SYV/_generated/favicon-dark/favicon-32x32.png\" media=\"(prefers-color-scheme: dark)\">\u003clink data-mint-head rel=\"shortcut icon\" type=\"image/x-icon\" href=\"/mintlify-assets/_mintlify/favicons/fetchski-attract-api/70pYtWMpcnXR0SYV/_generated/favicon-dark/favicon.ico\" media=\"(prefers-color-scheme: dark)\">\u003cmeta data-mint-head property=\"og:title\" content=\"Google Business Profile - Fetchski Attract Docs\">\u003cmeta data-mint-head property=\"og:description\" content=\"Connect your Google listing once, then edit its details, reply to reviews, post updates and read its performance without leaving the CMS.\">\u003cmeta data-mint-head property=\"og:site_name\" content=\"Fetchski Attract Docs\">\u003cmeta data-mint-head property=\"og:url\" content=\"https://docs.fetchski-attract.com/guides/connections/google-business-profile\">\u003cmeta data-mint-head property=\"og:type\" content=\"website\">\u003cmeta data-mint-head property=\"og:image\" content=\"https://fetchski-attract-api.mintlify.site/_mintlify/api/og/v2?division=Connections\u0026amp;title=Google+Business+Profile\u0026amp;description=Connect+your+Google+listing+once%2C+then+edit+its+details%2C+reply+to+reviews%2C+post+updates+and+read+its+performance+without+leaving+the+CMS.\u0026amp;theme=0e1cff4688ef26ca6a5fb667\u0026amp;signature=a5e345d03a9d2b815cbef22db7f3ff2e4f37aea7f9f663ad8c4cf0f123ba0a3a\">\u003cmeta data-mint-head property=\"og:image:width\" content=\"1200\">\u003cmeta data-mint-head property=\"og:image:height\" content=\"630\">\u003cmeta data-mint-head name=\"twitter:card\" content=\"summary_large_image\">\u003cmeta data-mint-head name=\"twitter:title\" content=\"Google Business Profile - Fetchski Attract Docs\">\u003cmeta data-mint-head name=\"twitter:description\" content=\"Connect your Google listing once, then edit its details, reply to reviews, post updates and read its performance without leaving the CMS.\">\u003cmeta data-mint-head name=\"twitter:image\" content=\"https://fetchski-attract-api.mintlify.site/_mintlify/api/og/v2?division=Connections\u0026amp;title=Google+Business+Profile\u0026amp;description=Connect+your+Google+listing+once%2C+then+edit+its+details%2C+reply+to+reviews%2C+post+updates+and+read+its+performance+without+leaving+the+CMS.\u0026amp;theme=0e1cff4688ef26ca6a5fb667\u0026amp;signature=a5e345d03a9d2b815cbef22db7f3ff2e4f37aea7f9f663ad8c4cf0f123ba0a3a\">\u003cmeta data-mint-head name=\"twitter:image:width\" content=\"1200\">\u003cmeta data-mint-head name=\"twitter:image:height\" content=\"630\">\u003cmeta data-mint-head name=\"msapplication-config\" content=\"/mintlify-assets/_mintlify/favicons/fetchski-attract-api/70pYtWMpcnXR0SYV/_generated/favicon/browserconfig.xml\">\u003cmeta data-mint-head name=\"apple-mobile-web-app-title\" content=\"Fetchski Attract Docs\">\u003cmeta data-mint-head name=\"msapplication-TileColor\" content=\"#16a34a\">\u003clink data-mint-head rel=\"canonical\" href=\"https://docs.fetchski-attract.com/guides/connections/google-business-profile\">\u003clink data-mint-head rel=\"alternate\" type=\"application/xml\" href=\"/sitemap.xml\">\u003clink data-mint-head rel=\"alternate\" type=\"text/markdown\" href=\"/guides/connections/google-business-profile.md\">\u003cscript data-mint-head type=\"application/ld+json\">{\"@context\":\"https://schema.org\",\"@graph\":[{\"@type\":\"Organization\",\"@id\":\"https://docs.fetchski-attract.com/#organization\",\"name\":\"Fetchski Attract Docs\",\"url\":\"https://docs.fetchski-attract.com\",\"logo\":{\"@type\":\"ImageObject\",\"url\":\"https://mintcdn.com/fetchski-attract-api/mn9qfQRsqaASh7UE/logo/light.svg?fit=max\u0026auto=format\u0026n=mn9qfQRsqaASh7UE\u0026q=85\u0026s=66db13e248b70a44a5ff5f6990d4cb63\"}},{\"@type\":\"WebSite\",\"@id\":\"https://docs.fetchski-attract.com#website\",\"name\":\"Fetchski Attract Docs\",\"url\":\"https://docs.fetchski-attract.com\",\"publisher\":{\"@id\":\"https://docs.fetchski-attract.com/#organization\"}},{\"@type\":\"WebPage\",\"@id\":\"https://docs.fetchski-attract.com/guides/connections/google-business-profile#webpage\",\"url\":\"https://docs.fetchski-attract.com/guides/connections/google-business-profile\",\"name\":\"Google Business Profile\",\"description\":\"Connect your Google listing once, then edit its details, reply to reviews, post updates and read its performance without leaving the CMS.\",\"dateModified\":\"2026-11-03T15:56:46.631Z\",\"isPartOf\":{\"@id\":\"https://docs.fetchski-attract.com#website\"},\"breadcrumb\":{\"@id\":\"https://docs.fetchski-attract.com/guides/connections/google-business-profile#breadcrumb\"}},{\"@type\":\"BreadcrumbList\",\"@id\":\"https://docs.fetchski-attract.com/guides/connections/google-business-profile#breadcrumb\",\"itemListElement\":[{\"@type\":\"ListItem\",\"position\":1,\"name\":\"Connections\",\"item\":\"https://docs.fetchski-attract.com/guides/connections\"},{\"@type\":\"ListItem\",\"position\":2,\"name\":\"Google Business Profile\",\"item\":\"https://docs.fetchski-attract.com/guides/connections/google-business-profile\"}]},{\"@type\":[\"Article\",\"TechArticle\"],\"@id\":\"https://docs.fetchski-attract.com/guides/connections/google-business-profile#article\",\"headline\":\"Google Business Profile\",\"name\":\"Google Business Profile\",\"description\":\"Connect your Google listing once, then edit its details, reply to reviews, post updates and read its performance without leaving the CMS.\",\"url\":\"https://docs.fetchski-attract.com/guides/connections/google-business-profile\",\"mainEntityOfPage\":{\"@id\":\"https://docs.fetchski-attract.com/guides/connections/google-business-profile#webpage\"},\"dateModified\":\"2026-11-03T15:56:46.631Z\",\"publisher\":{\"@id\":\"https://docs.fetchski-attract.com/#organization\"},\"isPartOf\":{\"@id\":\"https://docs.fetchski-attract.com#website\"}}]}\u003c/script>\u003cscript data-mint-head type=\"application/ld+json\">{\"@context\":\"https://schema.org\",\"@type\":\"WebSite\",\"name\":\"Fetchski Attract Docs\",\"publisher\":{\"@type\":\"Organization\",\"name\":\"Fetchski Attract Docs\"},\"provider\":{\"@type\":\"Organization\",\"name\":\"Mintlify\",\"url\":\"https://mintlify.com\"}}\u003c/script>","agentPointerHref":"/guides/connections/google-business-profile.md","siteName":"Fetchski Attract Docs","nav":{"global":null,"tabs":[{"tab":"Guides","icon":"book-open","groups":[{"group":"Get started","icon":"rocket","pages":[{"title":"Fetchski Attract Docs","sidebarTitle":"Introduction","icon":"house","mode":"wide","href":""},{"title":"A tour of Attract","sidebarTitle":"Tour","icon":"compass","href":"/guides/get-started/tour"},{"title":"Sign in","sidebarTitle":"Sign in","icon":"right-to-bracket","href":"/guides/get-started/sign-in"},{"title":"The toolbar and the command palette","sidebarTitle":"Toolbar and ⌘K","icon":"keyboard","href":"/guides/get-started/toolbar-and-command-palette"},{"title":"Set up your site","sidebarTitle":"Set up your site","icon":"list-check","href":"/guides/get-started/set-up-your-site"},{"title":"Your profile","sidebarTitle":"Your profile","icon":"circle-user","href":"/guides/get-started/your-profile"}]},{"group":"Build pages","icon":"pen-to-square","pages":[{"title":"Pages and the page tree","sidebarTitle":"Pages","icon":"sitemap","href":"/guides/build-pages/pages-and-the-page-tree"},{"title":"Start from a page template","sidebarTitle":"Page templates","icon":"clone","href":"/guides/build-pages/page-templates"},{"title":"Two ways to edit: on the page or in the page settings window","sidebarTitle":"Two ways to edit","icon":"pen-to-square","href":"/guides/build-pages/two-ways-to-edit"},{"title":"Add, move and remove sections","sidebarTitle":"Add and arrange sections","icon":"layer-group","href":"/guides/build-pages/add-move-remove-sections"},{"title":"Preview on phones and tablets","sidebarTitle":"Device preview","icon":"mobile-screen","href":"/guides/build-pages/preview-on-devices"},{"title":"Drafts, publishing and scheduling","sidebarTitle":"Publish and schedule","icon":"calendar-check","href":"/guides/build-pages/publish-and-schedule"},{"title":"Side-by-side layouts","sidebarTitle":"Layouts and columns","icon":"table-columns","href":"/guides/build-pages/side-by-side-layouts"},{"title":"Document versions","sidebarTitle":"Versions","icon":"clock-rotate-left","href":"/guides/build-pages/versions"},{"title":"Page SEO","sidebarTitle":"Page SEO","icon":"magnifying-glass","href":"/guides/build-pages/page-seo"},{"title":"Redirects","sidebarTitle":"Redirects","icon":"arrow-right-arrow-left","href":"/guides/build-pages/redirects"},{"title":"Your site in more than one language","sidebarTitle":"Languages","icon":"language","href":"/guides/build-pages/languages"}]},{"group":"Sections","icon":"grid-2","pages":[{"title":"Sections","sidebarTitle":"All sections","icon":"grid-2","href":"/guides/sections/index"},{"title":"What every section shares","sidebarTitle":"Shared options","icon":"sliders","href":"/guides/sections/what-every-section-shares"},{"title":"Page Header","sidebarTitle":"Page Header","icon":"heading","href":"/guides/sections/page-header"},{"title":"Hero","sidebarTitle":"Hero","icon":"flag","href":"/guides/sections/hero"},{"title":"Intro / Trust","sidebarTitle":"Intro / Trust","icon":"quote-left","href":"/guides/sections/intro-trust"},{"title":"Feature Cards","sidebarTitle":"Feature Cards","icon":"cards-blank","href":"/guides/sections/feature-cards"},{"title":"Stats / By the numbers","sidebarTitle":"Stats / By the numbers","icon":"chart-simple","href":"/guides/sections/stats"},{"title":"Logos / Partners","sidebarTitle":"Logos / Partners","icon":"handshake","href":"/guides/sections/logos"},{"title":"How it works / Steps","sidebarTitle":"How it works / Steps","icon":"shoe-prints","href":"/guides/sections/steps"},{"title":"Media + Text block","sidebarTitle":"Media + Text block","icon":"image-landscape","href":"/guides/sections/media-text"},{"title":"Device mocks","sidebarTitle":"Device mocks","icon":"laptop-mobile","href":"/guides/sections/device-mocks"},{"title":"Team","sidebarTitle":"Team","icon":"people-group","href":"/guides/sections/team"},{"title":"FAQ","sidebarTitle":"FAQ","icon":"circle-question","href":"/guides/sections/faq"},{"title":"Service Area Map","sidebarTitle":"Service Area Map","icon":"map-location-dot","href":"/guides/sections/service-area-map"},{"title":"Blog Preview","sidebarTitle":"Blog Preview","icon":"newspaper","href":"/guides/sections/blog-preview"},{"title":"Cookie Declaration","sidebarTitle":"Cookie Declaration","icon":"cookie-bite","href":"/guides/sections/cookie-declaration"},{"title":"Rich Text","sidebarTitle":"Rich Text","icon":"paragraph","href":"/guides/sections/rich-text"},{"title":"Images and videos (in columns and posts)","sidebarTitle":"Images and videos (in columns and posts)","icon":"photo-film","href":"/guides/sections/images-and-videos"},{"title":"Google Reviews","sidebarTitle":"Google Reviews","icon":"star","href":"/guides/sections/google-reviews"},{"title":"Testimonials","sidebarTitle":"Testimonials","icon":"comment-quote","href":"/guides/sections/testimonials"},{"title":"Instagram Feed","sidebarTitle":"Instagram Feed","icon":"camera-retro","href":"/guides/sections/instagram-feed"},{"title":"Gallery Preview and Gallery (Full)","sidebarTitle":"Gallery","icon":"images","href":"/guides/sections/gallery"},{"title":"Pricing / Packages","sidebarTitle":"Pricing / Packages","icon":"tags","href":"/guides/sections/pricing"},{"title":"Newsletter Subscription","sidebarTitle":"Newsletter Subscription","icon":"envelope-open-text","href":"/guides/sections/newsletter-signup"},{"title":"SMS Subscription","sidebarTitle":"SMS Subscription","icon":"comment-sms","href":"/guides/sections/sms-signup"},{"title":"Form","sidebarTitle":"Form","icon":"rectangle-list","href":"/guides/sections/form"},{"title":"Final CTA","sidebarTitle":"Final CTA","icon":"bullhorn","href":"/guides/sections/final-cta"}]},{"group":"Content","icon":"box-archive","pages":[{"title":"Content you reuse","sidebarTitle":"Overview","icon":"box-archive","href":"/guides/content/index"},{"title":"Blog posts, categories and authors","sidebarTitle":"Blog","icon":"pen-nib","href":"/guides/content/blog"},{"title":"Team members","sidebarTitle":"Team members","icon":"id-badge","href":"/guides/content/team-members"},{"title":"Testimonials","sidebarTitle":"Testimonials","icon":"comment-quote","href":"/guides/content/testimonials"},{"title":"FAQs and categories","sidebarTitle":"FAQs","icon":"circle-question","href":"/guides/content/faqs"},{"title":"Google reviews","sidebarTitle":"Google reviews","icon":"star","href":"/guides/content/google-reviews"},{"title":"Service areas","sidebarTitle":"Service areas","icon":"map-location-dot","href":"/guides/content/service-areas"},{"title":"Photo albums","sidebarTitle":"Photo albums","icon":"images","href":"/guides/content/photo-albums"},{"title":"Photo feeds","sidebarTitle":"Photo feeds","icon":"arrows-rotate","href":"/guides/content/photo-feeds"},{"title":"Archive, restore and delete","sidebarTitle":"Archive and delete","icon":"trash-can","href":"/guides/content/archive-restore-delete"},{"title":"Instagram posts","sidebarTitle":"Instagram posts","icon":"camera-retro","href":"/guides/content/instagram-posts"}]},{"group":"Media","icon":"photo-film","pages":[{"title":"The media library","sidebarTitle":"Media library","icon":"photo-film","href":"/guides/media/media-library"},{"title":"Folders","sidebarTitle":"Folders","icon":"folder-tree","href":"/guides/media/folders"},{"title":"Broken media","sidebarTitle":"Broken media","icon":"link-slash","href":"/guides/media/broken-media"}]},{"group":"Forms","icon":"rectangle-list","pages":[{"title":"Build a form","sidebarTitle":"Build a form","icon":"rectangle-list","href":"/guides/forms/build-a-form"},{"title":"Form submissions","sidebarTitle":"Submissions","icon":"inbox","href":"/guides/forms/form-submissions"},{"title":"Email notifications","sidebarTitle":"Email","icon":"envelope","href":"/guides/forms/email-notifications"},{"title":"Spam protection","sidebarTitle":"Spam protection","icon":"shield-halved","href":"/guides/forms/spam-protection"}]},{"group":"Site settings","icon":"gear","pages":[{"title":"Site settings","sidebarTitle":"Overview","icon":"gear","href":"/guides/site-settings/index"},{"title":"Brand","sidebarTitle":"Brand","icon":"badge","href":"/guides/site-settings/brand"},{"title":"Social links","sidebarTitle":"Social links","icon":"share-nodes","href":"/guides/site-settings/social-links"},{"title":"Site-wide SEO","sidebarTitle":"SEO","icon":"magnifying-glass-chart","href":"/guides/site-settings/seo"},{"title":"Legal details","sidebarTitle":"Legal","icon":"scale-balanced","href":"/guides/site-settings/legal"},{"title":"Cookie consent","sidebarTitle":"Cookie consent","icon":"cookie","href":"/guides/site-settings/cookie-consent"},{"title":"Service area map settings","sidebarTitle":"Service area map","icon":"map-location-dot","href":"/guides/site-settings/service-area-map"},{"title":"Maintenance mode","sidebarTitle":"Maintenance","icon":"person-digging","href":"/guides/site-settings/maintenance"}]},{"group":"Site design","icon":"palette","pages":[{"title":"Site design","sidebarTitle":"Overview","icon":"palette","href":"/guides/site-design/index"},{"title":"Colors","sidebarTitle":"Colors","icon":"swatchbook","href":"/guides/site-design/colors"},{"title":"Typography","sidebarTitle":"Typography","icon":"font","href":"/guides/site-design/typography"},{"title":"Site width","sidebarTitle":"Site width","icon":"arrows-left-right-to-line","href":"/guides/site-design/site-width"},{"title":"Motion","sidebarTitle":"Motion","icon":"wand-magic-sparkles","href":"/guides/site-design/motion"},{"title":"Header","sidebarTitle":"Header","icon":"window-maximize","href":"/guides/site-design/header"},{"title":"Footer","sidebarTitle":"Footer","icon":"window-minimize","href":"/guides/site-design/footer"},{"title":"Buttons and card styles","sidebarTitle":"Buttons and cards","icon":"hand-pointer","href":"/guides/site-design/buttons-and-card-styles"},{"title":"Custom CSS","sidebarTitle":"Custom CSS","icon":"code","href":"/guides/site-design/custom-css"}]},{"group":"Connections","icon":"plug","pages":[{"title":"Connections","sidebarTitle":"Overview","description":"One safe place for every outside service your site uses: email, spam protection, Google, Instagram, ads, analytics and FetchskiAI.","icon":"plug","href":"/guides/connections/index"},{"title":"Google Business Profile","sidebarTitle":"Google Business Profile","icon":"store","href":"/guides/connections/google-business-profile"},{"title":"Google Reviews connection","sidebarTitle":"Google Reviews","description":"Bring your Google reviews onto your site automatically, on a schedule you choose.","icon":"star-half-stroke","href":"/guides/connections/google-reviews"},{"title":"Google Maps","sidebarTitle":"Google Maps","icon":"map","href":"/guides/connections/google-maps"},{"title":"Google Sheets","sidebarTitle":"Google Sheets","icon":"table","href":"/guides/connections/google-sheets"},{"title":"Instagram","sidebarTitle":"Instagram","icon":"camera-retro","href":"/guides/connections/instagram"},{"title":"Photo storage","sidebarTitle":"Photo storage","icon":"cloud","href":"/guides/connections/photo-storage"},{"title":"Embed scripts","sidebarTitle":"Embed scripts","icon":"code","href":"/guides/connections/embed-scripts"},{"title":"Conversion tracking","sidebarTitle":"Conversion tracking","icon":"bullseye-arrow","href":"/guides/connections/conversion-tracking"},{"title":"Analytics","sidebarTitle":"Analytics","icon":"chart-line","href":"/guides/connections/analytics"},{"title":"Request log","sidebarTitle":"Request log","icon":"list-timeline","href":"/guides/connections/request-log"},{"title":"API keys and webhooks","sidebarTitle":"API keys and webhooks","icon":"key","href":"/guides/connections/api-keys-and-webhooks"}]},{"group":"People and access","icon":"users","pages":[{"title":"People \u0026 Roles","sidebarTitle":"People \u0026 Roles","icon":"users","href":"/guides/people/people-and-roles"},{"title":"What each role can do","sidebarTitle":"Roles","icon":"user-shield","href":"/guides/people/what-each-role-can-do"}]}]},{"tab":"FetchskiAI","icon":"sparkles","pages":[{"title":"FetchskiAI","href":"/fetchskiai/overview"}]},{"tab":"Recipes","icon":"book-open","pages":[{"title":"Recipes","href":"/recipes/laravel-ai-translate-your-site"}]},{"tab":"TypeScript","icon":"js","pages":[{"title":"TypeScript","href":"/typescript/overview"}]},{"tab":"Laravel","icon":"laravel","pages":[{"title":"Laravel","href":"/laravel/overview"}]},{"tab":"AdonisJS","icon":"https://mintlify.s3.us-west-1.amazonaws.com/fetchski-attract-api/logo/adonisjs.svg","pages":[{"title":"AdonisJS","href":"/adonisjs/overview"}]},{"tab":"API reference","icon":"code","pages":[{"title":"API reference","href":"/quickstart"}]}]},"basePath":"","title":"Google Business Profile - Fetchski Attract Docs","buildId":"dpl_5joLUXmnJgwqjrHAS4dxZrQTdxgh","deploymentId":"dpl_5joLUXmnJgwqjrHAS4dxZrQTdxgh","dynamics":["07c022d89b","a74be98ba7","a9bb46feb3"],"chunks":["Frame-B_503rGq.js","DynamicMarkdown-BfddVCX7.js","zoom-image-lightbox-B3yYlvdS.js","lightbox-handle-r17bVUz3.js","Markdown-DsWjhwJ4.js","clsx-B2t_mZQG.js","lib-DuNMoZ05.js","lib-B8HbPgcC.js","html-void-elements-mCSPHezU.js","dist-CUljsAY7.js","katex-YMM-FMeD.js","marked.esm-CZWythHk.js","AssistantPageLink-Cf70306N.js"]}


 AdonisJS