

 AdonisJS



Coming soon: the Fetchski Attract node for n8n
A full community node for the Attract API: every call a ready-made action, with your key and its signing handled for you. Until it ships, n8n’s HTTP Request node reaches the whole API, as this page shows.Token only
Token + HMAC signature
At a glance
- Token only
- Token + HMAC signature
Which requests need a signature
Make the API key
Open API Keys
API Keys, press Enter, then
click Create API Key.Fill it in
- Label:
n8n - Scopes: only what your workflow calls. To list and read pages, keep Start from a pack and pick the Read pages pack. For anything else, choose Pick scopes one by one: every page of the API reference names its scope under Access.
- Request signing: Token only, Token + signature on writes or Token + signature on every request.
Copy what it shows you
Secret token
fsk_acme_…Sent with every request, in the Authorization header.Signing secret
fss_…Only for signed requests: the key the HMAC is made with. Never sent.Token only
The site reads the token from one header: the wordApiKey, a space, then the token.
Save the token as a Header Auth credential
Fetchski Attract key.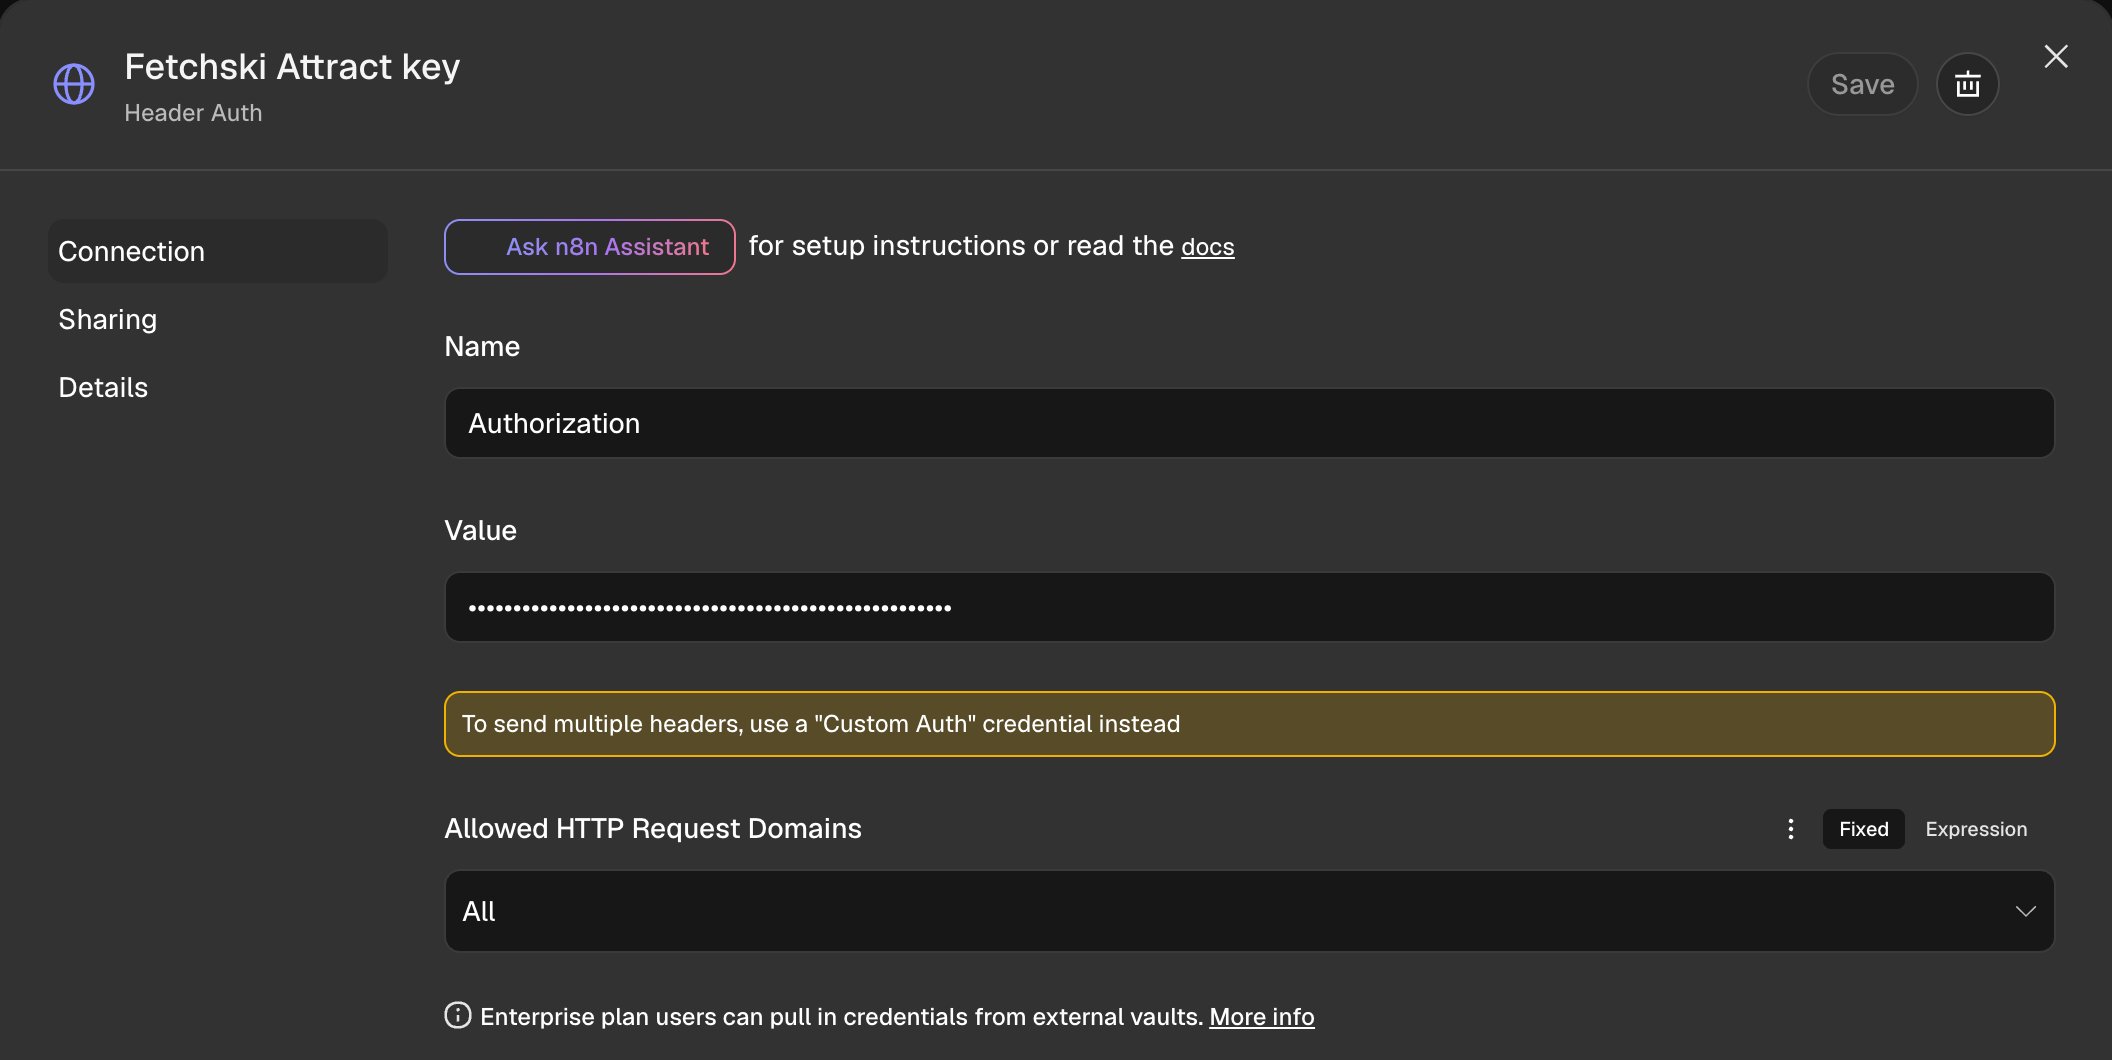
The Header Auth credential
Pick it on the HTTP Request node
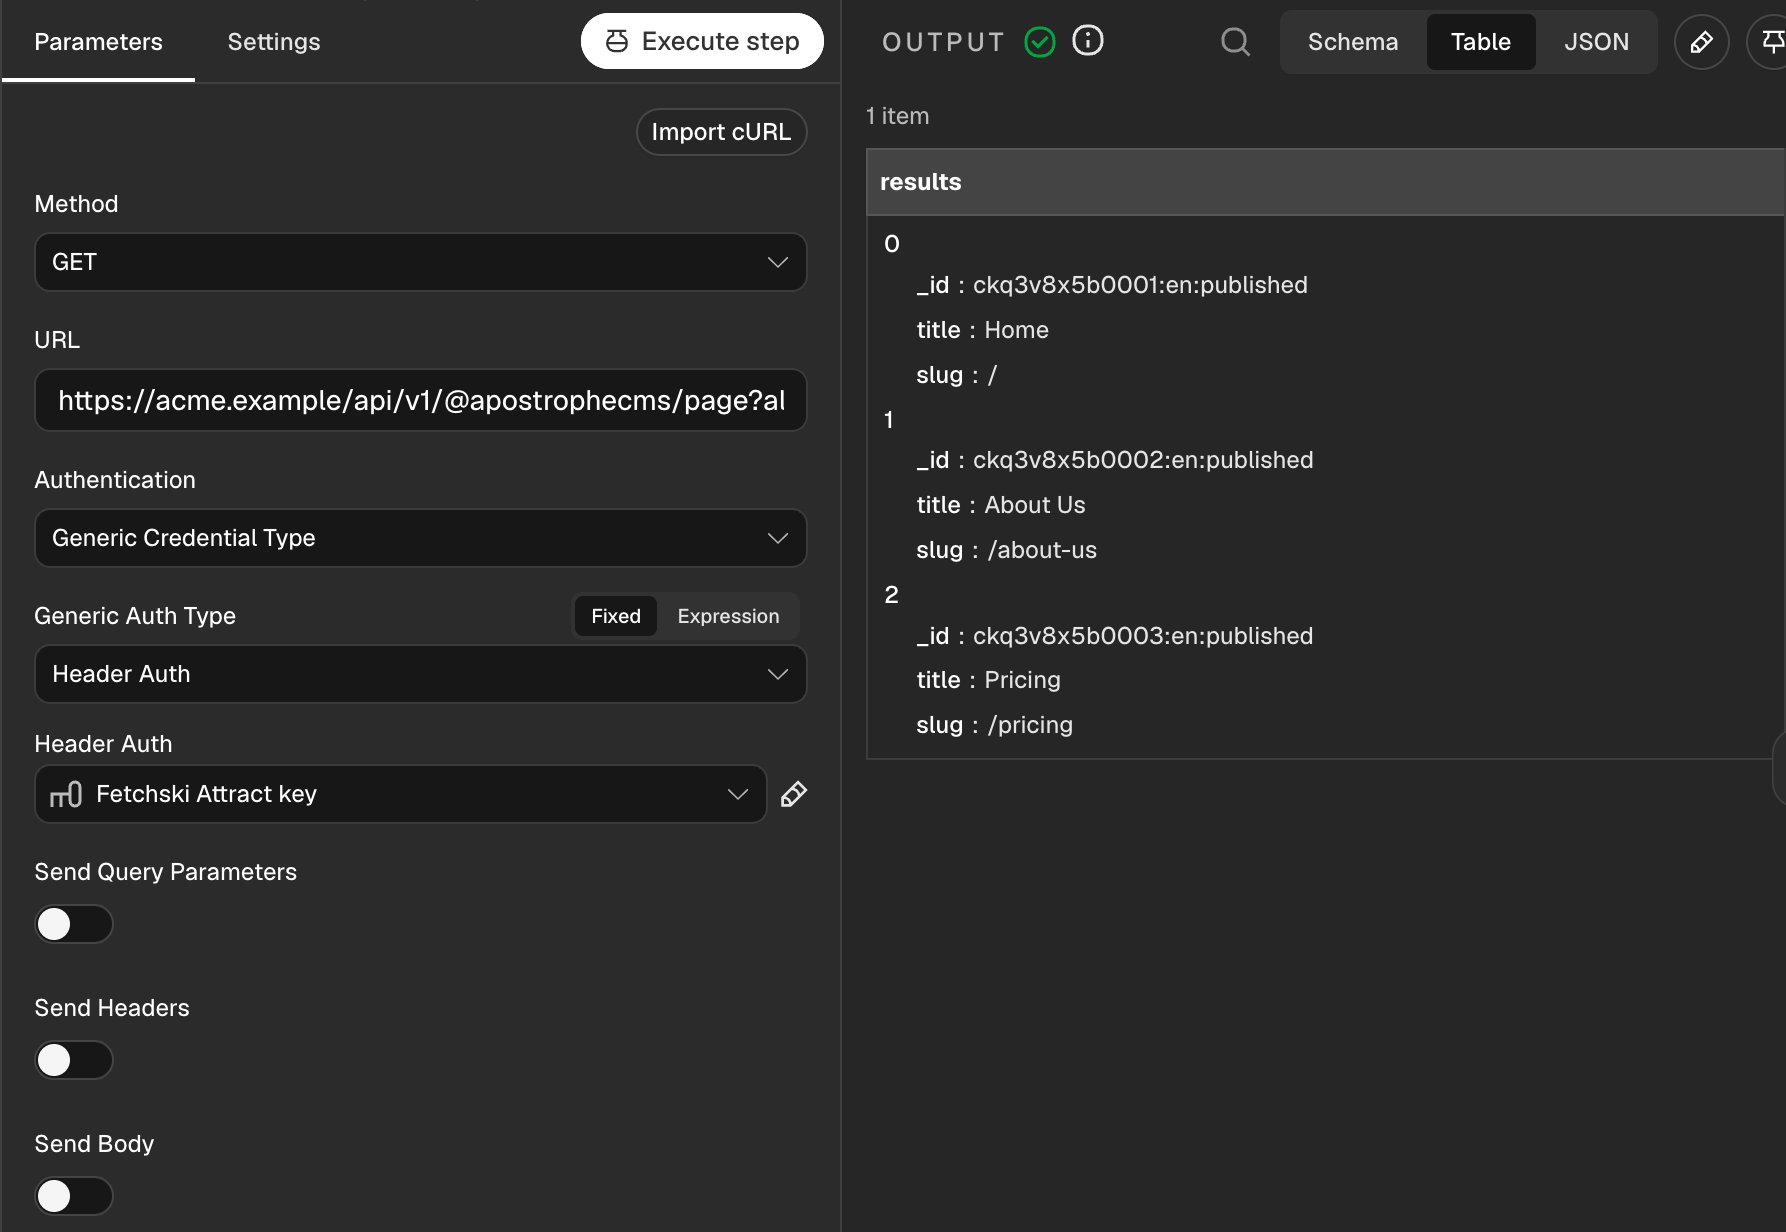
The HTTP Request node, with the Fetchski Attract key credential picked under Header Auth
Run it
Token and HMAC signature
A signed request sends the sameAuthorization header, plus two more:
What gets signed
The signature is an HMAC-SHA256 of four parts joined with dots, made with your signing secret and written as lower-case hex. For aGET of your pages list:
timestamp
X-Fetchski-Timestamp. The site allows five
minutes either way.method
GET, POST, PATCH, DELETE.path + query
/api/v1, with the query exactly as sent. Not the site’s address.body
GET, so the string ends in a dot.Build it in n8n
Two nodes go just before the HTTP Request node:Save the signing secret as a Crypto credential
fss_ included, in Hmac Secret, and leave the other fields empty. Save it as Fetchski Attract signing secret.Make the Fetchski Attract key Header Auth credential too, as in Token only.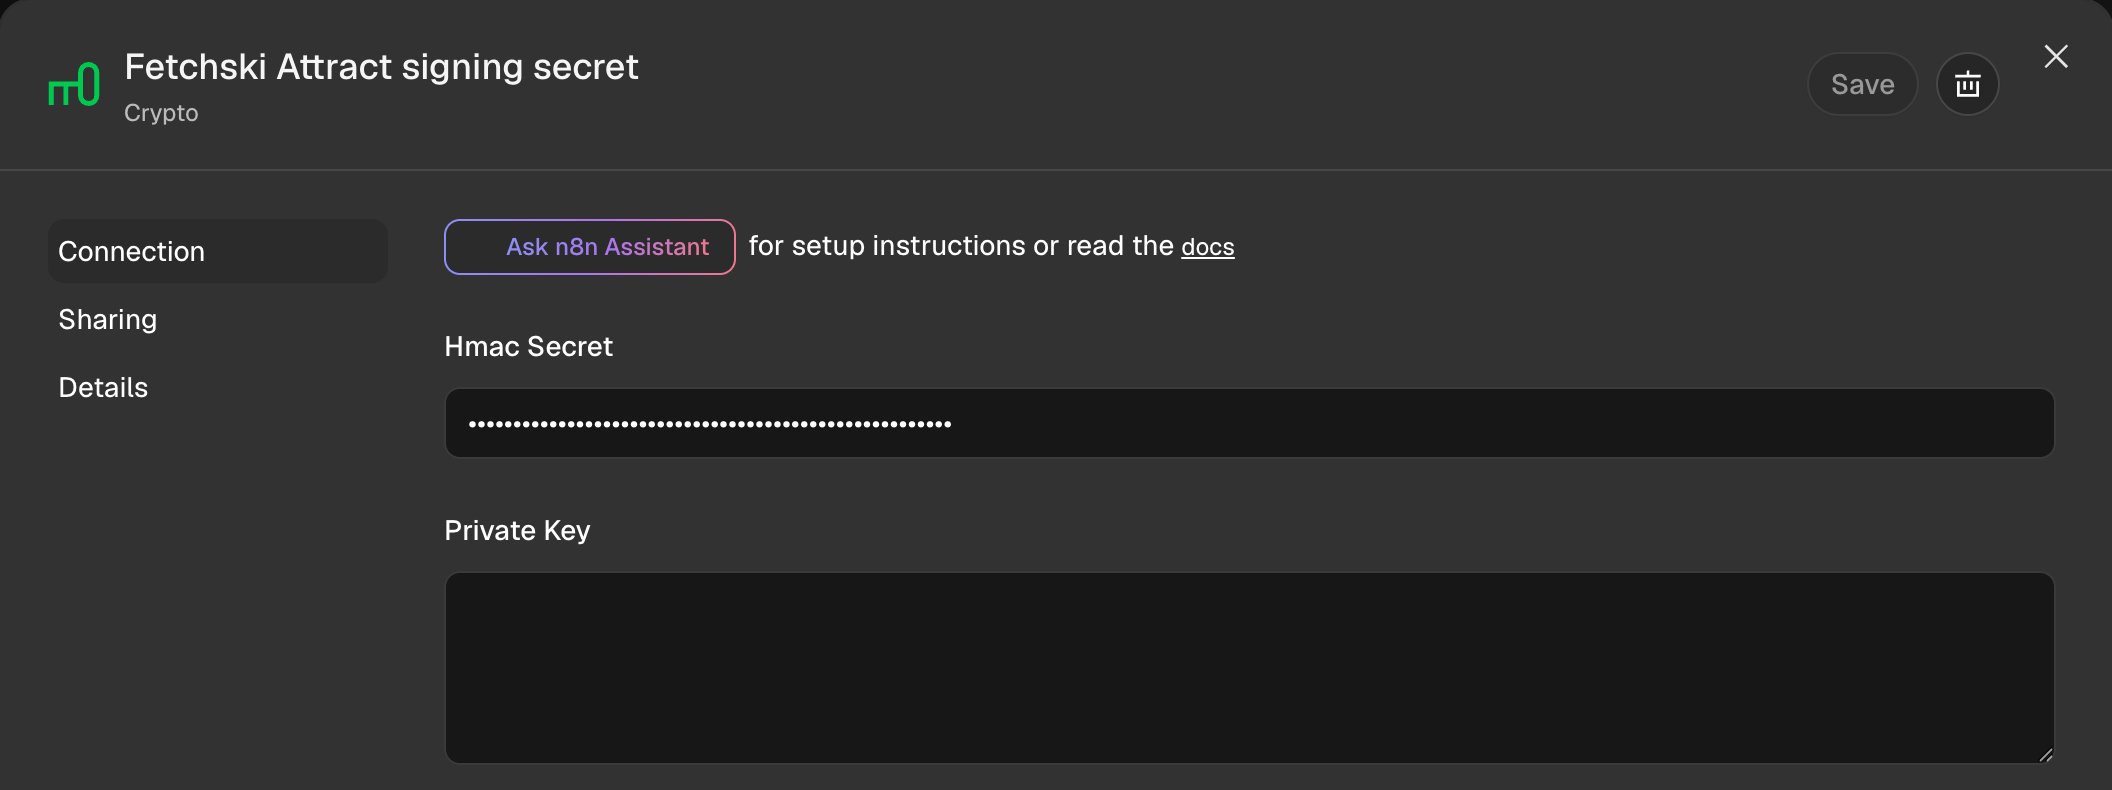
The Crypto credential: only Hmac Secret is filled in
What to sign: an Edit Fields node
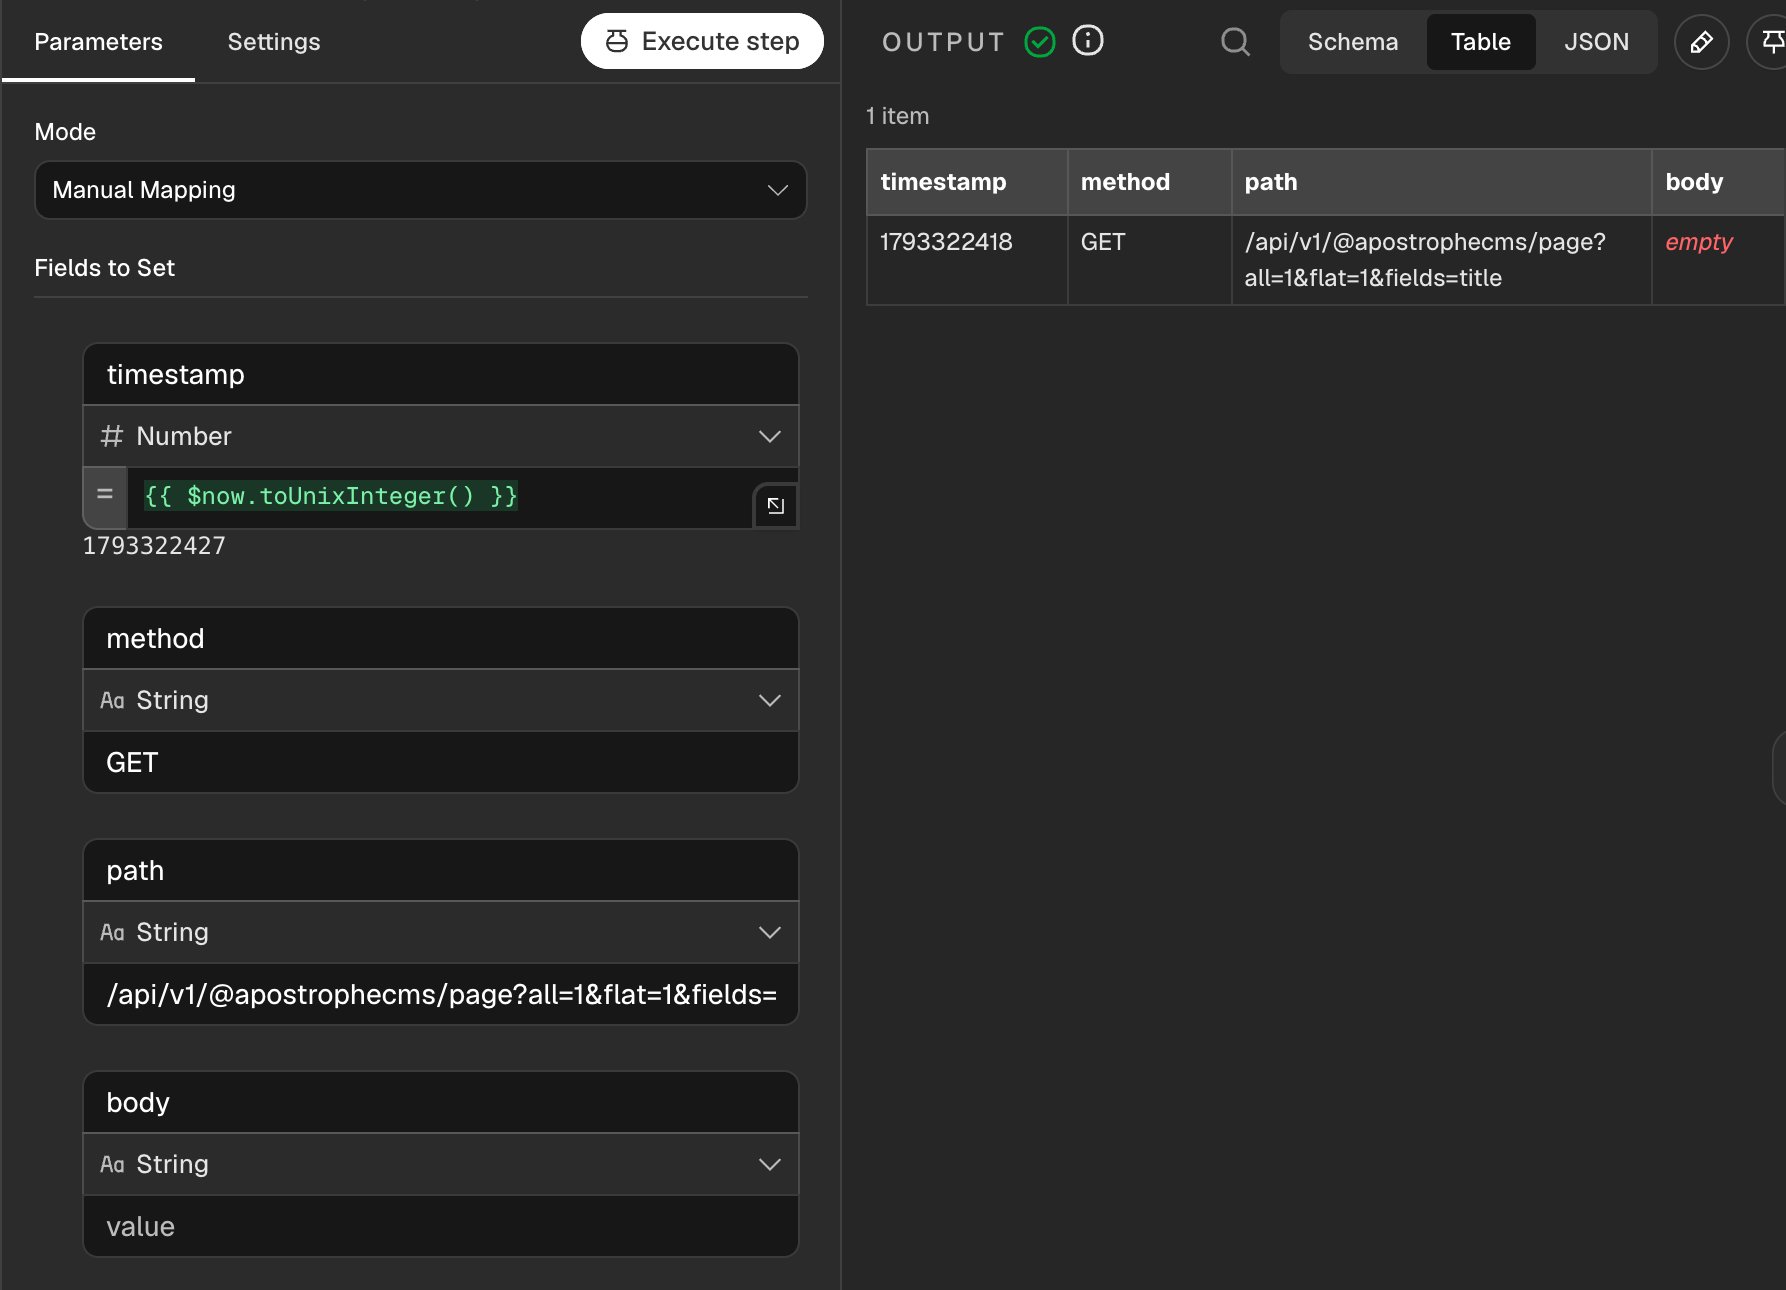
What to sign: the four parts
Sign it: a Crypto node
signature to the item and keeps the four fields, so the next node can read all five.
This node is the same for every request you sign.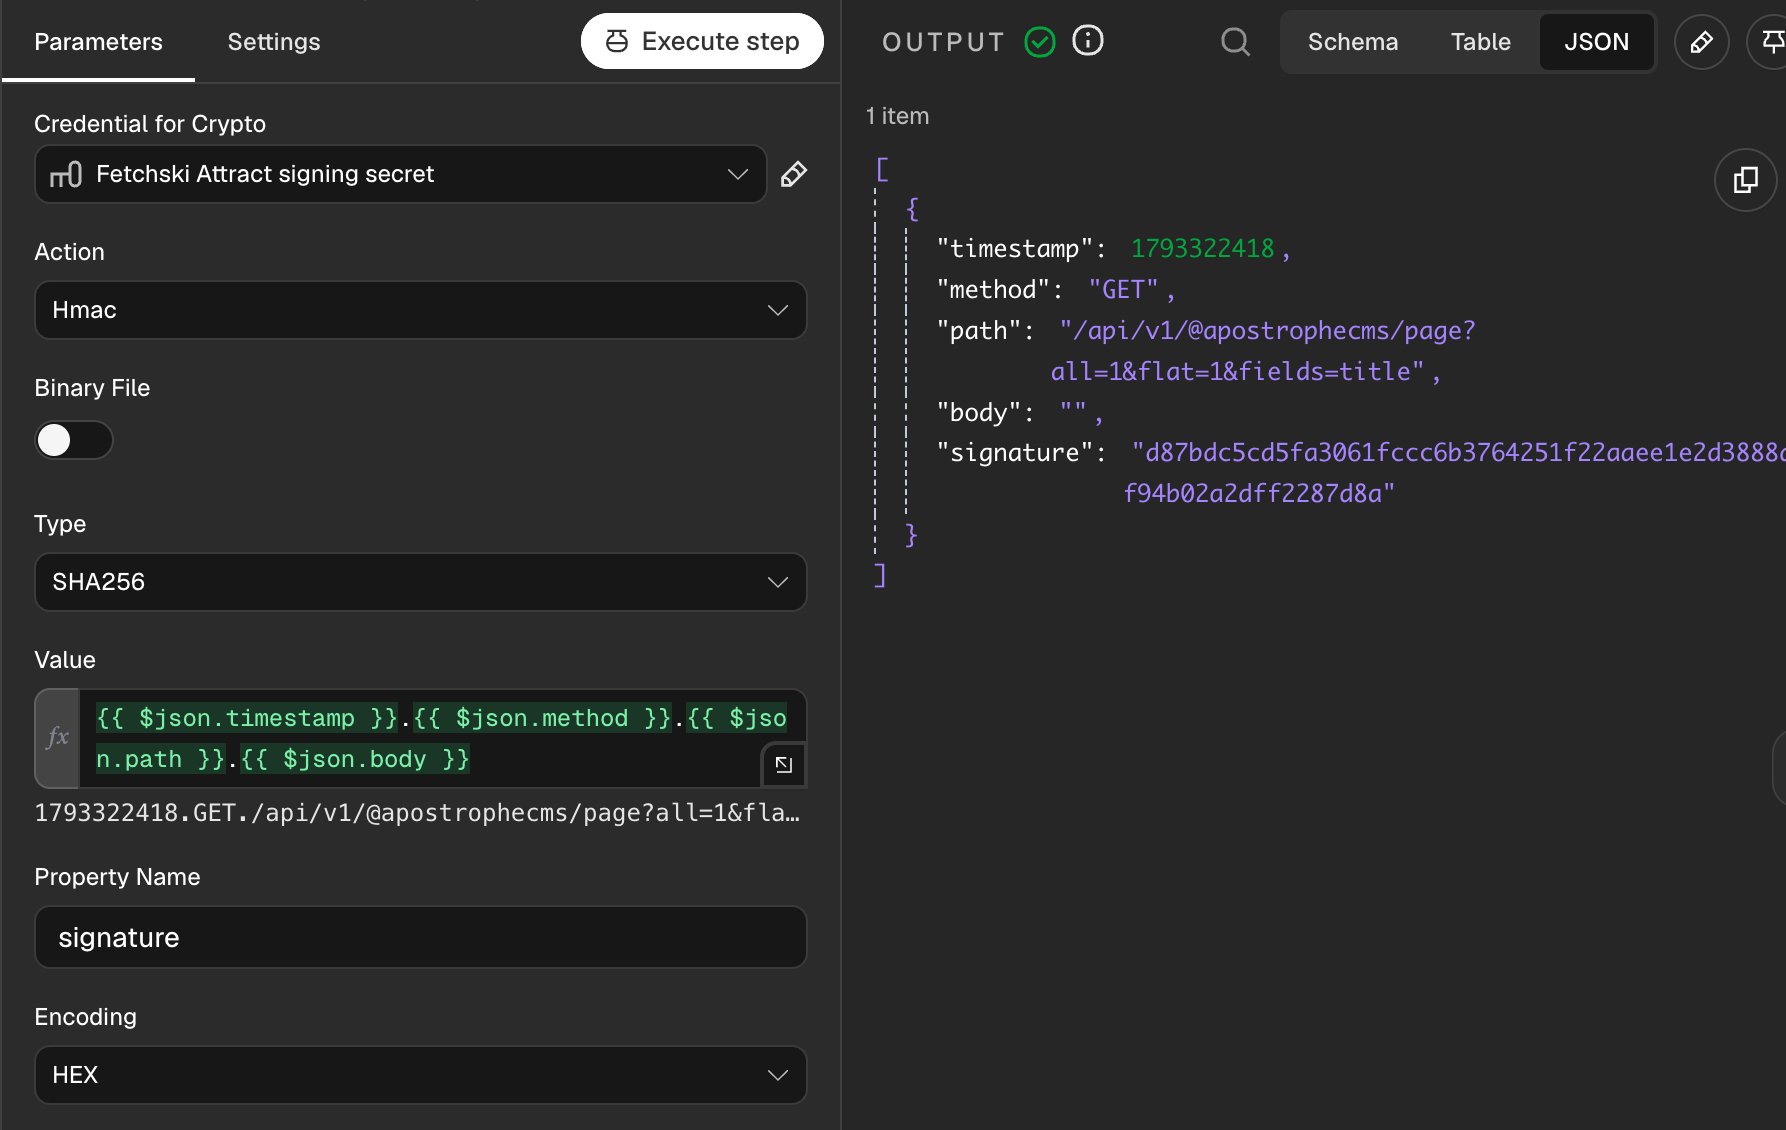
Sign it: Hmac, SHA256, HEX, and the signature it adds to the item
Send it: the HTTP Request node
path: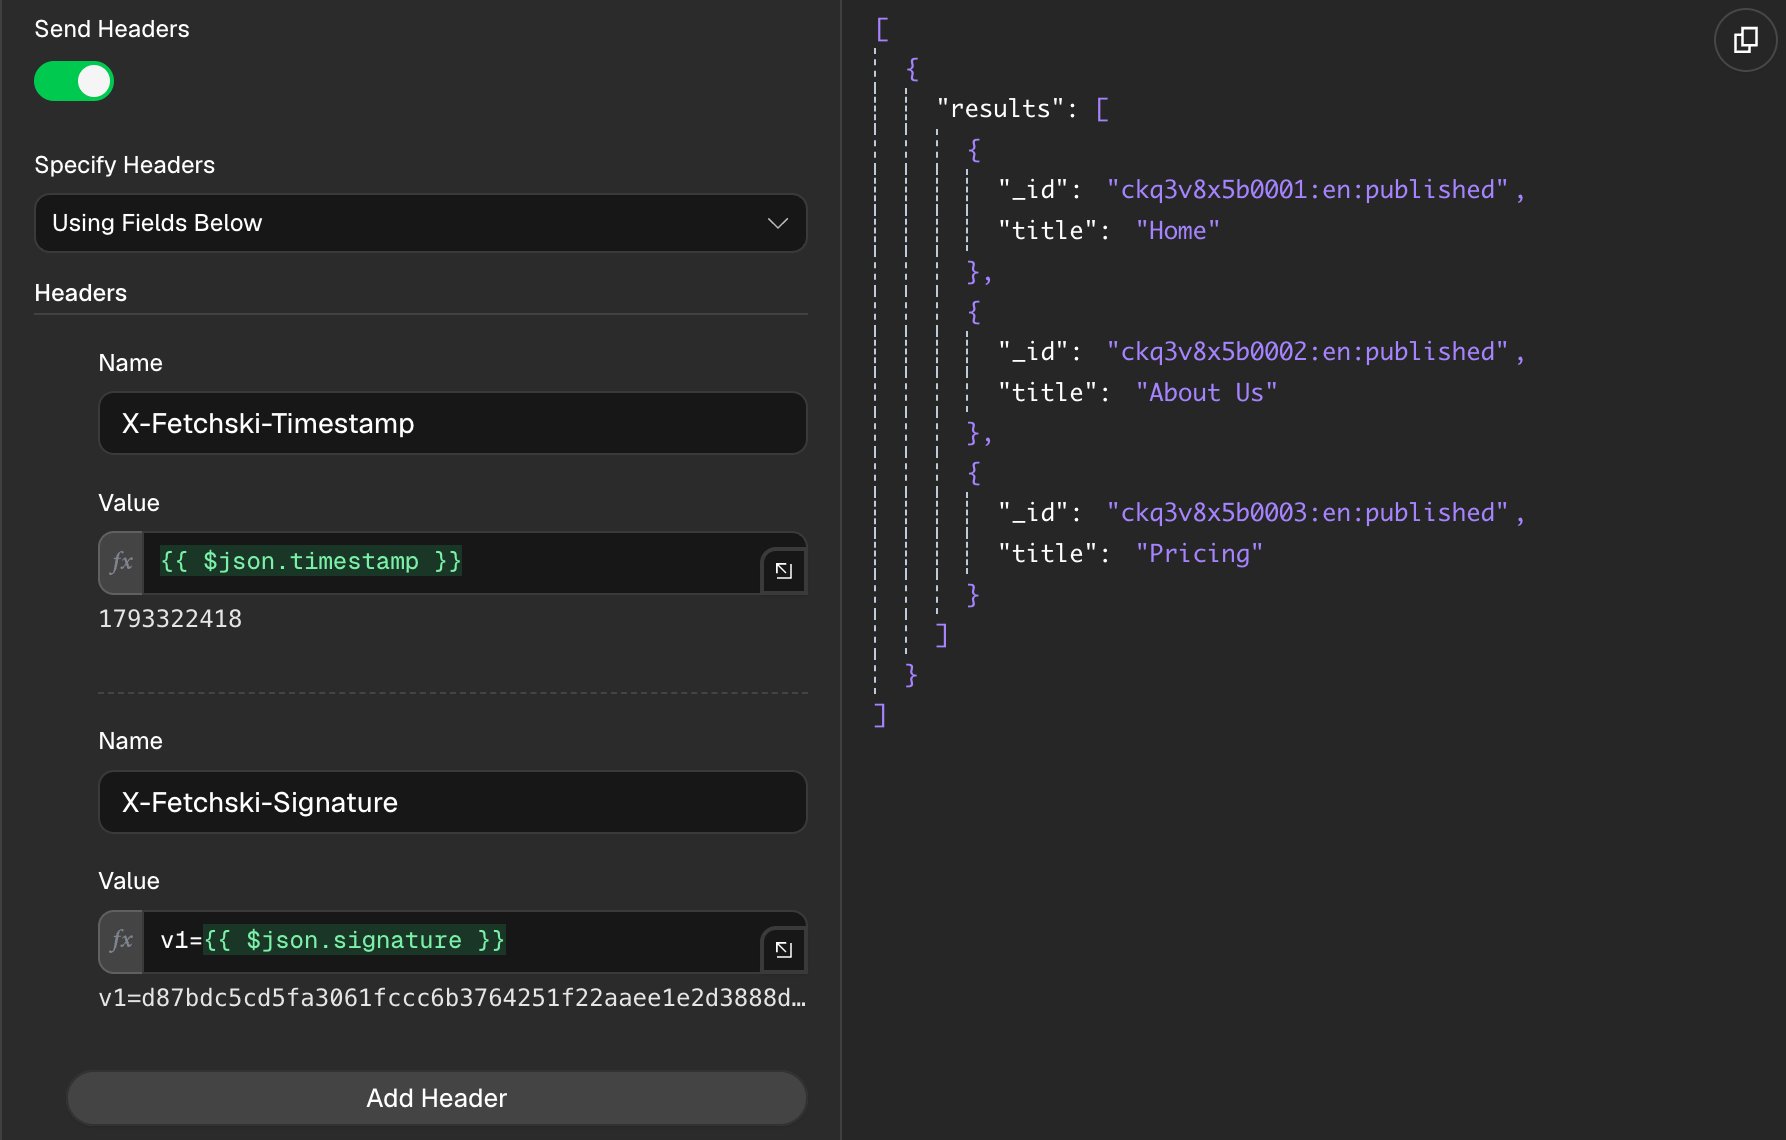
The HTTP Request node sends the two signature headers
Run it
signature on Sign
it, and your pages on the HTTP Request node.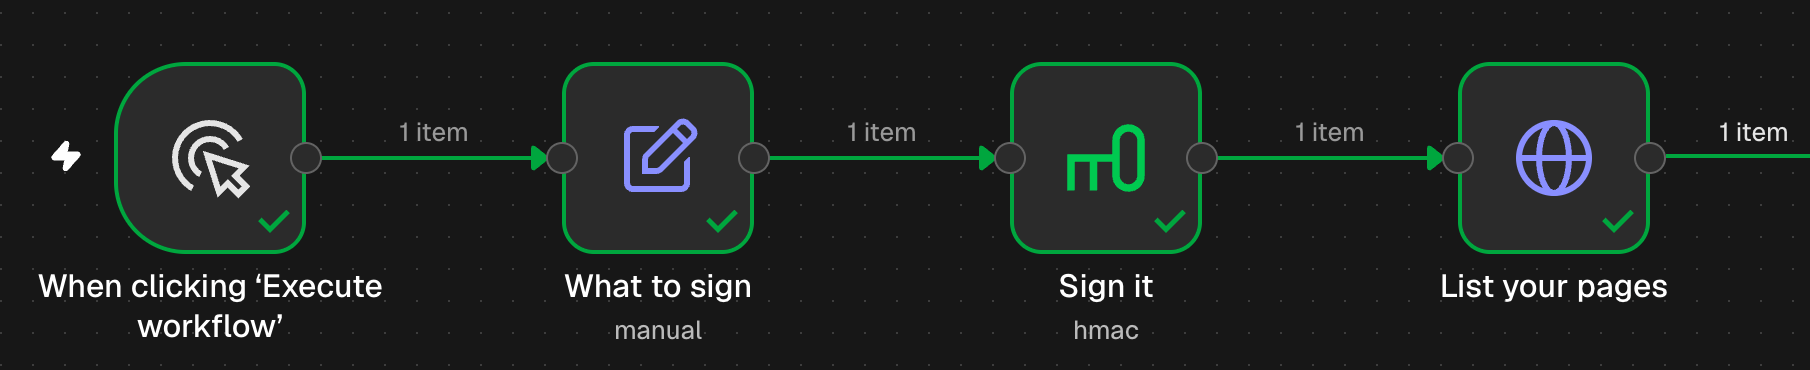
A signed run: What to sign, Sign it, then the request the site accepted
Signing a write (POST, PATCH, DELETE)
Signing a write (POST, PATCH, DELETE)
method to the write’s method and body to the exact
JSON you send, for example:Raw, set Content
Type to application/json and Body to {{ $json.body }}, so the body sent is the one
signed.If a request is refused
Click the red node. n8n shows its own message at the top, and the site’s answer, which names the fix, under Error details.Forbidden - perhaps check your credentials?
Forbidden - perhaps check your credentials?
403: the key lacks the scope this request needs, and the error’s details
name it. Edit the key in API Keys and tick that scope.The service is receiving too many requests from you
The service is receiving too many requests from you
429: the key went over its requests a minute (600 reads and 120 writes
unless set otherwise). On the HTTP Request node open Options → Batching and send fewer
items a minute.